Android & iOS
Introduction
This document is intended to help users quickly understand the full functionality of DASSET.
As the actual features available may vary depending on the specific hardware device in use, please refer to the functions displayed when accessing the device through DASSET.
Not all hardware devices supporting DASSET necessarily provide all the features mentioned in this document.
With ongoing version updates, the features and images described herein may differ from the actual product. Please always refer to the functions displayed in the DASSET App for the most accurate information.
DASSET Overview
What is DASSET
The DASSET App is a cross-platform application designed to provide intelligent storage, collaborative communication, and AI Agent services for small and medium-sized enterprises, families, individuals, and teams.
Through seamless integration with a wide range of DASSET-supported products and devices, the DASSET App enables true data freedom, allowing users to break free from third-party restrictions and maintain full control over their data and AI resources.
DASSET Features
-
Cross-platform support: Available for Windows, macOS, iOS, and Android, ensuring a consistent user experience across different devices.
-
Access DASSET devices anytime, anywhere: Users can remotely access and manage their DASSET hardware devices from any location via the DASSET App.
-
Unified cross-platform experience: Provides a consistent interface and operational logic across operating systems and devices, reducing the learning curve.
-
Data synchronization and backup: Supports data synchronization and backup between DASSET hardware devices and end-user devices, ensuring data security and availability.
Application Scenarios
-
Personal data management: Synchronize and back up personal data across multiple devices to ensure data integrity and security.
-
Family data sharing: Share photos, videos, and other files among family members to enhance interaction and communication.
-
Team collaboration: Serve as an internal file sharing and collaboration platform for small teams or startups to improve efficiency.
Installation and Download
DASSET Download Links
Download from the official DASSET website: Click to Download
System Requirements
-
Android: Android 7 or later
-
iOS: iOS 13 or later
Multi-Language Support
DASSET currently supports Simplified Chinese, Traditional Chinese, and English.
Installation and Launch
-
Android
- APK Package: Download from the official website, then tap the APK file to install.
Note: If a security warning appears, allow installation from unknown sources.
- Google Play Store: Available for direct installation.
-
iOS
- Download from the App Store.
Registration and Login
When using DASSET for the first time, you need to create an account. DASSET supports both mobile phone numbers and email addresses as account credentials.
Note: The current DASSET version does not allow mobile phone number registration.
If you forget your password, you can easily reset it on the DASSET login page using the phone number or email address registered with your account.
Registration
DASSET supports registration with either a mobile phone number or an email address. On the login screen, click Register to create an account.
Notes:
-
Due to the security policies of some email providers, DASSET registration emails may be misclassified as spam. If you do not receive the verification code, please check your spam folder.
-
DASSET does not strictly enforce password strength requirements, leaving security to your discretion. However, for account safety, it is strongly recommended that you set a strong password to reduce privacy risks.
Steps:
- Click Register.

- Enter your email address.
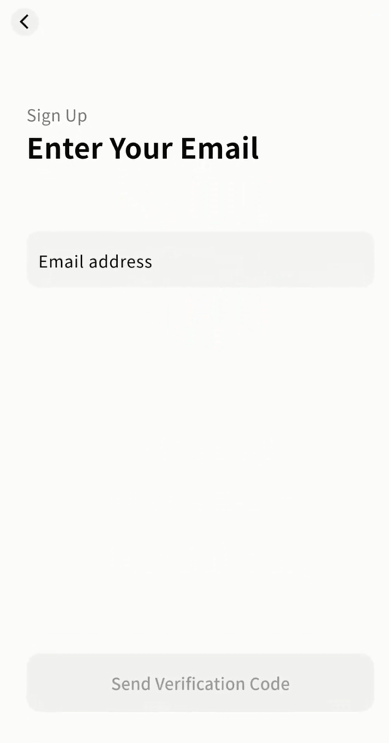
- Input the verification code and click Verify.
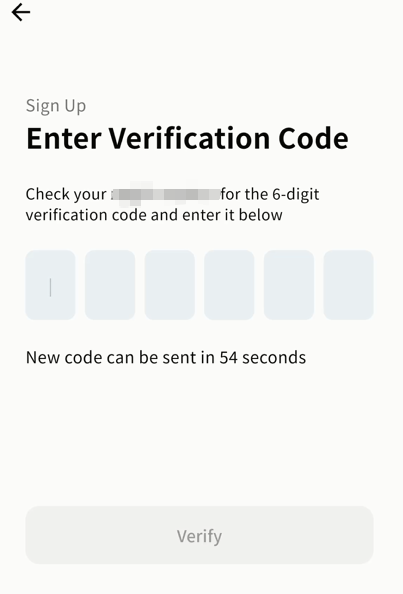
- After verification, set your login password. The password must be 6--32 characters, using letters, numbers, or symbols.
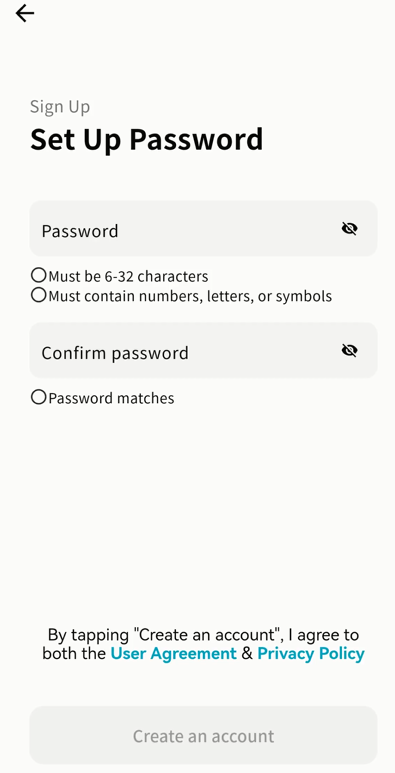
- Once completed, you can log in to the DASSET client using your new account.
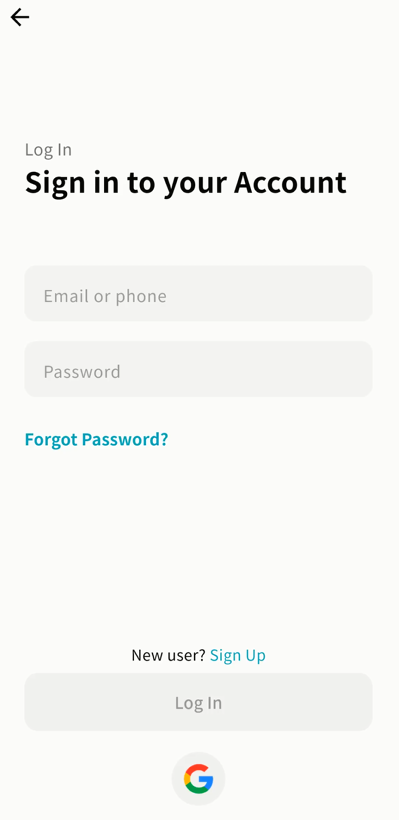
Login
DASSET supports login with either email or mobile phone number. Enter your registered account credentials and password, then click Login.
-
If this is your first login, the login screen will appear.
-
If you have logged in before, DASSET will automatically log you in.
-
If you have used multiple accounts, you can switch between them from the login screen.
-
You may also select a saved account from the dropdown menu for faster login.
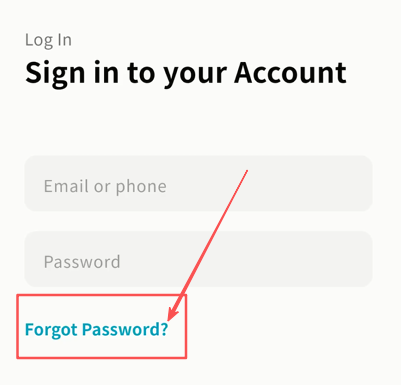
Password Reset
If you forget your password, click Forgot Password on the login screen and follow the prompts to reset it using your registered email or phone number.
Google Account Quick Login
- Click the Google Login button.
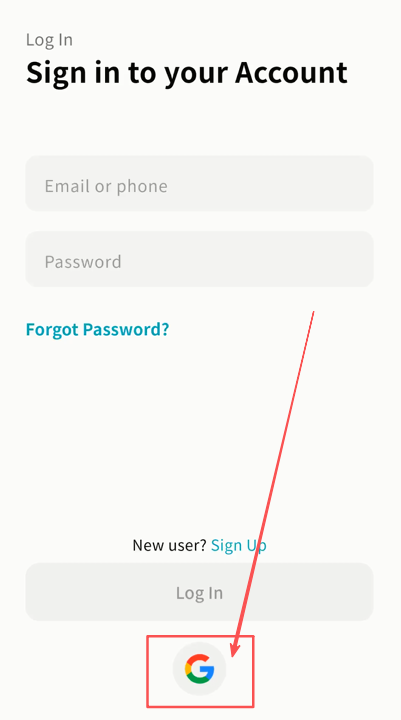
-
On the Google authorization page, enter your Google account and password.
-
After authorization, DASSET will complete the login automatically.
Apple ID Quick Login
- Click the Apple Login button.
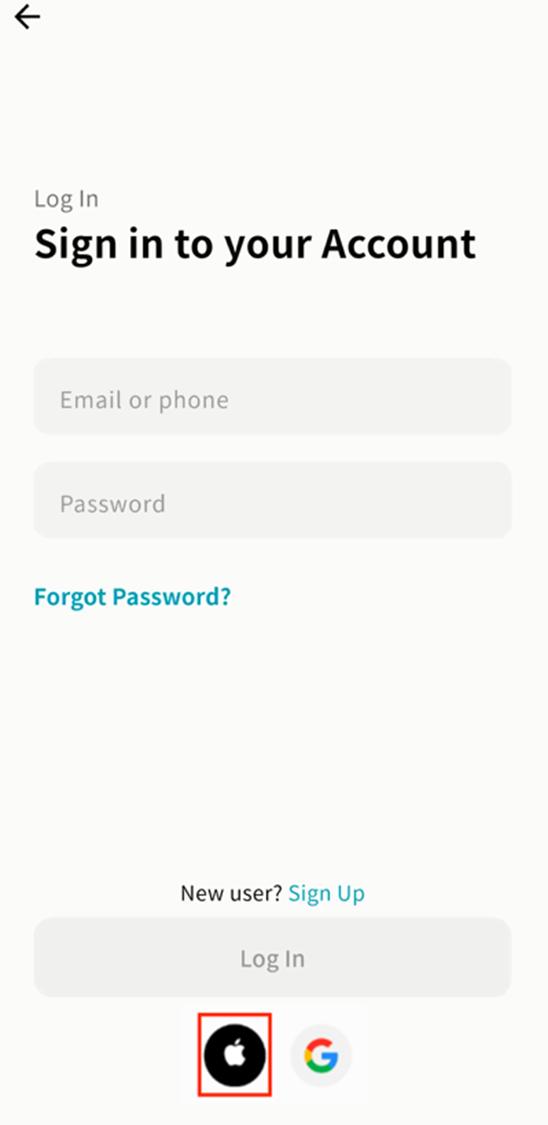
- In the login pop-up, select your current Apple account or log in with your Apple ID password.

- Wait for DASSET to complete the login.
OS Auto-Save Password
DASSET integrates with your device's OS keychain. On your first login, your DASSET account and password can be saved in the keychain.
When logging in again, your device can autofill the credentials, eliminating the need to re-enter them manually.
Note: If you choose to save your credentials in the OS keychain, the security of your account and password will be managed by the operating system.
DASSET Home
Device List Page
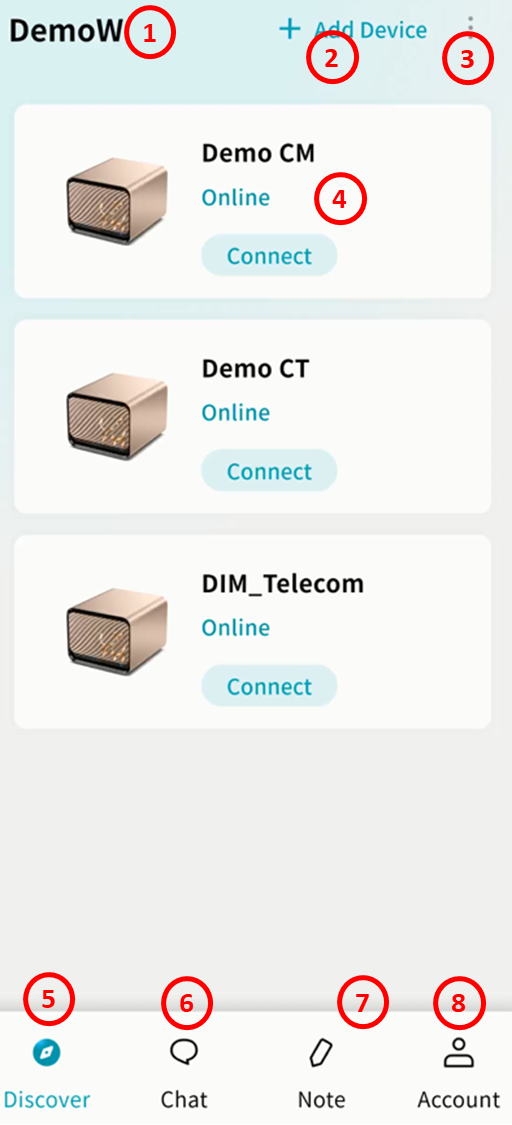
After logging in, you will enter the DASSET home page:
-
Account: Displays the currently logged-in account.
-
Add Device: Bind your DASSET edge device or join a device shared by a friend.
-
Show All / Online Devices:
-
Select Show All Devices to display all DASSET edge devices bound to your account, whether online or offline.
-
Select Show Online Devices to display only devices that are currently online and accessible.
-
-
Device List: Displays all devices bound to your account, including your own devices and those shared by friends. You can clearly see which devices are online or offline.
-
Device Status: Online or offline
-
Connect: Click to access the device
-
-
Discover: Switch to the device list page.
-
Chat: Enter the chat interface.
-
Notes: Access DASSET Notes to create, edit, and delete notes, and keep them synchronized between your computer and DASSET edge device.
-
My Profile: Access account management and client settings.
DASSET Edge Device Home
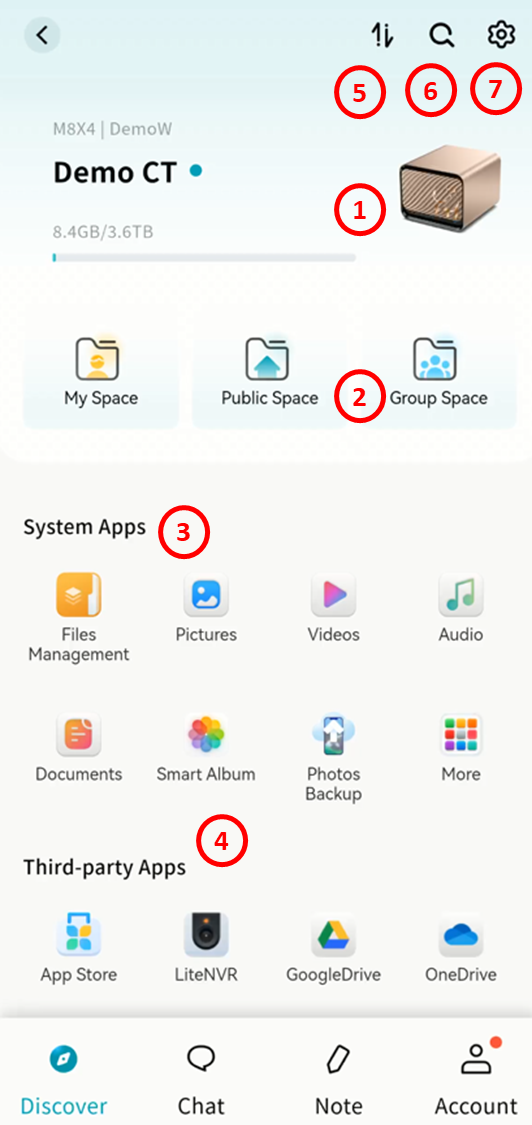
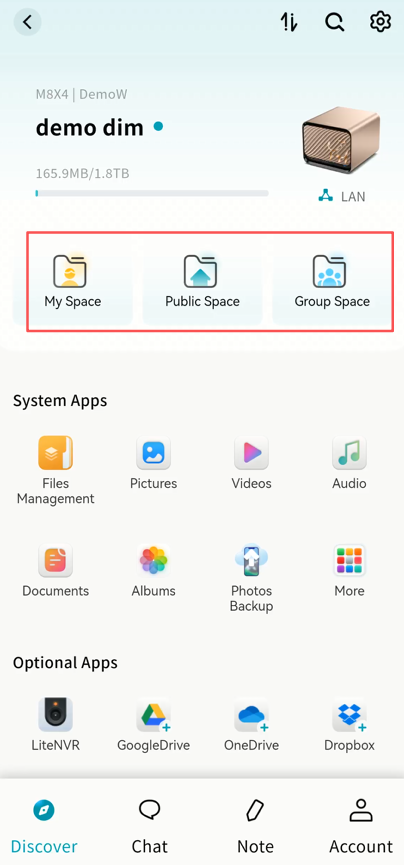
Click Connect on a device to enter its home page.
-
Device Status: Displays the following information:
-
Device name
-
Device model
-
Device owner account
-
Storage usage
-
-
Three Spaces: Quick access to My Space, Public Space, and Group Space.
-
System Applications: Displays built-in DASSET application icons. Click an icon to open the corresponding application page.
-
Third-party Applications: Displays third-party applications available for installation on DASSET. You can install and use them as needed.
-
Task Center: View and manage the progress of upload and download tasks.
-
Search: Search files stored on the DASSET edge device by keyword.
-
SET UP: Manage DASSET edge device settings, including hardware information, performance, disk management, and member management.
DASSET Device Binding and Unbinding
Device Binding
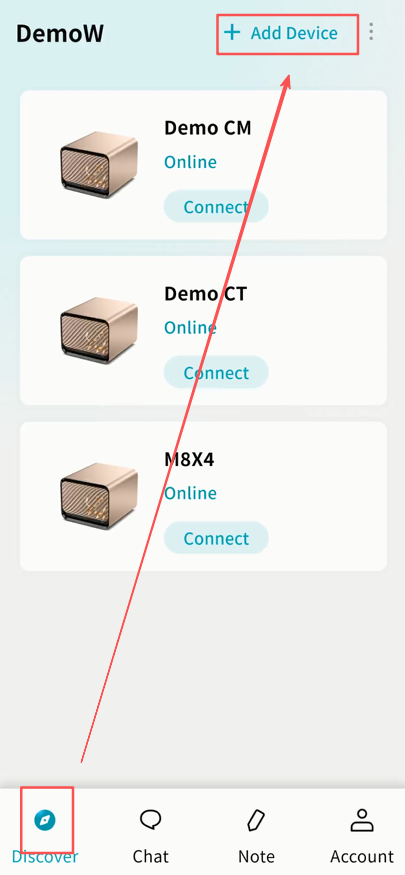
When you receive a new DASSET edge device, the first step is to bind it to your account using the DASSET mobile app.
The first account to bind the device will become its owner. Follow the steps below to complete binding:
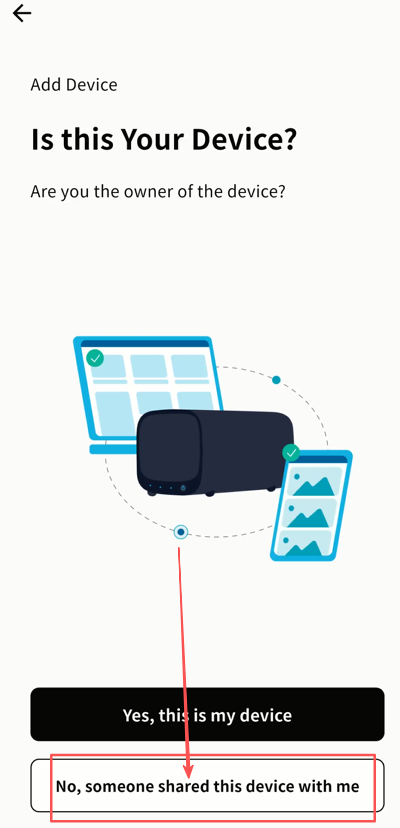
- Go to Discover Add Device.
- Select Yes, this is my device.
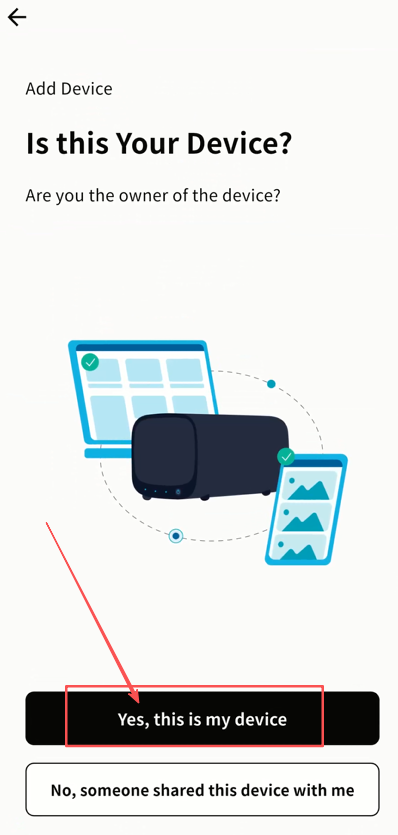
-
Follow the binding guide to connect the device to power and network.
-
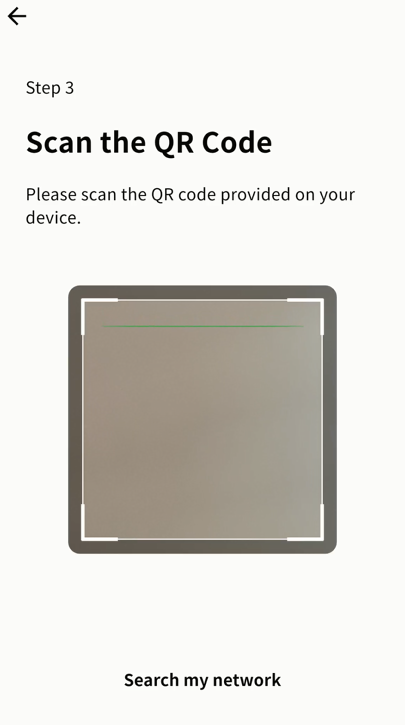
In step 3 of the guide, choose one of two binding methods:
-
Scan QR Code (Recommended): The default method is to scan the binding QR code located on the device.
-
Search my network: Alternatively, search for DASSET devices on the same LAN as your mobile device.
-
Note: Ensure both your mobile device and the DASSET device are on the same LAN; otherwise, the device cannot be discovered.
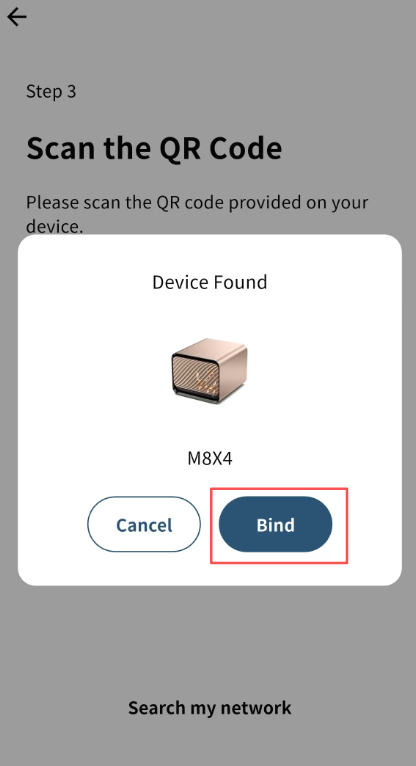
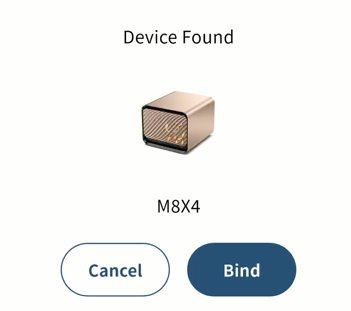
- After scanning, you will see the Device Found prompt. Click Bind.
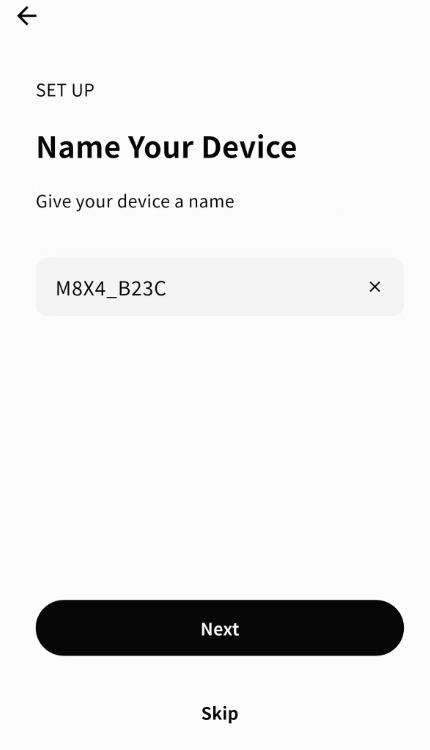
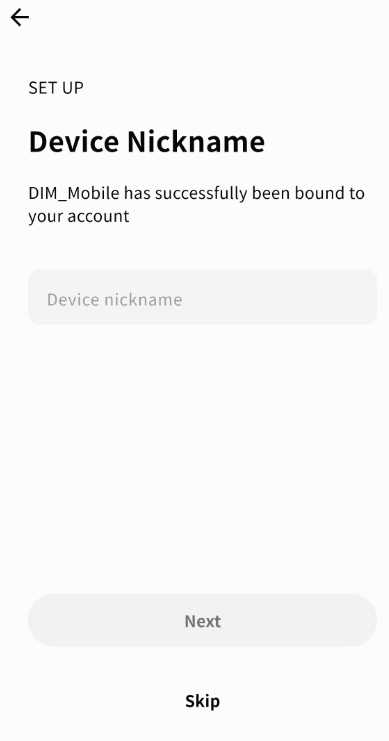
- Once binding is complete, click ✓.

- Set a name for the device for easier identification, or skip to use the default system name.
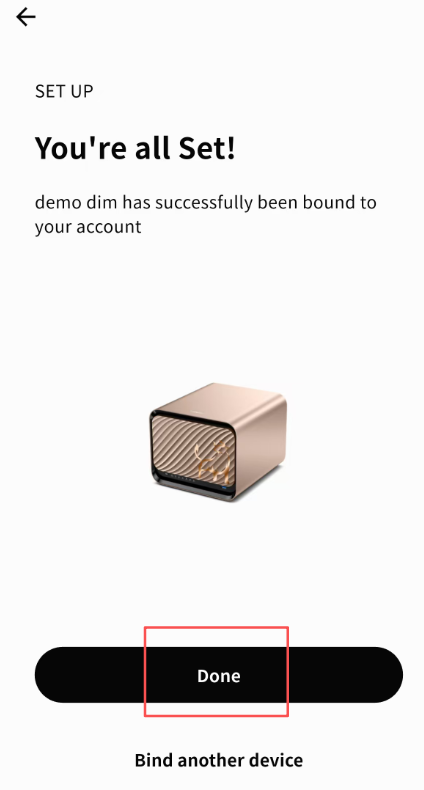
- Click Done. The device will now appear on the device home page.
Adding a Shared Device
You can also bind to a DASSET edge device shared by another user via the Add Device button on the home page. Use either an invitation QR code or an invitation code.
Steps:
- On the device page, click Add Device No, someone shared this device with me.
-
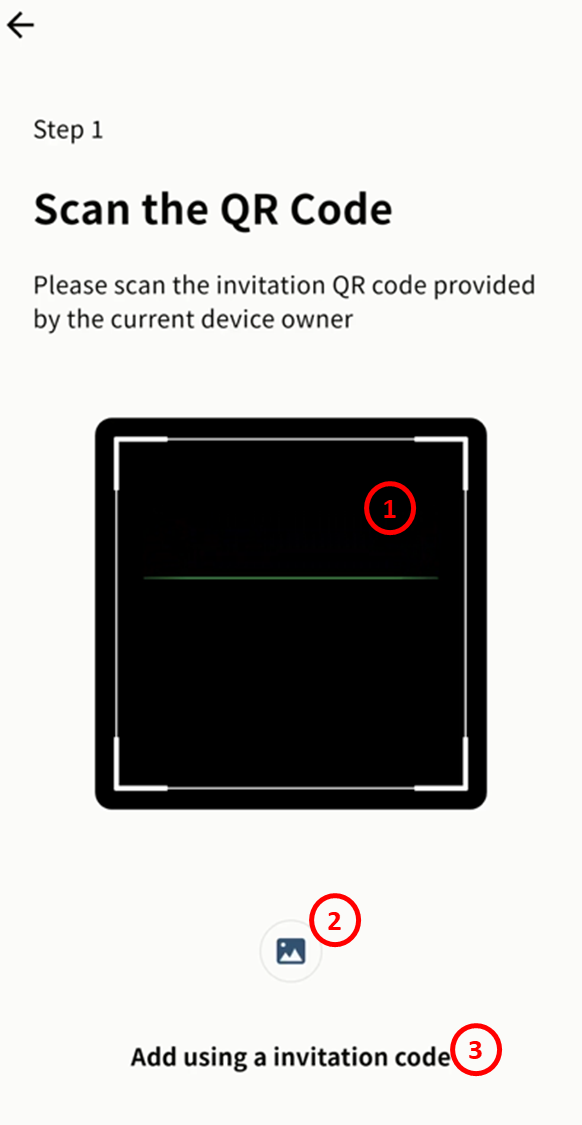
Choose one of the following methods to add the shared device:
-
Scan the invitation QR code with your mobile device camera.
-
Select an invitation QR code image stored in your photo album.
-
Enter the invitation code manually.
-
- After scanning or entering the code, a Device Found prompt will appear. Click Bind.
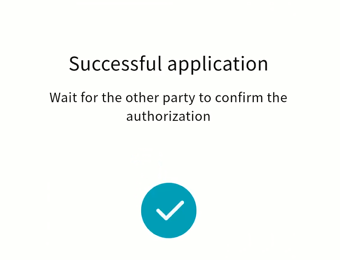
- If the device requires owner confirmation, you will see an application success message. Binding will complete only after the owner approves.
- Once binding is complete, set a name for the device.
- The device will appear on your device page. Click Connect to access it.
Device Unbinding
Owner Unbinding
The owner can unbind a DASSET edge device from their account. Once unbound, all users associated with the device will also be unbound.
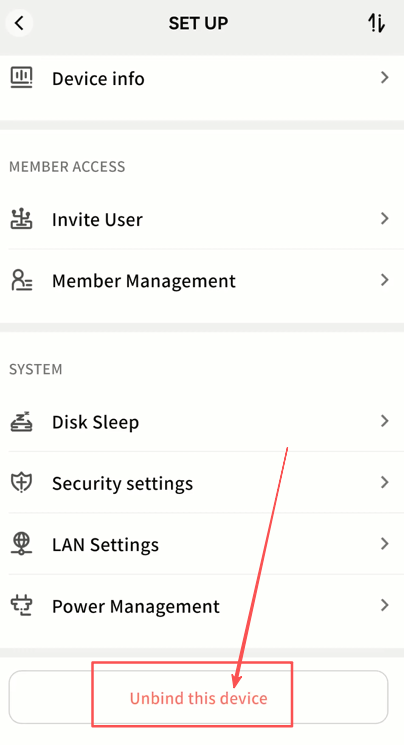
- Go to the device SET UP page and click Unbind this device.
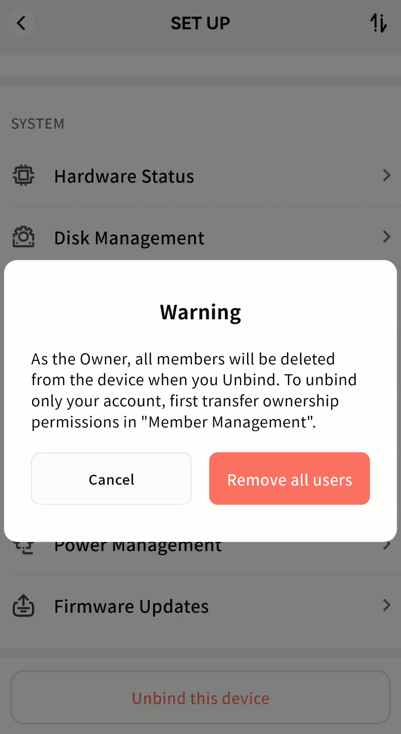
- As the owner, you will receive a warning. If you do not want to remove all members, you may first transfer ownership to another user before unbinding. If you wish to proceed, click Remove All Members.
-
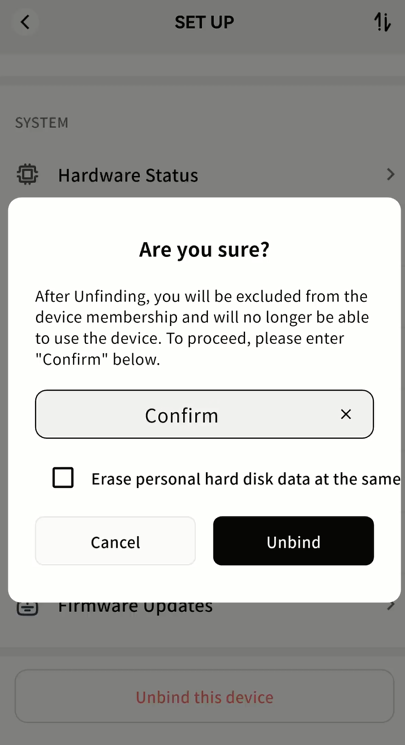
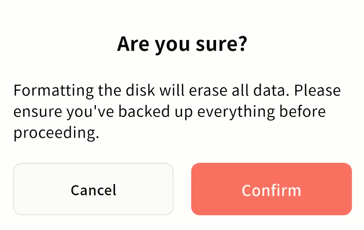
In the confirmation window, type Confirm. If you no longer need the data stored on this device, we strongly recommend selecting Erase personal hard disk data at the same time.
- When this option is enabled, all data in My Space associated with your account will be automatically deleted from the DASSET edge device after unbinding, ensuring your privacy and data security.
Member Unbinding
As a device member, you can unbind yourself from the device at any time. After unbinding, the device will no longer appear in your device list.
- Go to the device SET UP page and click Unbind this device.
-
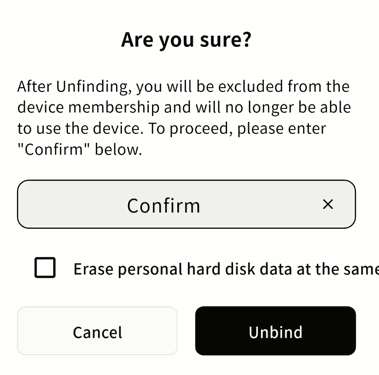
In the confirmation window, type Confirm. If you no longer need the data stored on this device, we strongly recommend selecting Erase personal hard disk data at the same time.
- When this option is enabled, all data in My Space associated with your account will be automatically deleted from the DASSET edge device after unbinding, ensuring your privacy and data security.
Device Offline
When a device is offline, you can still perform the following operations:
-
Device Information
-
View basic information, including device name, remarks, owner, join time, and device SN.
-
Unbind from the device.
-
-
Member Management
-
View all accounts bound to the device.
-
Promote a standard member to administrator.
-
Demote an administrator to standard member.
-
Remove members.
-
For detailed instructions, see the Member Management section.
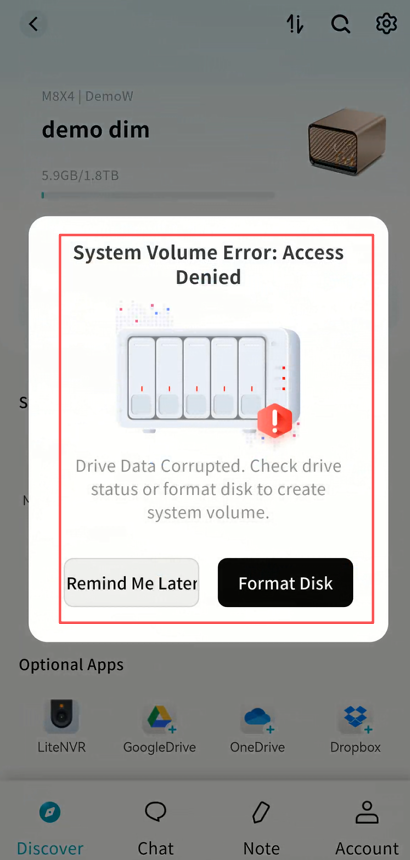
Device Initialization
If you are binding a DASSET edge device for the first time, you need to use the DASSET mobile client to scan the QR code on the device to complete binding. After binding, when you enter the device for the first time, you will be prompted to format the hard drive:
-
Insert the hard drive into your DASSET edge device.
-
From the Device List, click your device to enter.
-
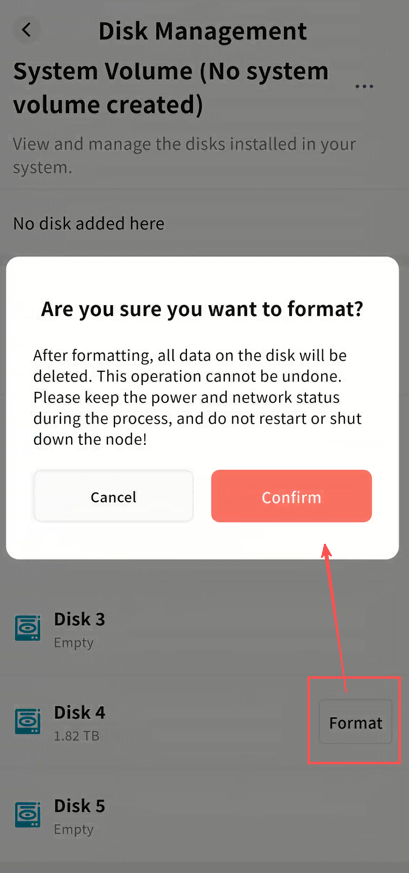
A format prompt will appear. Click Confirm.
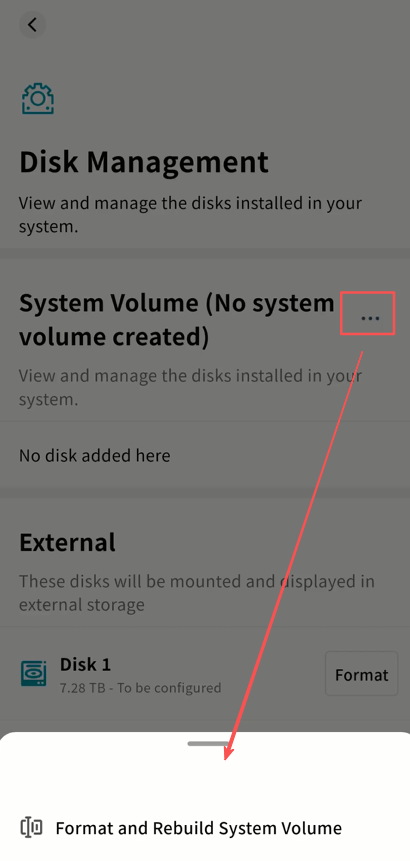
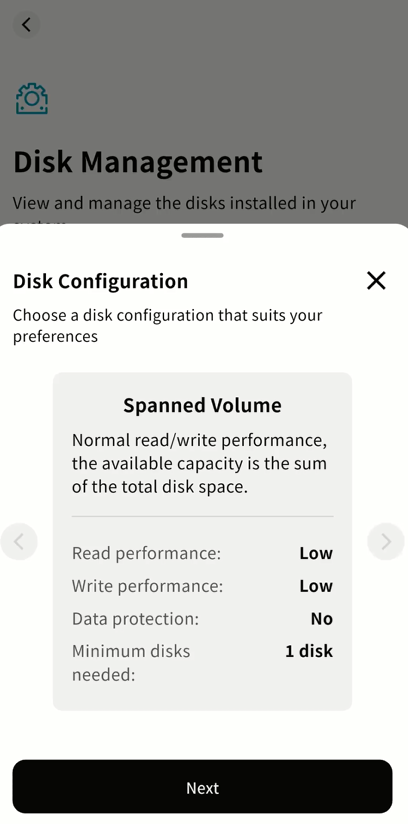
- The DASSET client will navigate to SET UP Disk Management. Click the ... menu next to the system volume and select Format and Rebuild System Volume.
-
Choose the hard drives to format and the desired disk format, then click Next. Supported formats include:
-
Normal Mode: Basic mode; total usable space equals the sum of all disks, with no redundancy.
-
RAID 0: Maximum read/write performance; usable space equals the sum of all disks, with no redundancy.
-
RAID 1: Two-disk mirroring; usable space equals the smaller of the two disks, with redundancy protection.
-
RAID 5: Requires at least three disks; usable capacity equals the sum of two disks used for data, with redundancy protection.
-
Note: The estimated capacity is displayed according to the selected format.
- After selecting the disk format, check the hard drives to be formatted. The system will calculate the available capacity after formatting.

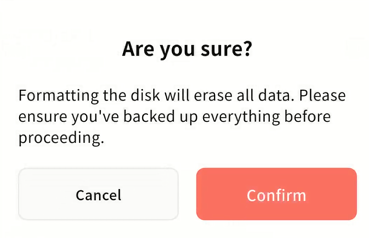
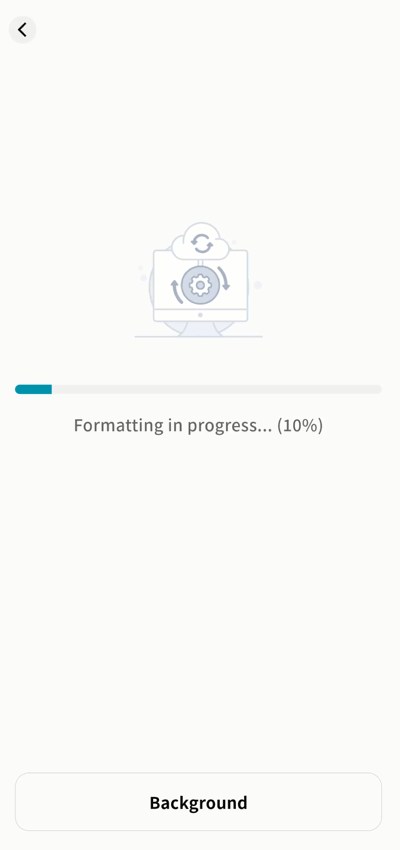
- In the confirmation window, click Confirm. The system will start the formatting process. Please wait until it completes.
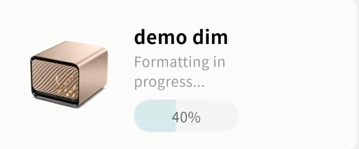
- During formatting, you may return to the device page. The formatting progress will be displayed.

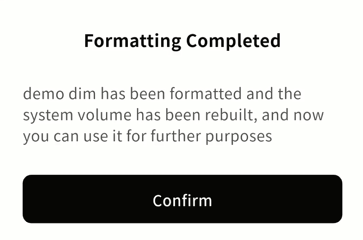
- Once formatting is complete, a notification will appear. Click Confirm and you can begin using your DASSET edge device.
Device SET UP
Device SET UP Overview
All management of the DASSET edge device is centralized in the Device SET UP page. The main functions include:
-
Device Info: Displays device name, network, SN, owner, and related details.
-
Invite User: Generate an invitation QR code to add other users to the device.
-
Member Management: Manage all members on the device and invite additional users.
-
Hardware Status: View CPU, memory, storage, and network performance of the device.
-
Disk Management: Manage inserted hard drives, including formatting and other operations.
-
Disk Self-test: Run diagnostics to detect disk issues.
-
Disk Sleep: Configure hard disk sleep rules.
-
Security Settings: Configure options such as showing hidden files, personal passwords, and public space passwords.
-
LAN Settings: Manage network configuration of the device.
-
Power Management: Perform remote power on/off and configure scheduled power rules.
-
Firmware Upgrade: Check for the latest firmware available for your device and perform the upgrade.
-
Unbind this device: Unbind the DASSET edge device from the current account.
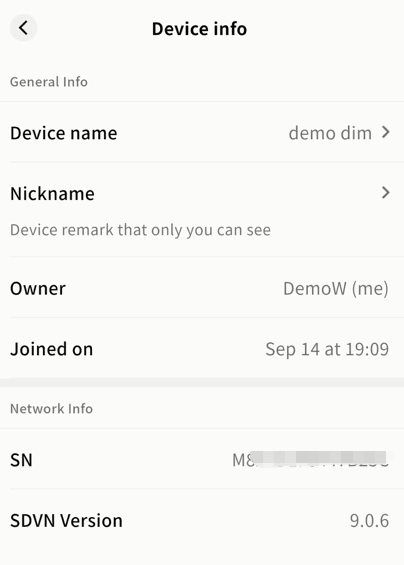
Device Information
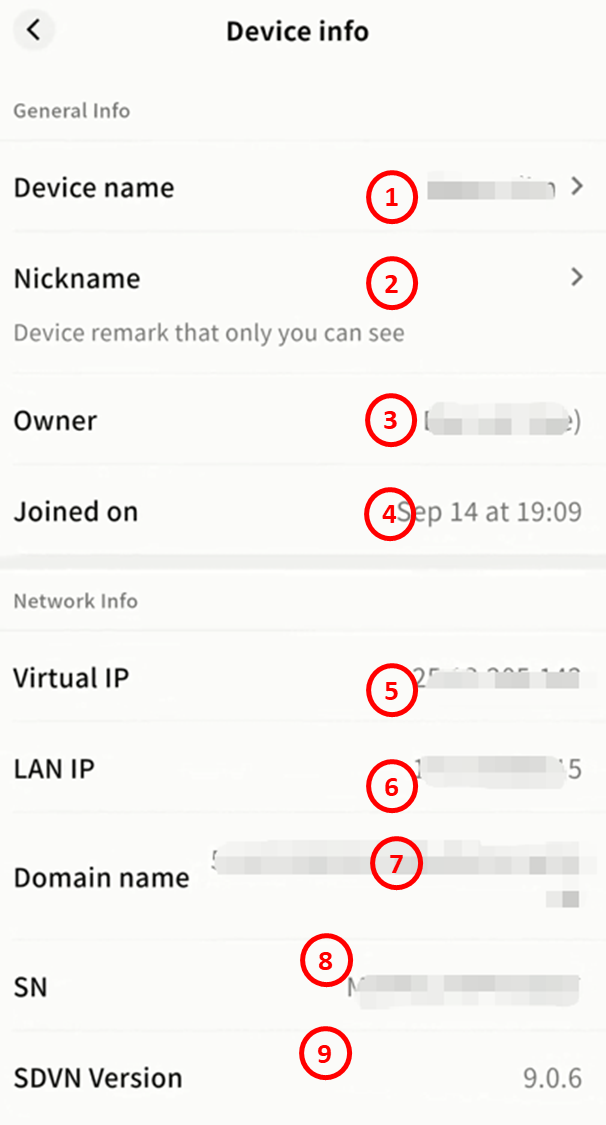
The Device Information page displays the basic details of your DASSET edge device:
-
Device Name: You can edit the device name. If no Device Remark is set, this name will be visible to all users.
-
Nickname: A private label visible only to you. This remark helps differentiate between multiple devices when you have several bound to your account.
-
Owner: Shows the nickname of the account that owns the device.
-
Joined On: Displays the date and time when the device was bound to your account.
-
Virtual IP: The dynamic IP address assigned to the device within the DASSET virtual network.
- Security Note: Only users bound to the device can access it through this virtual IP. Other accounts cannot connect using this address.
-
LAN IP: The IP address assigned to the device within your local network.
-
Domain Name: The static virtual domain URL assigned to the device in the DASSET network.
-
You can use either the domain name or the virtual IP to connect to the device.
-
Security Note: Only users bound to the device can access it through this domain. Other accounts cannot connect using it.
-
-
SN: The unique serial number of the device.
-
SDVN Version: Displays the current version number of the SDVN service running on the device.
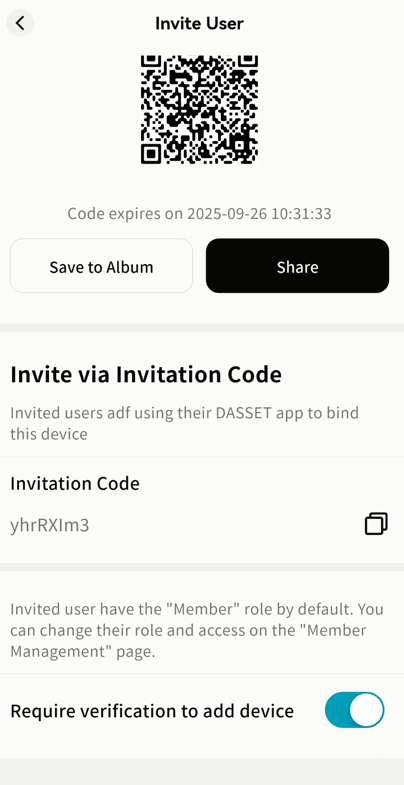
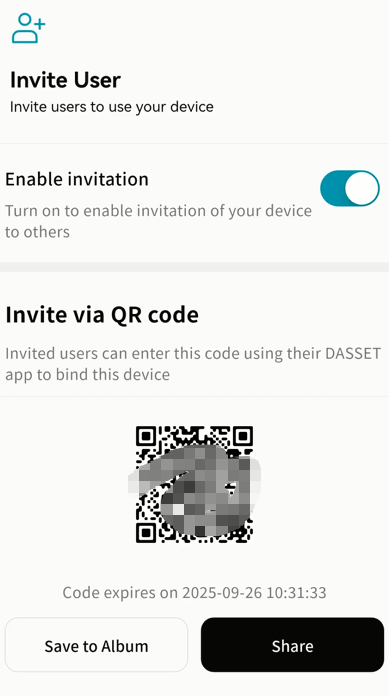
Invite User
On the Invite User page, you can click Enable Sharing to generate an invitation QR code and an invitation code, allowing other users to join your DASSET edge device.
- The invitation code is valid for 24 hours. After expiration, a new code must be generated.
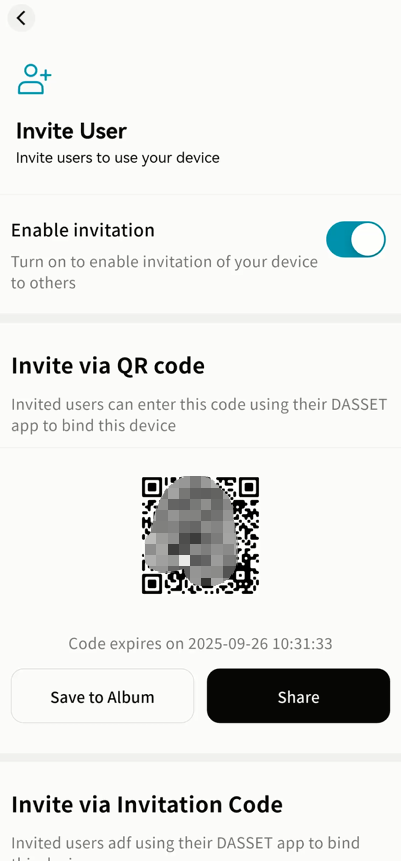
- Verification Required: When enabled, any join requests must first be approved by the device owner or administrator in the Messages section before access is granted.
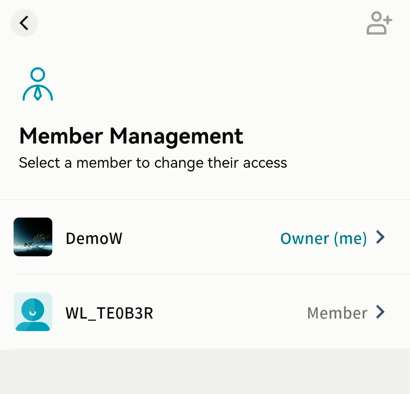
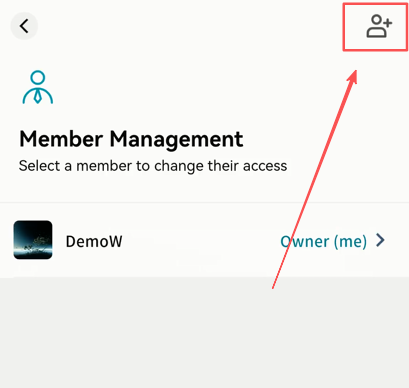
Member Management
On the Member Management page, you can manage all members of the device, assign roles and permissions, and invite others to join.
-
View Member List: See all accounts currently bound to the device.
-
Assign Roles: Set different roles for members, including Administrator and Member.
-
Permissions: Configure specific permissions for each member, such as read/write access to Public Space.
-
Invite Users: Generate an invitation code to allow new members to join the device.
Note: Only the Owner and Administrators can view or set member permissions. Members can see only their own permissions and cannot modify them.
User Roles
DASSET defines three roles with different levels of control:
-
Owner: The first account to bind the device. Has full administrative privileges.
-
Administrator: Assigned by the Owner. Has most management permissions, including setting member permissions.
-
Member: Invited users who join the device. Has only basic permissions.
Role Permission Matrix
The differences in permissions between user roles are shown in the table below:
Permission Item Owner Administrator Member
Manage account storage limit √ √
Read/Write My Space √ √ √
View Public Space √ √ √
Edit Public Space √ √
Use Group Space √ √ √
Create Groups √ √
View External Storage √ √
Edit External Storage √ √
Transfer Ownership √
Assign Administrator √
Remove Users √ √
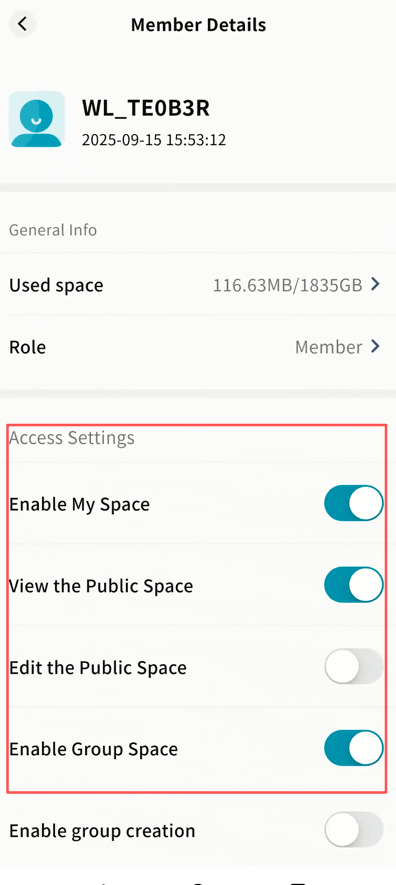
Adjusting Member Permissions
-
The Owner can set permissions for all users.
-
Administrators can set permissions for Members.
-
To configure permissions, select a member and adjust their detailed permission options in the right-hand panel.
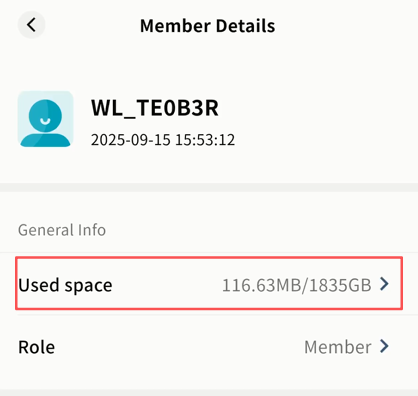
Storage Quota
You can set the maximum storage a member can use.
-
Owners can set quotas for all users.
-
Administrators can set quotas for Members.
Steps:
- In Member Management, open a member's detail page and click Storage Usage.
-
On the Storage Authorization page, choose one of the following:
-
Unlimited: No limit on storage.
-
Percentage: Allow the user to use a set percentage of total device capacity.
-
Custom Size: Define a maximum limit in GB.
-
Once set, the user cannot exceed the allocated storage.
Transfer Ownership
The Owner can transfer device ownership to another member.
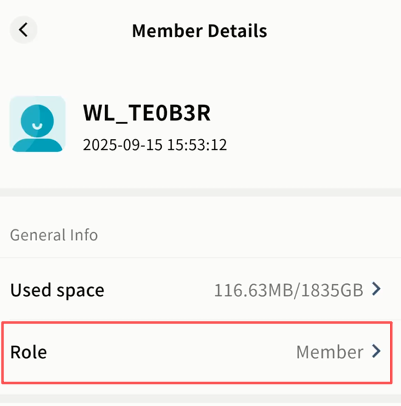
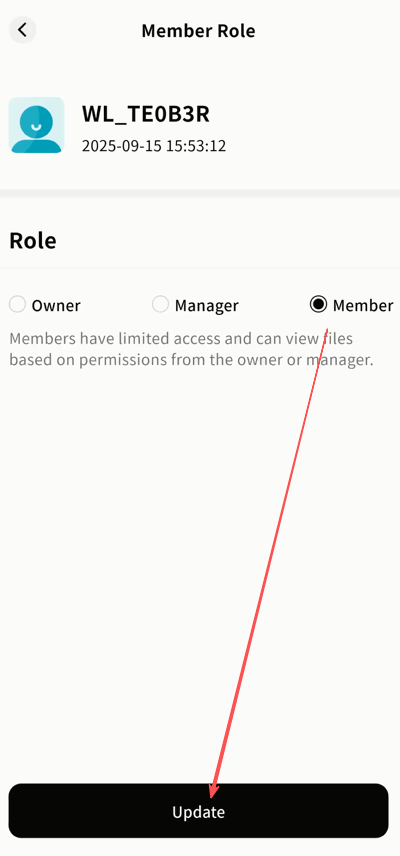
- In Member Management, open a member's detail page and click Role.
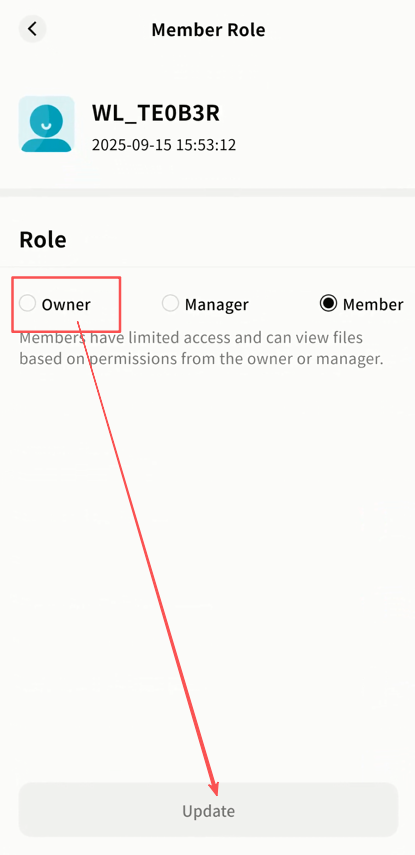
- On the Role Settings page, select Owner and click Update.
- In the confirmation dialog, click Transfer.
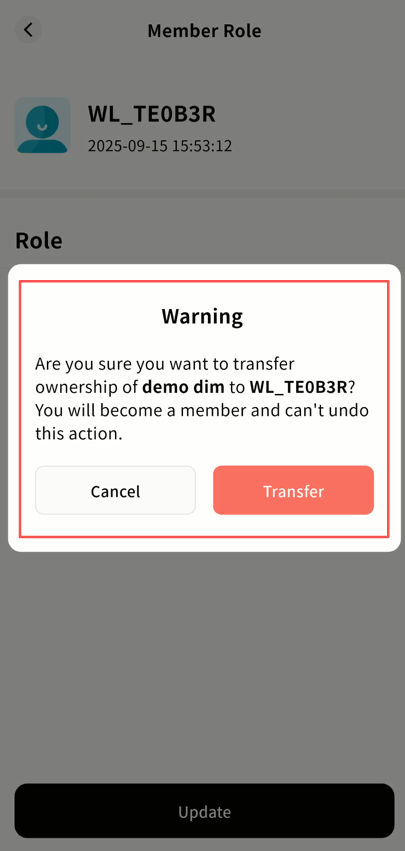
Note: After transferring ownership, your account will become a regular Member.
- The device will go offline and then back online to process internal permissions. Afterward, the new account will be listed as Owner.
Admin Promotion and Demotion
Promote Member to Admin
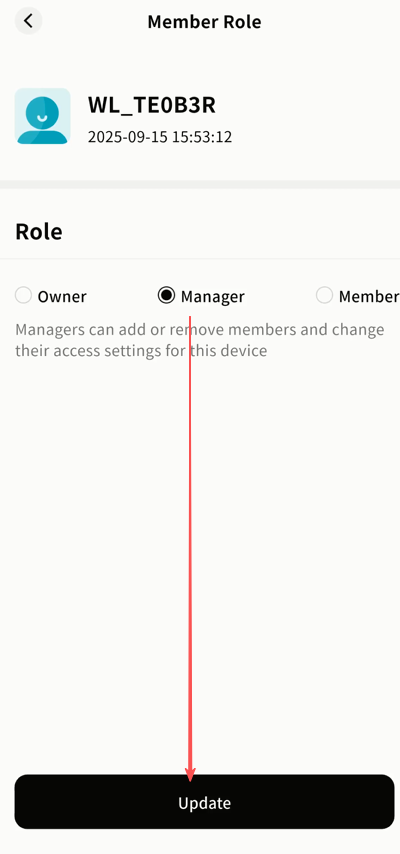
- In Member Management, open the member's detail page and click Role.
- Select Manager and click Update.
- The device will restart its permissions cycle (offline → online). The member will now appear as an Administrator.
Demote Admin to Member
- In Member Management, open the admin's detail page and click Role.
- Select Member and click Update.
- The device will restart its permissions cycle (offline → online). The user will now appear as a Member.
Remove Users
Owners and Administrators can remove users from the device.
-
Owners can remove Admins and Members.
-
Administrators can remove Members only.
Steps:
-
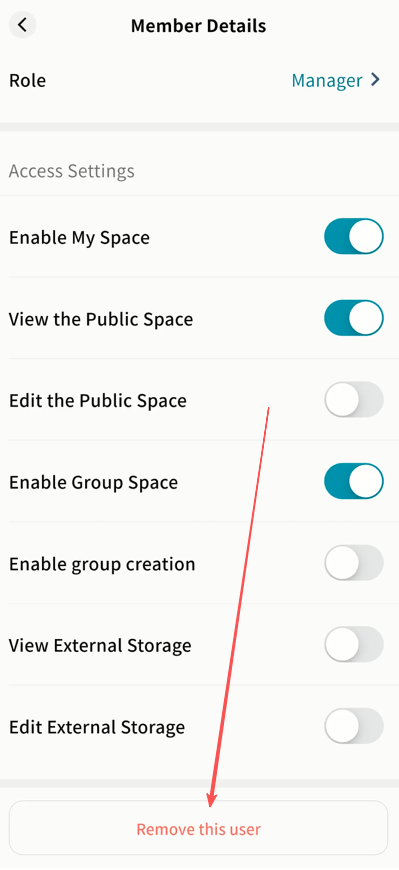
In Member Management, open the member's detail page and scroll to the bottom.
-
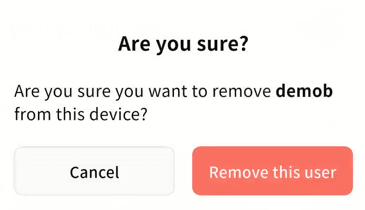
Click Remove this user, then confirm.
-
The user will be unbound from the device.
-
Their personal space data on the device will be cleaned up to free storage.
Invite Users
Owners and Administrators can invite new members to join the device.
Steps:
- In Member Management, click Invite User in the top-right corner.
-
A QR code and invitation code will be generated:
-
Enable Sharing: Must be enabled before generating the QR code.
-
QR Code: Can be scanned within its validity period to join the device. You can also save it to your gallery or share it through other apps.
-
-
Invitation Code: Equivalent to the QR code. Click Copy to share it directly.
-
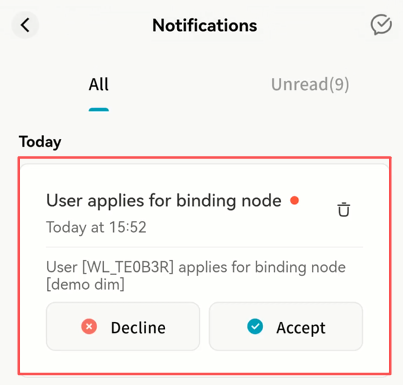
Verification Required: If enabled, new join requests must be approved by the Owner or Administrator in the Notifications panel.
- If verification is required, the Owner/Administrator will see a request notification and must click Accept for the new member to join.
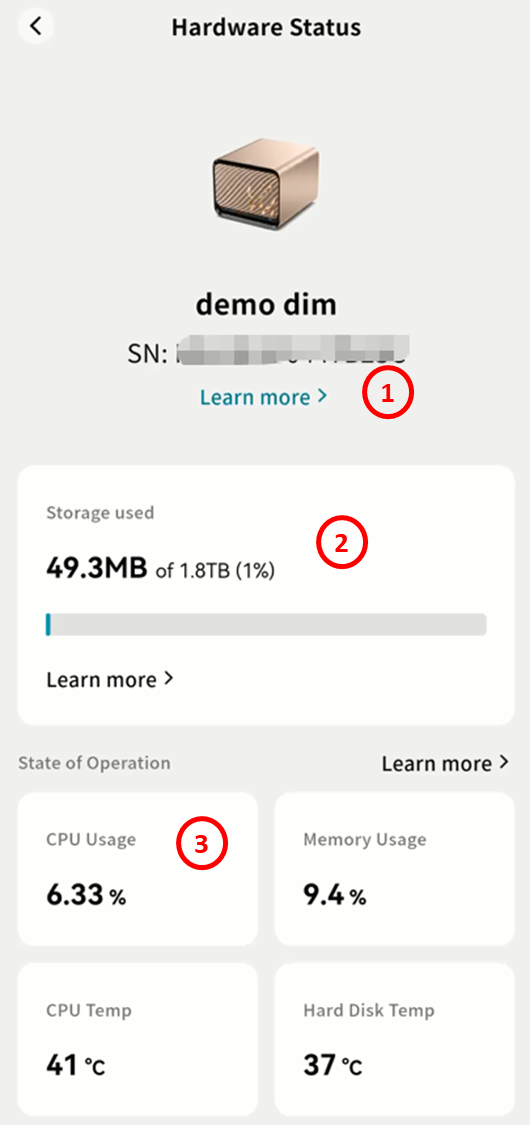
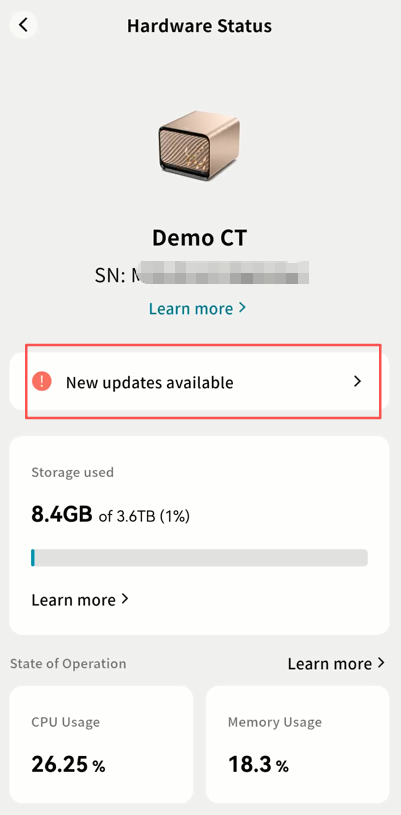
Hardware Status
The Hardware Status section allows you to monitor the performance and usage of your DASSET edge device.
-
Basic Information: Displays the device name and SN. Click More to view general device details and disk information.
-
Storage Usage: Shows how much storage space is currently in use. Click More to view per-member usage details.
-
Operating Status: Displays real-time performance indicators, including:
-
CPU usage and temperature
-
Memory usage
-
Hard disk temperature
-
Upload and download speed
-
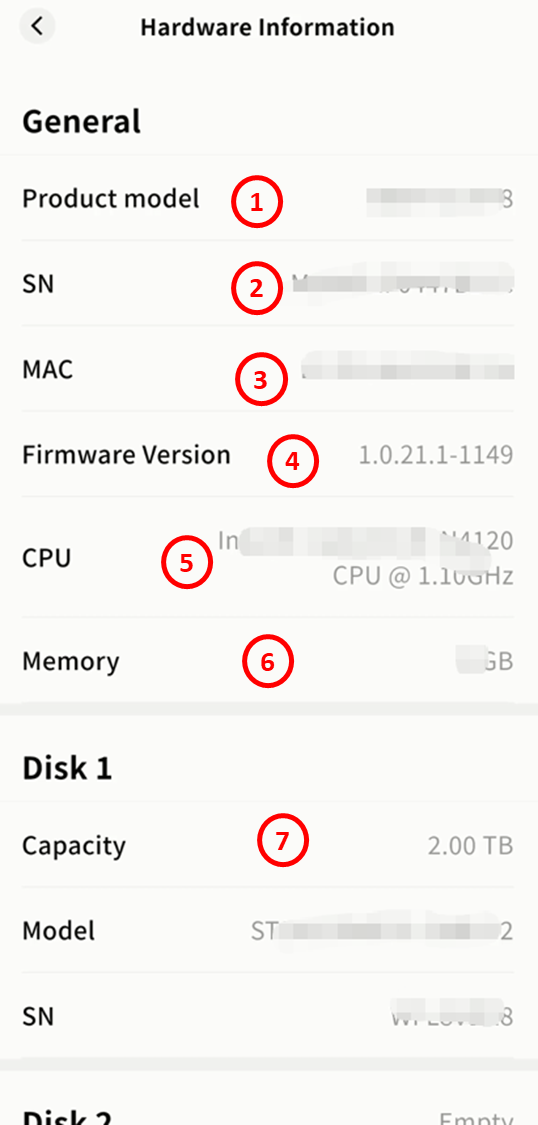
Hardware Information
Click More in the hardware status panel to access detailed hardware information, including:
-
Product model
-
SN: Unique device identifier
-
MAC: Device MAC address
-
Firmware Version: Current firmware installed on the device
-
CPU Model
-
Memory Size
-
Disk Information: Shows details for each slot, including capacity, model, and serial number
Storage Information
Click More in the storage usage panel to view detailed storage information:
-
Used Storage
-
Total disk capacity
-
Total used space (all users combined)
-
Space used in My Space (all users combined)
-
Space used in Public Space (all users combined)
-
Space used in Group Space (all users combined)
-
Space used in Other Areas (such as My Vault, Recycle Bin, and thumbnails)
-
Total available space
-
-
Member Usage
- Displays per-user storage consumption statistics
-
Former Members
-
If a removed member chose to retain data, their usage will appear with an exclamation mark.
-
Click the exclamation mark to delete the retained data and free up storage.
-

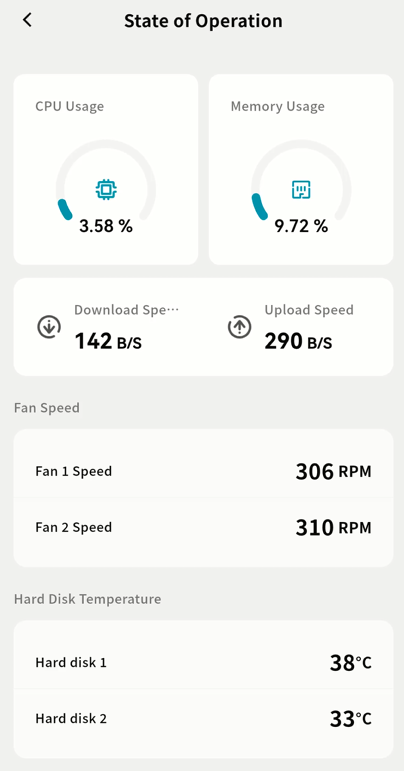
Operating Status
Click More in the operating status panel to view detailed performance metrics:
-
CPU Usage
-
Memory Usage
-
Download/Upload Speed
-
Fan Speed (shows one entry per fan installed in the device)
-
Disk Temperature
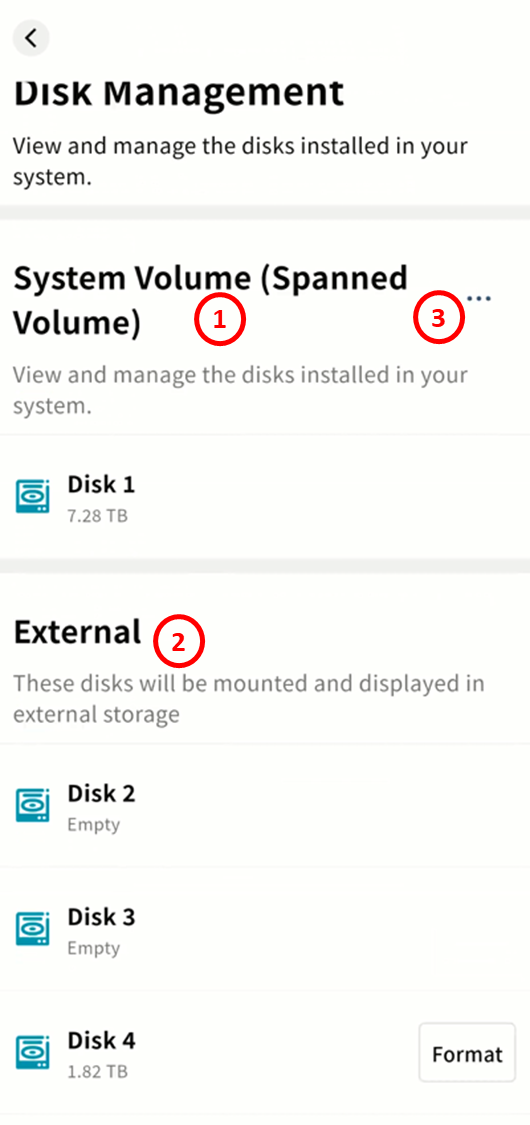
Disk Management
In Disk Management, you can view all hard drives currently inserted in the DASSET edge device and configure them accordingly.
-
System Volume: Configure the system volume, format disks, and view the format type and capacity of each disk included in the system volume.
-
External Disks: Newly connected hard drives not yet part of the system volume will appear here. After formatting, they can be used as external storage.
-
Format and Rebuild System Volume: Reformat all or selected hard drives into a new disk configuration.
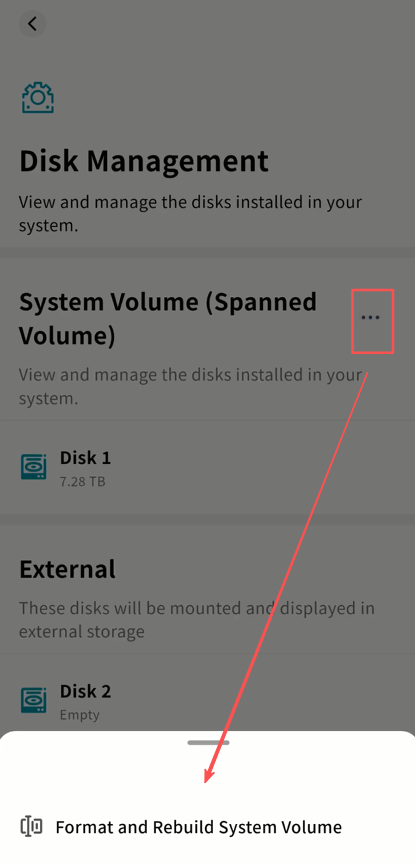
Format and Rebuild System Volume
If you install or replace hard drives and do not want to use them as external storage, select Format and Rebuild System Volume.
Steps:
- Go to SET UP Disk Management and click Format and Rebuild System Volume.
-
In the pop-up window, choose a new disk format. DASSET supports multiple disk formats:
-
Normal Mode: Basic mode. Total usable space equals the sum of all disks, no redundancy.
-
RAID 0: Optimized read/write performance. Usable space equals the sum of all disks, no redundancy.
-
RAID 1: Requires two disks. Usable space equals the smaller of the two disks, with redundancy.
-
RAID 5: Requires at least three disks. Usable space equals the combined capacity of two data disks, with redundancy.
-
RAID 10: Requires at least four disks. Usable space equals the smaller group's total capacity, with redundancy.
-
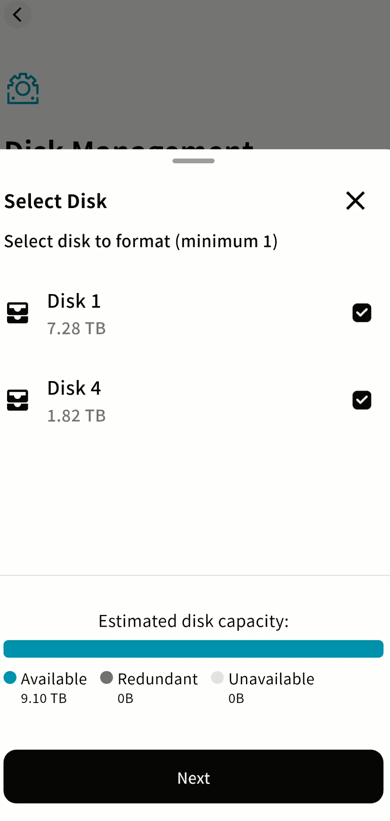
The interface will display the estimated available capacity for the selected configuration.
- After selecting the format, choose the hard drives to include in the system volume.
-
Click Confirm to begin formatting. Please wait until the process completes.
- In RAID modes, after formatting you may see the disk status as Synchronizing. This is an internal process and will not prevent you from uploading, downloading, or managing files.
- During formatting, you can return to the device page to view the progress.

- Once formatting is complete, a notification will appear. Click Confirm to start using your DASSET device.
Add External Disk
If you insert a new hard drive and do not want to rebuild the system volume (which would erase existing data), you can configure it as an external disk.
Steps:
- Go to SET UP Disk Management. Newly inserted drives will appear as Pending Configuration.
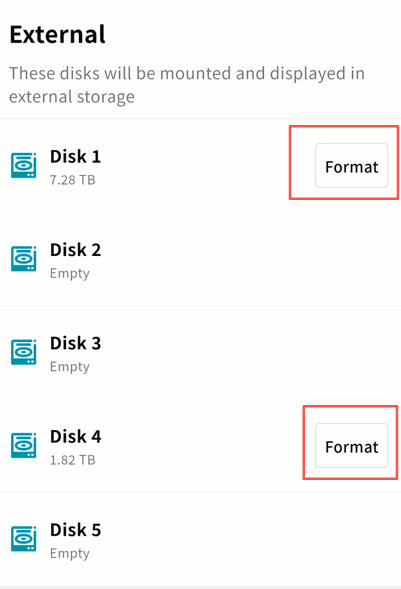
- On the pending disk, click Format. In the pop-up window, click Confirm.
- The system will begin formatting. You can click the Back button to close the progress window.
-
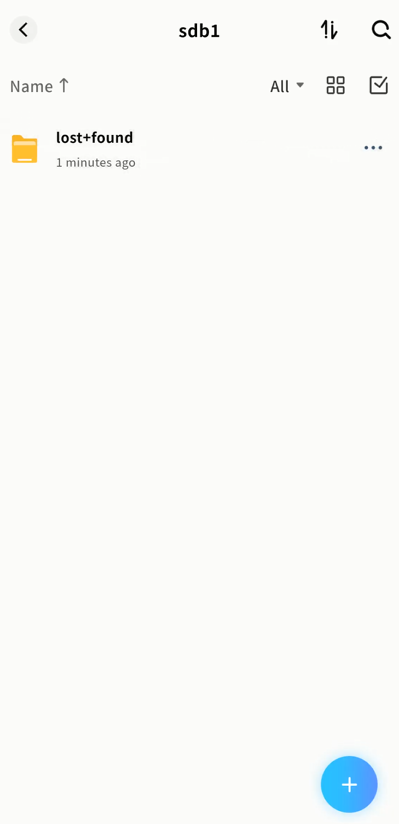
Once formatting is complete, you will see a success notification and the Pending Configuration status will be removed.
-
Go to System Apps External Storage to view the newly added external disk.

- Double-click the disk name to access it and perform file operations.
Note: Do not delete the "lost+found" folder to avoid unexpected issues.
Disk Self-test
The Disk Self-test feature allows you to run diagnostics on your hard drives to identify potential issues early and prevent data loss. We recommend performing disk self-checks regularly to ensure data security.
Steps:
-
Go to Settings Disk Self-test.
-
Click Self-test Again.
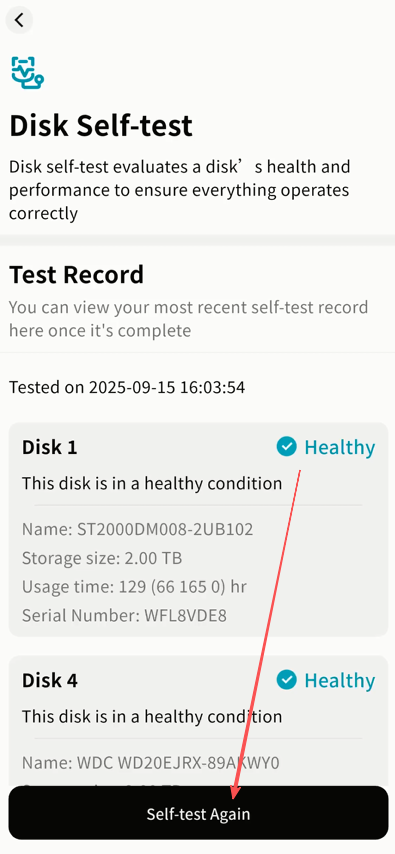
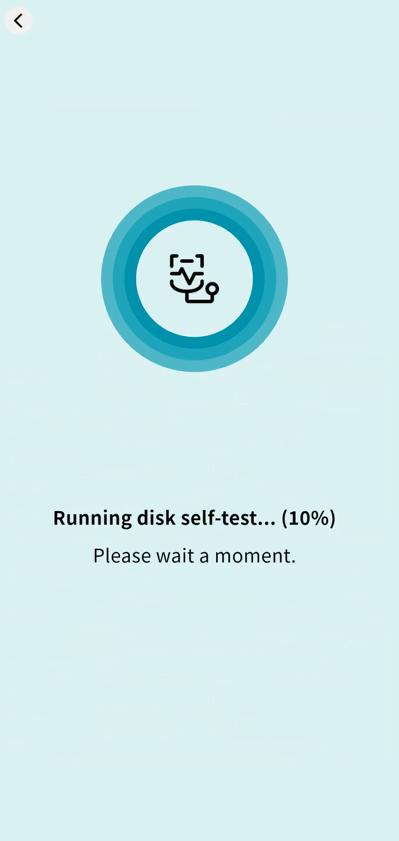
- The system will begin scanning the hard drives. Please wait for the process to complete. (The duration depends on the size and type of the drives.)
- After completion, the system will display the health status of the drives along with the timestamp of the last self-check.
Hard Disk Sleep
The Hard Disk Sleep feature powers down hard drives when there is no read/write activity. This helps extend drive lifespan and reduces power consumption during standby.
Manual Sleep
- Go to SET UP Hard Disk Sleep Sleep now.
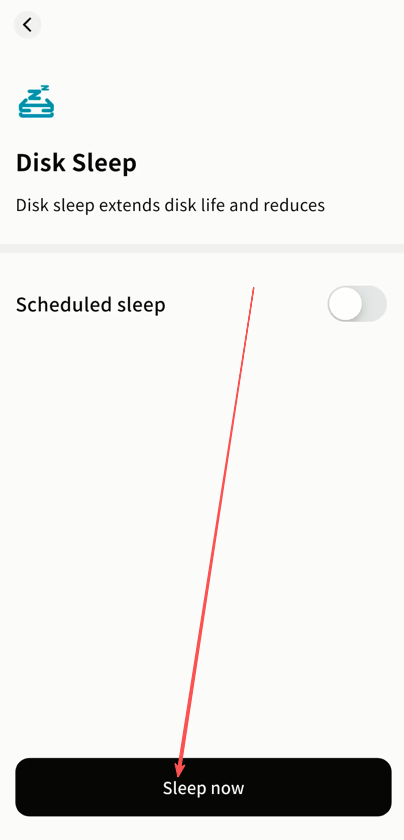
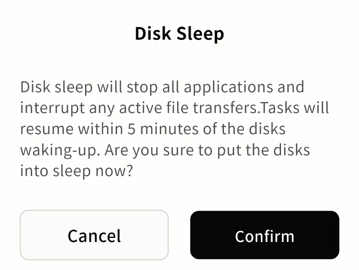
- In the warning window, click Confirm. All applications and transfer tasks will be stopped before the disk powers down.
- A notification will confirm when the hard drive has entered sleep mode.
Scheduled Sleep
To enable scheduled sleep, go to SET UP Scheduled Sleep and switch on Scheduled Sleep.
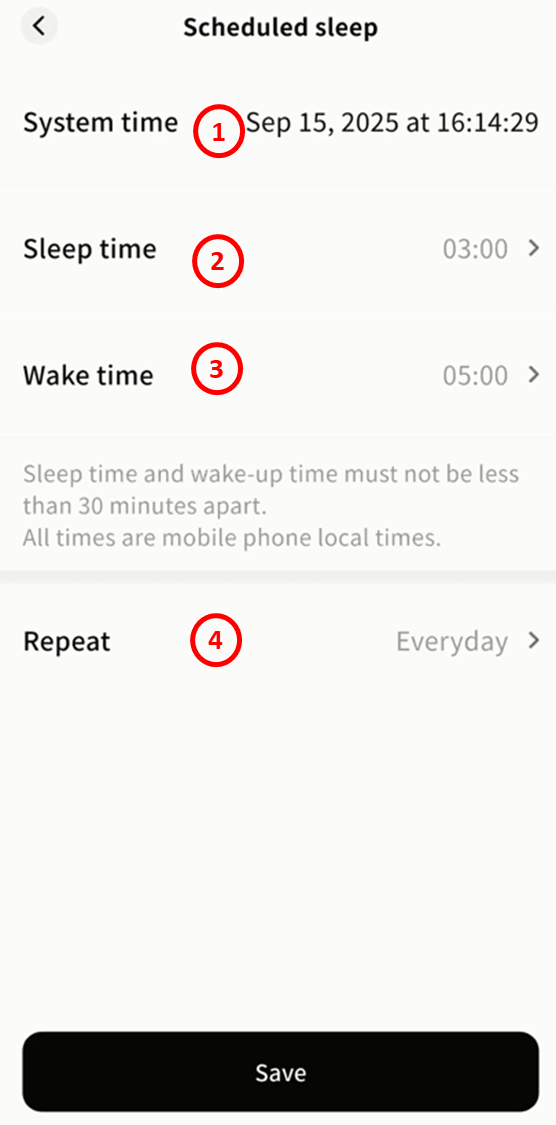
-
Once enabled, configure the following:
-
System Time: Based on the time zone of your client.
-
Sleep Time: The time when the hard disk should enter sleep mode.
-
Wake Time: The time when the hard disk should resume operation.
-
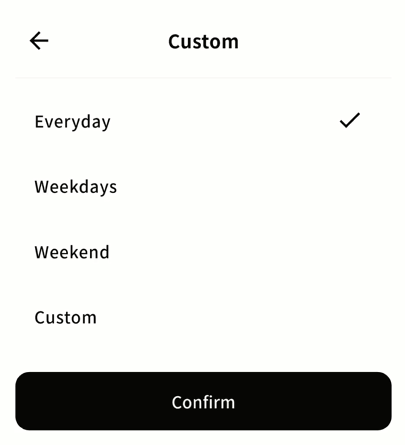
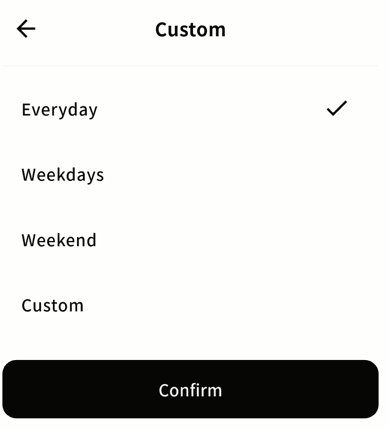
Repeat: Choose when the schedule should apply --- every day, weekdays, weekends, or custom days of the week.
-
- To disable scheduled sleep, simply turn off the option.
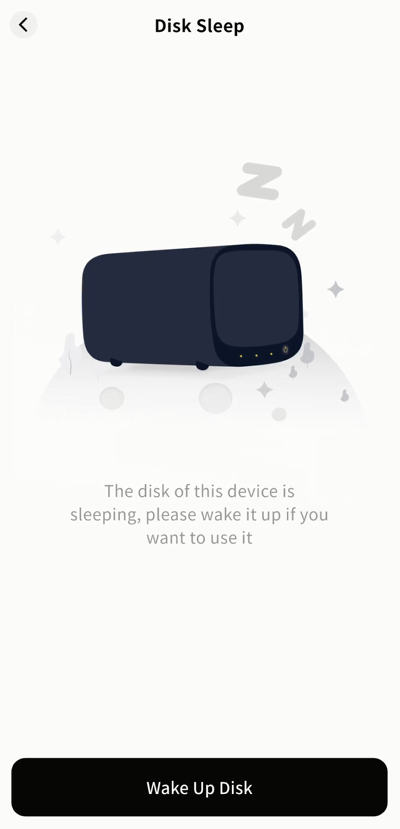
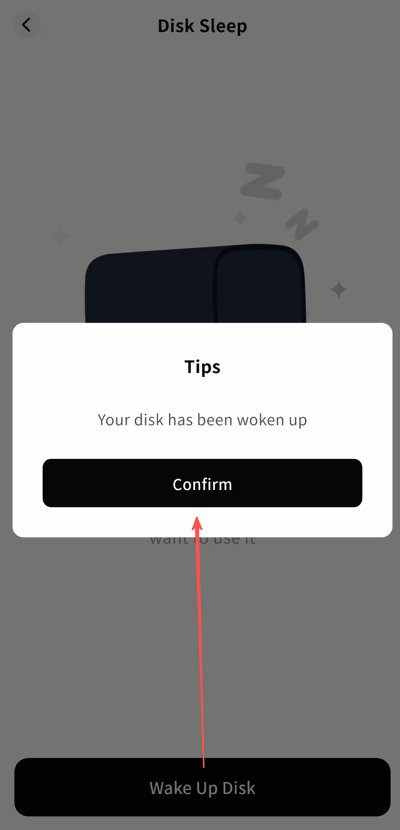
Wake Disk
After the hard disk enters sleep mode, the DASSET client will notify you when you attempt to access the device. Click Wake Up Disk to restart the drive and resume normal operations.
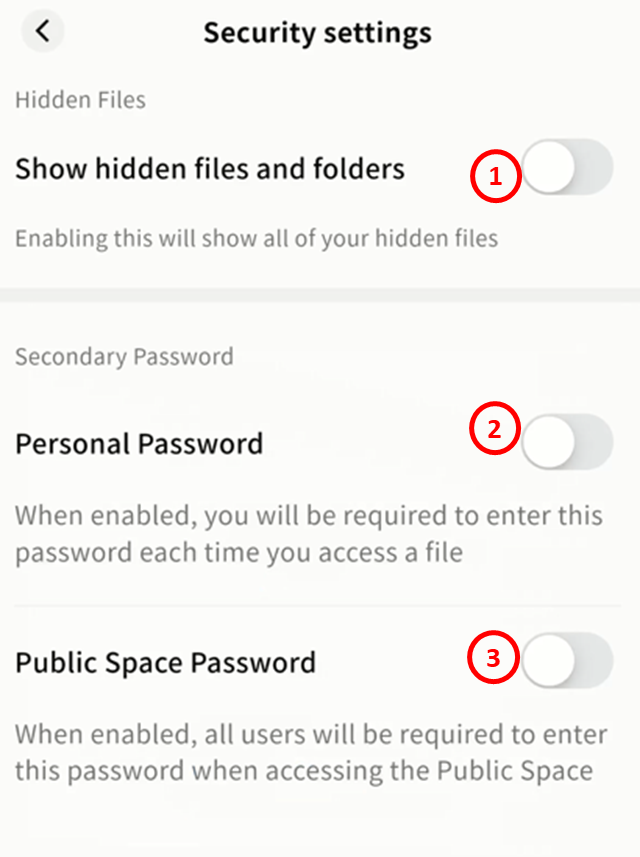
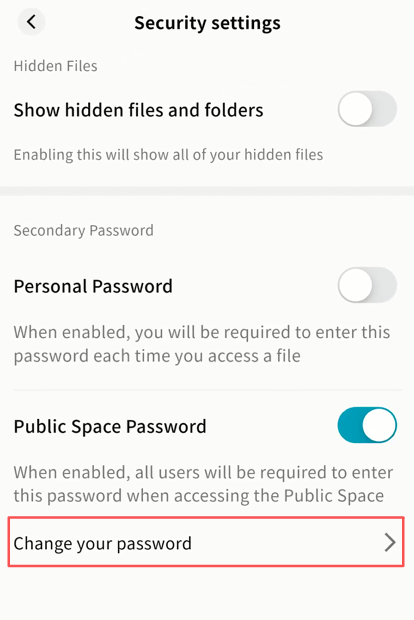
Security Settings
Go to SET UP Security Settings to configure security-related options.
-
Show Hidden Files and Folders: When enabled, hidden files/folders become visible in file management.
-
Personal Password: When enabled, a password is required to access the device.
-
Public Space Password: When enabled, a password is required to access data stored in Public Space.
Show Hidden Files and Folders
If certain files are hidden, enable this option to make them visible in the file manager.
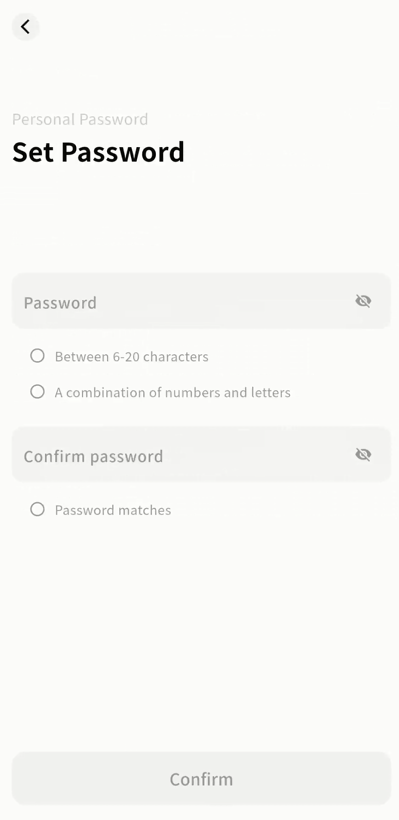
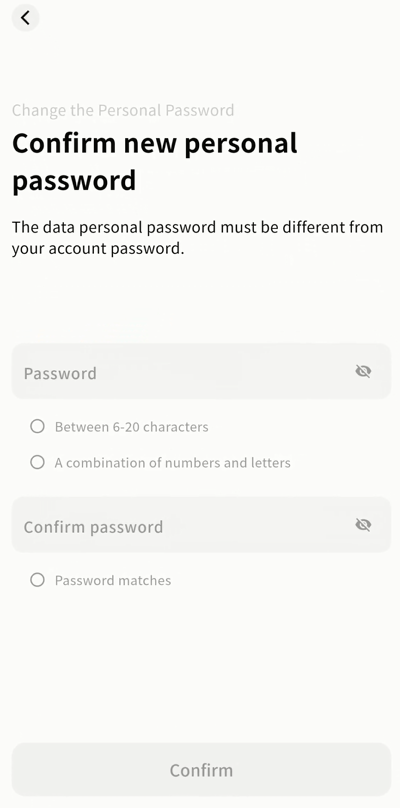
Personal Password
Set Personal Password
-
On the Device Information page, go to Security Settings and enable Personal Password.
-
Enter your password in the prompt to complete setup.
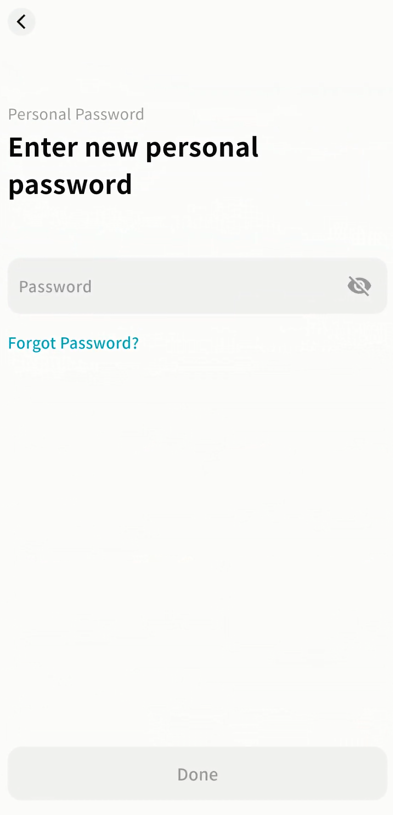
Access Device with Personal Password
Once set, you will be prompted to enter the password when accessing the device home page. Only after entering the correct password can you proceed.
Change Personal Password
- Go to SET UP Security Settings Personal Password Change Password.
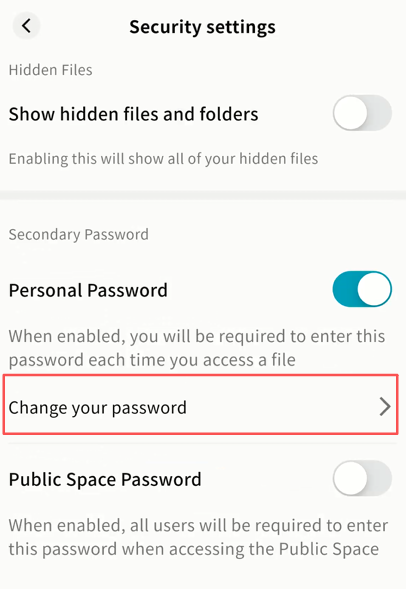
-
Enter your current password to verify your identity.
-
Enter the new password and save changes.
Forgot Personal Password
- In the Personal Password prompt or change window, click Forgot Password.
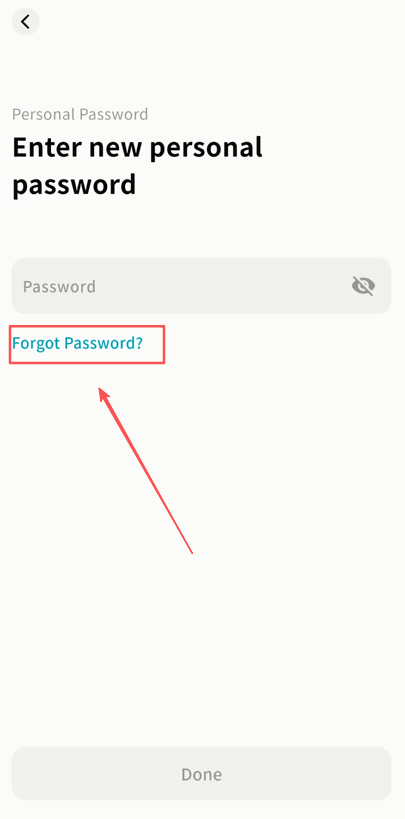
- Enter the email or phone number linked to your DASSET account.
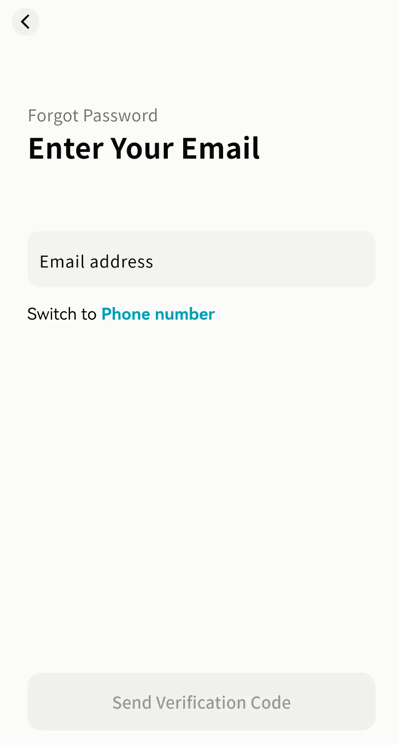
-
Enter the verification code sent to you.
-
After verification, set a new personal password.
Public Space Password
Only Owners and Administrators can configure this option.
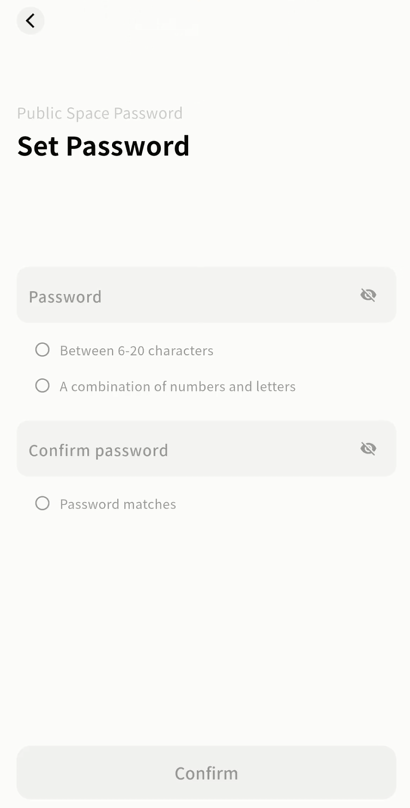
Set Public Space Password
-
Go to SET UP Security Settings and enable Public Space Password.
-
Enter the desired password to complete setup.
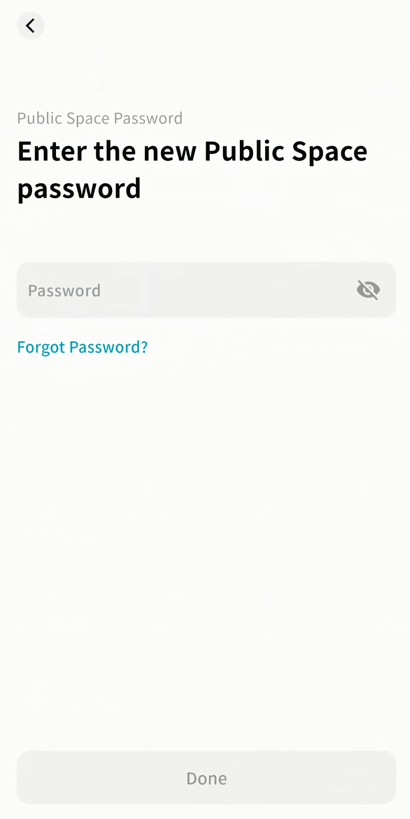
Access Public Space
When accessing Public Space, a password prompt will appear. Only the correct password will grant access.
Change Public Space Password
- Go to SET UP Security Settings Public Space Password Change Password.
-
Enter the current password to verify your identity.
-
Enter a new password to update.
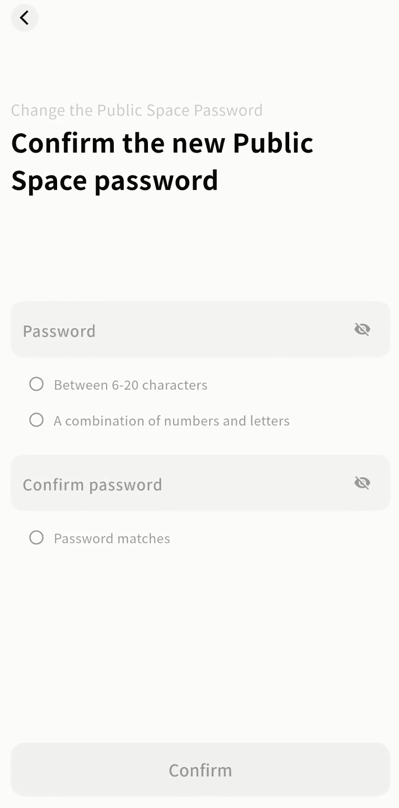
Forgot Public Space Password
Only Owners and Administrators can use this option.
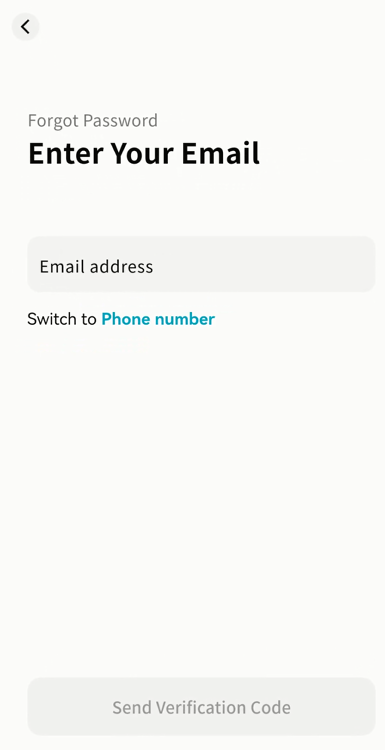
- In the Public Space Password prompt or change window, click Forgot Password.
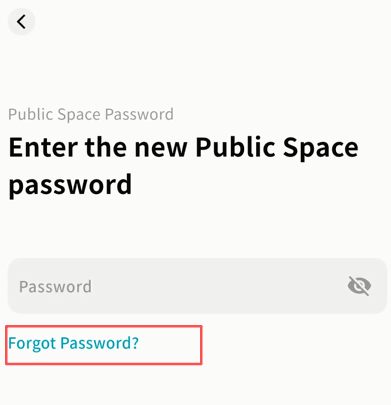
- Enter the email or phone number linked to your DASSET account.
-
Enter the verification code sent to you.
-
After verification, set a new password.
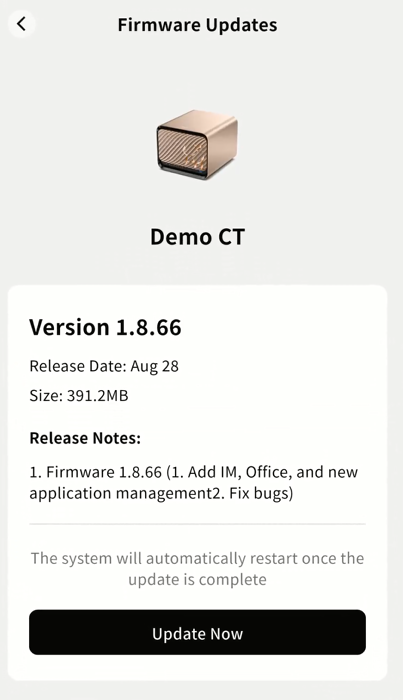
Firmware Upgrade
Only Owners and Administrators can perform this operation.
When a firmware update is available, you will see a pop-up notification upon entering the device.
-
Click Update Now to begin the upgrade.
-
If you prefer not to update immediately, click Back and upgrade later.
-
Important: Do not shut down or restart the device during the update, as this may cause the upgrade to fail and result in device malfunction.
You can also check update notifications under SET UP Hardware Status.
- Click New Updates Available to view details of the update.
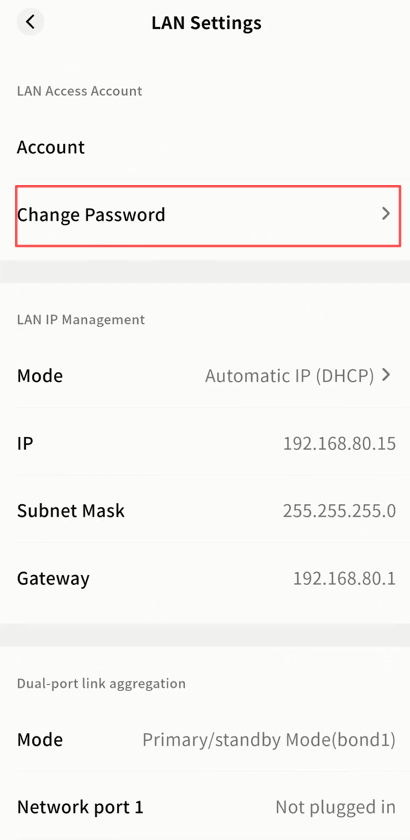
LAN Settings
On the LAN Settings page, you can configure:
-
LAN Access Account: Change the password used to access Samba and Time Machine.
-
LAN IP Management: Configure the network information of the DASSET edge device.
-
Link Aggregation: If your device has multiple network ports, you can combine them into one logical interface to improve performance.
LAN Access Account
-
Click Change Password.
-
In the pop-up window, enter a new password and confirm.
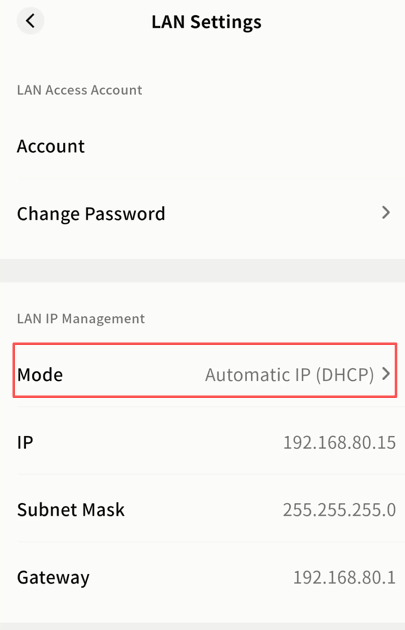
LAN IP Management
Two IP management modes are available:
-
DHCP (Automatic IP Assignment): The switch/router assigns an IP address to the DASSET device automatically. No manual configuration is required. This is ideal for plug-and-play use and users without networking knowledge.
-
Manual IP Assignment: The user assigns a fixed IP address to the DASSET device. This is recommended when services (such as Samba) require a stable IP address.
Important: Ensure that the manually configured IP matches the subnet of the current network and is not already in use. If the device cannot connect after manual configuration, press and hold the reset button on the device to restore IP settings.
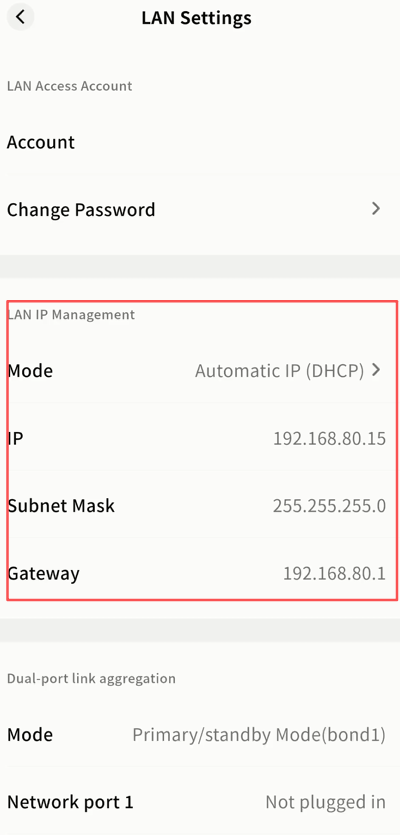
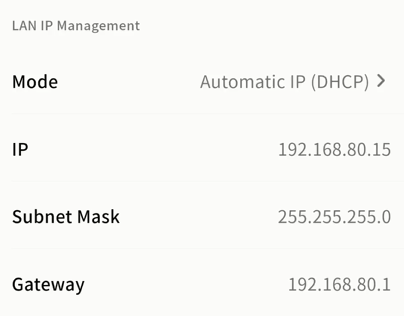
DHCP (Automatic)
By default, DASSET devices use DHCP. On the LAN IP Management page, you can view:
-
Current IP address
-
Subnet mask
-
Gateway IP address
Note: IP details assigned by DHCP cannot be modified manually.
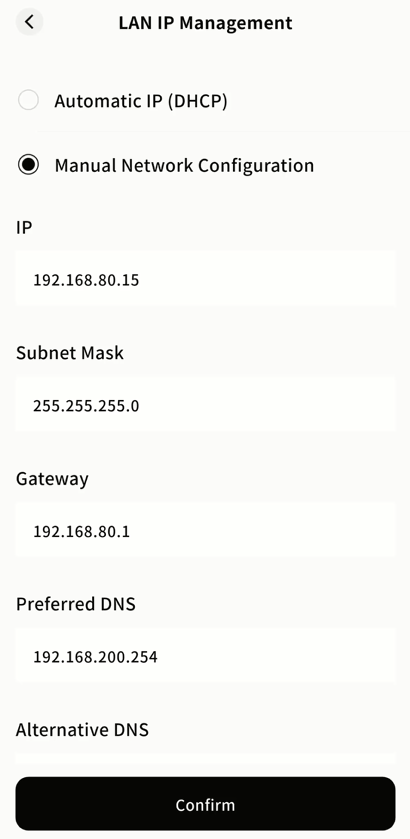
Manual IP Assignment
If you use protocols such as Samba, it is recommended to configure a static IP to avoid DHCP changes disrupting access.
Steps:
- Go to SET UP LAN Settings LAN IP Management, then click Mode.
-
Enable Manual Network Configuration and enter:
-
IP address
-
Subnet mask
-
Gateway
-
Primary and secondary DNS servers
-
Once saved, you can access Samba and other services using the fixed IP address.
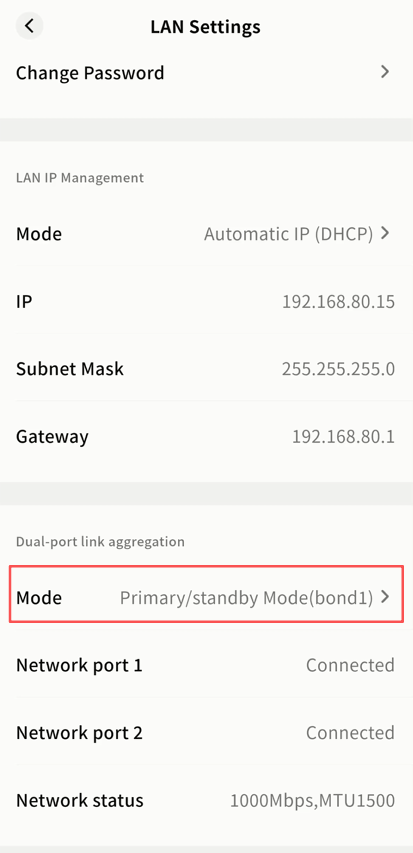
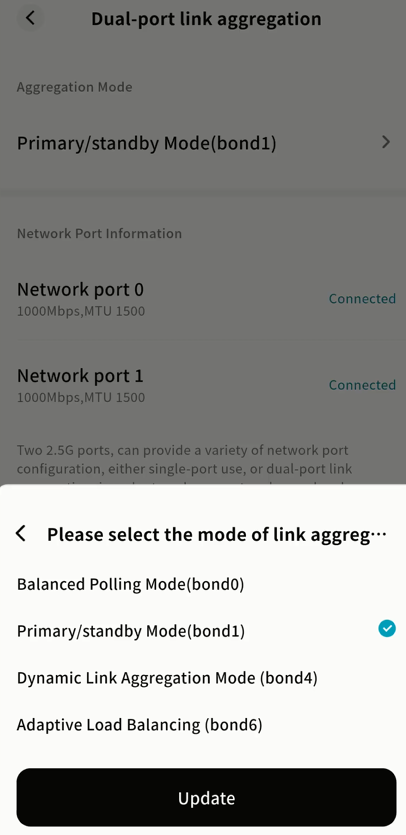
Link Aggregation
If your device has multiple network ports, you can enable link aggregation and select a working mode:
-
Balance Polling Mode: Both ports transmit packets in turn, providing load balancing and fault tolerance. Requires switch support for port aggregation.
-
Primary/standby Mode: One port is active, the other serves as backup. If the active port fails, the backup takes over automatically.
-
Dynamic Link Aggregation Mode: Requires a switch with LACP support. Provides real-time monitoring, load balancing, and failover.
-
Adaptive Load Balancing: Distributes traffic across ports automatically. Does not require switch support.
Note: To ensure proper use, connect both ports to the same switch.
Steps:
- Go to SET UP LAN Settings Link Aggregation Mode.
- Select the desired mode and click Update.
Power Management
On the Power Management page, you can perform remote shutdown, restart, and scheduled power tasks.
Safe Shutdown
Available to Owners and Administrators only.
Click Shutdown to remotely power off the DASSET device.
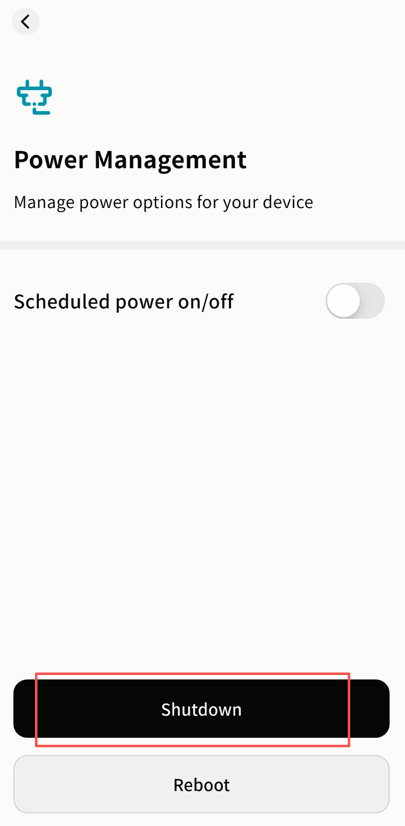
Important: If your device does not support remote power-on, it can only be restarted by:
-
Power cycling (unplugging and re-plugging the power cable, if the device supports auto power-on).
-
Pressing the physical power button on the device.
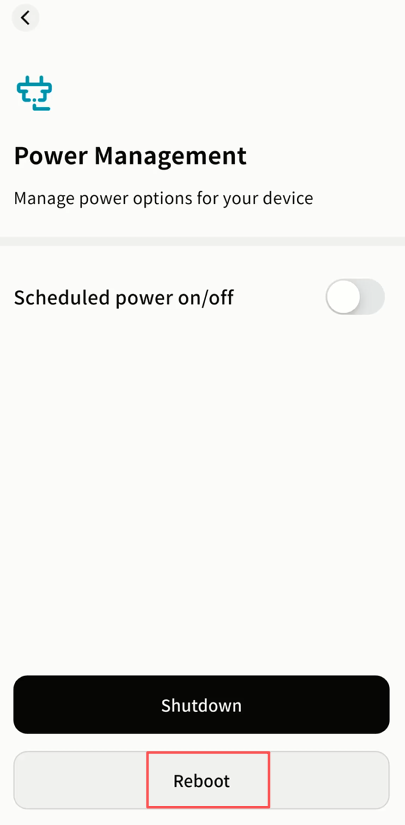
Restart
Available to Owners and Administrators only.
Click Reboot to remotely reboot the DASSET device.
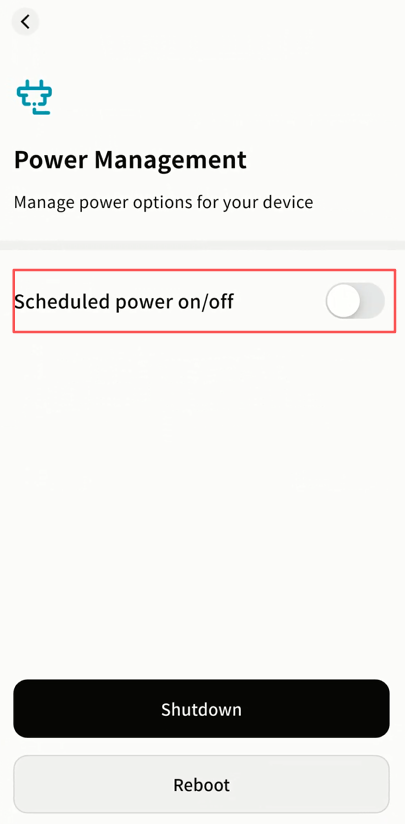
Scheduled Power Management
Available to Owners and Administrators only (regular users can only view rules).
Steps:
- Go to SET UP Power Management Scheduled Power on/off and enable the option.
- Configure rules:
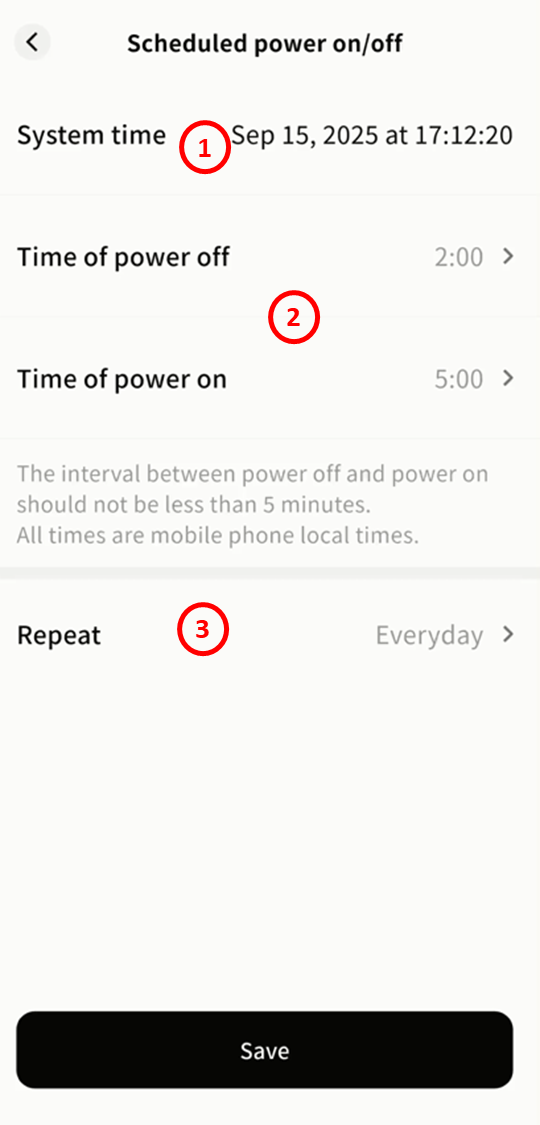
-
System Time: Based on the device's time zone.
-
Time of power off/on: Define exact times or adjust by hour using arrows.
-
Repeat: Apply the rule daily, on weekdays, weekends, or custom days of the week.
- To disable scheduling, simply switch off the option.
Device Unbinding
Owner Unbinding
The Owner can unbind the device. This action unbinds all members associated with the device.
- Go to SET UP Unbind this device.
- A warning will appear. If you prefer not to remove all members, transfer ownership first. Otherwise, click Remove All Members.
-
In the confirmation window, type Confirm. If you no longer need the data stored on this device, we strongly recommend selecting Erase personal hard disk data at the same time.
- When this option is enabled, all data in My Space associated with your account will be automatically deleted from the DASSET edge device after unbinding, ensuring your privacy and data security.
Member Unbinding
Members can unbind themselves from a device at any time. After unbinding, the device will no longer appear in their device list.
- Go to SET UP Unbind Device.
-
In the confirmation window, type Confirm. If you no longer need the data stored on this device, we strongly recommend selecting Erase personal hard disk data at the same time.
- When this option is enabled, all data in My Space associated with your account will be automatically deleted from the DASSET edge device after unbinding, ensuring your privacy and data security.
File Management
Three Storage Spaces
DASSET divides storage into three types of spaces:
- My Space
Accessible only by you. Other members cannot see the files stored here.
- Public Space
Accessible to all users bound to the device. Read/write permissions can be configured per user.
- Group Space
Accessible only to members of the same group.
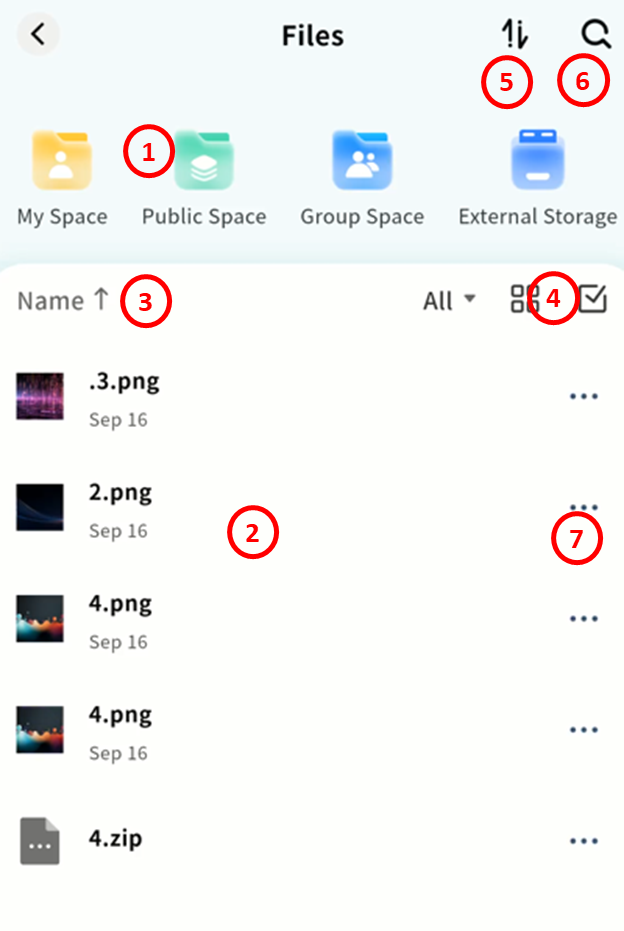
File Browser Interface
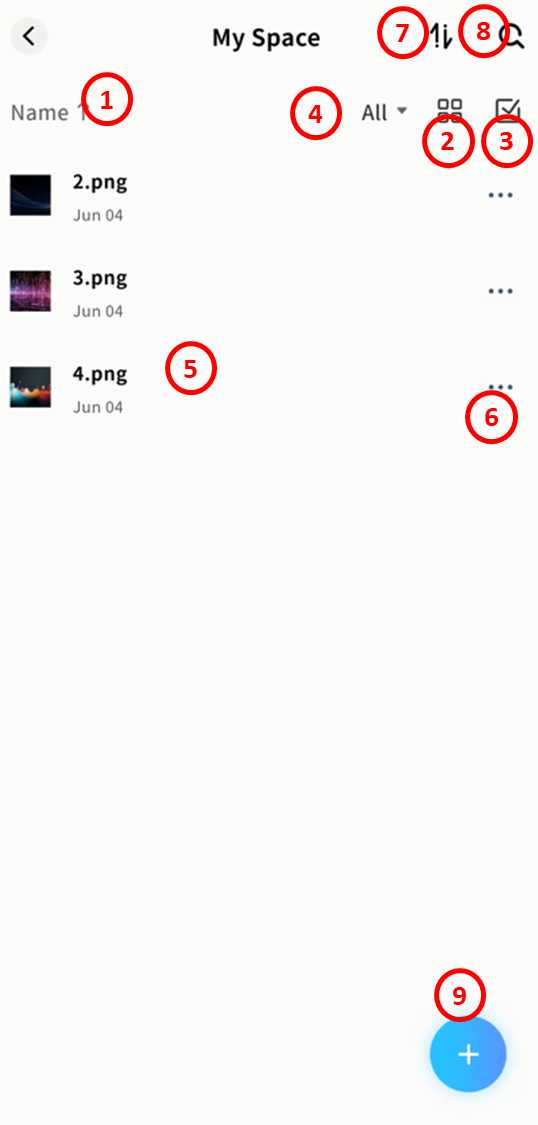
Inside any space, you can browse and manage files with multiple options:
-
Sorting: Sort files by name, size, or modification date.
-
View Options: Display files in list view or grid view.
-
Selection: Select single or multiple files.
-
File Type Filter: Quickly filter files by type (images, videos, audio, documents, compressed files).
-
File List: Shows file names and modification dates.
-
File Menu (...): Open the file operations menu.
-
Task Center: Track upload, download, and other task progress.
-
Search: Search for files within the current space using keywords.
-
+ Button: Upload photos, videos, files, or create new folders.
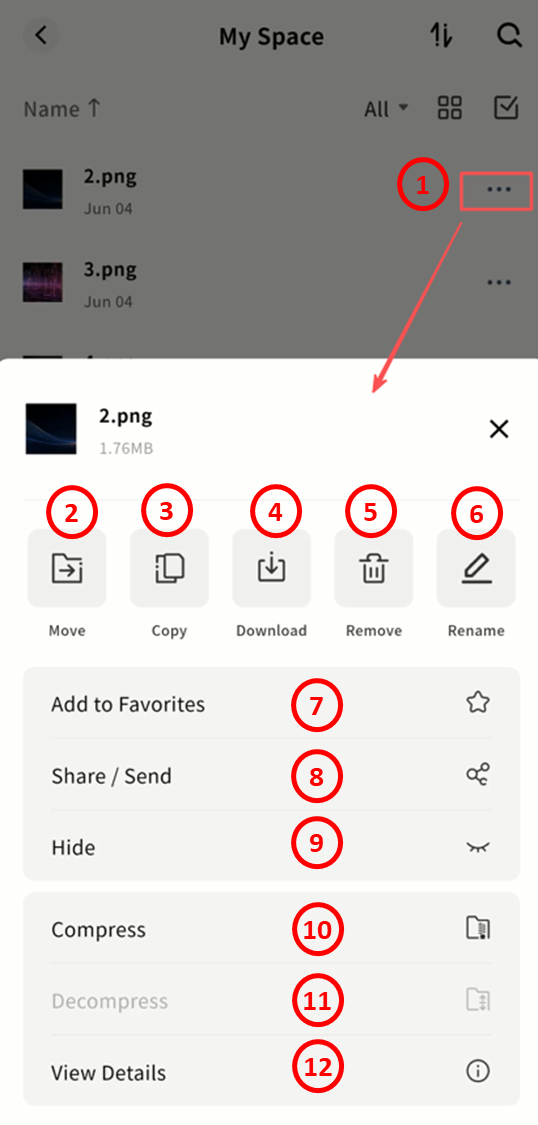
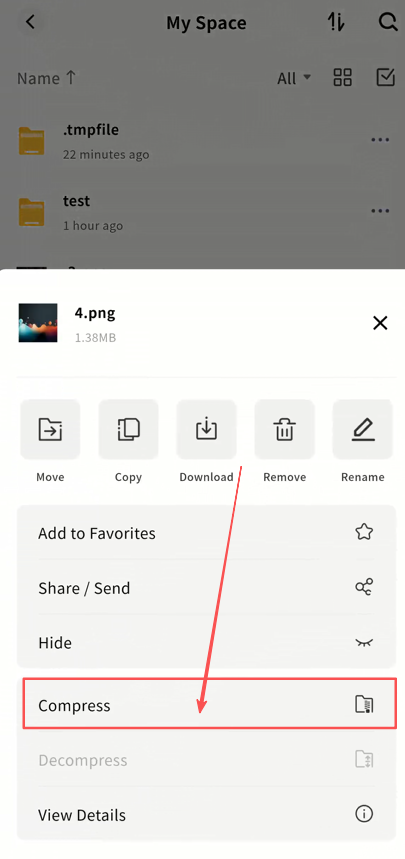
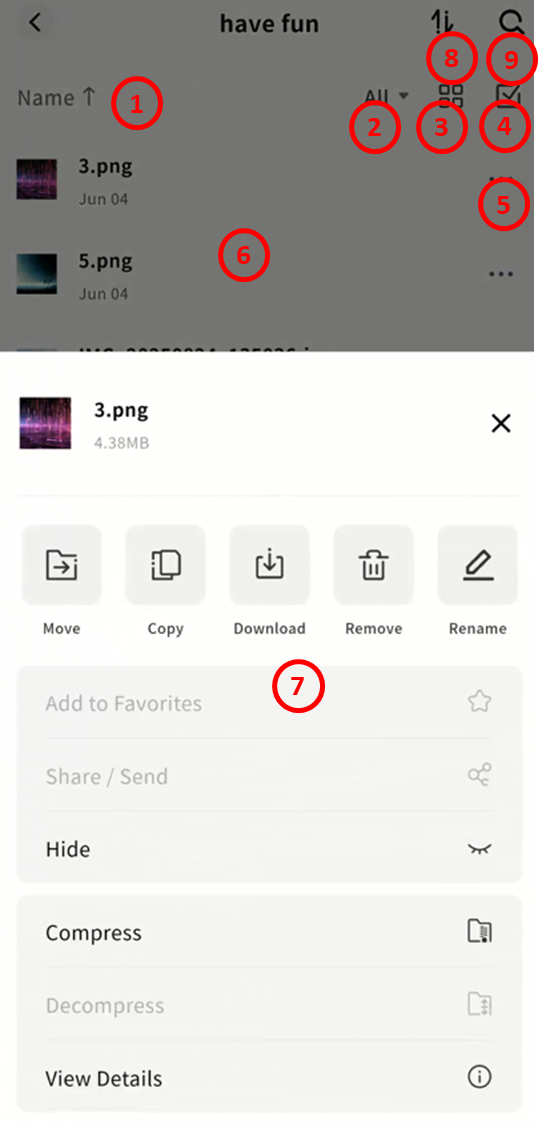
File Operations Menu
DASSET supports a wide range of file operations:
-
File Menu (...): Open file operations menu.
-
Move: Move files from the current directory to another.
-
Copy: Copy files to another directory.
-
Download: Download files to your local device.
-
Delete: Remove files.
-
Rename: Assign a new name to the file.
-
Favorite: Add files to My Favorites.
-
Share/Send: Share files in different ways:
-
Member Share: Share with other members of the same device.
-
QR Code Share: Generate a QR code for sharing with other DASSET users.
-
My Other Devices: Copy files to another DASSET device you own. (Note: The target device must also belong to your account.)
-
-
Hide: Hide files. Hidden files will not appear unless Show Hidden Files is enabled.
-
Compress: Compress one or multiple files into a ZIP archive.
-
Decompress: Extract compressed files. Supported formats: RAR, ZIP, TAR, TAR.GZ.
-
View Details: Display file details, including name, location, creation date, and modification date.
File Selection
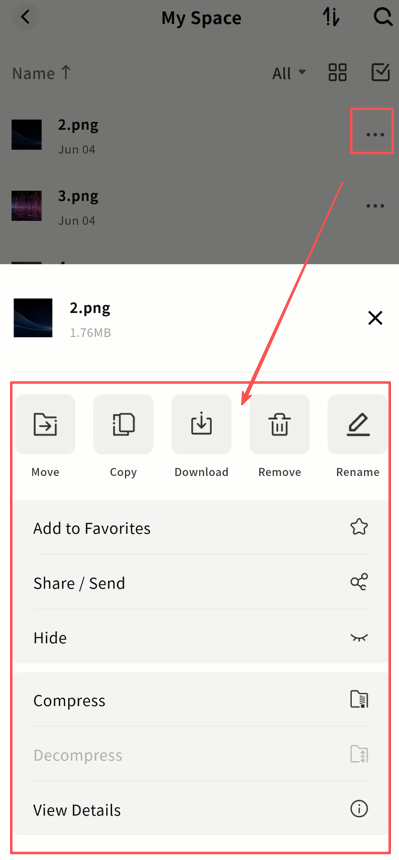
Single File Operations
Click ... next to a file to open the menu and choose operations for that file.
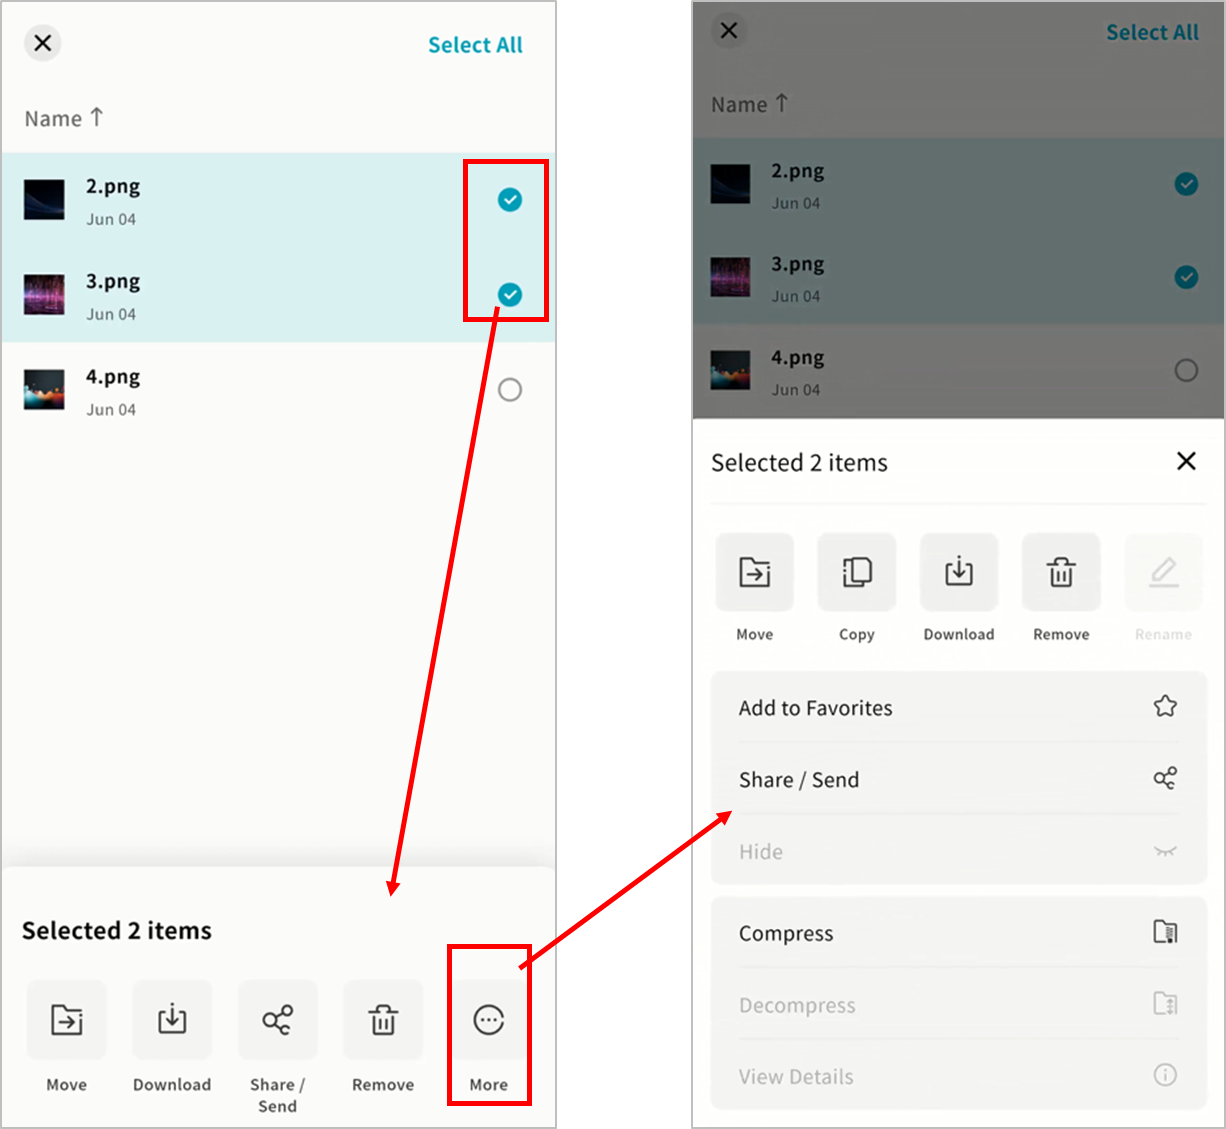
Batch File Operations
-
Use the checkboxes to select one or more files.
-
From the bottom menu, choose an operation:
-
Move: Move selected files to another directory.
-
Download: Download selected files to your device.
-
Share/Send: Share selected files via member share, QR code, or send to another DASSET device you own.
-
More: Access additional operations.
-
File Upload and New Folder
You can upload files from your mobile device to the DASSET edge device in any space by tapping the + button.
Note: Ensure you grant file access permissions to the DASSET app before uploading.
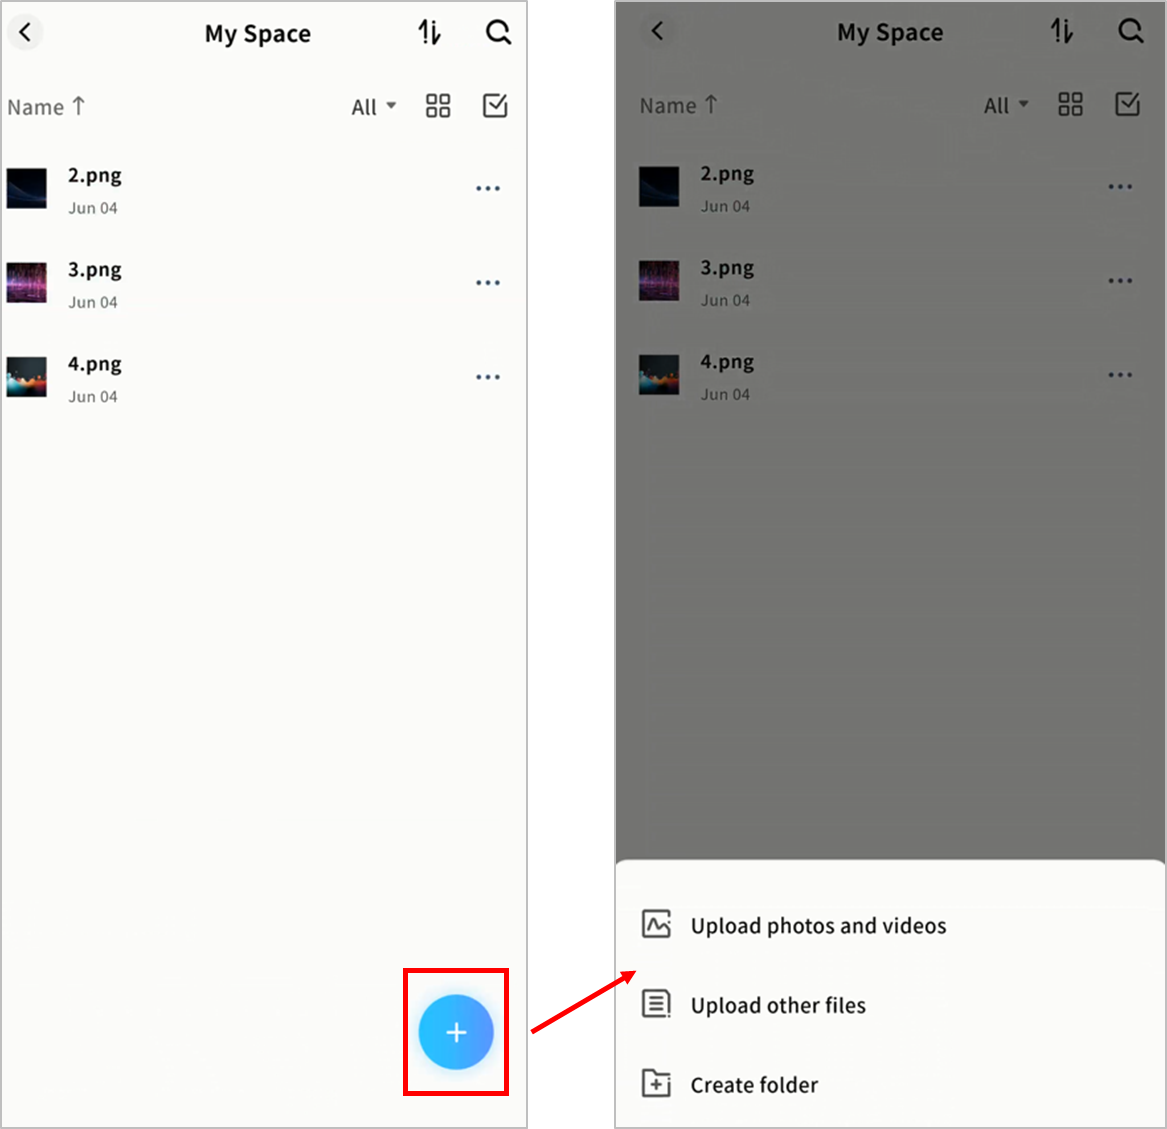
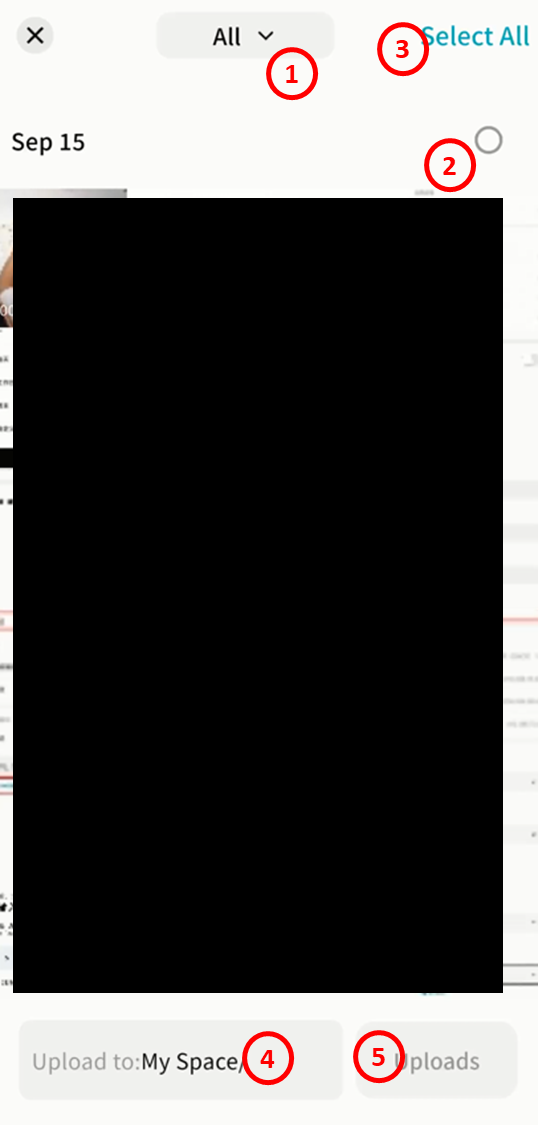
Upload Photos and Videos
-
Tap + Upload Photos/Videos.
-
In the pop-up window, select the photos or videos to upload to the device.
-
Album Selection: Switch between different albums from the dropdown.
-
Select by Date: Checkmark a date to select all photos/videos from that time.
-
Select All: Select all items in the album.
-
Upload To: Choose the destination folder.
-
Uploads: Start uploading the selected items.
- Monitor progress in Task Center Upload.
Upload Files
-
Tap + Upload Files.
-
The DASSET app will open your device's File Manager. Select the files to upload. The upload will begin automatically once confirmed.
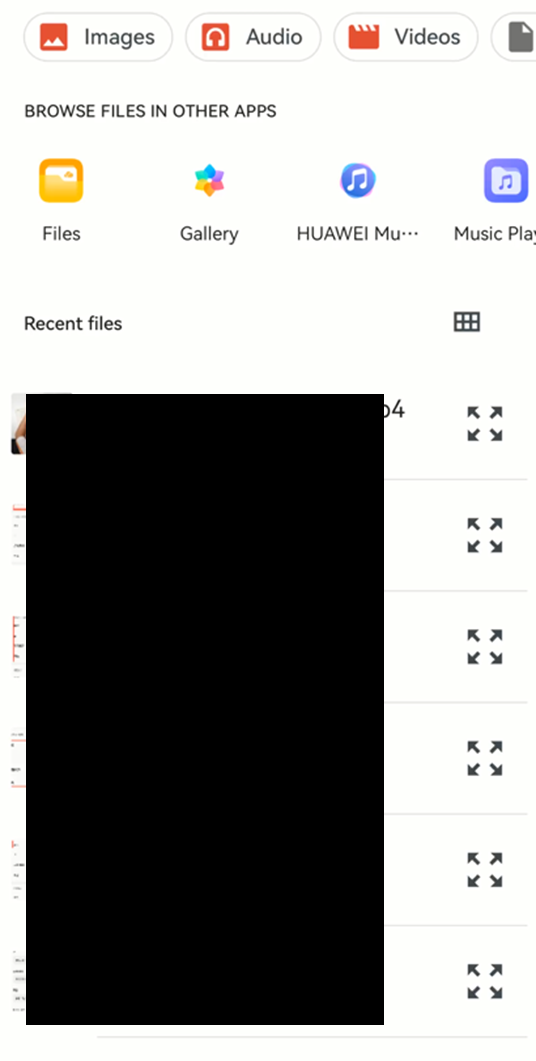
Note: The File Manager interface may vary depending on the mobile device.
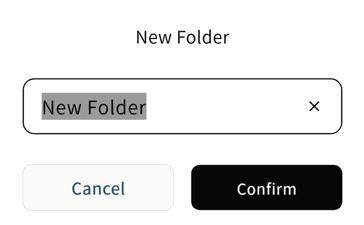
Create a New Folder
-
Tap + New Folder.
-
In the pop-up window, enter the folder name and click Confirm.
Note: The following characters are not supported in folder names: \ / < * ` | ? " '
Upload Progress
You can view current and completed uploads in Task Center Upload.
File Download
Files stored on the DASSET edge device can be downloaded to your mobile device at any time. Both single and multiple file downloads are supported.
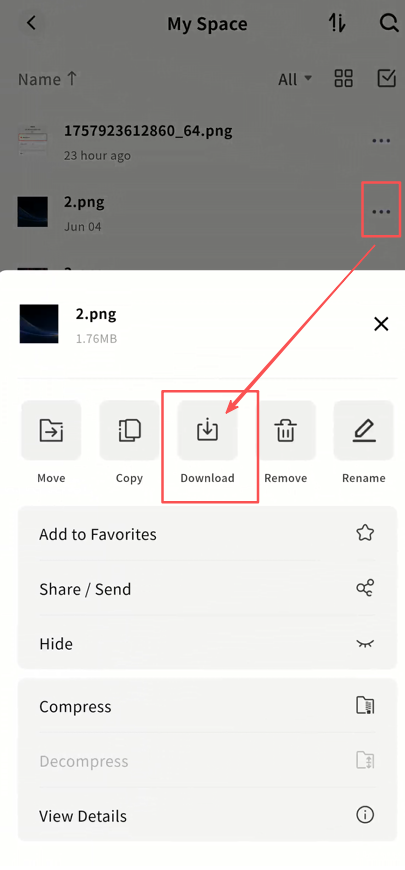
Single File Download
-
Tap the ... menu next to a file and select Download.
-
The download will start automatically.
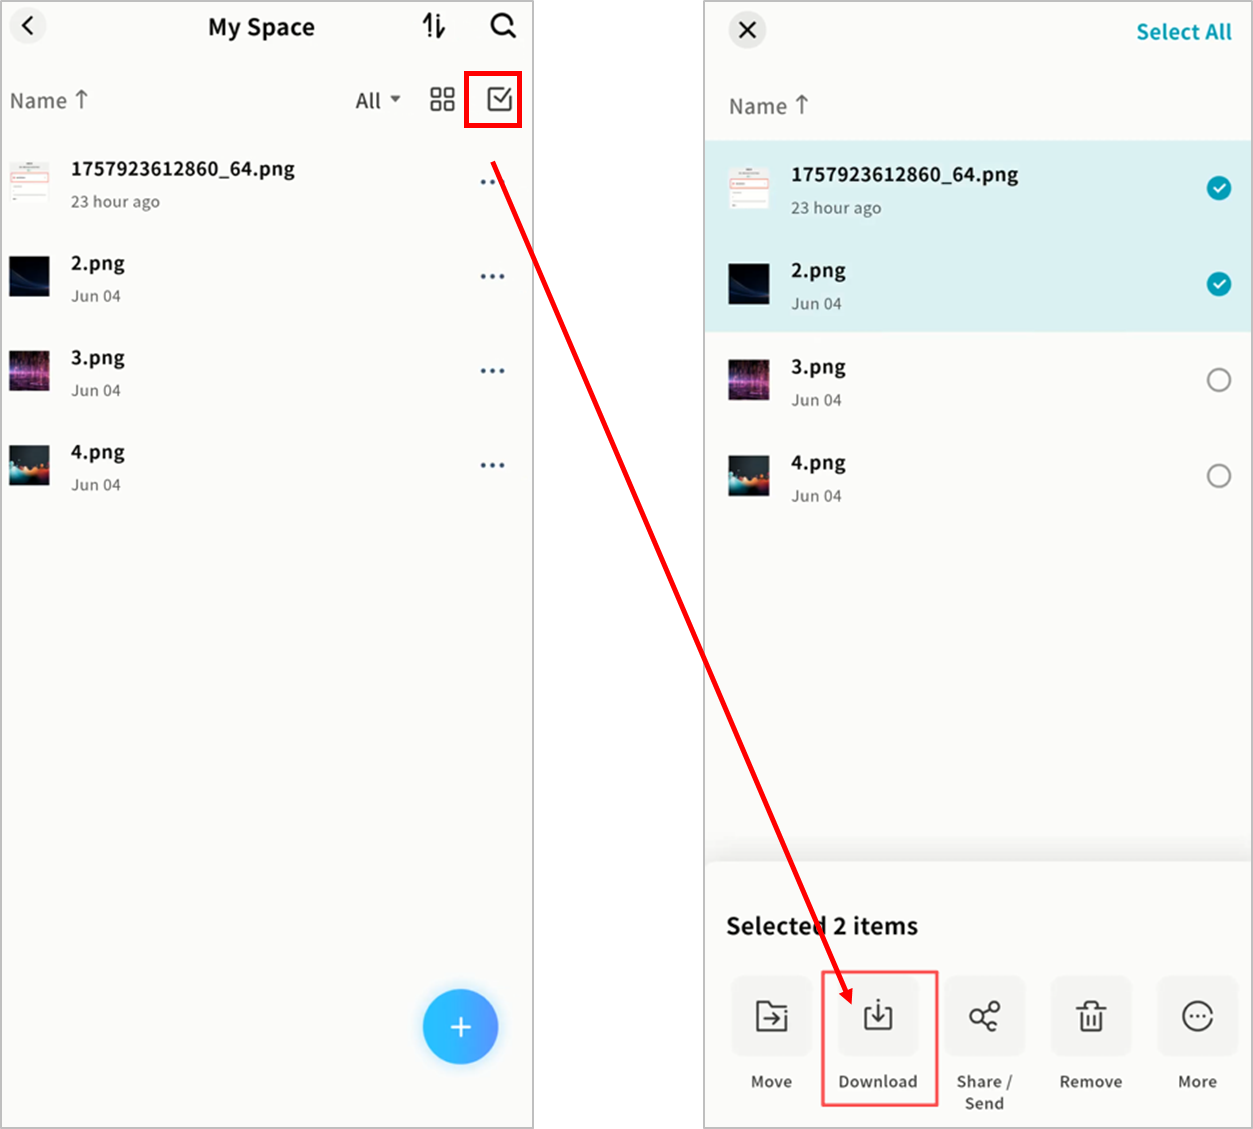
Multi-File Download
-
Use the checkboxes to select one or more files.
-
Tap Download in the bottom menu to begin.
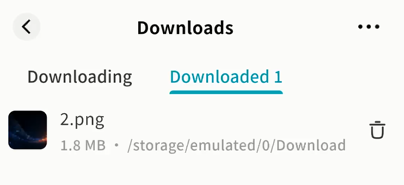
Download Progress
Track downloads in Task Center Download.
File Move
The File Move function transfers files from one directory to another. After moving, files will exist only in the new directory and no longer in the original location. Single and batch operations are supported.
- Tap the ... menu next to a file and select Move.
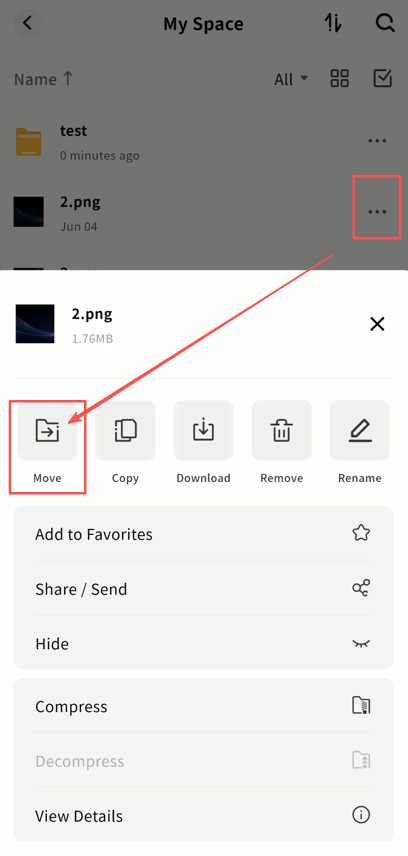
- On the Select Destination page, choose the target space. All available spaces will be listed.
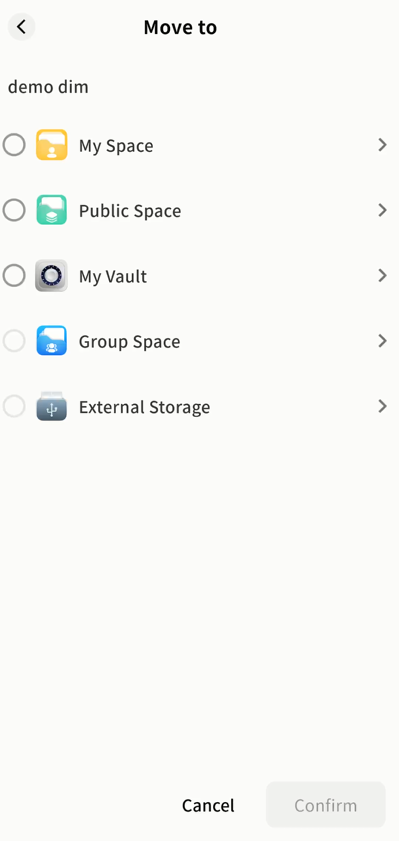
- In the chosen space, select the destination folder. You can also tap + in the top-right corner to create a new folder as the target.
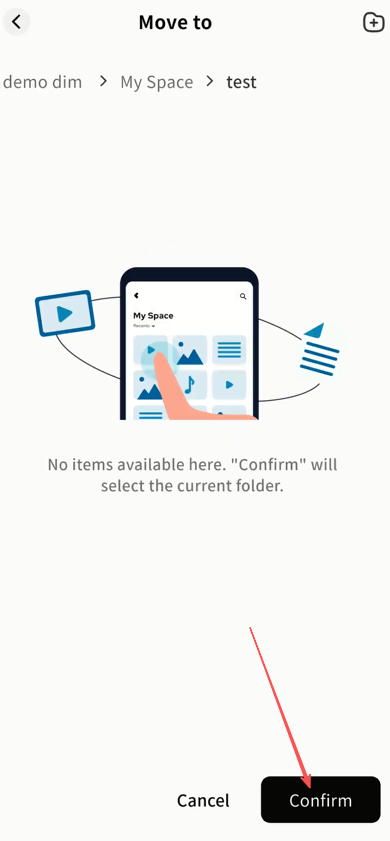
- Monitor move progress in Task Center Other Operations.
File Copy
The File Copy function duplicates files into a target directory while keeping the original files in their original location. Both single and batch copy operations are supported.
- Tap the ... menu next to a file and select Copy.
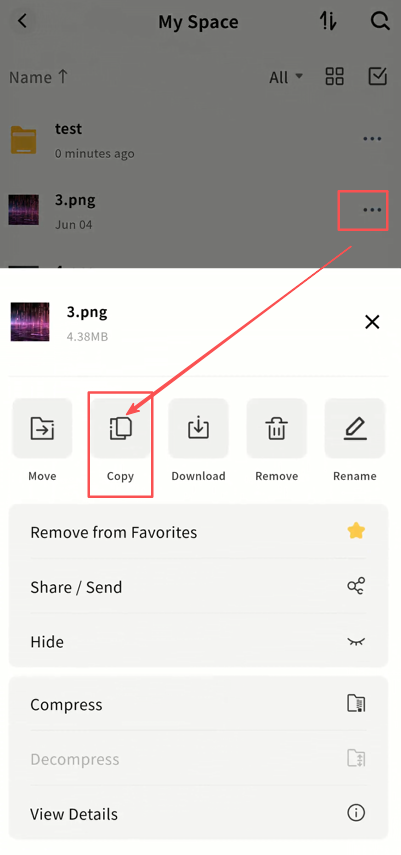
- On the Select Destination page, choose the target space. DASSET will list all available spaces.
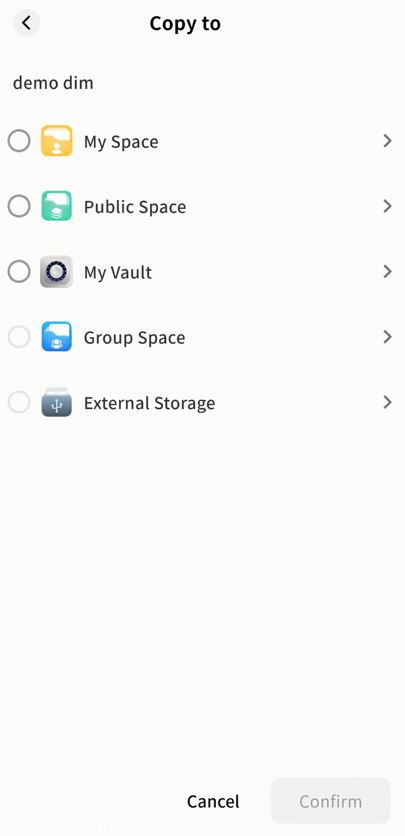
- Select the destination folder within the chosen space. You can also tap + in the top-right corner to create a new folder as the target directory.
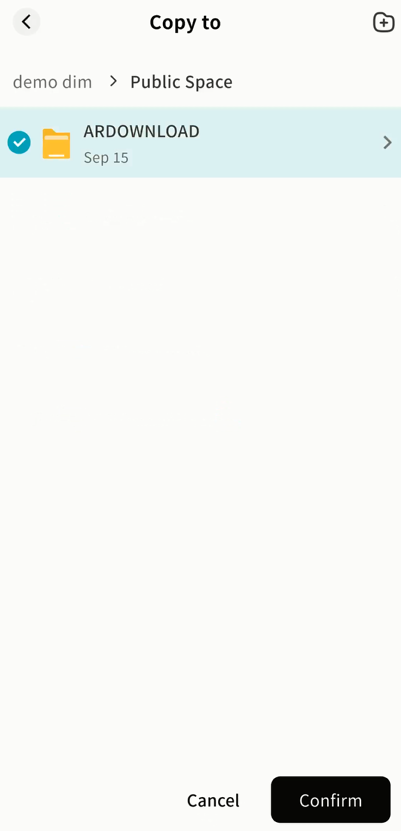
- Monitor copy tasks in Task Center Other Operations.
Online Media Playback
DASSET supports online playback of images, videos, and audio files. Simply tap the file to open it.
- Supported Video Formats
avi, flv, mpg, mov, mkv, mp4, m2ts, asf, wmv, vob, divx, 3gp, mpeg, mts, ts, f4v, hevc
- Supported Image Formats
bmp, gif, heic, jpg, png, jpeg, tif, tiff, dng
- Supported Audio Formats
mp3, wma, flac, wav, aac, ape, m4a, ogg
Video Playback
Tap a video file to open the video player and watch online.
-
Total video duration and current playback time
-
Progress bar with drag-to-seek support
-
Fullscreen/windowed playback toggle
-
Play/Pause
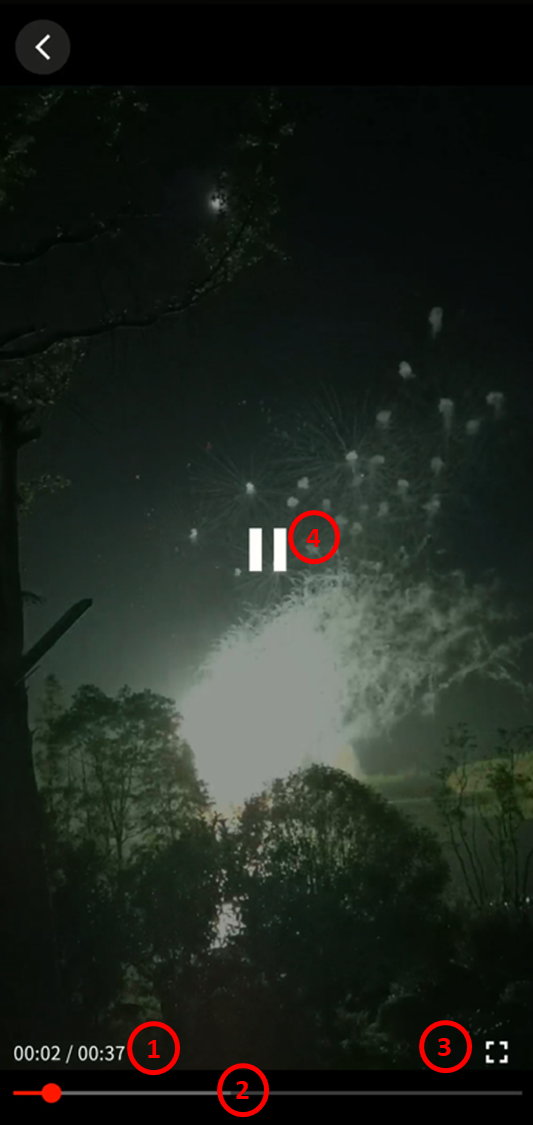
Image Viewing
Tap an image file to open the image viewer and view the original file.
- Swipe left or right to switch images

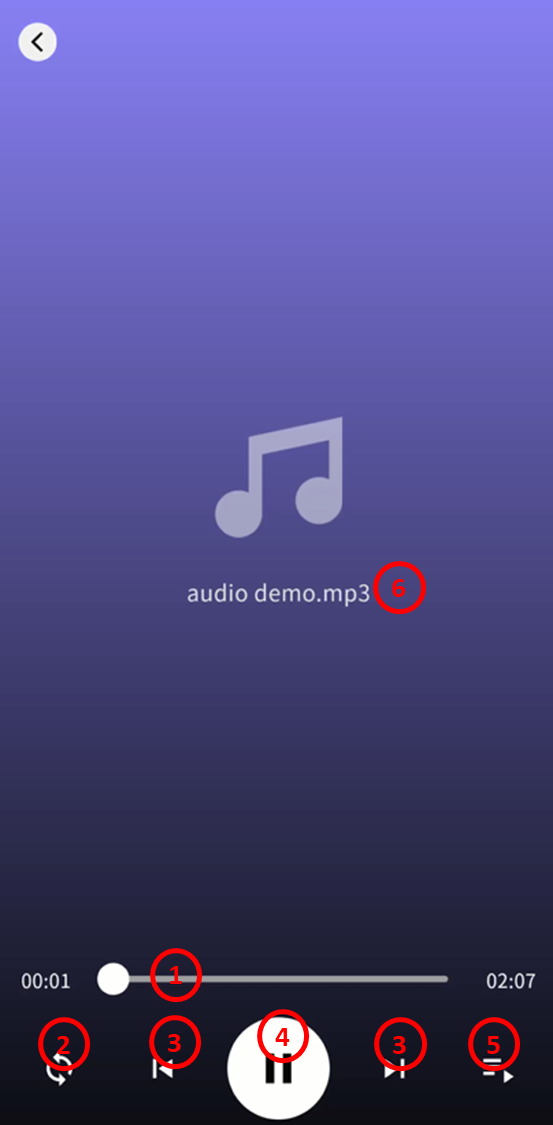
Audio Playback
Tap an audio file to open the audio player and listen online.
-
Progress bar with drag-to-seek support
-
Sequential or random playback
-
Previous/Next track
-
Play/Pause
-
Playlist (all audio files in the same directory are automatically added)
-
Display of current audio filename
File Sharing / Sending
DASSET supports sharing files stored on your device in multiple ways, either with other users or between your own devices.
-
Member Share: Share files directly with members on the same DASSET device. Useful for private file sharing outside Public or Group Spaces.
-
QR Code Share: Generate a sharing code (QR code) to securely share files with other DASSET users not on the same device. The recipient must own at least one DASSET device.
-
My Other Devices: Copy files between DASSET devices under your ownership.
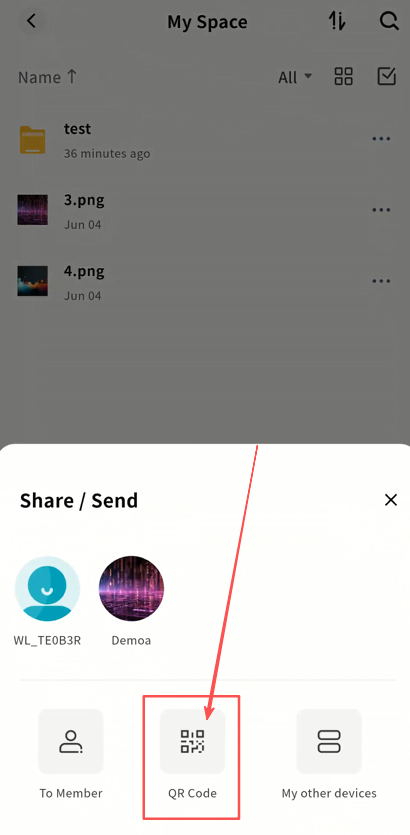
Share/Send Entry
- Tap the ... menu next to a file and select Share/Send.
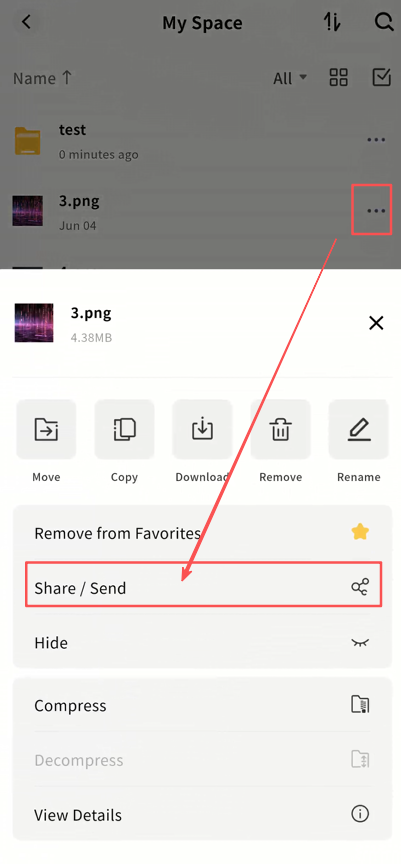
- Choose the desired sharing method.

Member Share
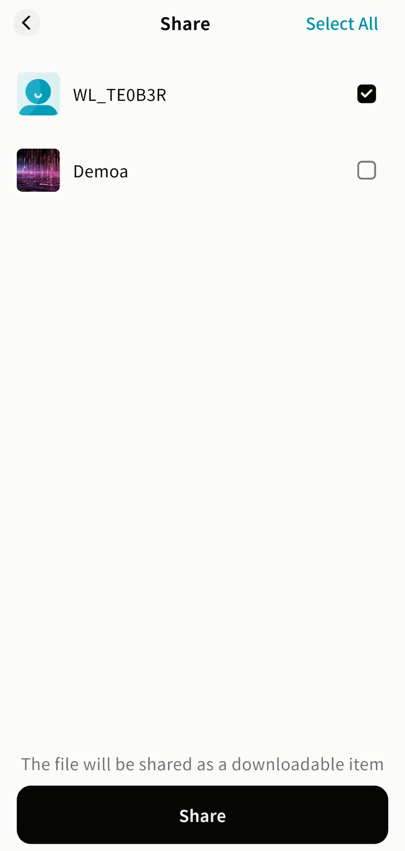
Send Files via Member Share
-
Tap the ... menu next to a file Share/Send.
-
Select the target members in the pop-up window.
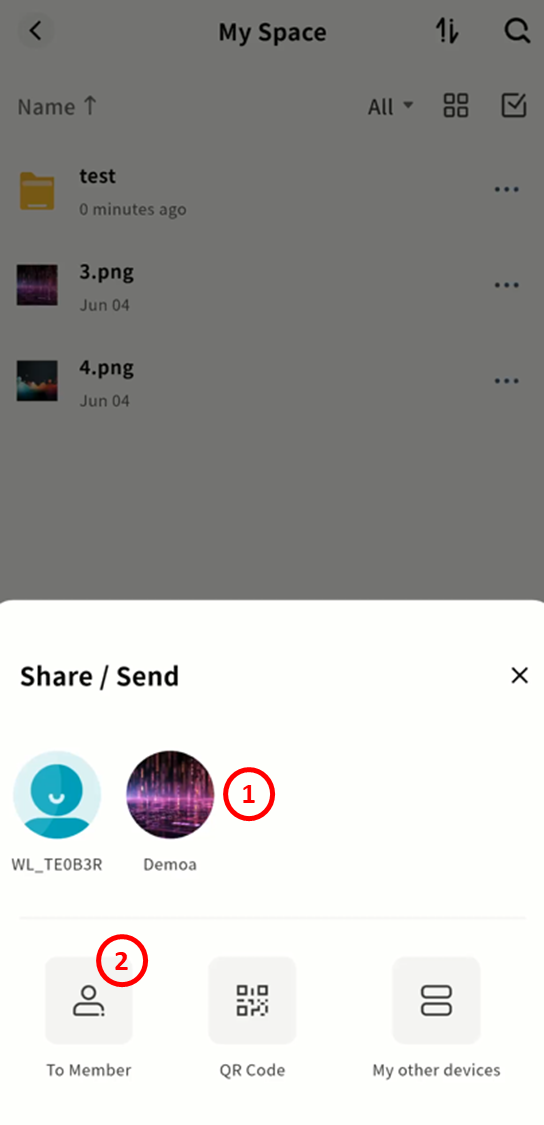
-
Tap a member avatar to send directly.
-
Or go to the Member Share page, select multiple members, and share in batch.
Receive Files via Member Share
Check Task Center Get Share to see incoming files.
-
Displays a list of received share tasks. Tap a task to view details.
-
Delete tasks by tapping ×.
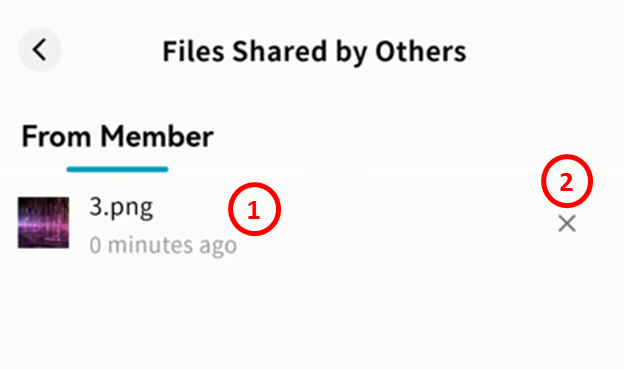
For each received file, you can:
-
Save: Store the file in a directory on your DASSET device.
-
Download: Save the file directly to your mobile device.
QR Code Share
Create a QR Code Share
-
Tap the ... menu next to a file Share/Send.
-
Select QR Code.
- Configure share rules:
-
Share Expiration: The validity period of the QR code.
-
Downloadable: Maximum number of times the file can be downloaded.
-
Access Settings:
-
Public: Anyone with the QR code can access the file.
-
Password-Protected: A password is required to access the file.
-
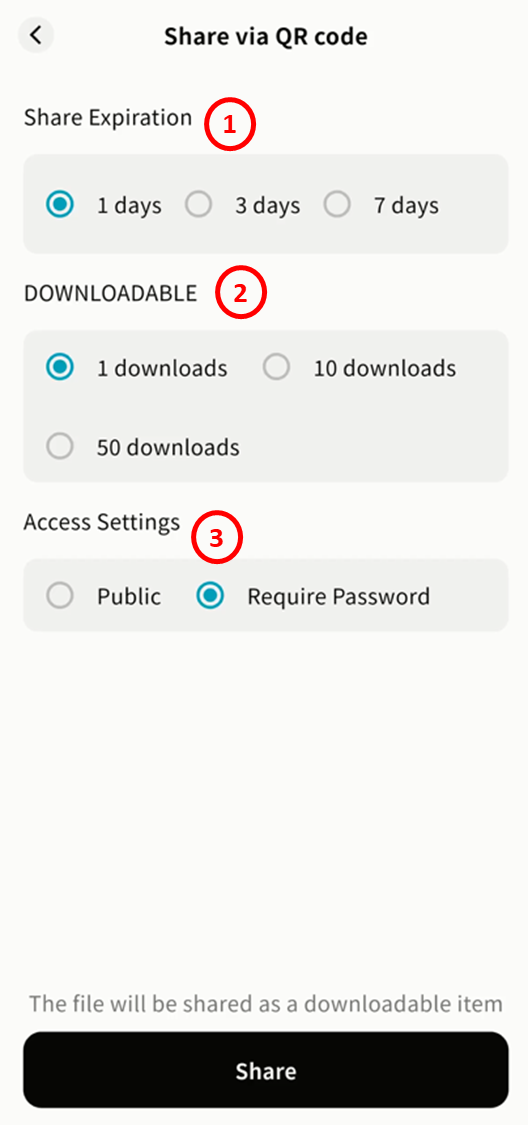
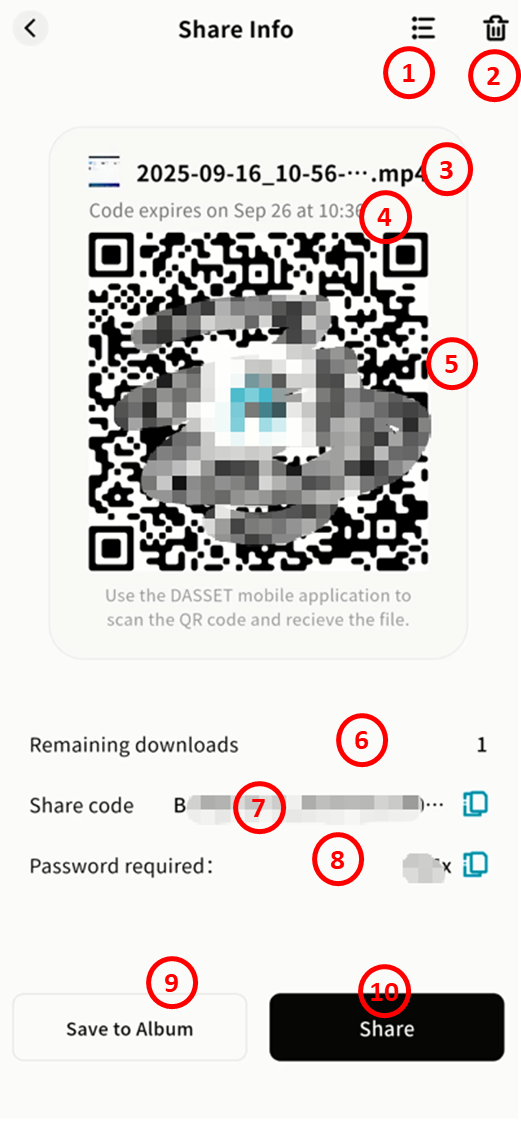
- After setup, click Share to generate a QR code. Options include:
-
File list in the share task
-
Delete share task
-
Task name
-
Expiration date
-
QR code image
-
Remaining downloads
-
Share code (string form)
-
Access password (if password-protected)
-
Save QR code to gallery
-
Share QR code via other apps
Retrieve Files via QR Code Share
-
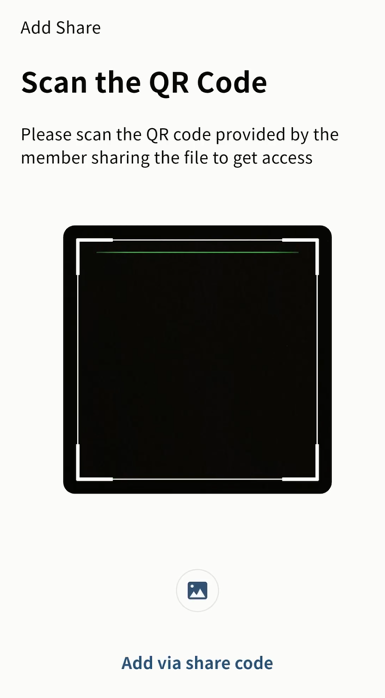
Method 1: Scan QR Code
- Open DASSET Account Scan.
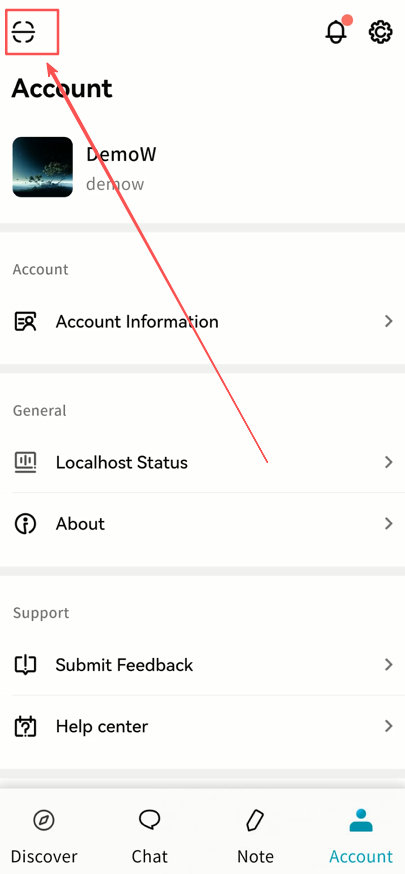
- Choose to scan using the camera or select a saved QR image from the gallery.
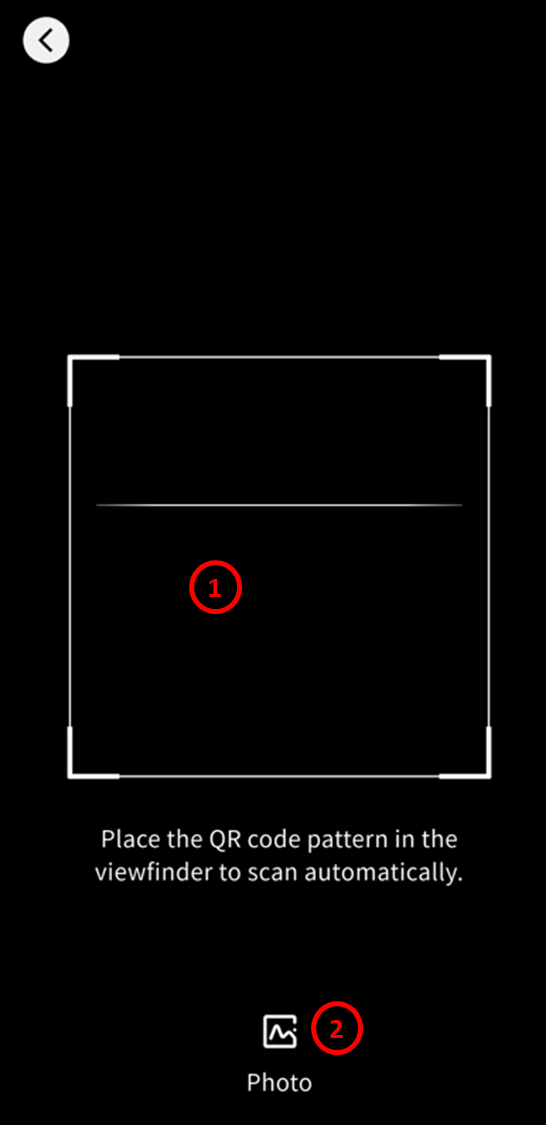
- Enter the access password if required.
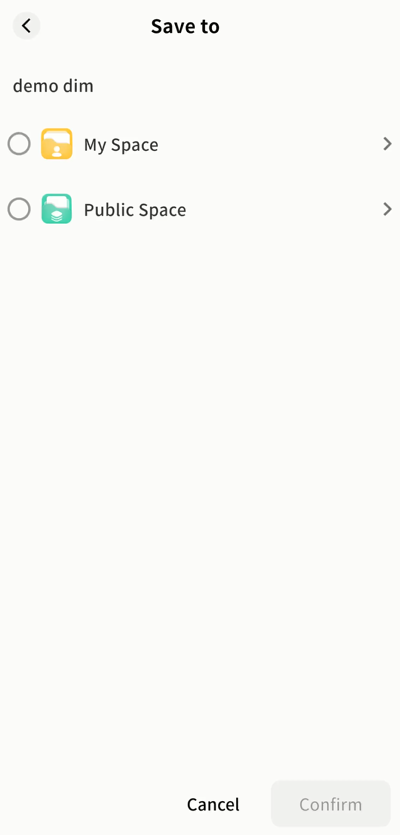
- View the file details, select files, and click Save.
- Select the target DASSET device (only those you own will appear).
- Choose the destination space and directory, then Confirm.
- Monitor download progress in the Task Center.
-
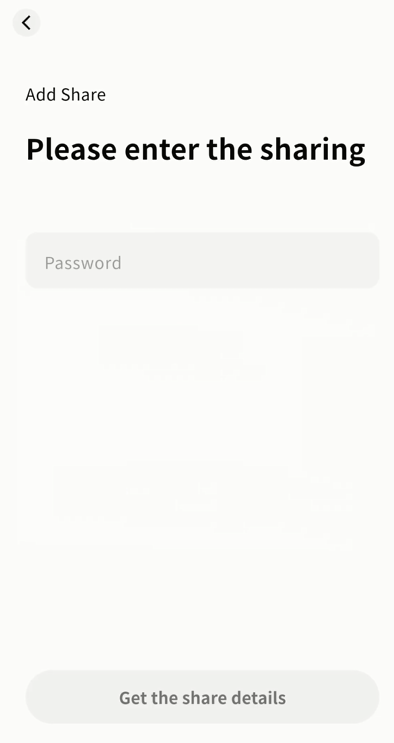
Method 2: Enter Share Code
- Go to Task Center Get Share QR Code +.
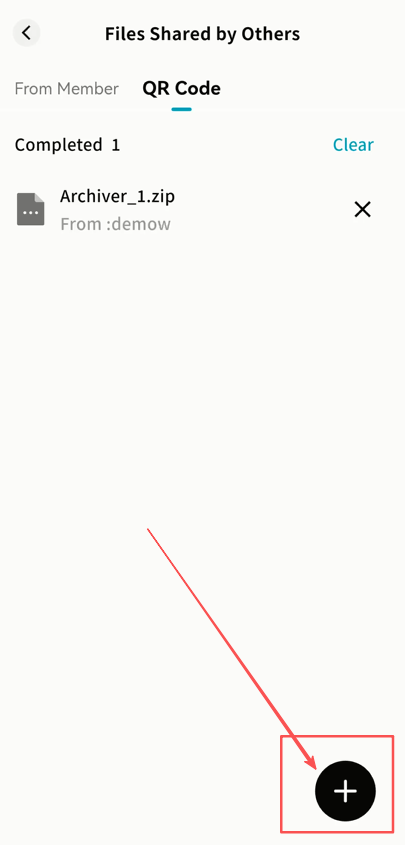
- Choose to scan QR code, select from gallery, or enter the share code string.
- Enter the share code manually if selected.
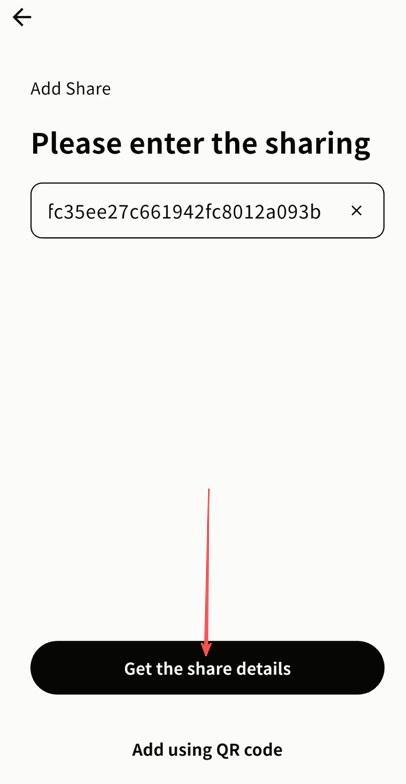
- Provide the access password if required.
- View file details and select files to save.
- Select the target DASSET device (only those you own will appear).
- Choose the destination space and directory, then Confirm.
- Monitor progress in the Task Center until complete.
Send to My Other Devices
Used to copy files between two DASSET devices under your account.
-
Tap the ... menu next to a file Share/Send.
-
Select My Other Devices.
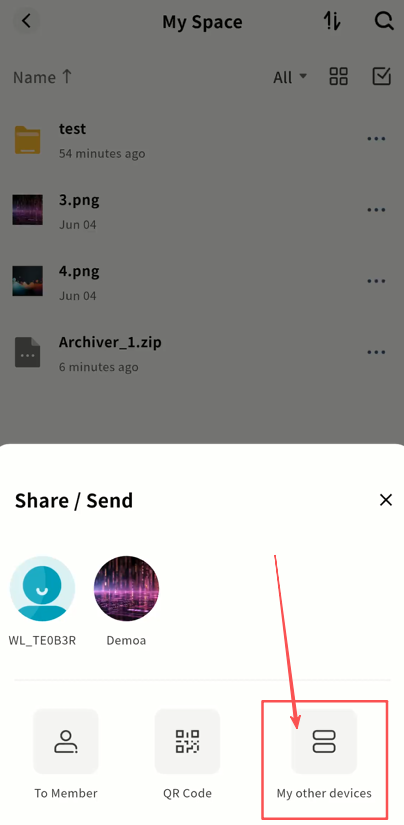
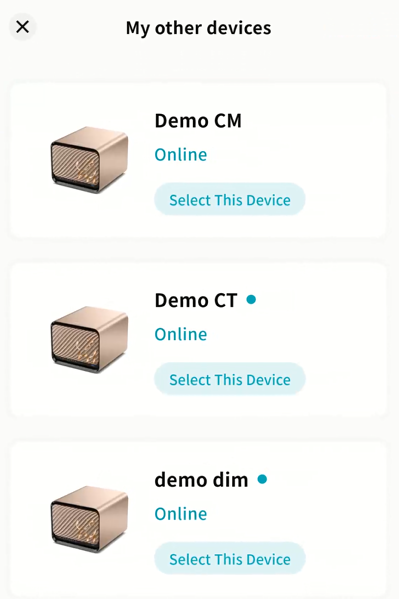
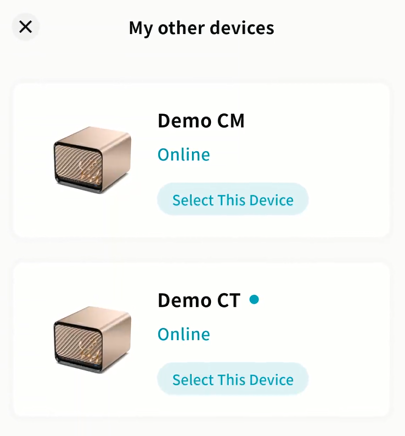
- In the list, select the destination device (only devices you own will be displayed).
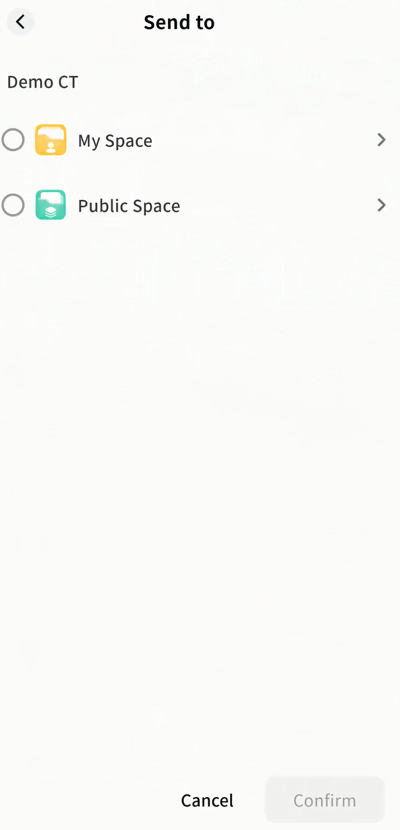
- Choose the save path and click Confirm. The file will transfer automatically.
- On the destination device, go to Task Center Get Share QR Code to view progress.

Rename
You can rename files stored on the DASSET edge device.
- Tap the ... menu next to a file Rename.

- Enter a new file name and click Confirm.
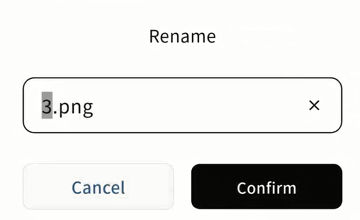
Note: The following characters are not supported in file names: \ / < * ` | ? " '
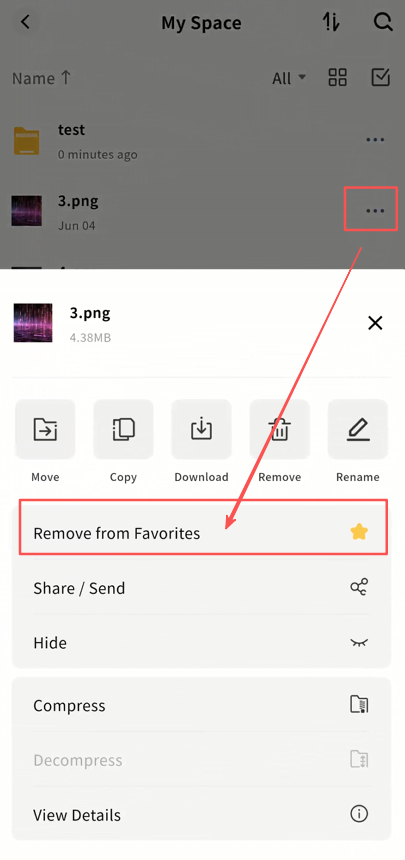
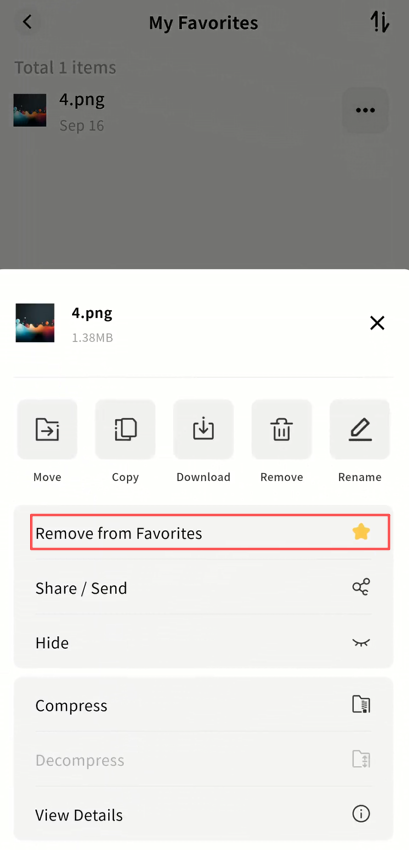
Favorites
You can add files to My Favorites for quick access later. Both single and multiple files can be added.
- Tap the ... menu next to a file Add to Favorite.
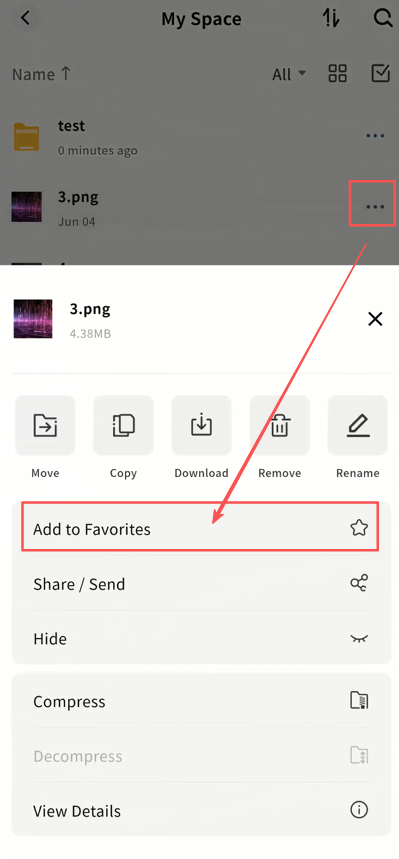
- To remove, select Remove from Favorite.
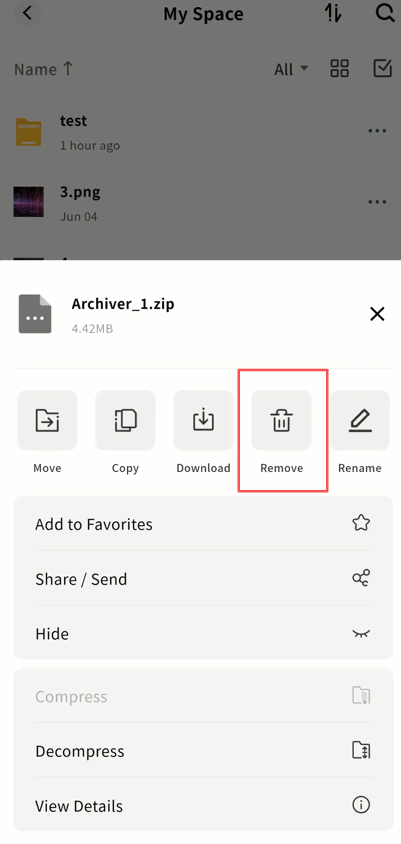
Remove
You can delete unwanted files, either individually or in batches.
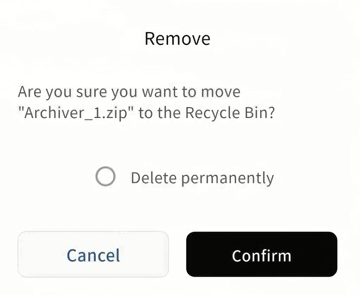
- Tap the ... menu next to a file and select Remove.
-
Choose one of two deletion methods:
-
Delete permanently: If selected, the file will be deleted immediately and cannot be recovered.
-
Move to Recycle Bin: If not selected, the file will first be moved to the Recycle Bin for 30 days before being permanently deleted. Files in the Recycle Bin can be restored to their original directory if deleted by mistake.
-
Hide
Hide and Unhide Files
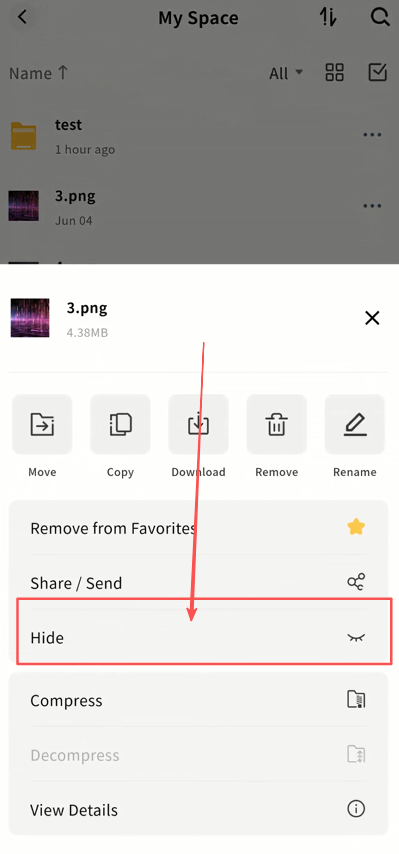
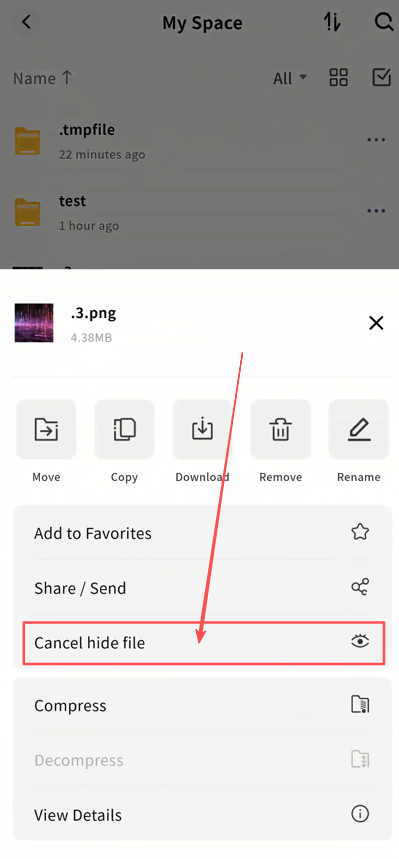
For sensitive files, you can hide them from view. Both single and batch operations are supported.
- Tap the ... menu next to a file and select Hide.
-
Hidden files will not appear in the file list by default.
-
You can later Cancel hide file so they are always visible again.
Show Hidden Files
To view hidden files:
- Go to SET UP Security Settings.
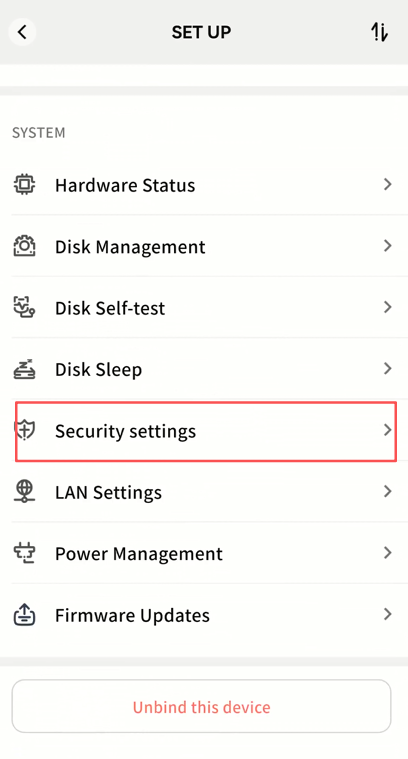
- Enable Show Hidden Files and Folders.

- Hidden files will then appear in the file list.
File Compression and Decompression
DASSET supports online compression and decompression, without downloading files locally.
-
Supported Decompression Formats: rar, zip, tar, tar.gz
-
Default Compression Format: zip (cross-platform friendly)
Compression
- Select one or more files and choose Compress from the menu.
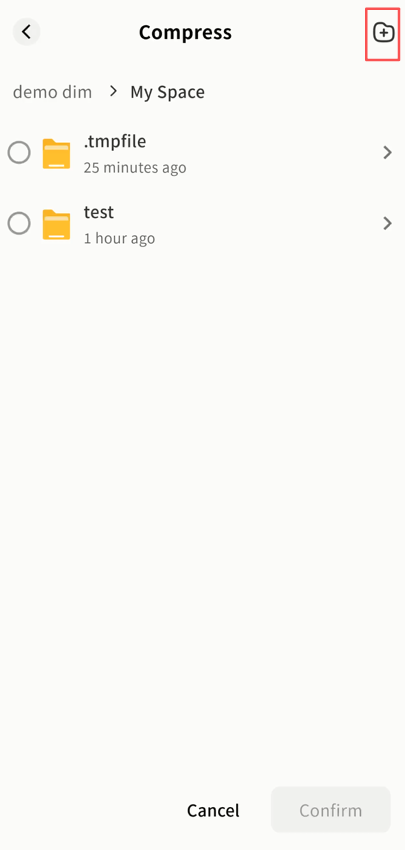
- On the Select Destination page, choose a target space.
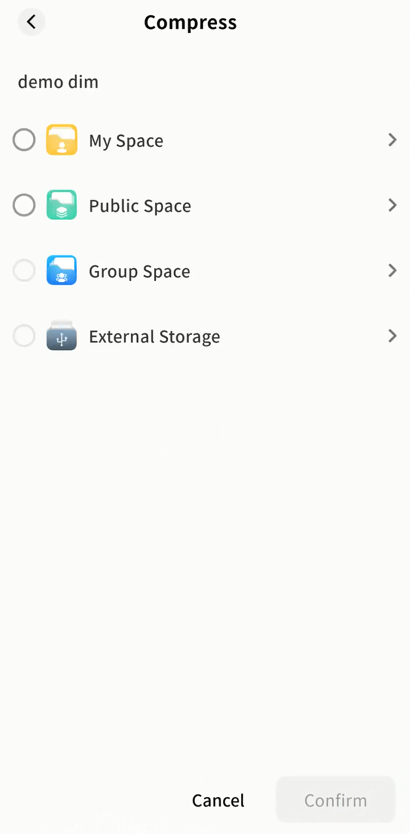
- Select the target folder, or tap + to create a new folder.
-
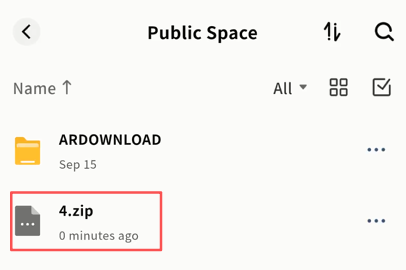
After compression:
-
Multiple files will be packed into Archiver.zip.
-
A single file will be compressed as OriginalFileName.zip.
-
- Track compression tasks in Task Center Other Operations.
Decompression
- Tap the ... menu next to a compressed file and select Decompress.
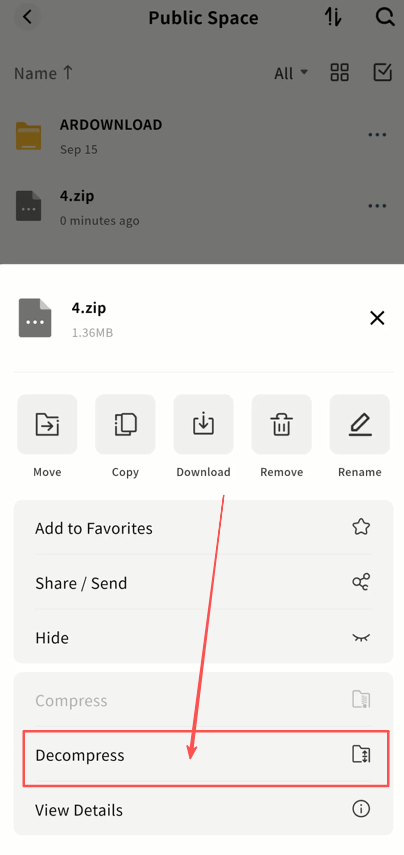
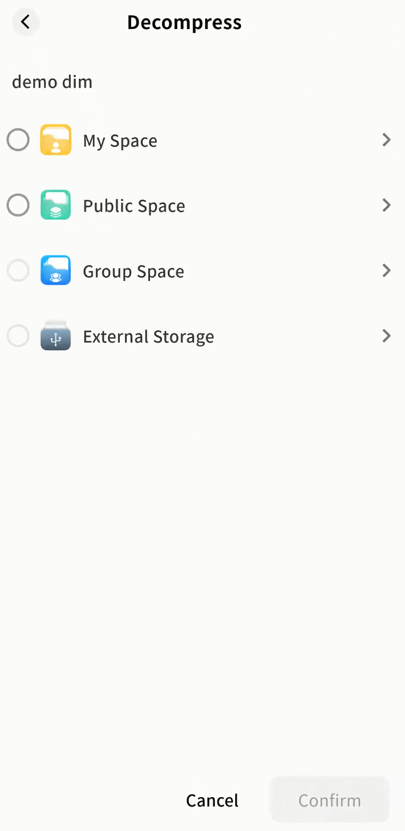
- On the Select Destination page, choose a target space.
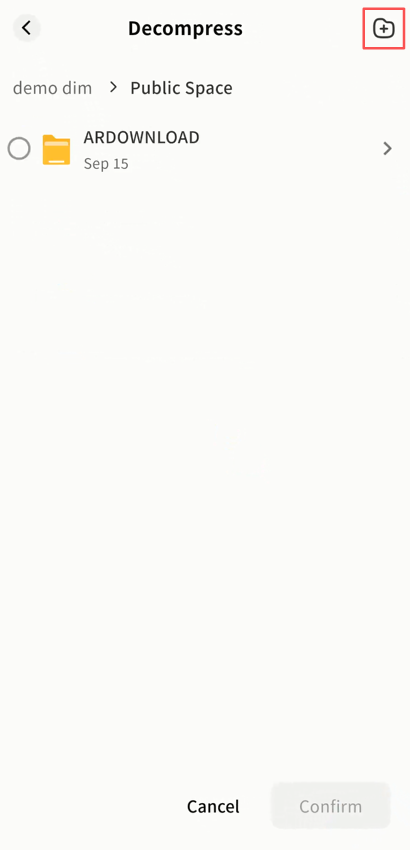
- Select the folder where extracted files will be saved, or tap + to create a new folder.
- Extracted files will appear in the chosen directory.
Compression/Decompression Progress
Monitor task progress in Task Center Other Operations.
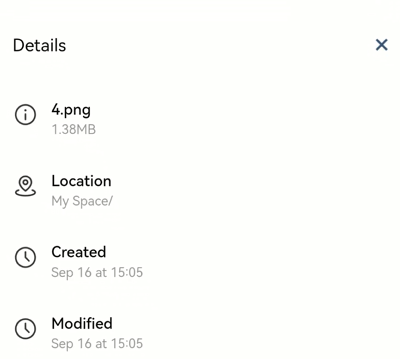
View Details
You can view detailed information about any file or folder, including size, location, creation date, and modification date. Details vary depending on file type.
- Tap the ... menu next to a file and select View Details.
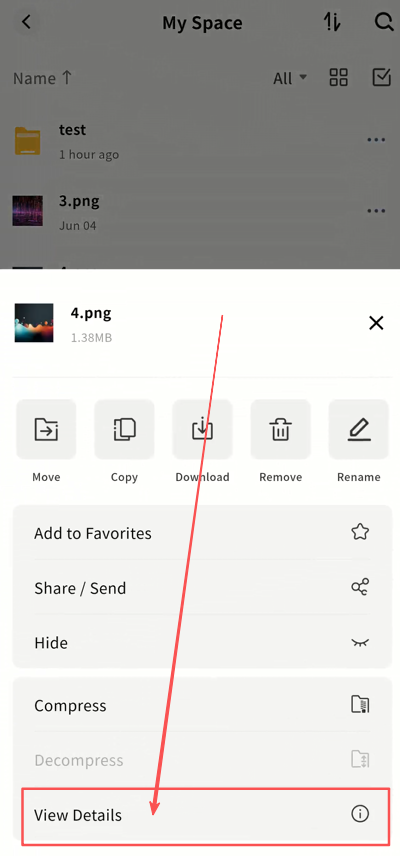
- A pop-up window will display the file's information.
DASSET Applications
File Management
The File Management application provides centralized management of all files stored in My Space and Public Space.
-
Quick Space Switch: Instantly switch between My Space, Public Space, and Group Space.
-
File Display List: View files stored in the selected space.
-
Sorting: Sort files by name, modification time, or size.
-
File Categorization and Multi-Select: Filter files by type and perform batch operations.
-
Task Center Access: View upload and download progress.
-
Search Bar: Search files by keyword.
-
File Operations Menu: Perform actions such as move, copy, download, or delete.
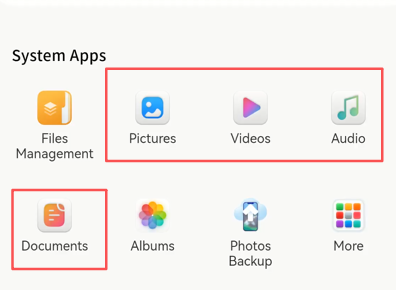
File Libraries
The system provides four categorized libraries: Pictures, Videos, Audio, and Documents. These libraries allow quick access to files of the same type across My Space and Public Space.
Pictures
The Picture Library displays all image files from My Space and Public Space.
-
Grouping: Organize by day or month, with options to sort by time.
-
Batch Selection: Select multiple images for actions such as move or download.
-
Preview Thumbnails: Browse images visually.
-
Task Center Access: Track tasks.
-
Search Bar: Search images by keyword.

Videos
The Video Library displays all video files from My Space and Public Space.
-
Sort by Modification Time: Order videos chronologically.
-
Batch Selection: Select multiple videos for file operations.
-
Preview Thumbnails: Browse video previews.
-
Task Center Access: Track tasks.
-
Search Bar: Search videos by keyword.

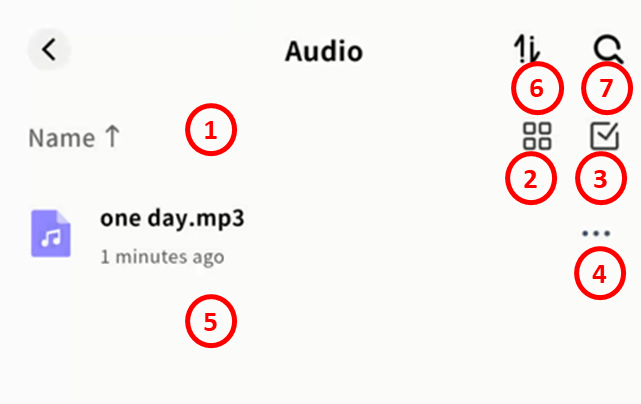
Audio
The Audio Library displays all audio files from My Space and Public Space.
-
Sorting: Sort by name, modification time, or size.
-
View Options: Switch between list view and grid view.
-
Batch Selection: Select multiple audio files for actions such as move or download.
-
File Menu (...): Open the file operations menu.
-
Audio File List: Browse available audio files.
-
Task Center Access: Track upload/download tasks.
-
Search Bar: Search audio files by keyword.
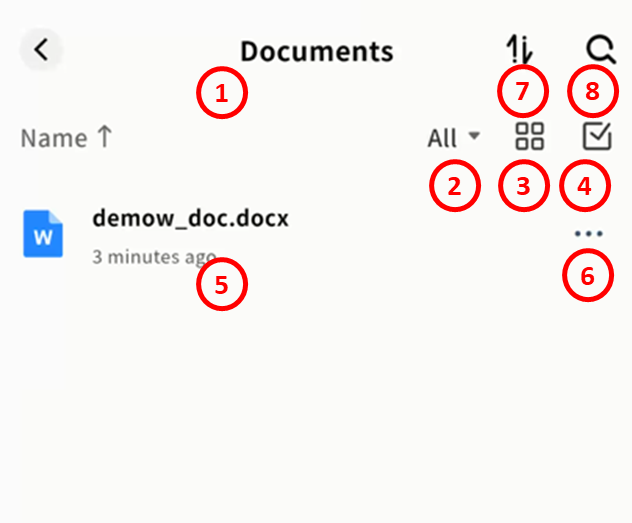
Documents
The Document Library displays all document files from My Space and Public Space.
-
Sorting: Sort by name, modification time, or size.
-
Categories: Filter by type, including DOC, XLS, PPT, PDF, and TXT.
-
View Options: Switch between list view and grid view.
-
Batch Selection: Select multiple documents for actions such as move or download.
-
Document List: Browse all documents.
-
File Menu (...): Open the file operations menu.
-
Task Center Access: Track tasks.
-
Search Bar: Search documents by keyword.
Group Space
In Group Space, users with access permissions can create group folders and invite specific members to join. Only members of the group can access its contents, subject to defined read/write permissions.
Group Space is useful when photos, videos, or files need to be shared only with certain users on the same device. By creating multiple groups, different content can be shared with different people, providing resource sharing and collaboration for families or small teams. Group Space supports cross-device, multi-platform access but does not support Samba access.
Note: Files deleted in Group Space are permanently removed and do not go to the Recycle Bin.
Create a Group
- Go to Group Space + Create Group, enter a group name, and click Next.
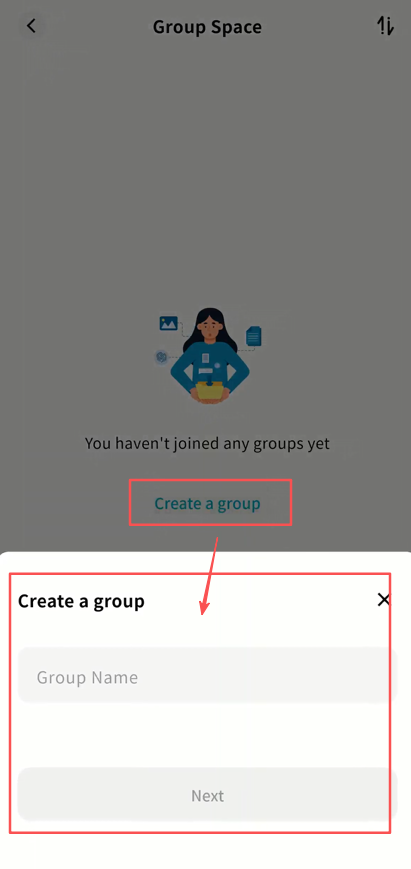
- Select members to add from the list of all bound device members. You can add one, multiple, or skip this step and add members later.
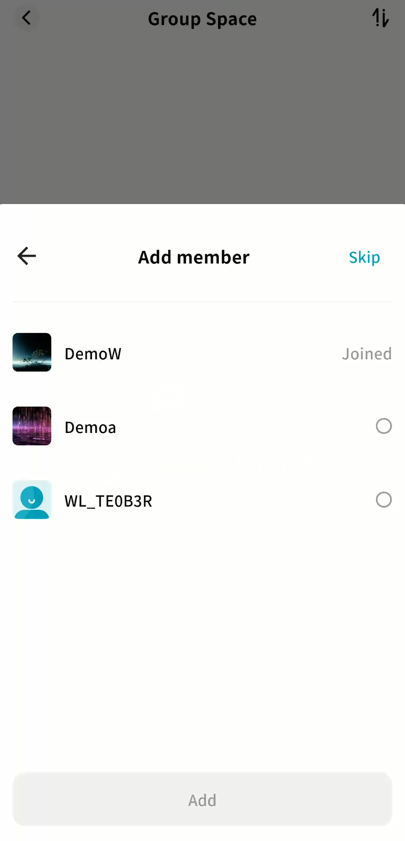
- Once created, the new group will appear on the Group Space page.
Using Group Space
The Group Space functions just like other file management areas. You can upload, download, create folders, move/copy files, rename, and more.
Features include:
-
Sort files by name, modification date, or size.
-
File Type Filter: Quickly filter files by type (images, videos, audio, documents, compressed files).
-
Switch between list view and grid view.
-
Toggle single or multiple file selection.
-
File operations menu.
-
File list view.
-
File actions supported: move, copy, download, delete, rename, hide, and view details.
-
Task Center for monitoring file transfers.
-
Keyword search within the group.
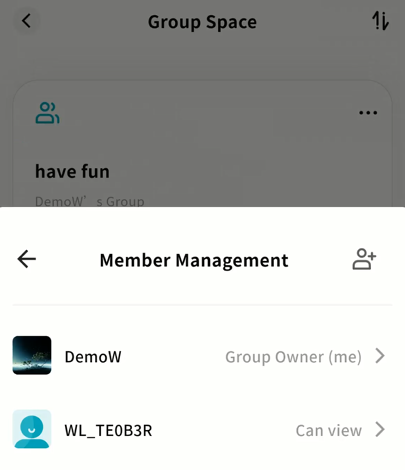
Group Management
Click ... next to a group to open the group management menu:
-
Member Management (group owner only): Add or remove members.
-
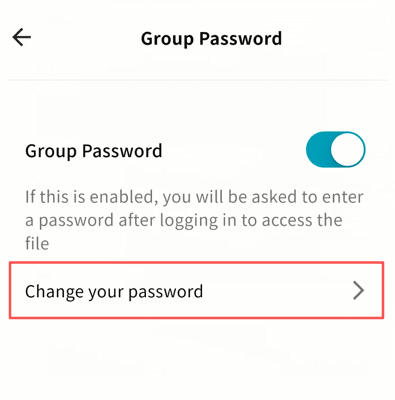
Group Password (group owner only): Require a password to access the group.
-
Rename (group owner only): Change the group name.
-
Delete this Group (group owner only): Delete the group and all its contents.
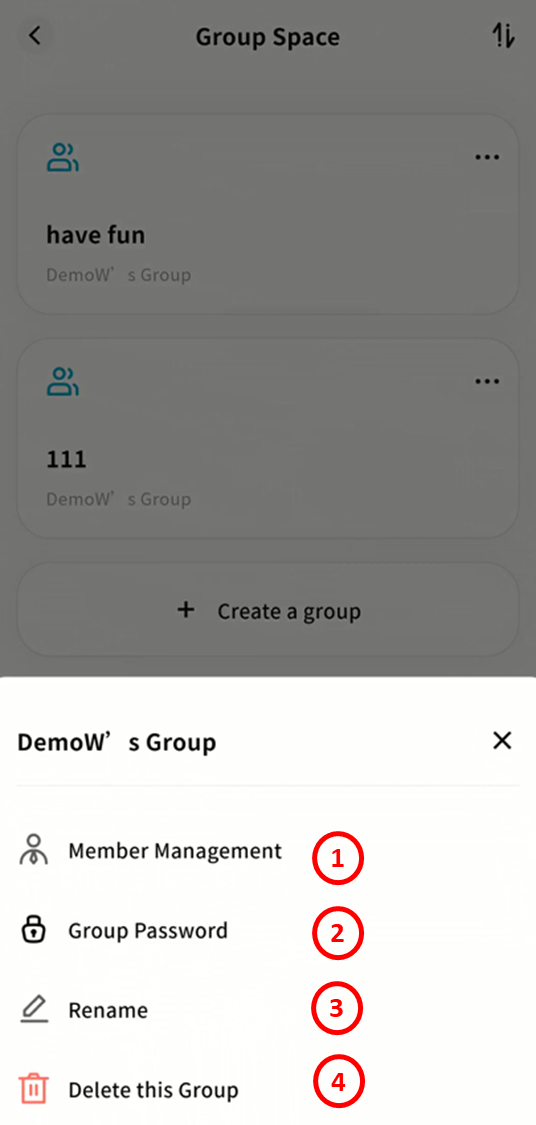
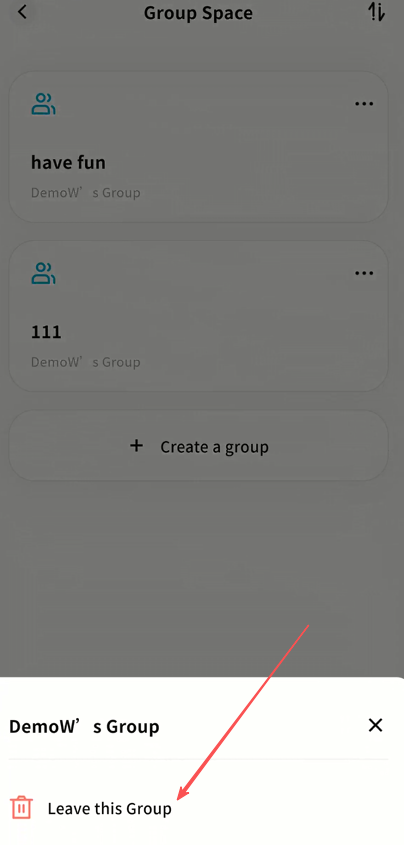
- Leave this Group (members only): Non-owners can leave the group at any time.
Member Management
In the Member Management interface, you can add/remove members and assign permissions:
- Add Members: Invite other device-bound members.
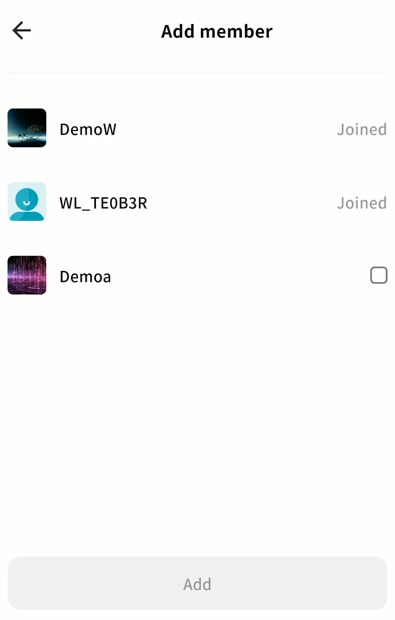
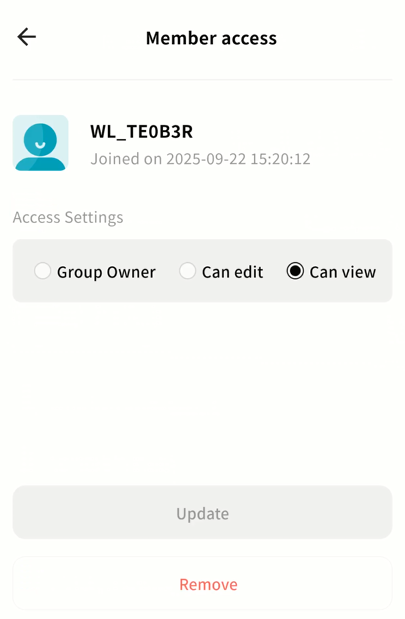
- Member List: Displays current members and their permissions.
-
Permissions:
-
Owner: Transfer ownership to this member.
-
Editable: Member can perform write operations (upload, move, download, etc.).
-
View Only: Member can view and copy/download files, but not edit.
-
Remove: Remove the member from the group.
-
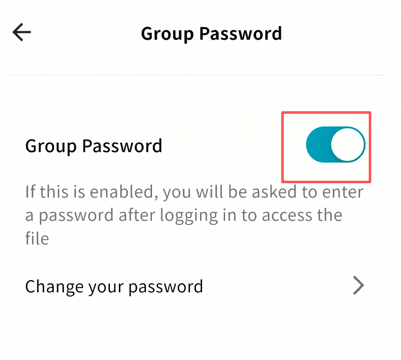
Group Password
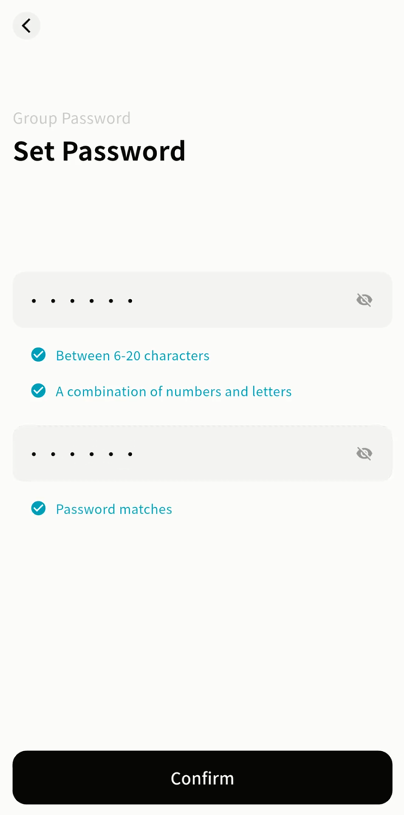
Set Group Password
- Go to Group Password Enable.
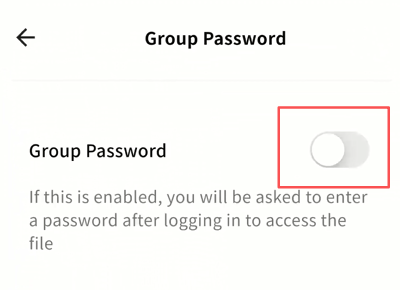
- Enter a password and confirm.
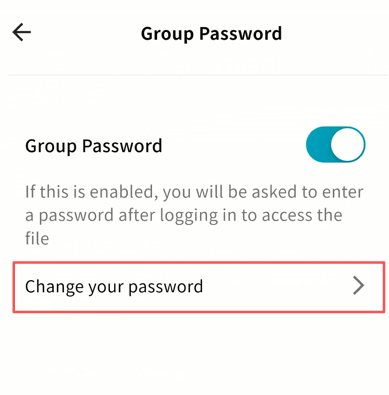
Change Group Password
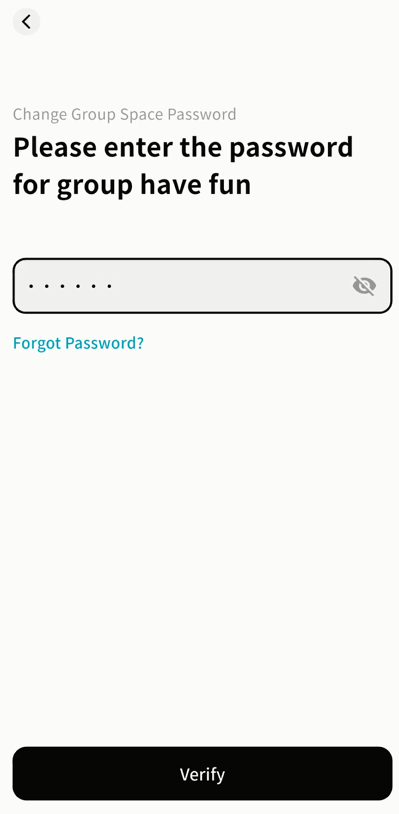
- Go to Group Password Change Password.
- Enter the current password to verify.
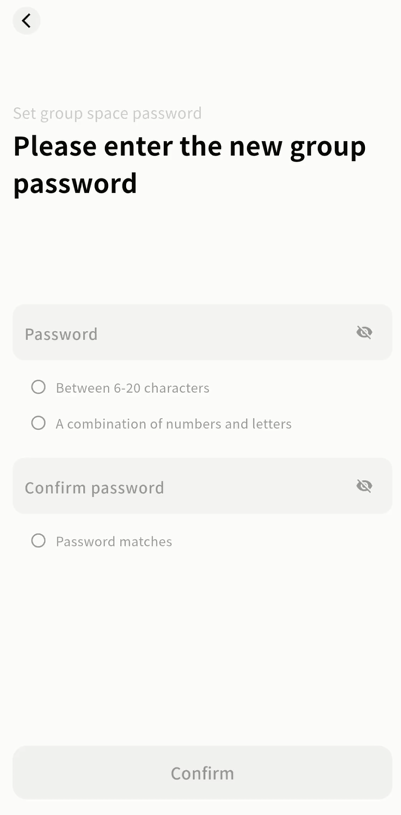
- Set a new password (must differ from the old one).
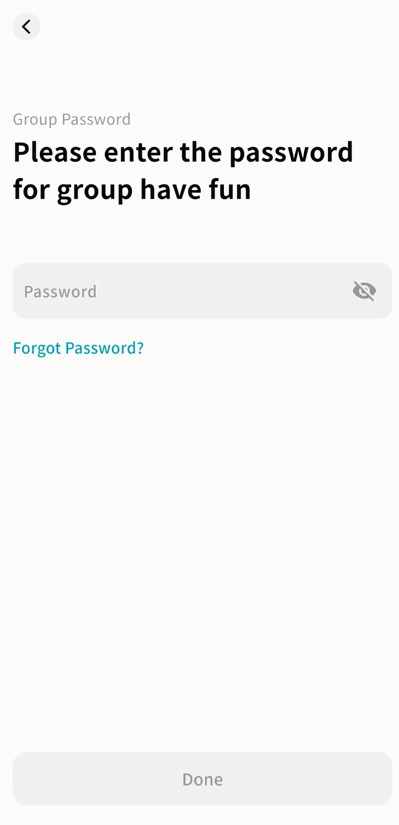
Enter a Password-Protected Group
-
Select the group.
-
Enter the correct password to access.
Recover Group Password (owner only)
- Go to Group Password Change Password or the password prompt window.
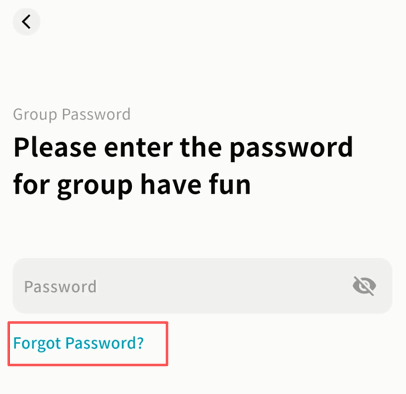
-
Click Forgot Password.
-
Enter the email or phone number linked to your DASSET account and request a verification code.
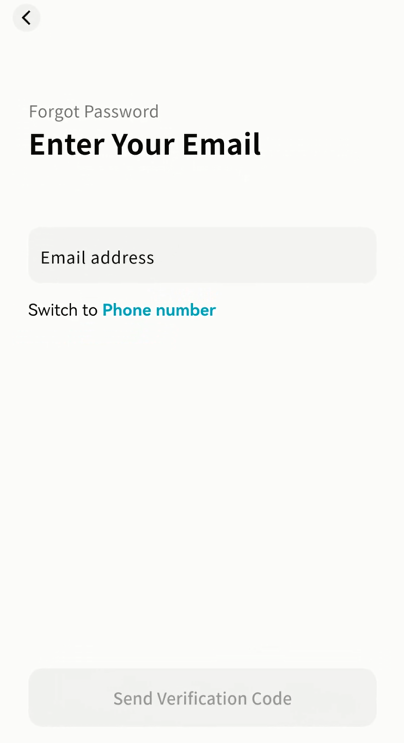
-
Enter the received code and confirm.
-
After verification, set a new password.
Disable Group Password
- Go to Group Password Disable.
- Enter the current password to confirm.
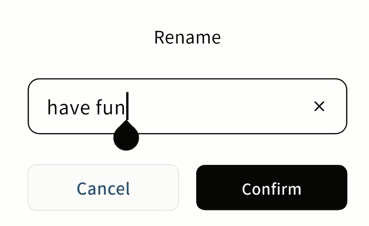
Rename Group
Select Rename, enter the new group name, and confirm.
Delete Group
Select Delete this Group. The group and all files inside will be permanently removed.
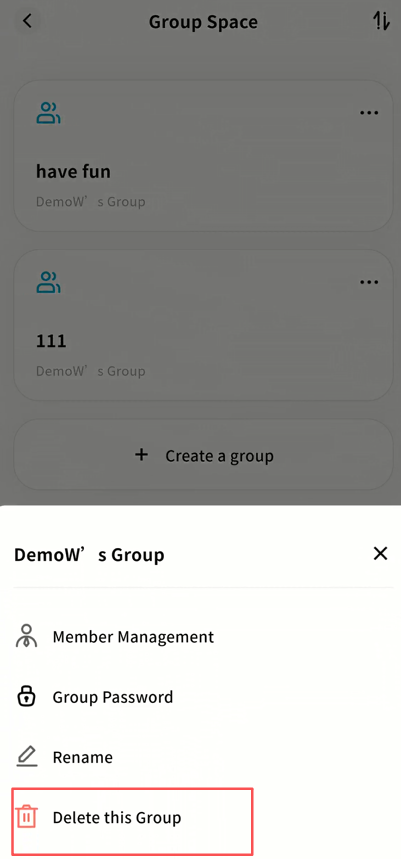
Photo Backup
The Photo Backup feature allows you to regularly back up photos and videos from your mobile device's album to the DASSET edge device. This helps free up storage on your device and also makes it easy to share albums with friends via the DASSET device.
Once a backup rule is configured, the DASSET client automatically checks for new photos in the selected albums whenever it starts and backs them up to the device.
Note: Due to power-saving restrictions in mobile operating systems, photo backup tasks may be stopped if the DASSET client is running in the background. We recommend keeping the DASSET client active in the foreground when backing up large numbers of photos.
Steps:
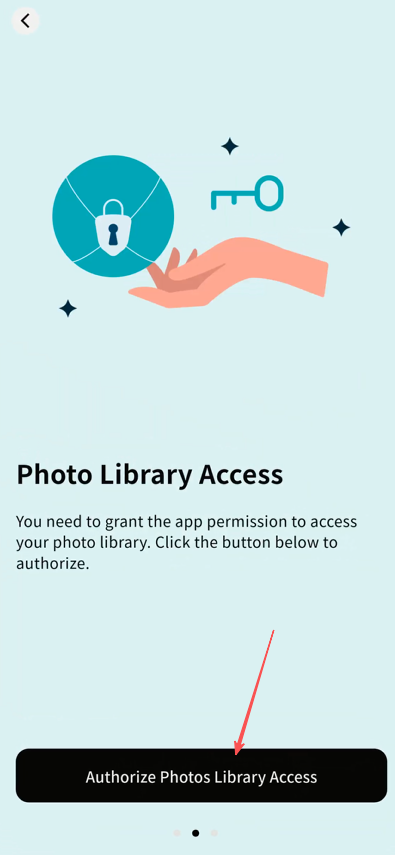
- Go to Applications Photo Backup and click Next.

- Click Grant Access to Photo Library. The first time you use this feature, DASSET must request OS-level permissions to access your photos.
- Click Select Album.
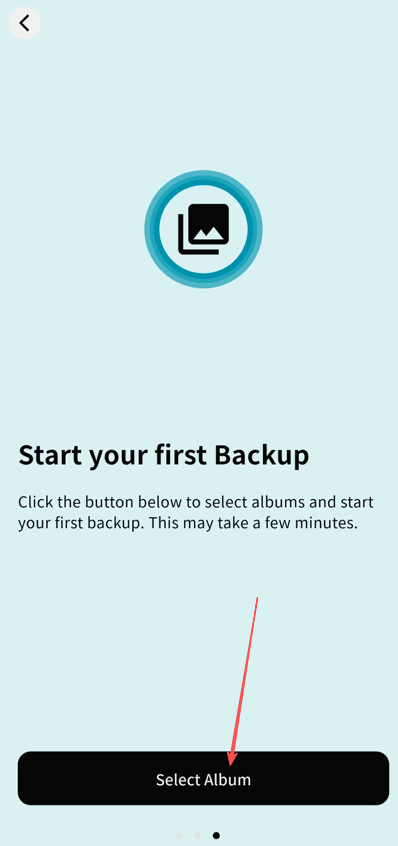
- Choose the albums you want to back up. You can modify album selections later if needed. After selecting, click Backup.

- The backup process begins automatically.
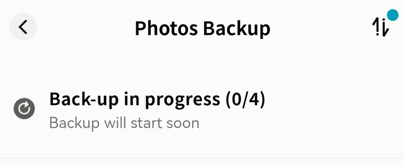
Photo Backup Settings
After completing the initial backup setup, you can:
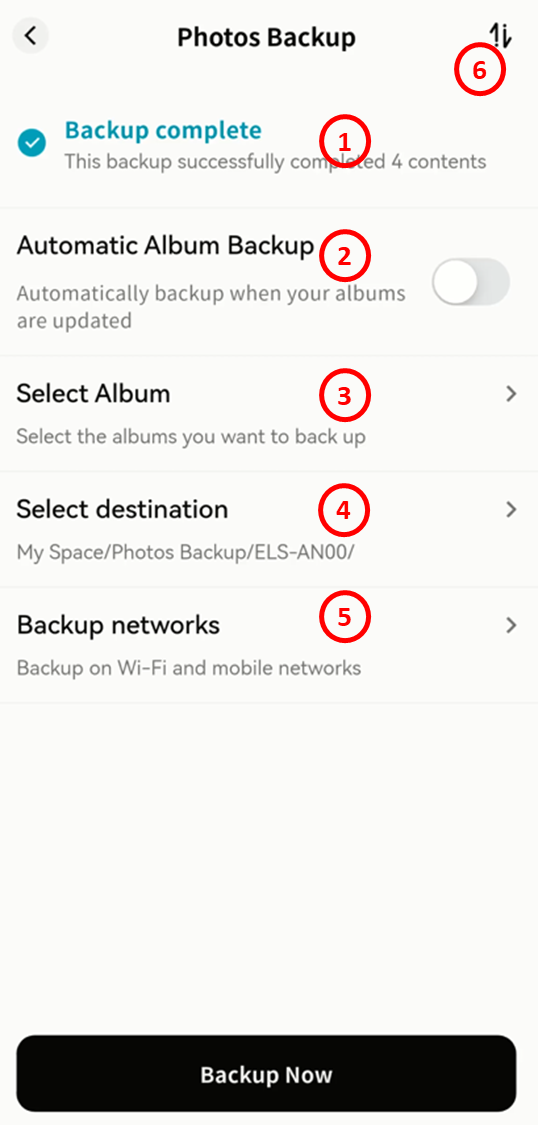
-
View progress of current backup tasks.
-
Enable Automatic Album Backup: The client will automatically check for new photos each time it starts and back them up.
-
Change the selected albums for backup.
-
Choose the backup destination: My Space, Public Space, Group Space, or My Vault.
For privacy reasons, we strongly recommend backing up photos to My Space or the My Vault. -
Configure backup conditions:
-
Wi-Fi Only: Backups run only when connected to Wi-Fi.
-
Wi-Fi and Mobile Data: Backups run regardless of network type.
-
-
Monitor progress in Task Center Backup Tasks.
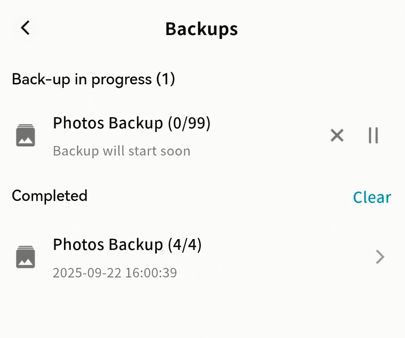
Viewing Photo Backup Progress
You can check backup progress anytime:
- Go to Applications Photo Backup to see live progress.
-
Or go to Task Center Mobile Backup:
-
Pause or resume backup tasks.
-
Cancel backup tasks.
-
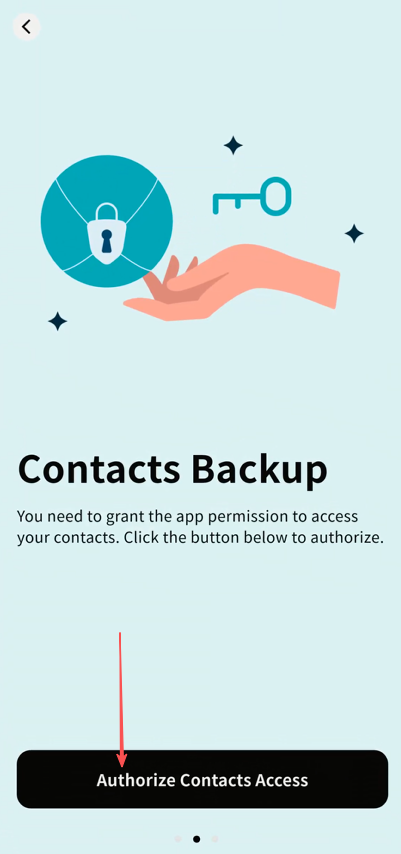
Contacts Backup
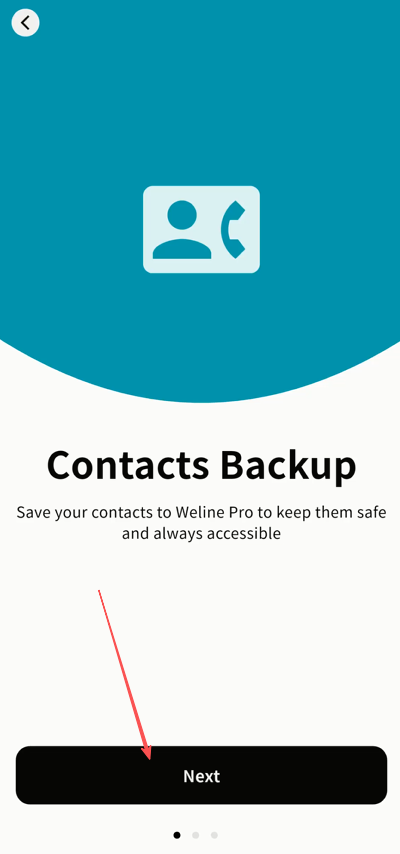
The Contacts Backup feature saves your mobile device's contact information to the DASSET edge device. When you change phones, you can restore your contacts from the device to the new phone.
Steps:
- Go to Applications Contacts Backup and click Next.
- Grant Contacts Access permission. Without it, DASSET cannot read your contacts.
- Once authorized, click Start Contacts Backup.
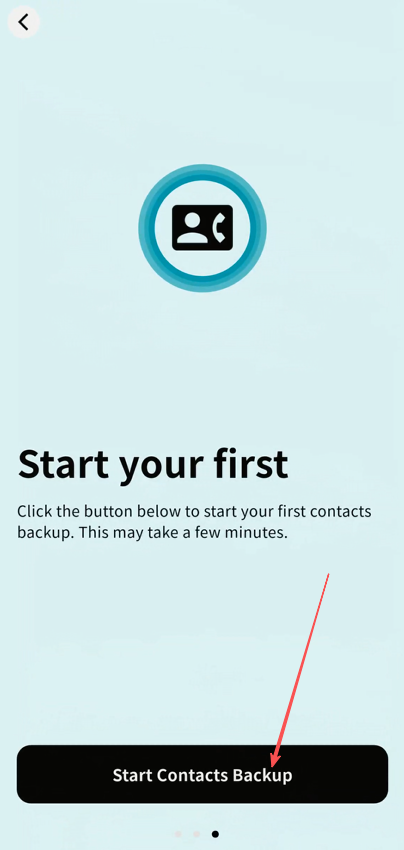
- Wait for the process to complete.

-
After completion, you can view your backup history:
-
Backup date and time, source device, and number of contacts.
-
Option to delete the backup.
-
Option to restore the backup to the current phone.
-
Start a new backup.
-

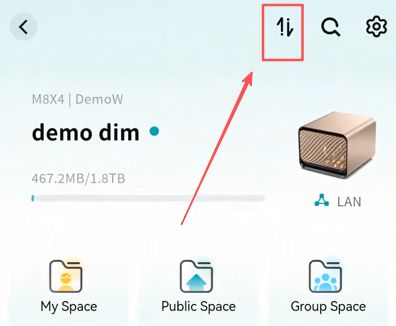
Task Center
The Task Center consolidates all upload, download, backup, and other operations. From the device home page, click the Task Center icon in the top-right corner to access it.
The badge indicator shows the number of tasks currently in progress.
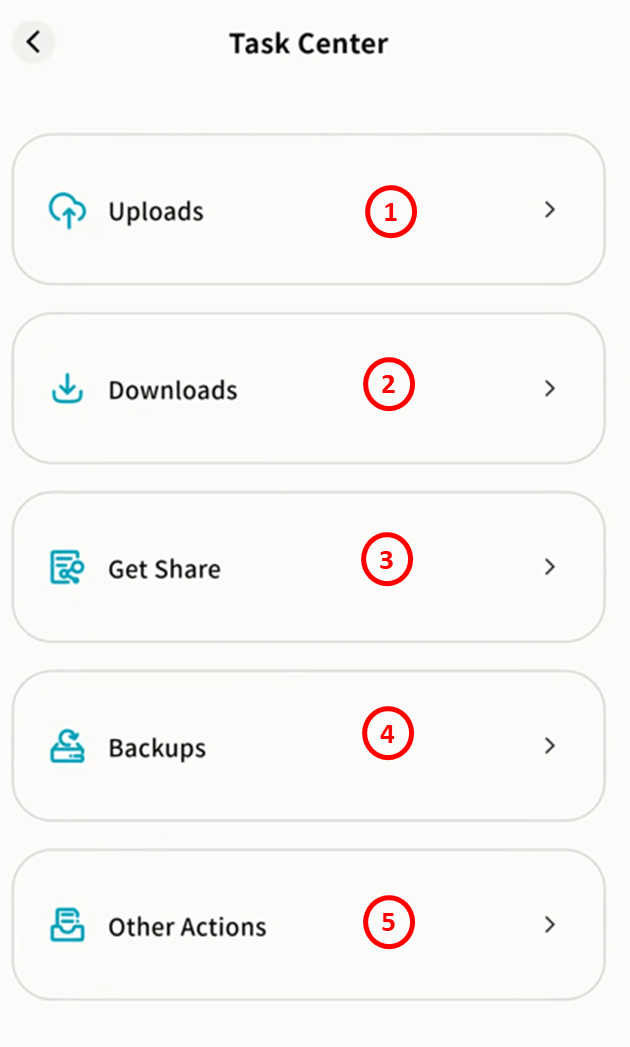
Within the Task Center, tasks are categorized as follows:
-
Upload: Displays active and completed upload tasks.
-
Downloads: Displays active and completed download tasks.
-
Get Share: Displays files shared with you and files you shared with others.
-
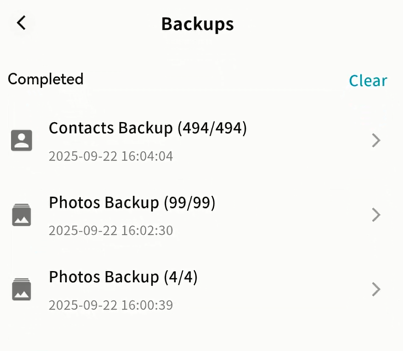
Backups: Displays photo and contacts backup tasks.
-
Other Actions: Displays move, copy, compression, decompression, and similar tasks.
Note: Tasks related to the My Vault are shown separately to ensure privacy.
Upload
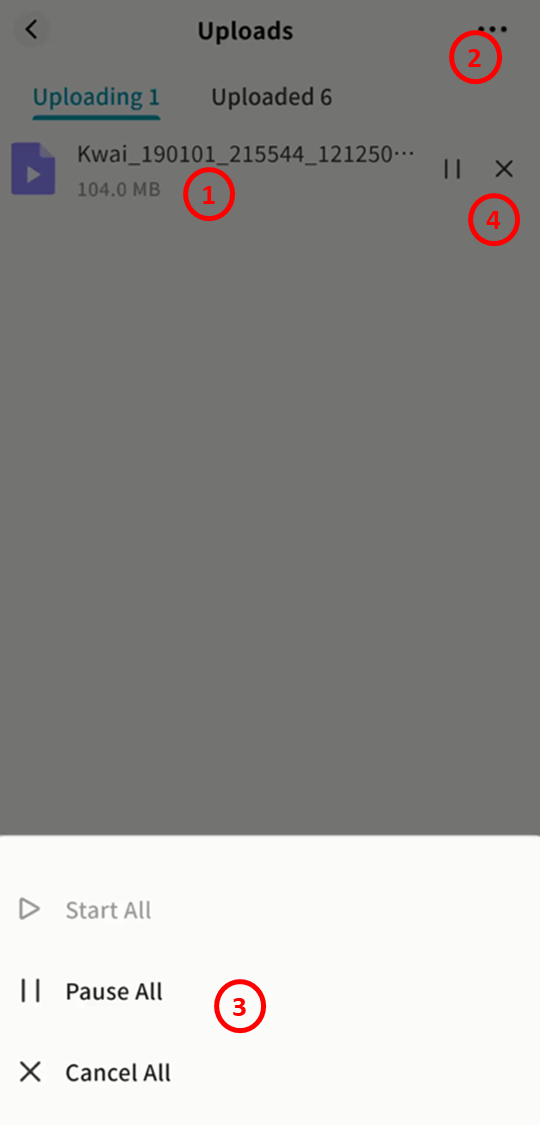
Uploading
In the Uploading tab, you will see:
-
Number of active upload tasks
-
Upload speed, completed size, and total file size
-
A global task menu to Start All, Pause All, or Cancel All uploads
-
Controls to start, pause, or cancel individual tasks
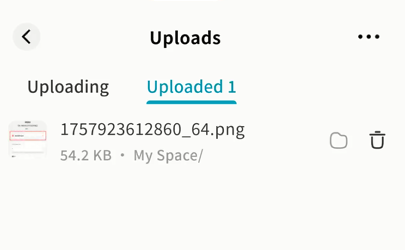
Uploaded
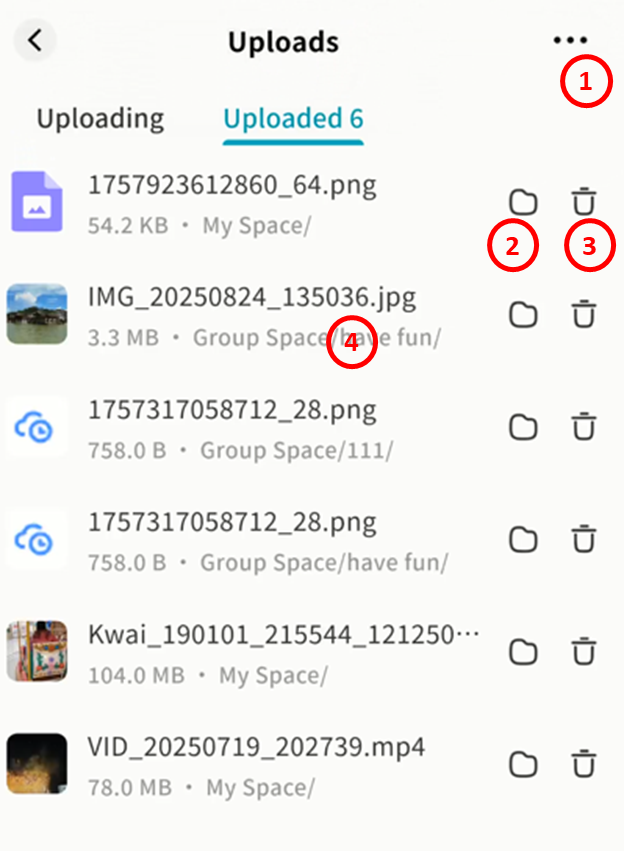
In the Uploaded tab, you will see:
Number of finished uploads
-
Option to Delete All Records
-
Option to open the upload destination directory automatically
-
Option to delete individual task records
-
A list of all completed upload tasks
Downloads
Downloading
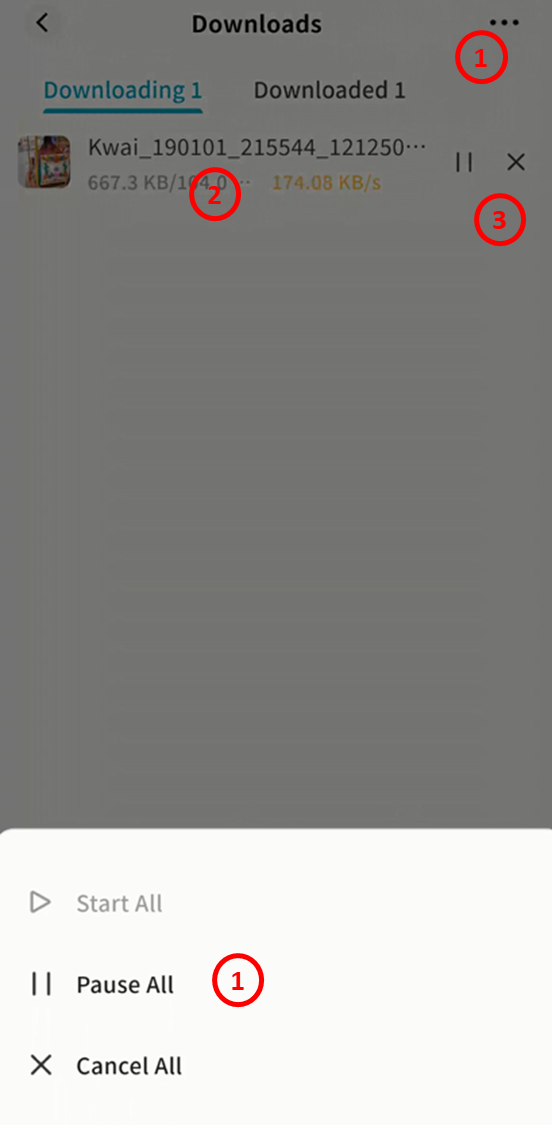
In the Downloading tab, you will see:
-
Number of active download tasks
-
Download speed, completed size, and total file size
-
Options to Start All, Pause All, or Cancel All downloads
-
Controls for individual downloads
Downloaded
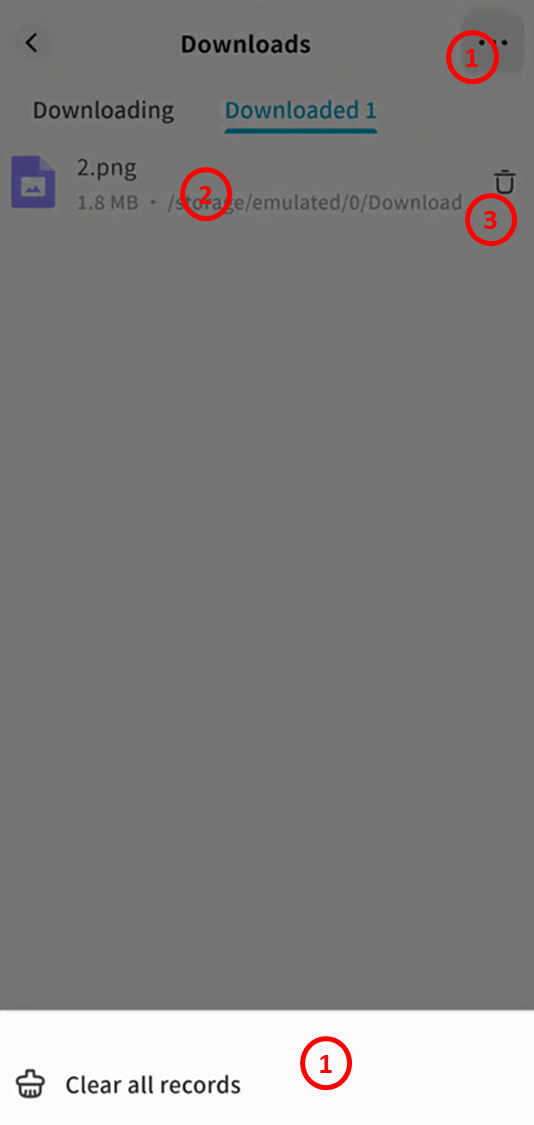
In the Downloaded tab, you will see:
Number of finished downloads
-
Option to Delete All Records
-
Option to delete individual download records
-
A list of all completed downloads
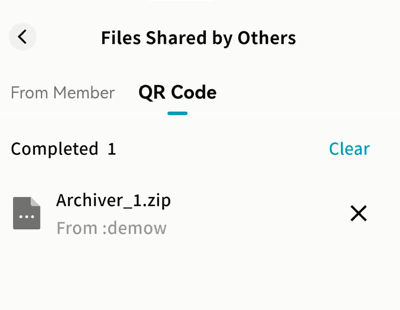
Get Share
Two types of shares are supported:
-
From Member: File shares between users on the same DASSET device (available to all users).
-
QR Code: File shares using QR codes or share codes across devices (available only to device owners).
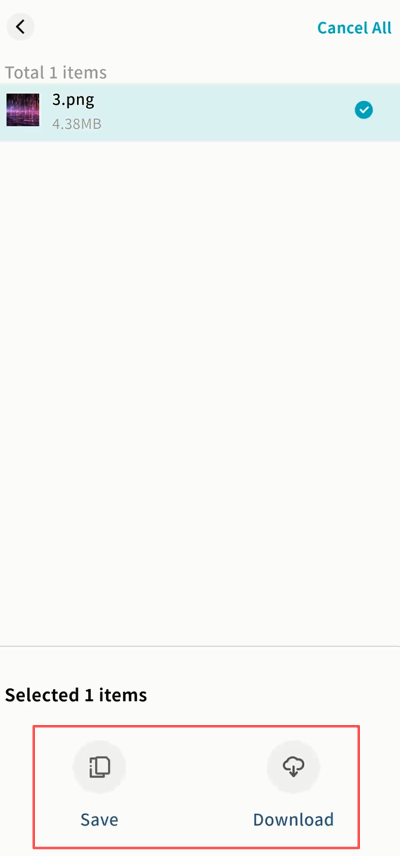
From Members
-
Go to Task Center Get Share From Member.
-
View all files shared with you.
- Click × to delete a share task.
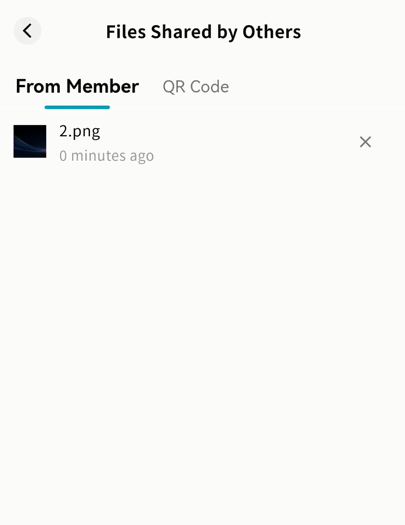
-
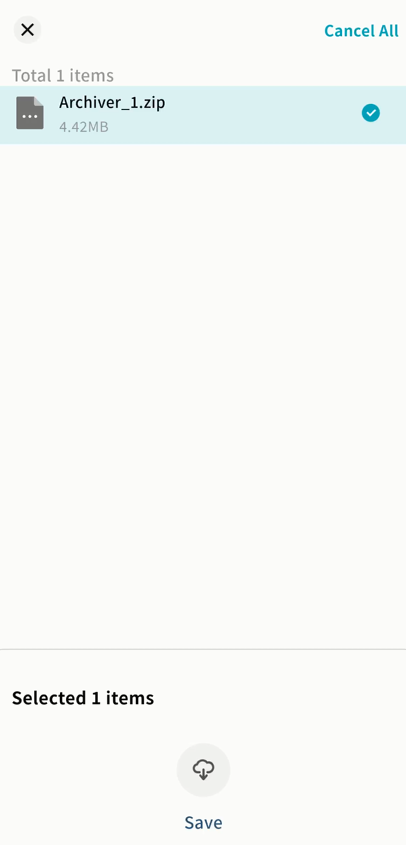
Click a task to enter the Share Details page.
-
Preview files directly.
-
Select single or multiple files for Save or Download.
-
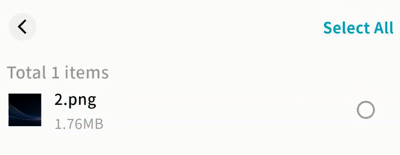
- Options:
-
Save: Store the file into a directory of your choice (My Space, Public Space, Group Space, My Vault, or External Storage --- subject to your account permissions).
-
Download: Save the file to your mobile device.

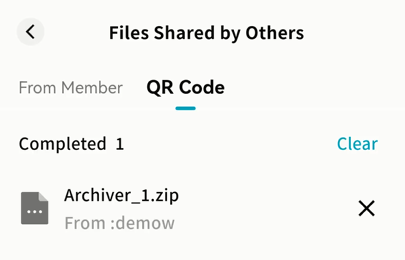
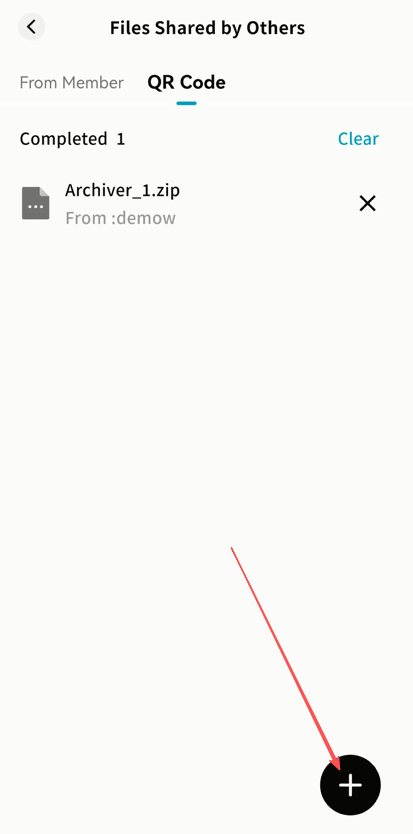
QR Code
The QR Code page provides:
-
Add Share: Enter a share code to receive files.
-
Download Status: Track active, completed, and failed share downloads.
For details on QR sharing, see the File Sharing section.
Backups
Displays records of photo and contacts backup tasks, including completed and in-progress backups.
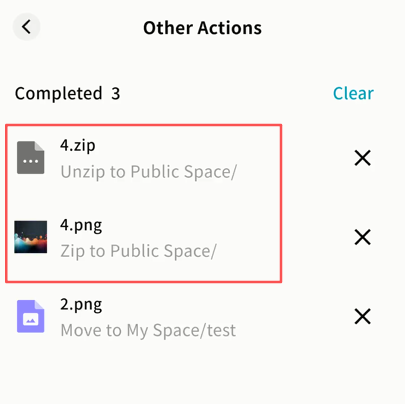
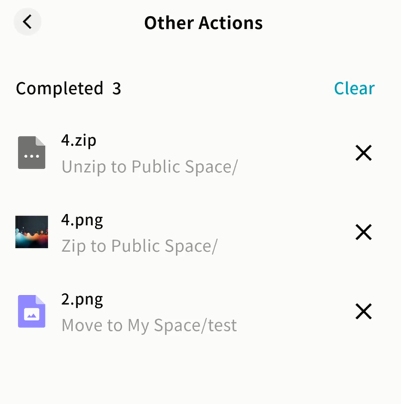
Other Actions
All move, copy, compress, decompress, and similar tasks are shown under Other Operations.
Features:
-
Clear All: Delete all task records.
-
Task List: View current operations and their progress.
-
Delete Single Task: Remove an individual record.
My Favorites
You can add frequently accessed files to My Favorites for quick access later.
-
Access via the Favorites icon in the DASSET application or the Favorites button in the file manager.
-
Files in Favorites can be managed like regular files: Remove from Favorites, download, and more.
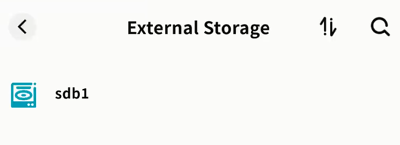
External Storage
When you connect a USB drive or formatted external hard disk to the DASSET device, it appears under External Storage.
-
Manage files in external storage just like files in My Space, Public Space, or Group Space.
-
Access via the External Storage icon or the file manager top menu.
-
Supported disk formats: exFAT, FAT32, VFAT, EXT4, NTFS.
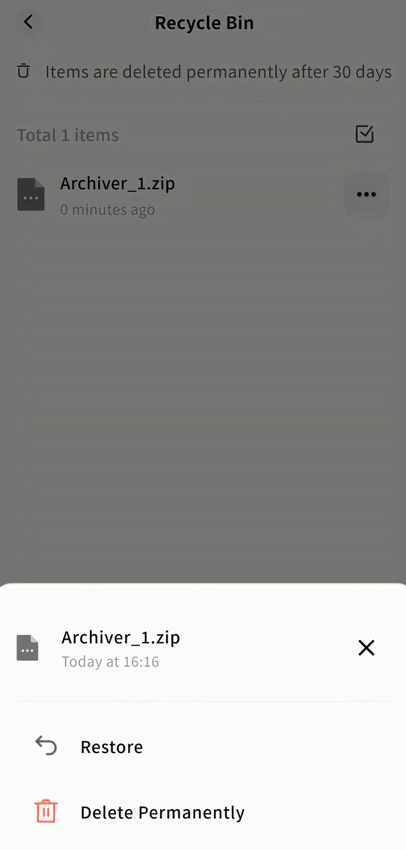
Recycle Bin
All deleted files are moved to the Recycle Bin. You can restore or permanently delete them.
-
Supports single and multiple file operations.
-
Files remain in the Recycle Bin for 30 days before being permanently deleted.
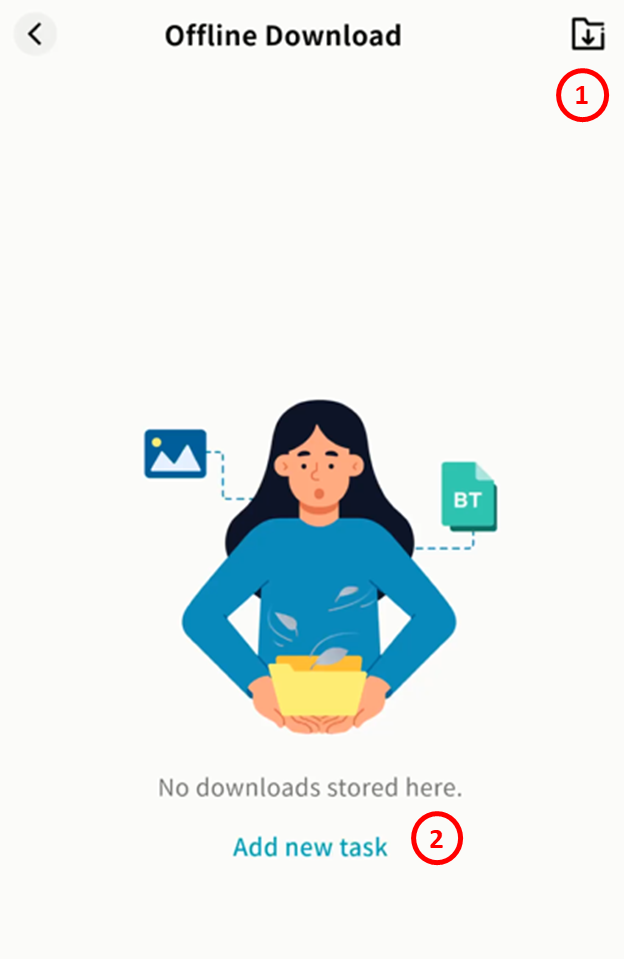
Offline Download
The Offline Download feature enables 24/7 automated downloads directly on the DASSET device.
Only available to Owners and Administrators.
Features:
-
Set Save Path: Choose My Space or Public Space as the download destination.
-
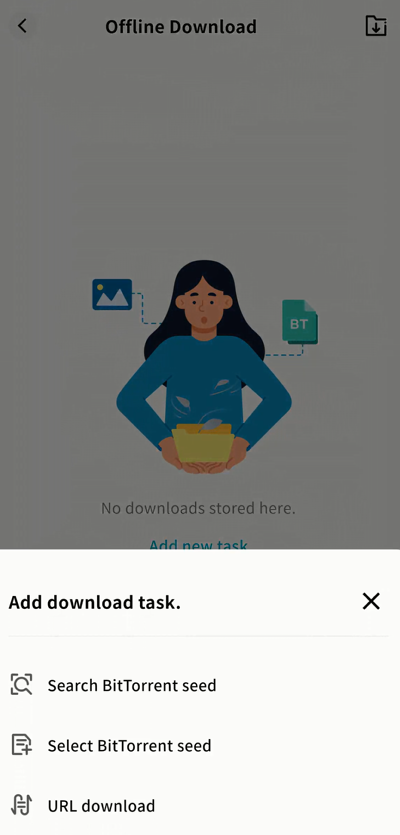
Add New Task: Enter a download link or torrent file.
-
Supports HTTP, HTTPS, FTP, magnet links, and torrent files.
-
Torrent files can be uploaded locally or selected from files already on the device.
-
By default, downloads are saved to My Space/Download, but you can customize the directory.
- Monitor Progress: View download progress in the Offline Download interface.
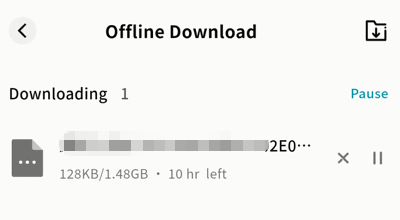
Note: Download speed depends on network conditions, resource availability, and thread control.
My Shares
The My Shares section consolidates all sharing tasks you have created, including Member Shares and QR Code Shares:
-
Member Shares: Files you shared with other members on the same DASSET device.
-
QR Code Shares: Includes QR code shares you created and files sent to another DASSET device.
Member Share Management
-
Displays a list of all active member shares.
-
Click × to cancel a share task.
QR Code Share
This section displays QR code shares you created or sent to another DASSET device.
-
Click × to cancel a share task.
-
Click on a task to view its QR code and details again, even if the original QR code image was lost.
Information available for each share task:
-
File list in the share task
-
Delete share task
-
Task name
-
Expiration date
-
QR code image
-
Remaining downloads
-
Share code (string form)
-
Access password (if password-protected)
-
Save QR code to gallery
-
Share QR code via other apps
File Dedupe
The File Dedupe feature helps you locate and remove duplicate files on the DASSET device, saving disk space.
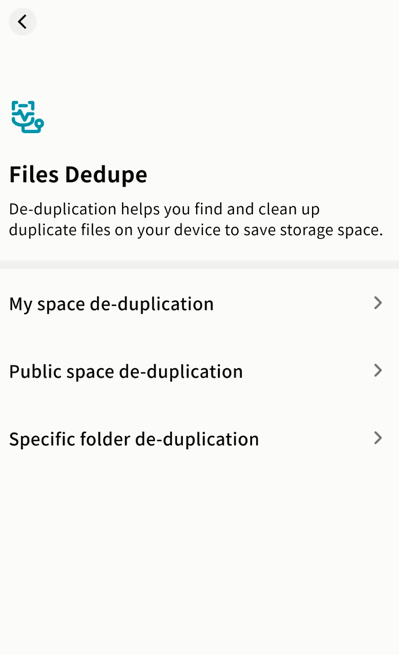
You can perform deduplication in:
-
My Space
-
Public Space (Owner and Administrators only)
-
Specified Folders: Select one or more directories you have permission to scan.
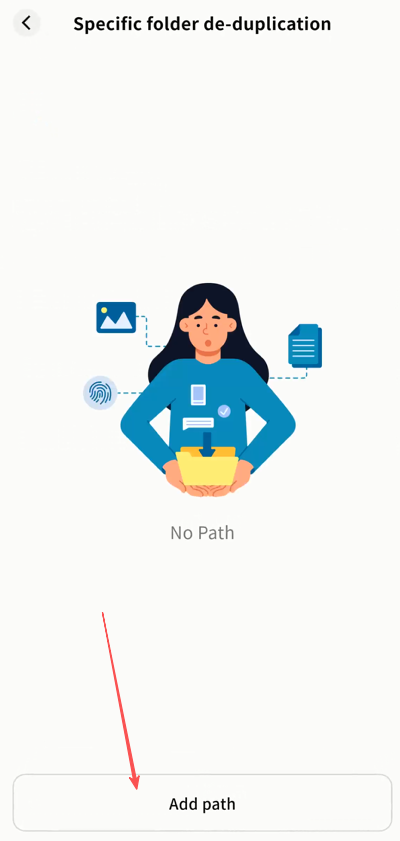
Once paths are selected, click Start Scan to initiate duplicate file detection.
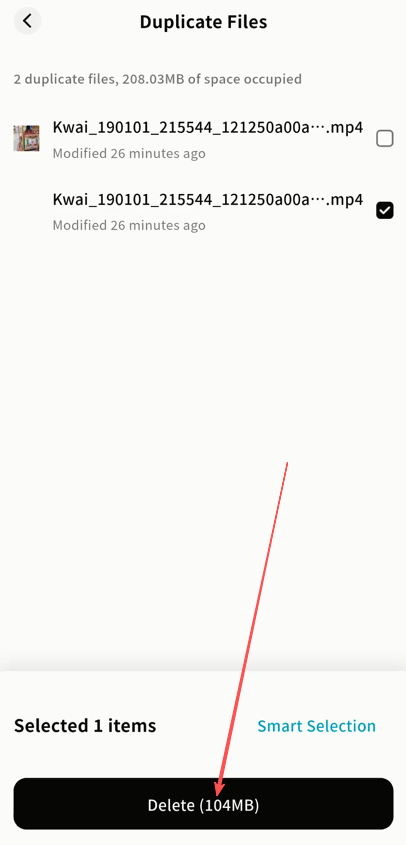
Deduplication Process
After scanning, duplicate files are listed. Review them and click Delete to remove duplicates.
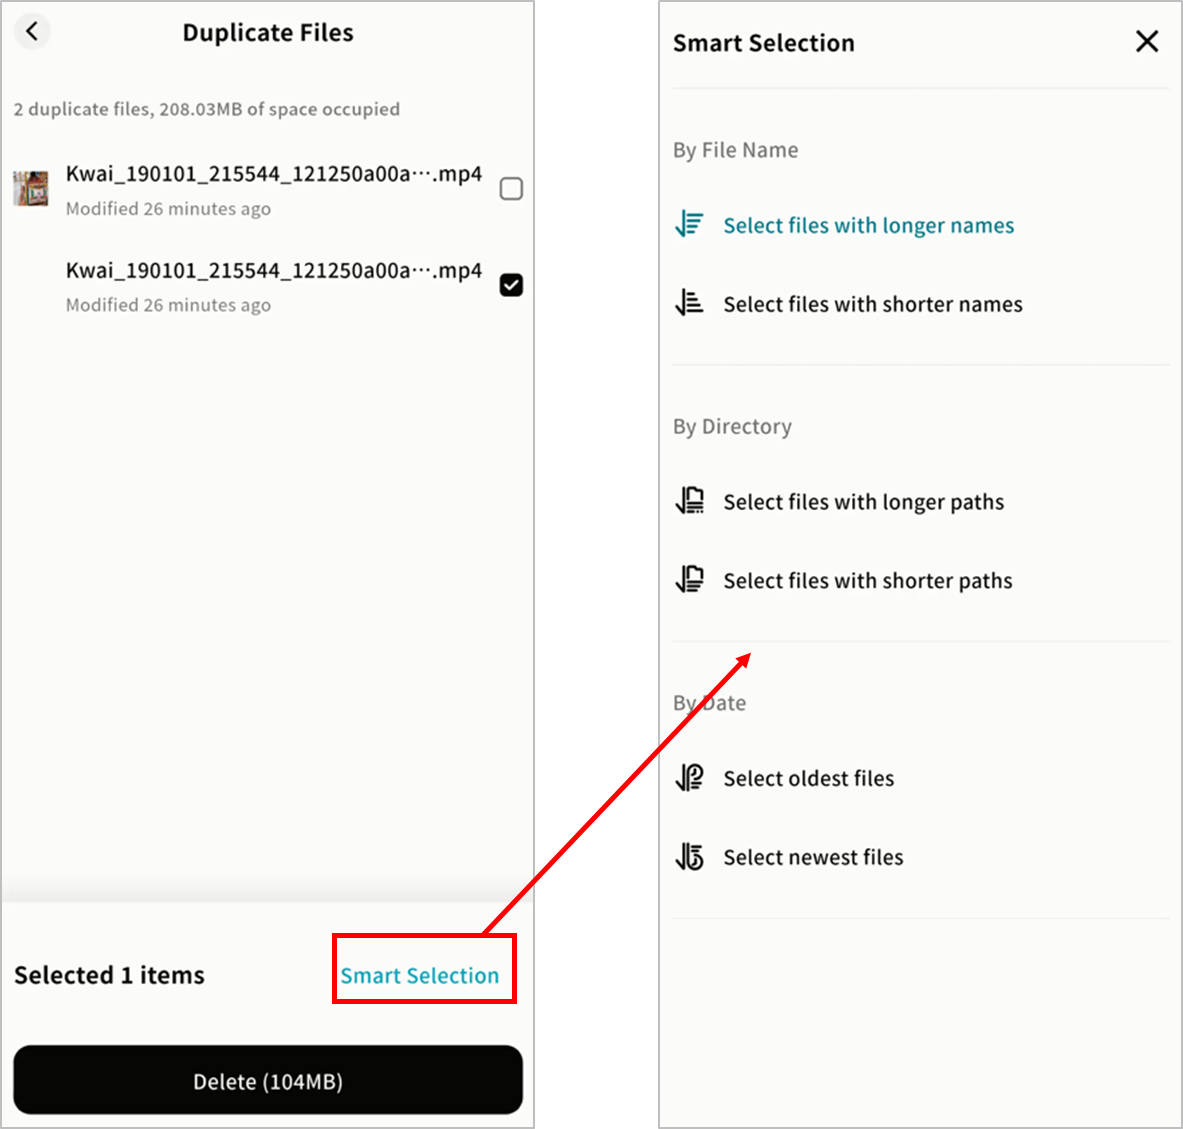
Deduplication Rules
Click Smart Selection to define how duplicate files should be handled:
-
By filename length
-
By file path length
-
By file modification time
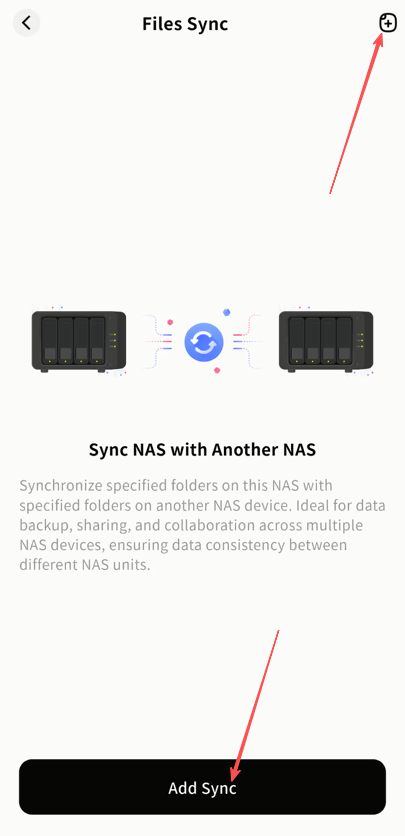
Files Sync
This feature is available only to device owners.
The Files Sync function supports:
-
File sync between a DASSET device and a computer (desktop client required).
-
File sync between two DASSET devices, enabling off-site backups and improved redundancy.
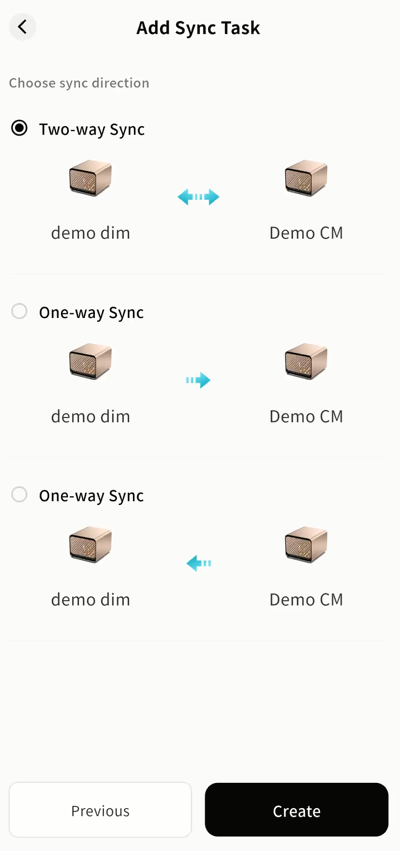
Supported modes:
-
Two-Way Sync: Keeps files consistent between both sides. Any change triggers synchronization.
-
One-Way Sync (A → B): Only new/modified files from Device A sync to Device B. Changes on B are not synced back.
-
One-Way Sync (B → A): Only new/modified files from Device B sync to Device A. Changes on A are not synced back.
Configure Device-to-Device Sync
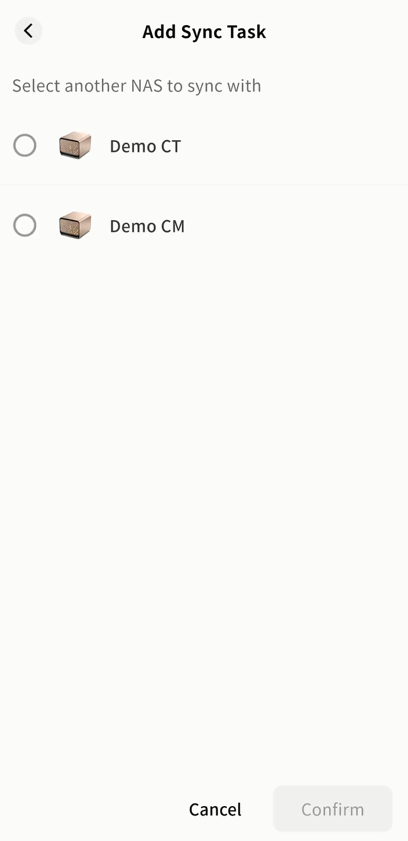
- Go to Files Sync Add Sync or tap +.
- In the Add Sync Task window, select another DASSET device you own, then click Confirm.
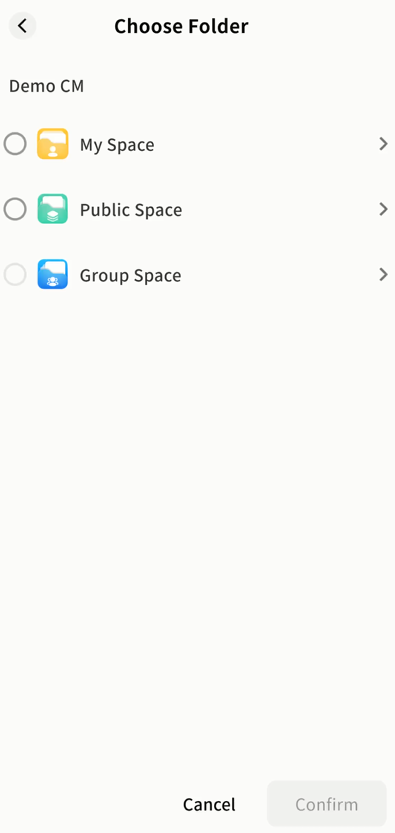
- Choose the folder to sync from the current device. You may use an existing folder or create a new one.
Tip: Choose the space (My Space, Public Space, Group Space) according to privacy requirements.
- Choose the folder to sync on the target device (existing or new).
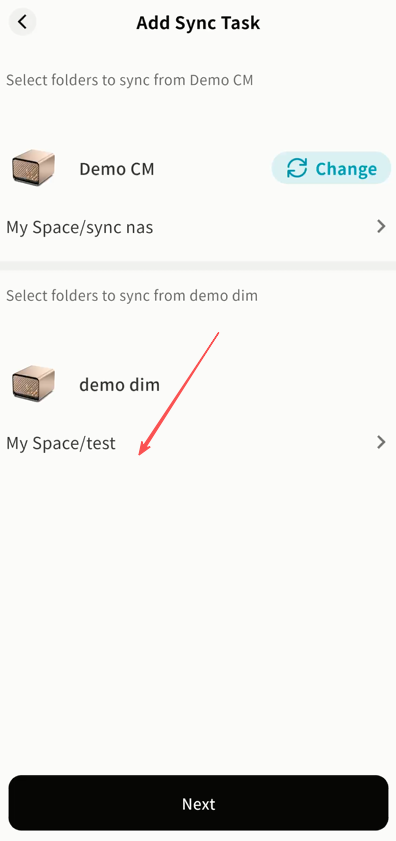
-
Review the source folder and target folder in the Add Sync Task window, then click Next. You can also change the folder if needed.
-
Select a synchronization mode:
-
Two-Way Sync
-
Current Device → Target Device
-
Target Device → Current Device
-
- The sync task will start automatically. Any file changes in the designated folders will trigger synchronization.
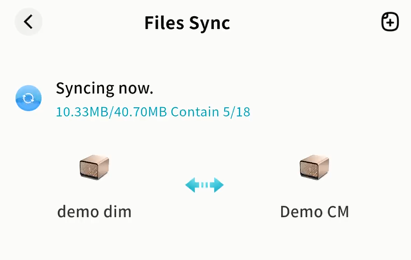
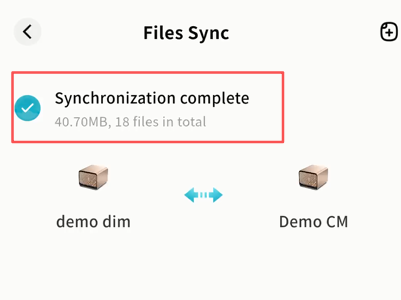
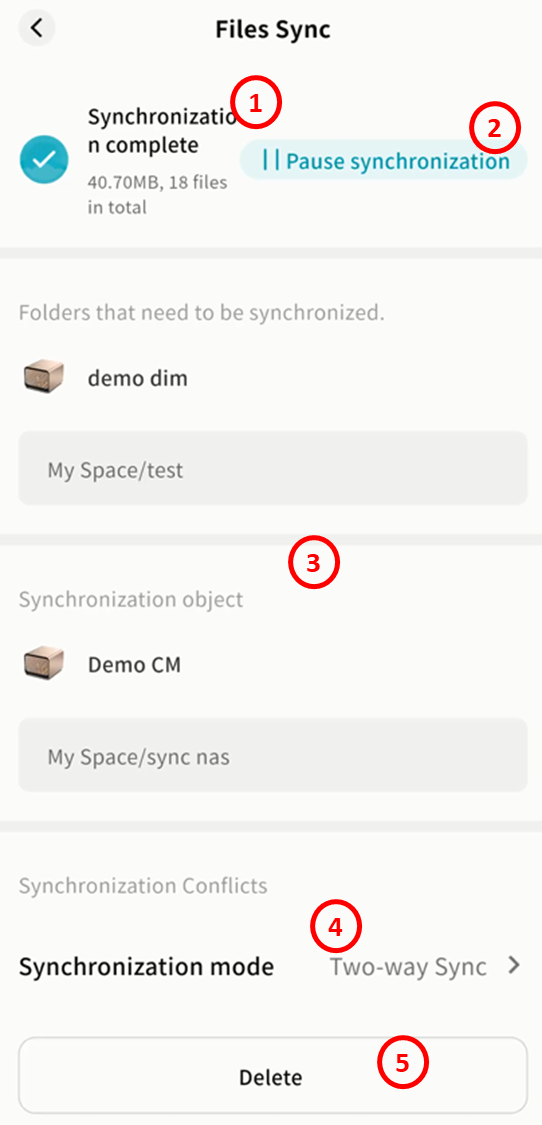
View Sync Tasks
In the Sync Tasks panel, you can:
- View task status (In Progress, Completed, or Error)
-
Check total file size and file count being synchronized
-
Pause or resume tasks
-
View device names and directory paths of both sides
-
Modify sync mode
-
Delete sync tasks
Lite NVR
The DASSET edge device supports cameras compatible with the Onvif protocol, enabling centralized management of cameras, storage of surveillance video, live and recorded video playback, and PTZ (pan-tilt-zoom) control. You can securely view surveillance video anytime, anywhere, avoiding the privacy risks of cloud storage.
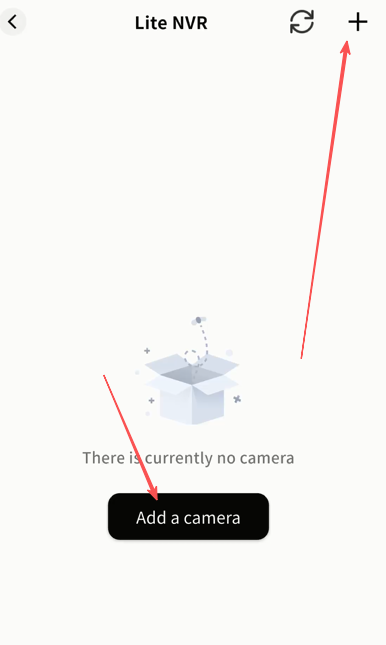
Add a Camera
- Click + to search for cameras on the same LAN as the DASSET device.
Note: Ensure the camera is powered on, connected to the same LAN, and supports the Onvif protocol.
- Wait for search results; the process is usually fast.
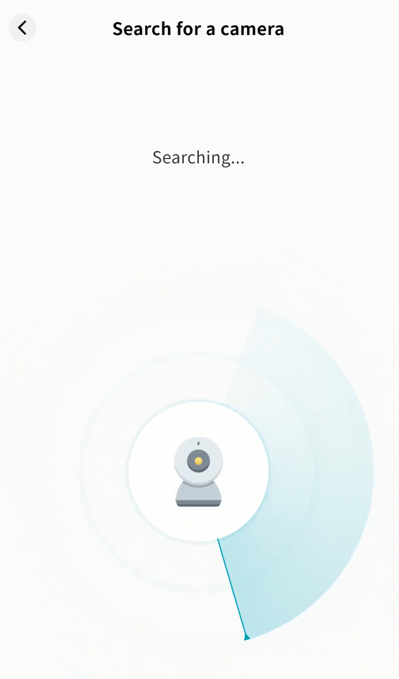
- Once found, the camera will appear in the results page.
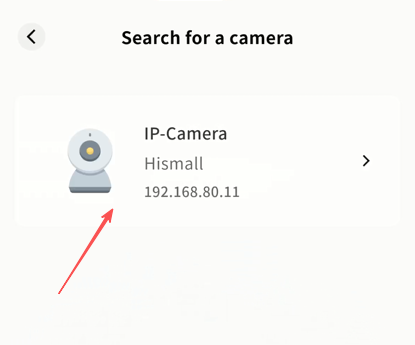
-
Select the camera to open its configuration page. If authentication is required, enter the camera's username and password (refer to the user manual or contact the manufacturer).
-
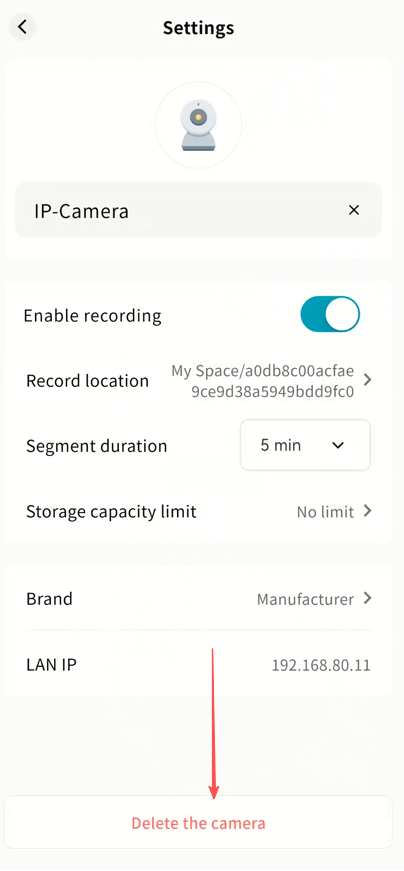
Configure settings:
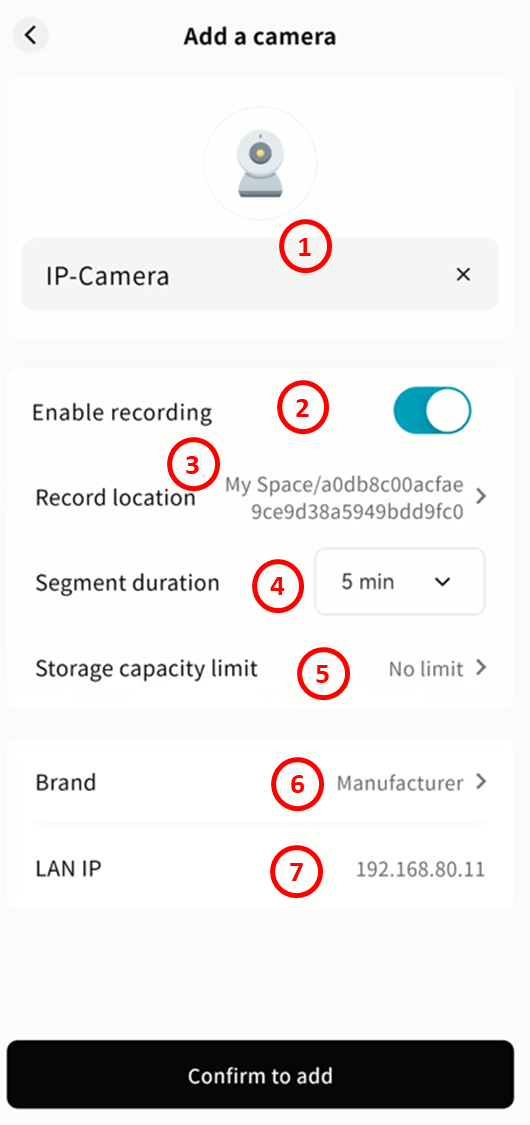
-
Camera Name: Displayed in the Video Monitoring app.
-
Enable Recording: Enable to save surveillance video to the DASSET device.
-
Record Location: Define where video files are stored.
Recommendation: For privacy, save to My Space or Group Space, unless you need to share recordings with all device members.
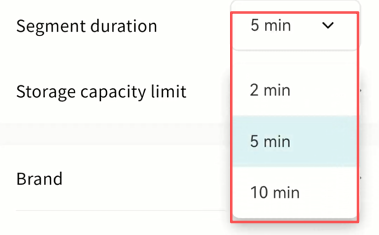
- Segment Duration: Define the length of each video file. Files are automatically segmented.
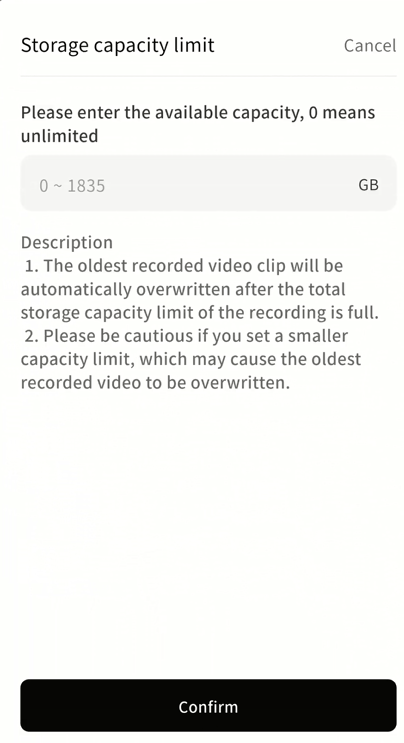
- Storage Capacity Limit: Set a maximum quota. Older recordings will be overwritten when the limit is reached.
-
Brand: Automatically detected from the camera protocol; can be corrected manually.
-
LAN IP: Displays the current IP address of the camera.
- After configuration, click Confirm Add. The camera will appear in the Video Monitoring page.
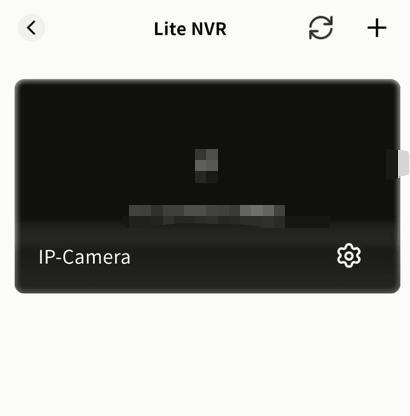
View Live Video
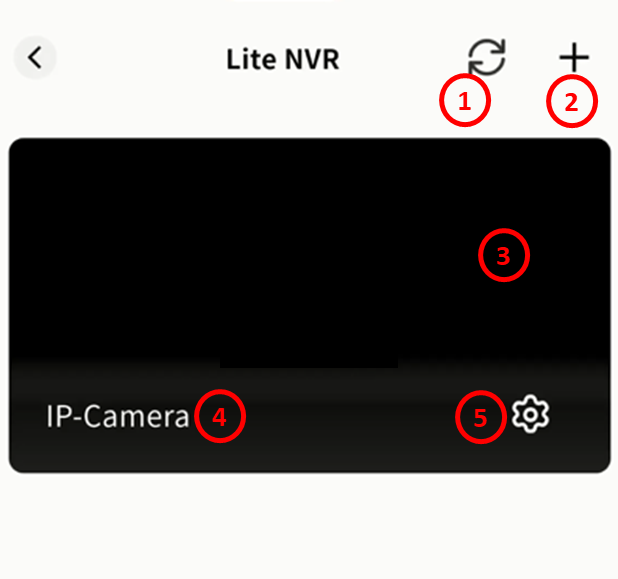
In Video Monitoring, you can see all connected cameras with preview images, camera name, and time.
-
Refresh: Update the current view.
-
Add Camera: Add new cameras.
-
Preview Window: Shows static preview and timestamp.
-
Camera Name: Display label.
-
Camera Configuration: Manage or delete the camera.
Camera Monitoring Operations
Click a camera preview to enter the monitoring interface.
You can:
-
View live feed with timestamp.
-
Switch to fullscreen.
-
Use PTZ controls.
-
Access recorded playback.
-
Configure the camera.
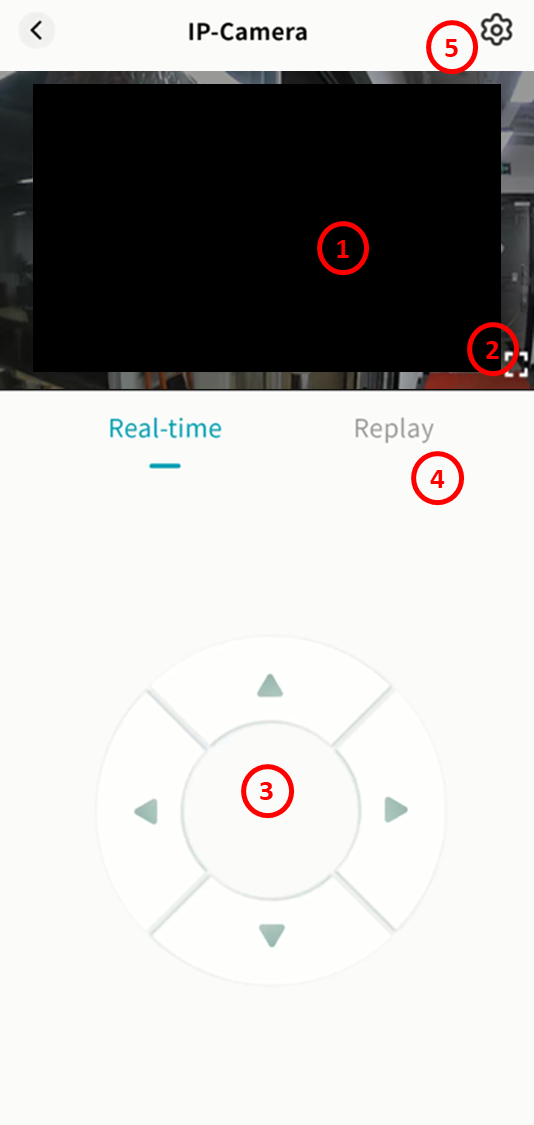
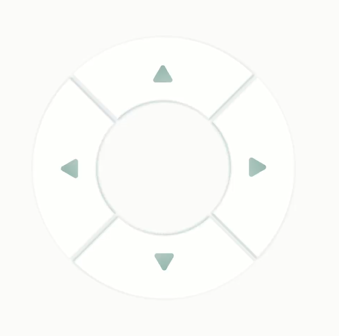
PTZ Control
Use the directional keys to adjust camera angles.
If PTZ is not supported, a notification will be displayed.
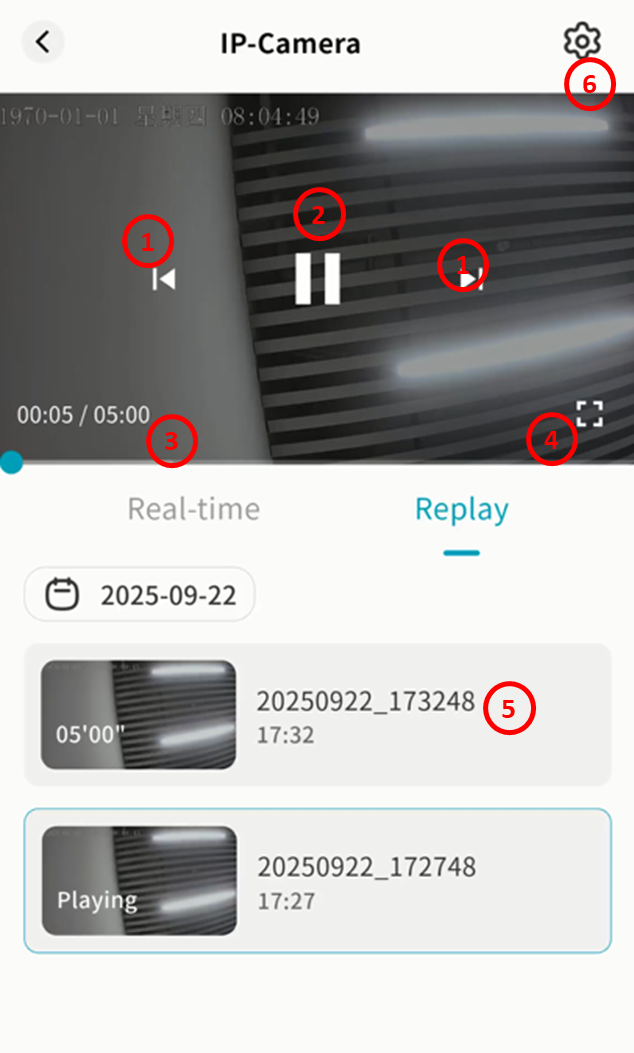
Playback
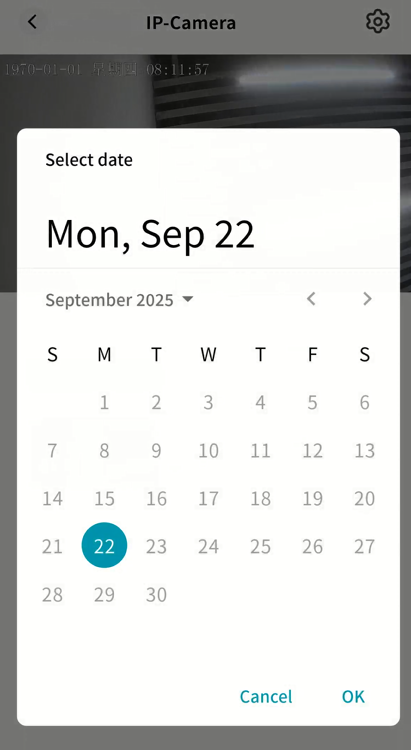
- In the monitoring interface, click Playback to access recorded footage stored on the DASSET device. Videos are sorted by time based on recording duration.
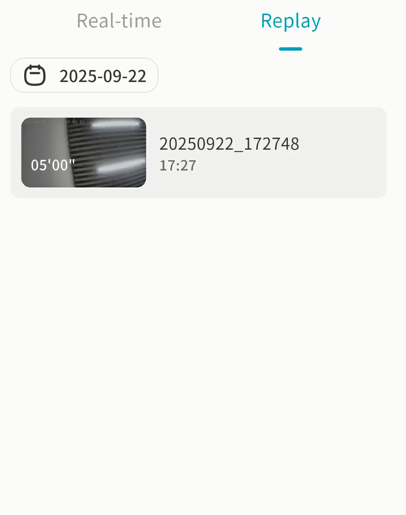
- Use the calendar to select a specific date.
-
Click a video segment to play. Features include:
-
Switch between previous/next recordings
-
Pause/Play
-
Display total video duration and playback timestamp
-
Fullscreen playback
-
Show filename of the current recording
-
Enter camera settings
-
Delete a Camera
You can remove a camera at any time.
-
In the Video Monitoring home page or monitoring interface, click the gear icon.
-
Select Delete the Camera to remove it.
Recent Files
The Recent Files page displays recently accessed files on the DASSET device. From here, you can perform file operations such as move, copy, download, and delete.

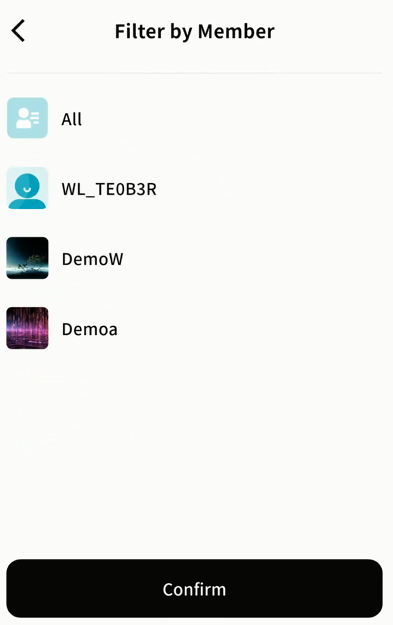
Access Log
The Access Log page shows all member access records for the device, including:
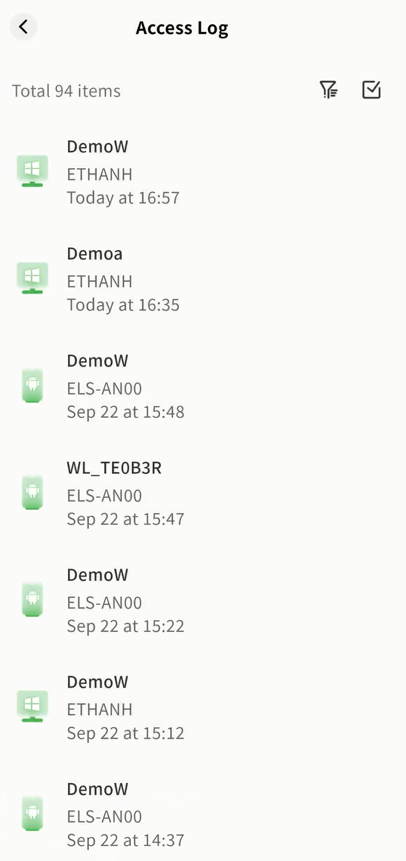
-
Account name
-
Client type
-
Terminal name
-
Access time
You can filter logs by account using the filter button in the top-right corner. Multiple records can be selected and deleted.
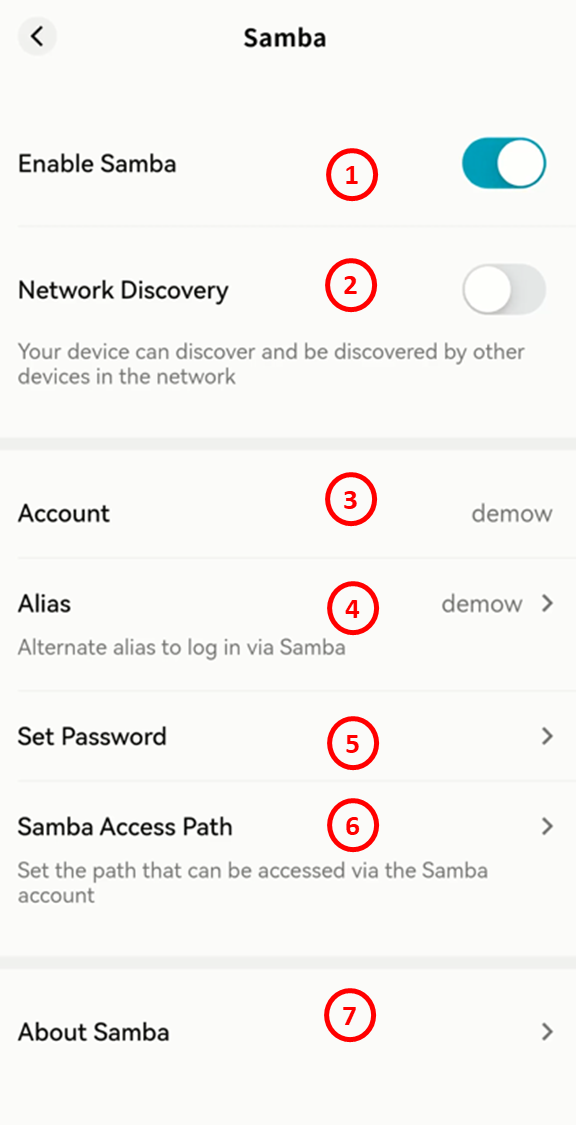
Samba
The DASSET edge device supports the Samba protocol, allowing you to connect from computers, smart TVs, and other devices to access files stored on the device.
-
Enable/Disable Samba: Turn Samba service on or off.
-
Network Discovery: Allow your DASSET edge device's Samba service to be discovered via LAN scanning.
-
Account: Your Samba login account.
-
Alias: Set an alias for Samba, which can later be used as the login username.
-
Set Password: Define the login password for Samba access.
-
Samba Access Path: Specify which directories on the DASSET device can be accessed via Samba.
-
About Samba: Provides a tutorial on how to connect to the DASSET device's Samba service from Windows or macOS.
Note: If your DASSET device does not frequently change networks, it is recommended to configure a static IP address. This ensures that the Samba service is always accessible at the same IP within the LAN.
Windows Connection to Samba
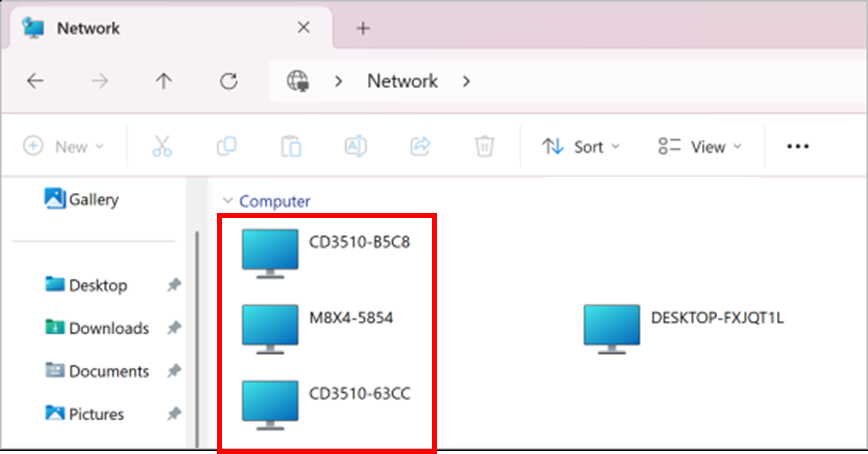
Access via Network Discovery
When " Visible in LAN Scan" is enabled on Smart DAS, the device will appear automatically under the Network section in File Explorer.
Simply double-click the DAS icon and enter your username and password to log in.
Map as a Network Drive
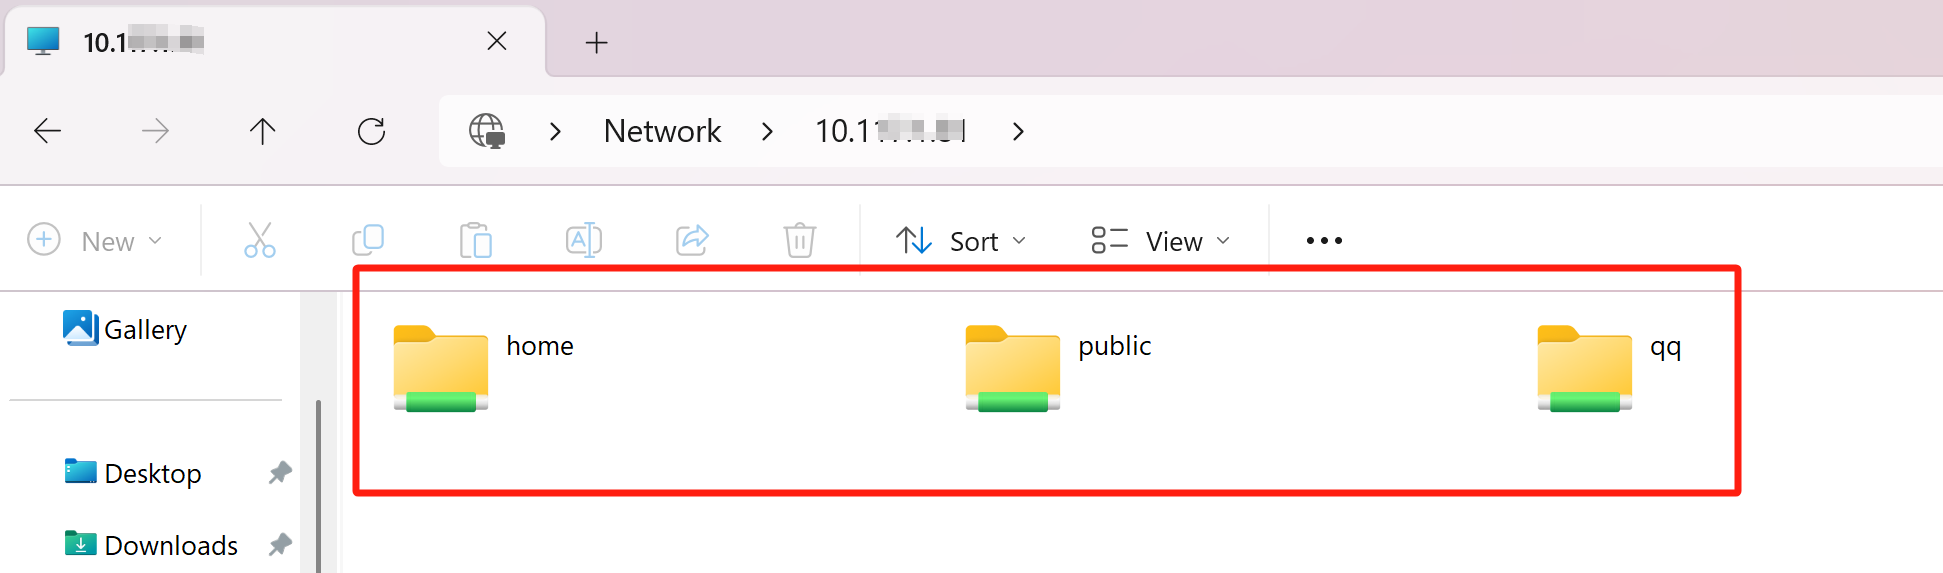
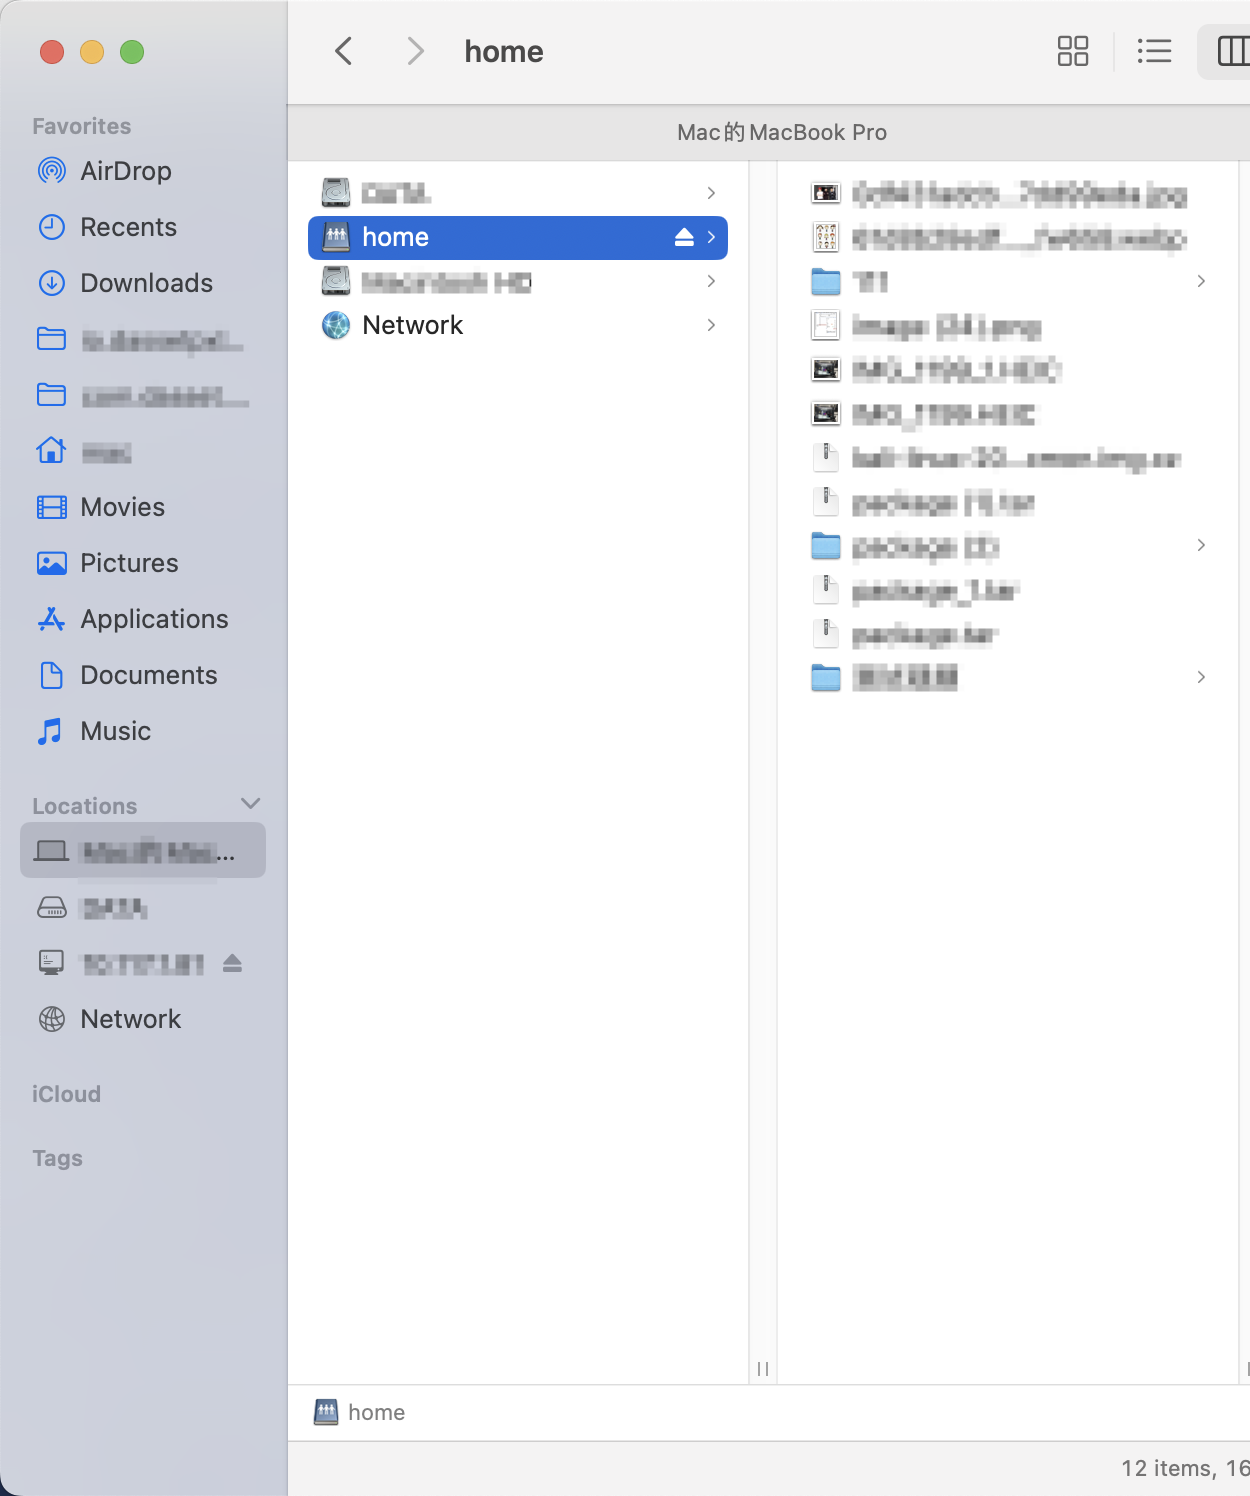
- Open File Explorer, type \\DASSET device IP address in the address bar, and press Enter.
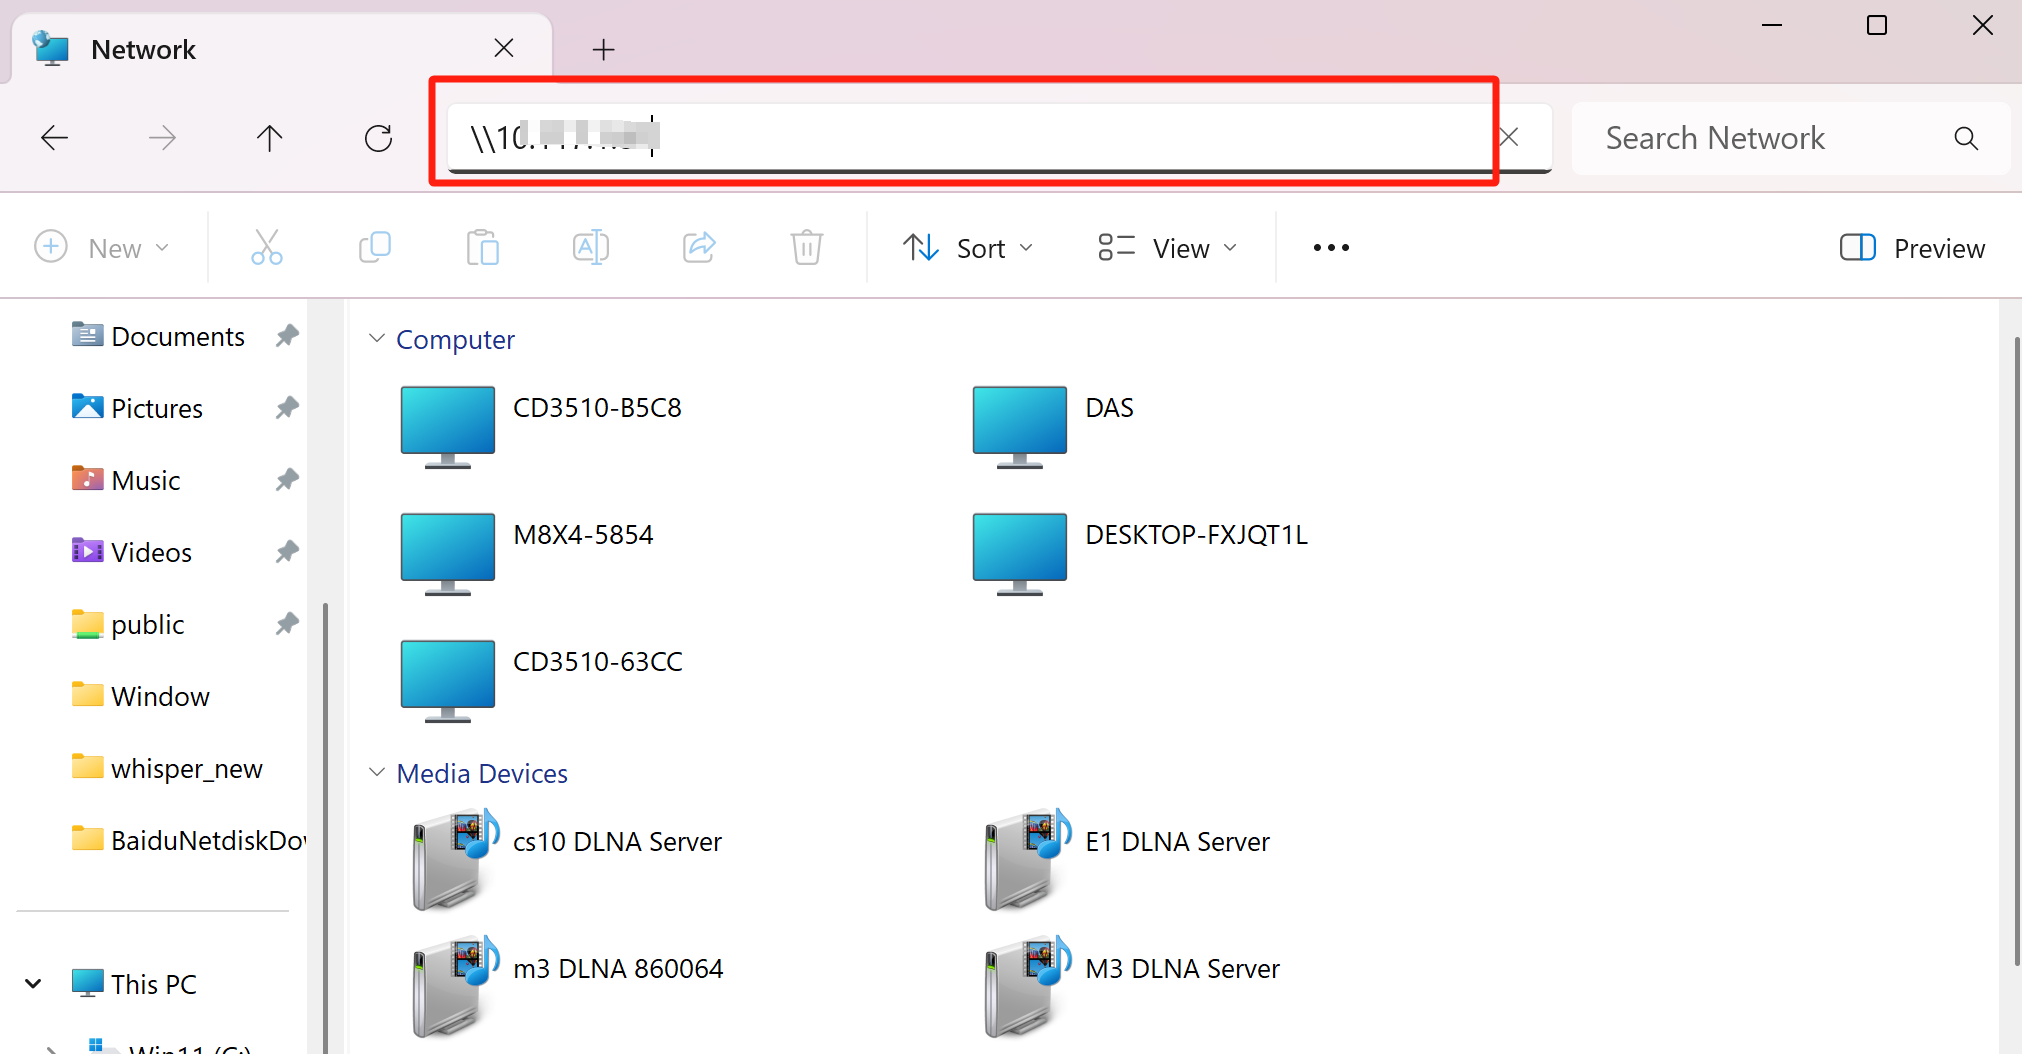
- When prompted, enter your username and password, then click OK.
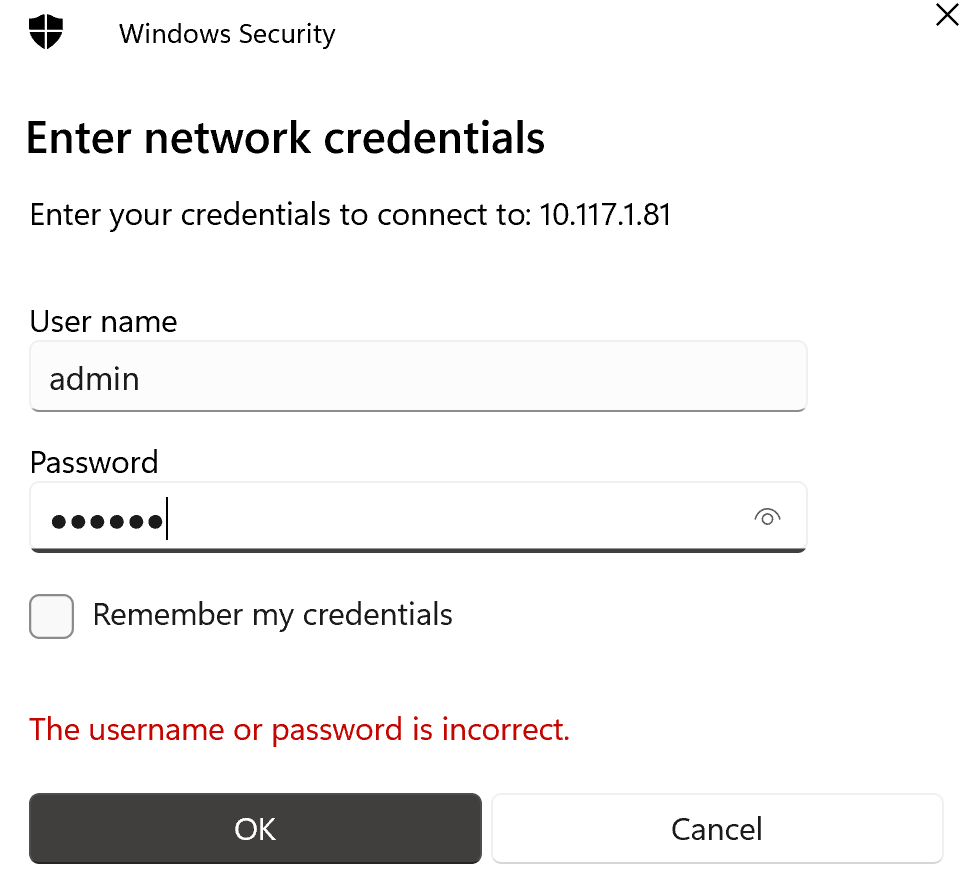
- Once authenticated, File Explorer will display all folders accessible under your DASSET account.
-
home: Your personal space on Smart DAS.
-
public: The public space accessible to all users on Smart DAS.
-
Other directories: Shared group spaces that your account has joined on Smart DAS.
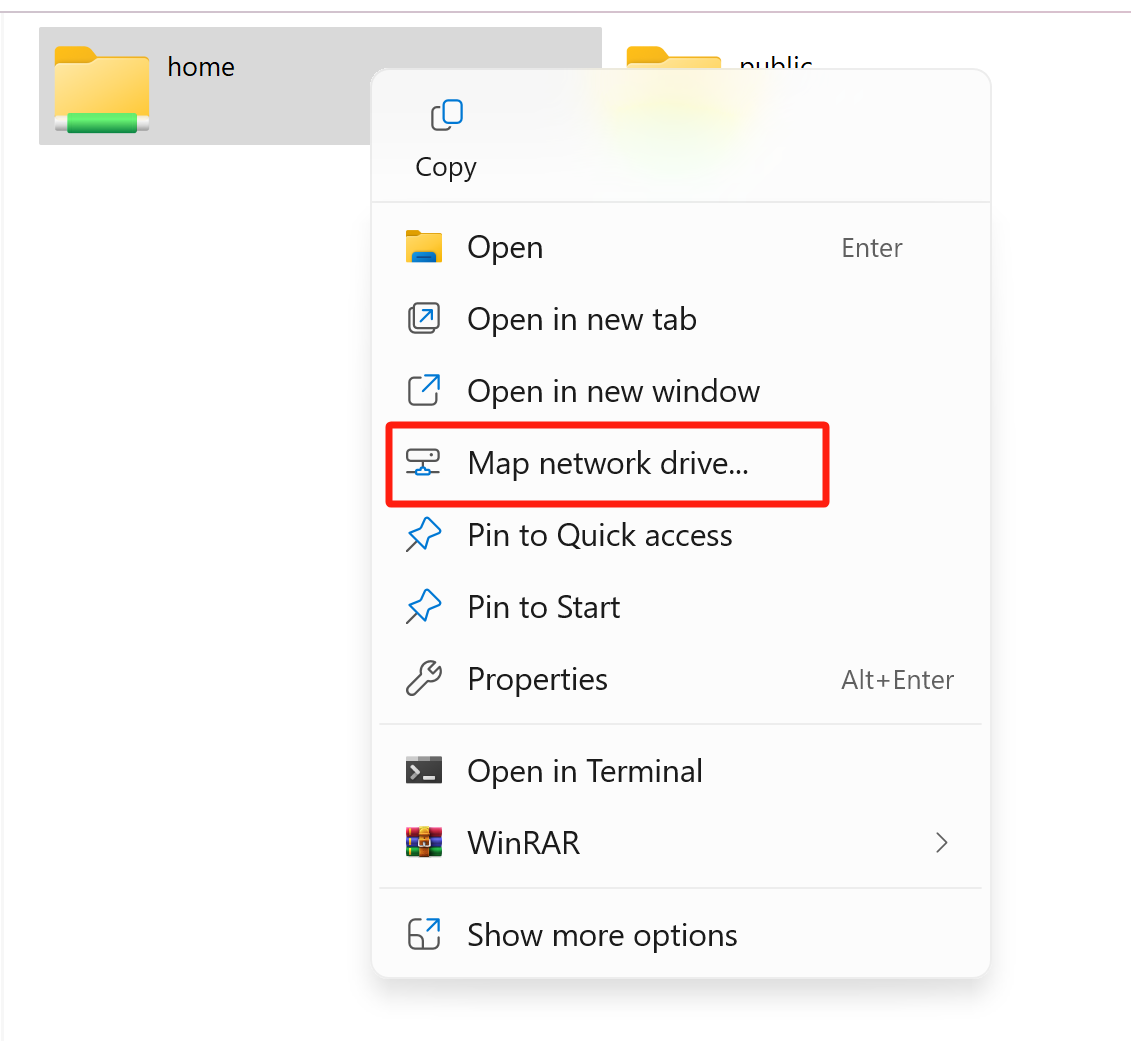
- Right-click the folder you access frequently, and select Map network drive....
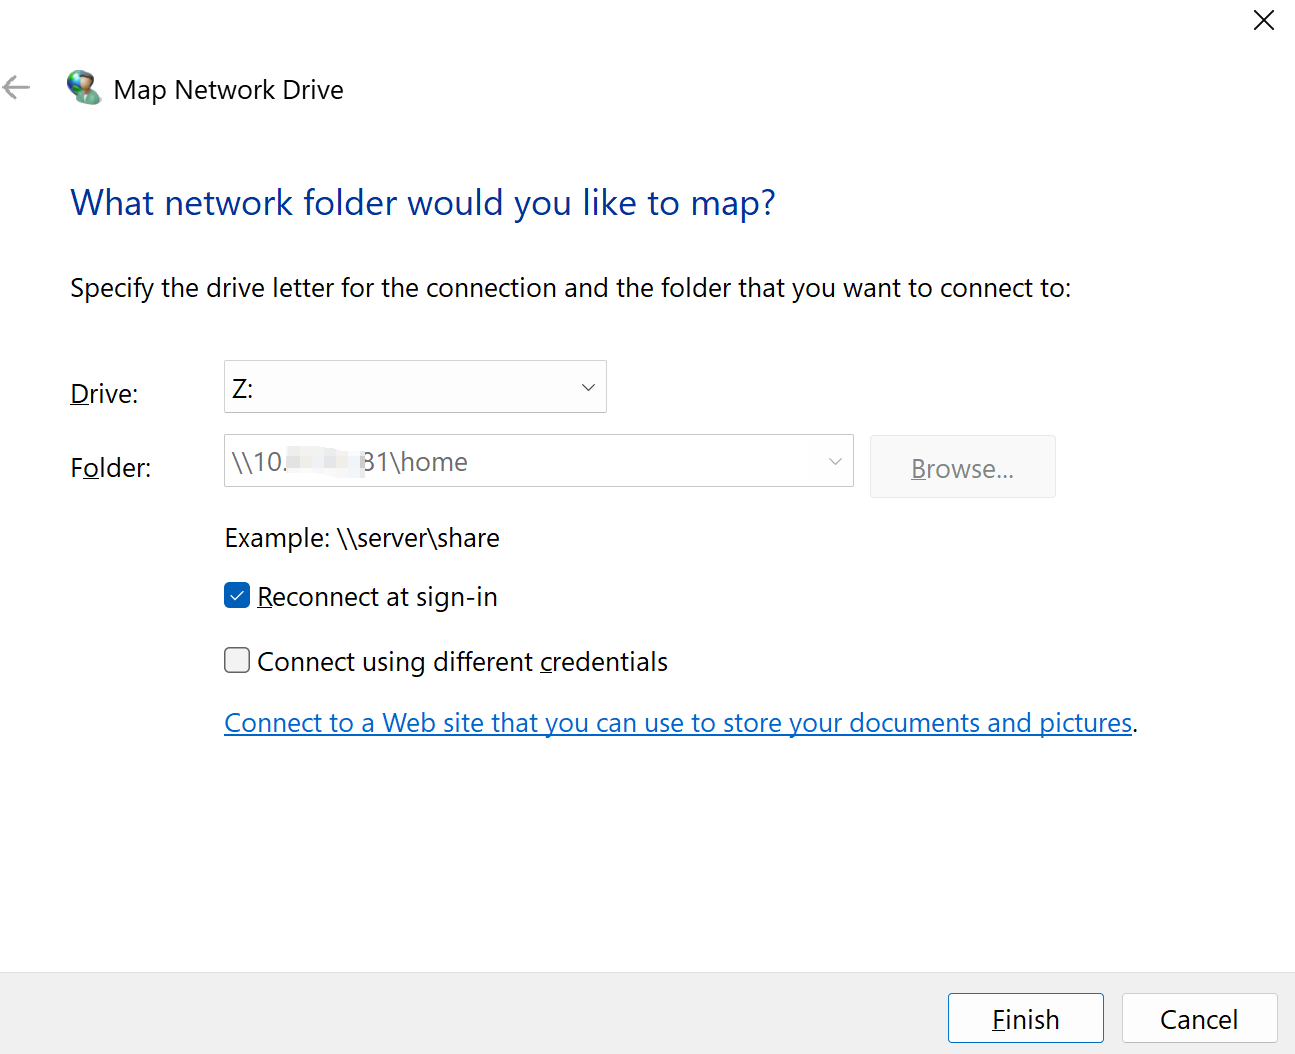
- Choose an available drive letter, check Reconnect at sign-in, and click Finish.
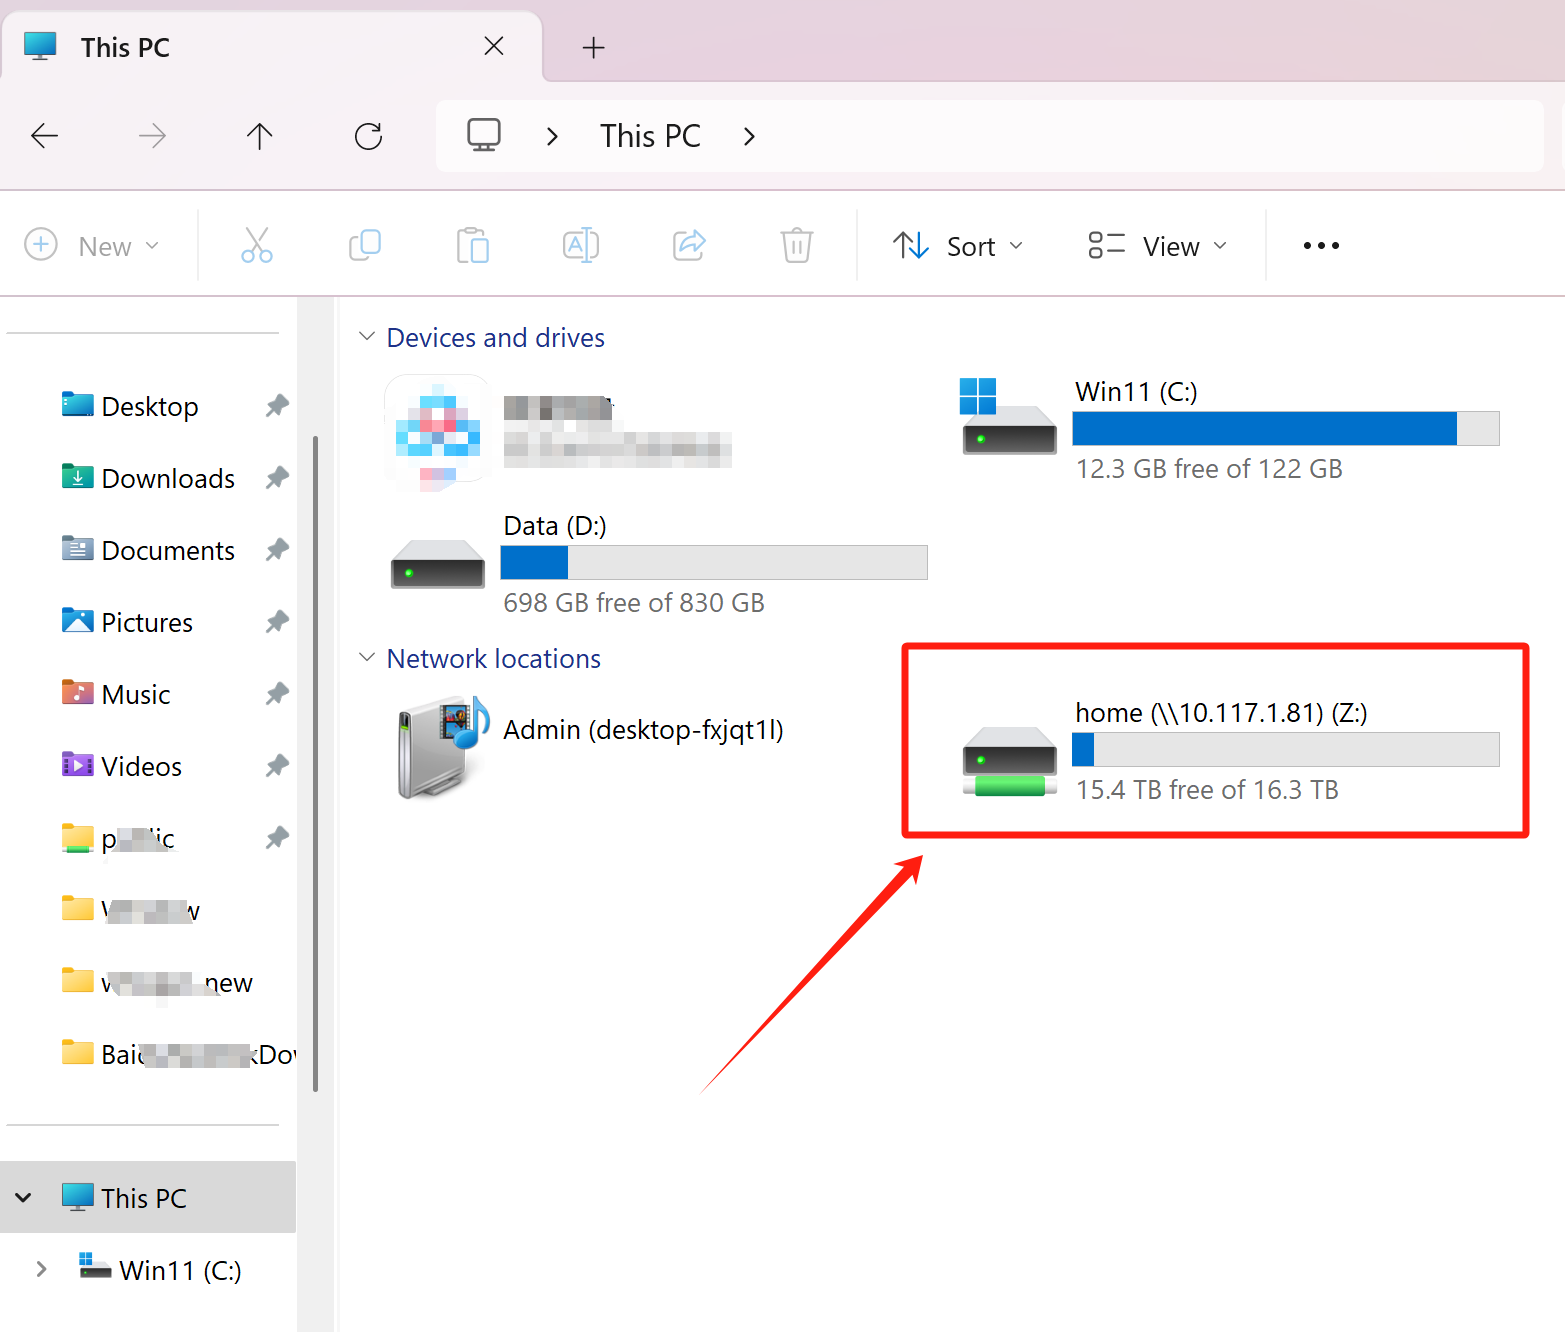
- The mapped network drive will now appear under This PC, allowing quick access to shared files on your DASSET Edge Device.
macOS Connection to Samba
- Open Finder Go Connect to Server.
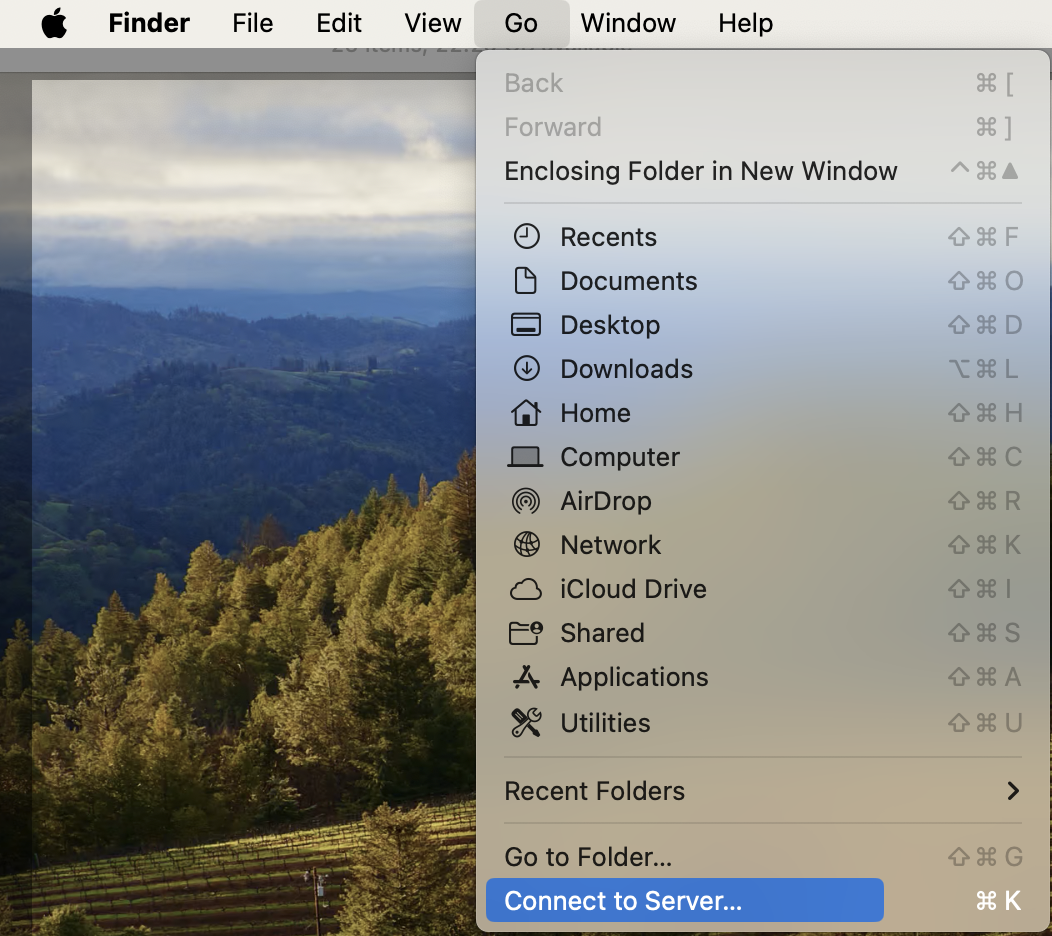
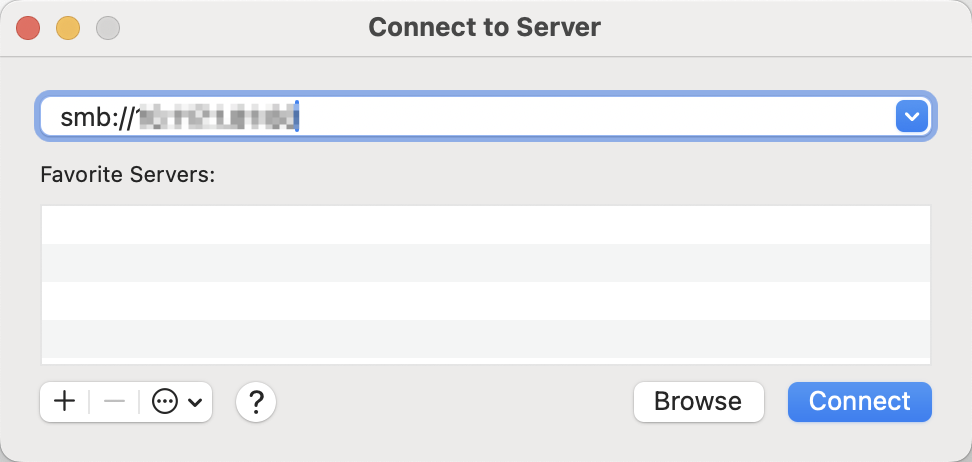
- In the server address field, enter:
smb://Smart_DAS_IP_address
(The Samba application interface will display your current IP address.)
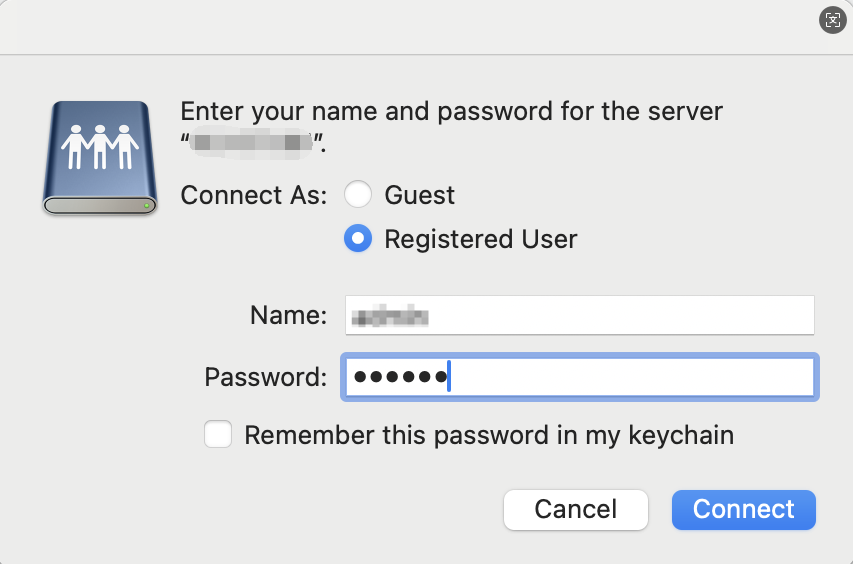
-
Click Connect Select Registered User
-
Enter your Samba username and password and click Connect.
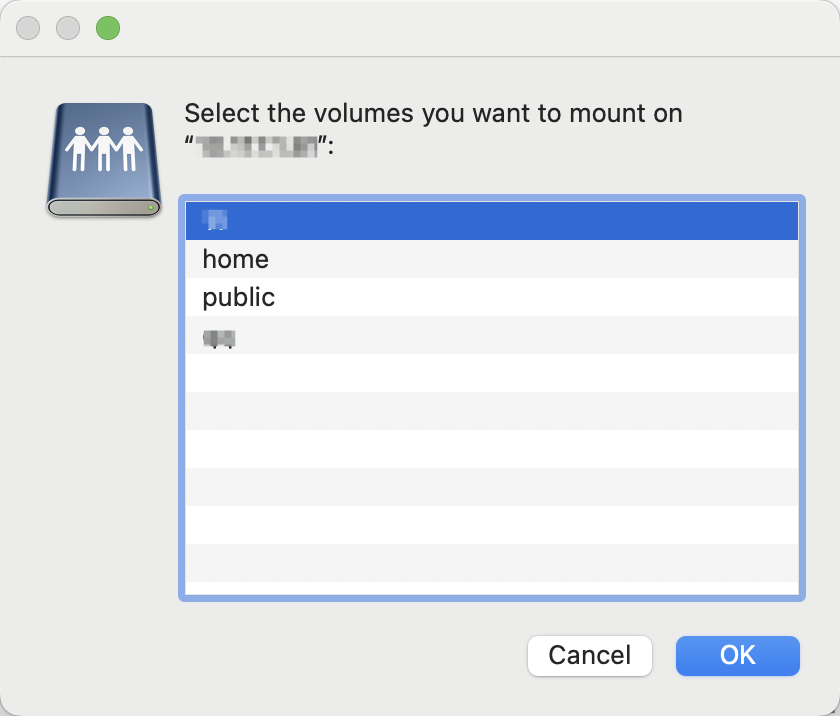
- Select shared directories to access:
-
home (Personal space)
-
public (Public space)
-
Group spaces (if available)
- Quick access setup: Drag frequently used folders to the "Locations" section in Finder's sidebar
DLNA
You can enable the DLNA protocol on the DASSET edge device so that your computer, phone, smart TV, and other compatible devices can automatically discover the device and directly access its media files.
Note: DLNA is a standardized protocol that allows compatible devices (such as smart TVs, phones, computers, and speakers) to automatically discover each other on a home network and directly stream or play stored music, videos, and photos without copying files or using physical media like USB drives.
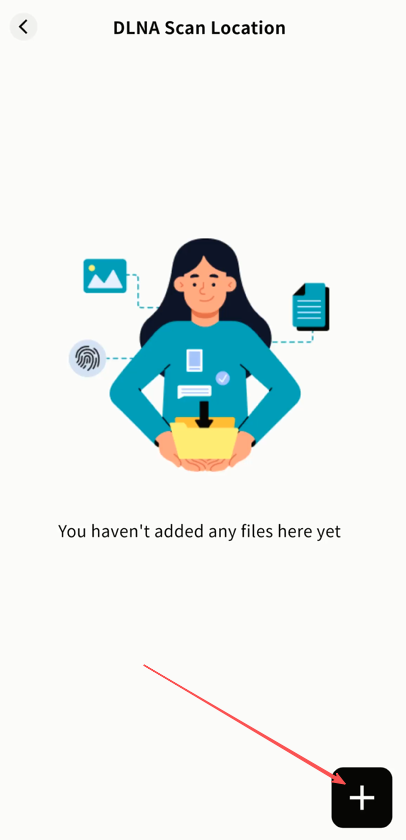
First-time setup: You must add a DLNA scan path. Only media files within the added folders will be accessible over the LAN.
Steps:
- Go to the DLNA page and click DLNA Scan Location.
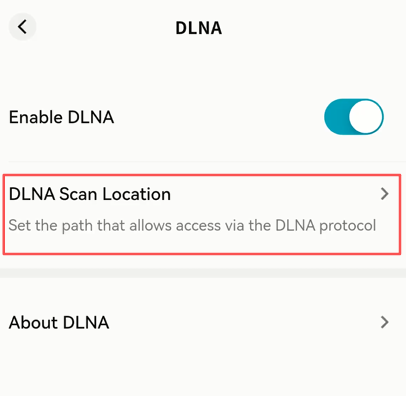
- In the pop-up window, select the folders you want to share via DLNA.
-
Once added, your computer or any other DLNA-supported device on the LAN will discover the DASSET device and access its media files.
-
You can edit or remove folders from the DLNA interface at any time. Once removed, the folder will no longer be accessible to other LAN devices.
Time Machine
The DASSET edge device supports Apple's Time Machine feature. Once enabled, you can back up your Mac directly to the DASSET device.
-
Enable/Disable Time Machine: Allow your Mac to connect to the device for backup and restore.
-
Account: The account used to log in from macOS.
-
Alias: Set an alternate login alias for Time Machine.
-
Enable this Account: Enable this account for Time Machine access.
-
Set Password: When enabling Time Machine for the first time, set a password for authentication.
-
About Time Machine: Provides instructions on how to connect from macOS to the DASSET device using Time Machine.
Note: Apple's Time Machine does not support the @ character in account names.
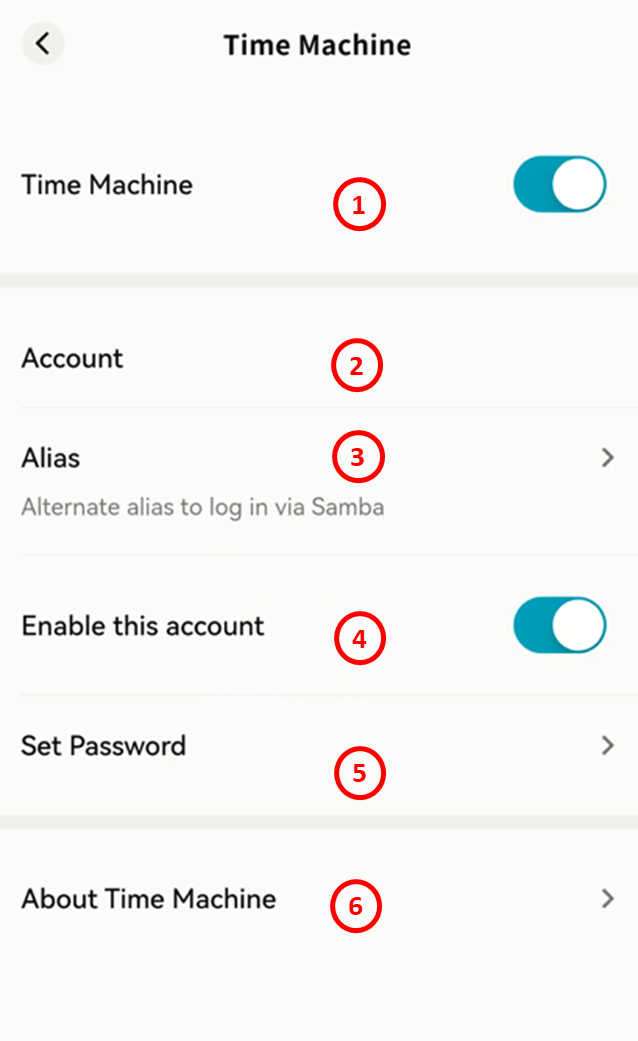
Connecting a Mac to Time Machine
-
On your Mac, go to System Settings General Time Machine.
-
Select Add Backup Disk..., then choose your device from the list and click Set Disk....
-
Enter the corresponding network account and password in the pop-up window, then click Connect.
-
After setup is complete, your Mac will automatically back up files to the DASSET device using Time Machine.
Cloud Drive
DASSET supports integration with third-party cloud drives. You can upload files from the DASSET edge device to a cloud drive, download files from a cloud drive to the device, or synchronize data between them.
Currently supported third-party cloud drives include: Google Drive, OneDrive, and Dropbox.
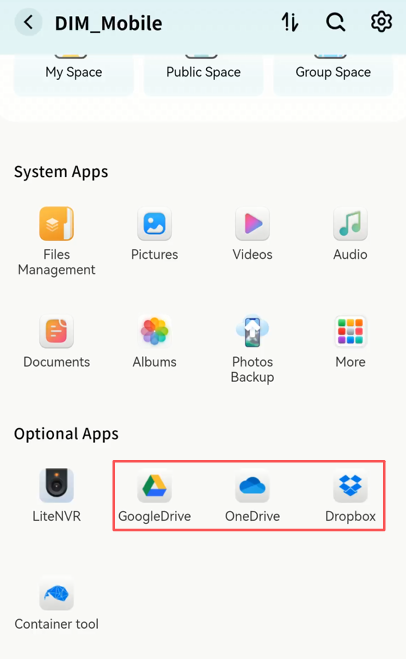
Cloud Drive Login
Log in to Google Drive
-
For first-time use, click Install wait Open.
-
Read and agree to the usage terms, then click Confirm.
-
On the Google Drive authorization page, enter your account credentials.
-
Once logged in, your Google Drive files will be accessible.
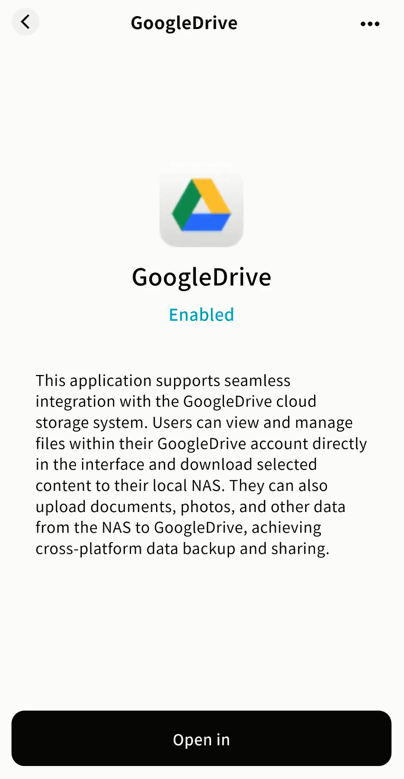
Log in to OneDrive
-
For first-time use, click Install wait Open.
-
Read and agree to the usage terms, then click Confirm.
-
On the OneDrive authorization page, enter your account credentials.
-
Once logged in, your OneDrive files will be accessible.

Log in to Dropbox
-
For first-time use, click Install wait Open.
-
Read and agree to the usage terms, then click Confirm.
-
On the Dropbox authorization page, log in with your account credentials or sign in via Google/Apple.
-
Once logged in, your Dropbox files will be accessible.
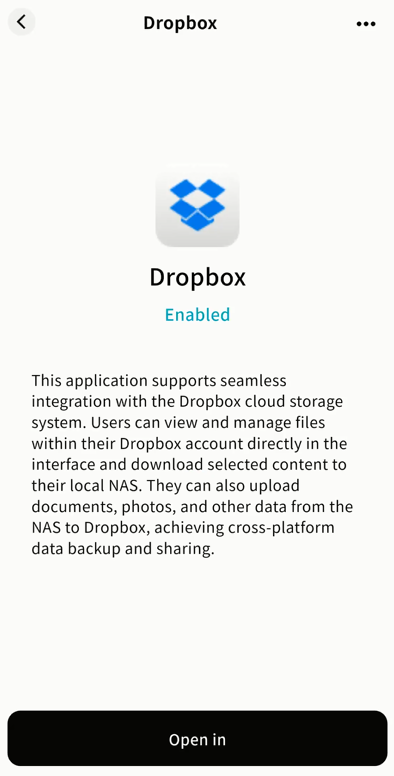
Cloud Drive Operations
Cloud Drive Interface
After login, the interface includes:
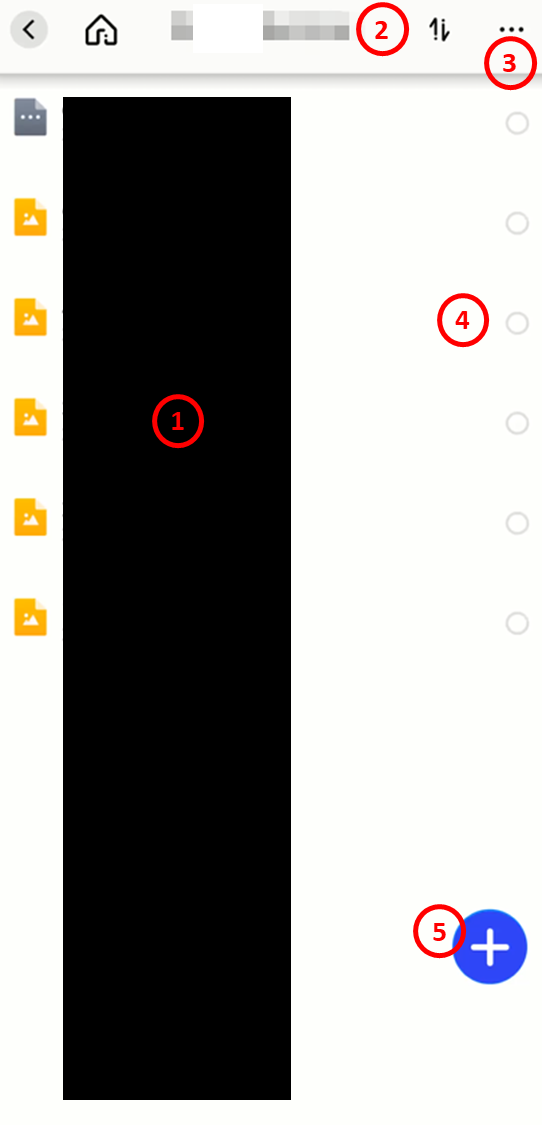
-
File List: Displays files stored in the cloud drive.
-
Task List: Shows progress and history of upload/download tasks.
-
Logout: Exits the account; re-login required to re-enter.
-
File Operations: Available via menu, including download, rename, copy, move, and delete.

- Add Files: Upload files from DASSET to the cloud or create new folders.
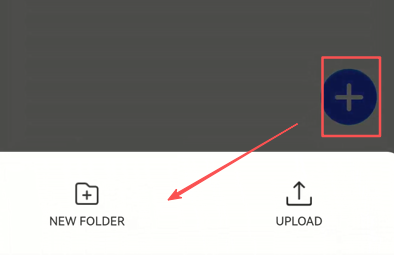
Upload Files from DASSET to Cloud Drive
- Go to Cloud Drive + and choose upload or create folder.
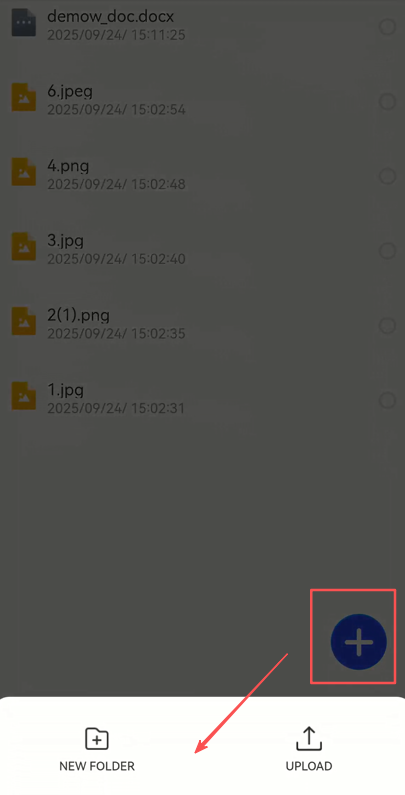
- Select files/folders from My Space to upload (multi-select supported).
Note: For security reasons, only files from My Space can be uploaded.
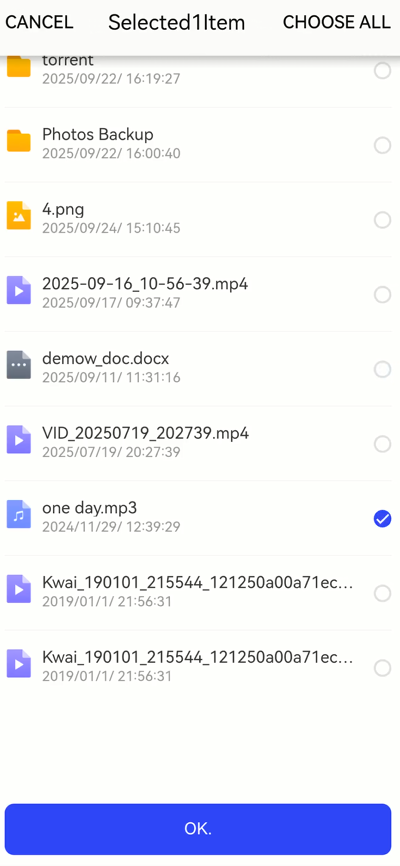
- Confirm to start upload.
Download Files from Cloud Drive to DASSET
- Select the file(s) click Download.
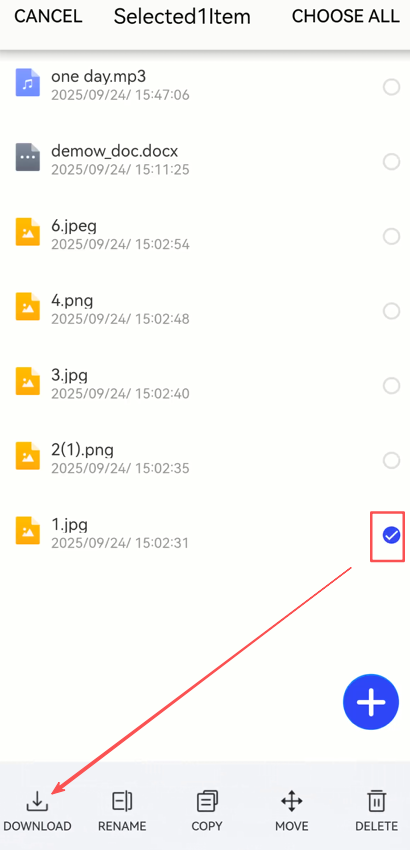
- Choose the destination folder in My Space (only My Space is allowed).
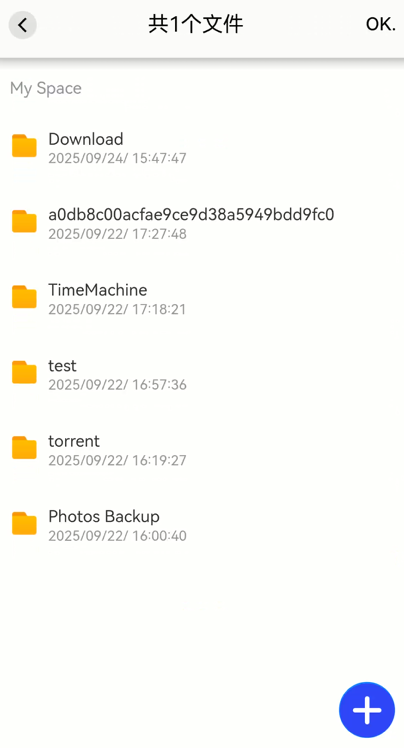
- Confirm to start download.
File Operations in Cloud Drive
After selecting files/folders, the operations menu allows you to:
-
Download: Save cloud drive files to DASSET (multi-select supported).
-
Move: Relocate files to another folder within the cloud drive.
-
Copy: Duplicate files to another folder within the cloud drive.
-
Delete: Remove one or more files.
-
Rename: Change file or folder names.
-
+ Button: Upload files from DASSET or create new folders in the cloud drive.
Transfer List
Monitor upload and download tasks under the Transfer List.
-
Uploads to Cloud Drive:
-
Pause, start, or cancel multiple tasks.
-
Clear all completed tasks.
-
View failed uploads.
-
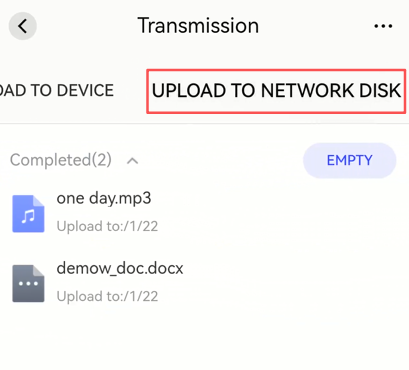
-
Downloads to Device:
-
Pause, start, or cancel multiple tasks.
-
View or clear single or all completed tasks.
-
View failed downloads.
-

My Vault
The My Vault is a secure area within the DASSET edge device. Files stored here are protected with strong encryption. Without entering the correct password, the My Vault cannot be accessed from the DASSET client.
Creating a My Vault
When using the My Vault for the first time, you must set a password and a security question.
- Create a Password: Set a password to unlock the My Vault. It must be 6--20 characters long, containing only numbers or letters.
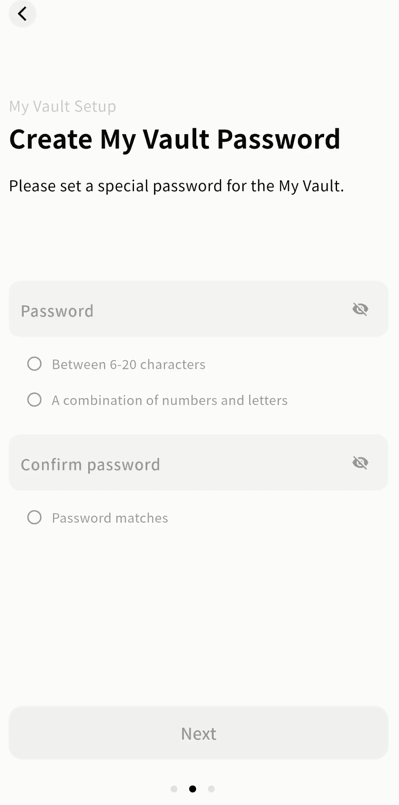
- Set a Security Question: Create a question to help recover your My Vault password.
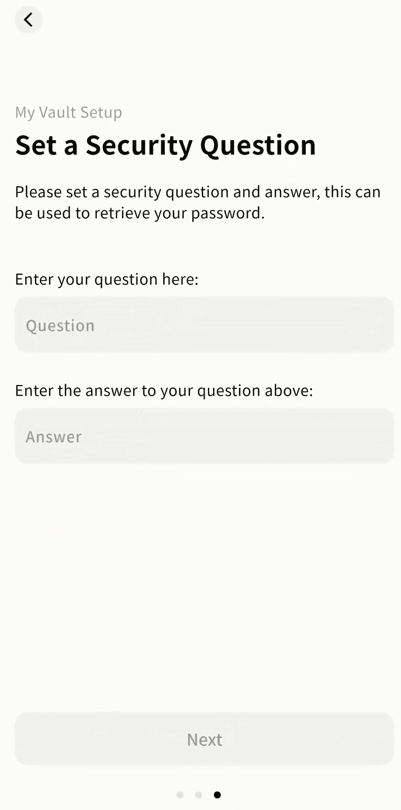
- After setup, log in to the My Vault and you will be prompted to enter your password.
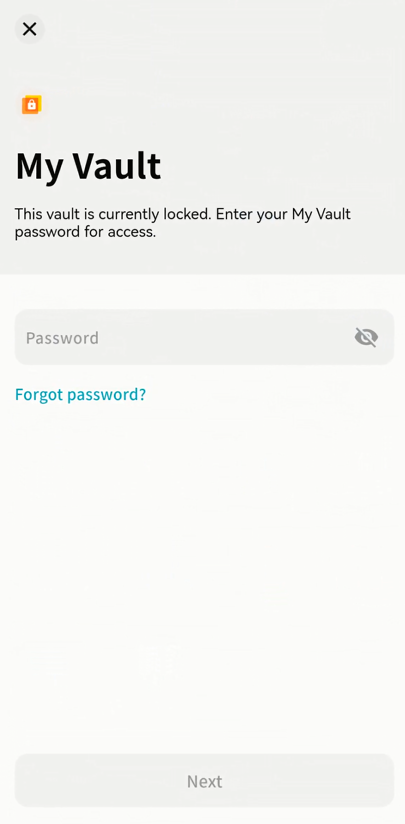
My Vault Operations
Within the My Vault, you can manage files just like in other areas of DASSET.
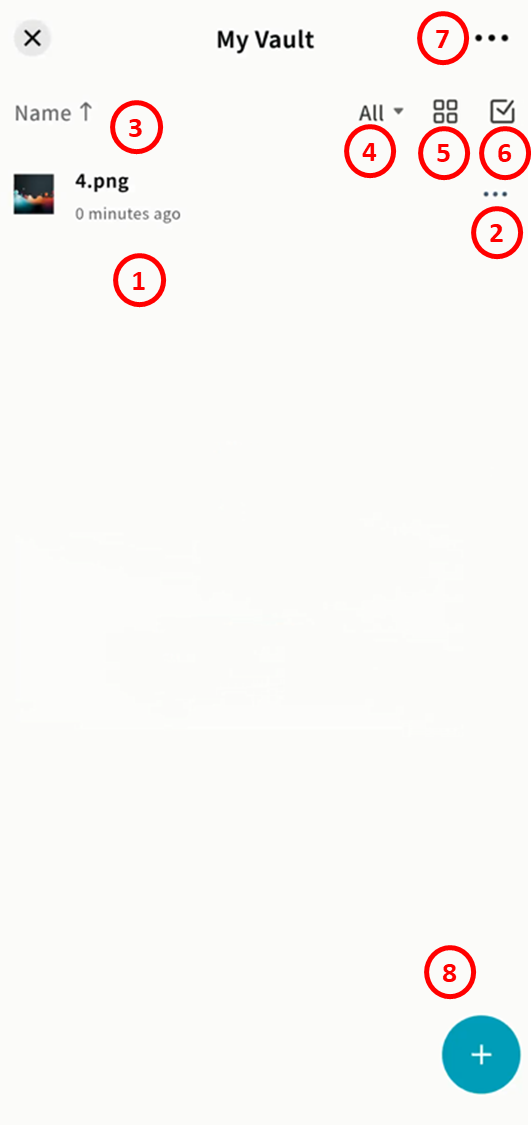
-
File List: Displays all stored files.
-
File Operations: Access the file menu to move, copy, download, delete, rename, hide, or view file details.
-
Sorting Options: Sort by name, modification time, or file size.
-
File Type Filter: Quickly filter files by type (images, videos, audio, documents, compressed files).
-
View Modes: Switch between list view and grid view.
-
File Selection: Toggle between single and multiple selection.
-
My Vault Settings:
-
Unlock Settings: Configure lock rules (auto-lock after exiting, or stay unlocked until next login).
-
Change Password: Update the My Vault access password.
-
Task List: View upload and download task progress.
-
Change Security Question: Update the recovery question.
-
Reset My Vault: Requires verification of your DASSET account. All data will be erased after reset.
-
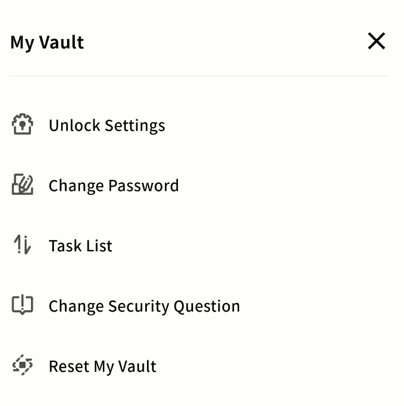
-
Add (+): Upload or create new content.
-
Upload photos and videos from your mobile device's gallery
-
Upload other files from your device (requires OS permission)
-
File from Device: Move files from DASSET device storage into the My Vault
-
Create folder
-
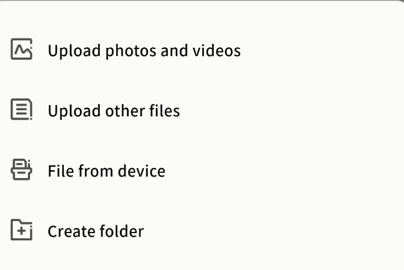
Note: Files deleted in the My Vault are permanently erased and do not go to the Recycle Bin.
My Vault Settings
From the My Vault settings page, you can configure:
- Unlock Settings: Modify locking rules (auto-lock after exiting or remain unlocked until re-login).
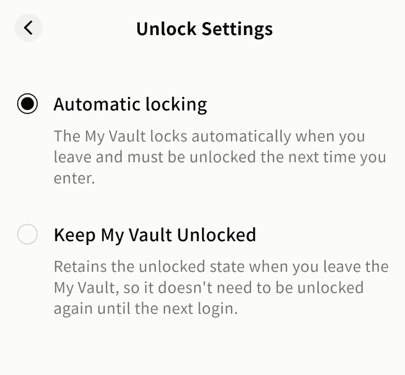
-
Change Password: Update the My Vault password.
-
Task List: Monitor upload/download tasks.
-
Upload tasks with progress and history
-
Download tasks with progress and history
-
Other tasks such as move/copy with progress and history
-
-
Change Security Question: Update the security question.
-
Reset My Vault: Requires verification of your DASSET account. All data will be permanently erased after reset.
Password Recovery
If you forget the My Vault password, you can use the Forgot Password option on the login page.
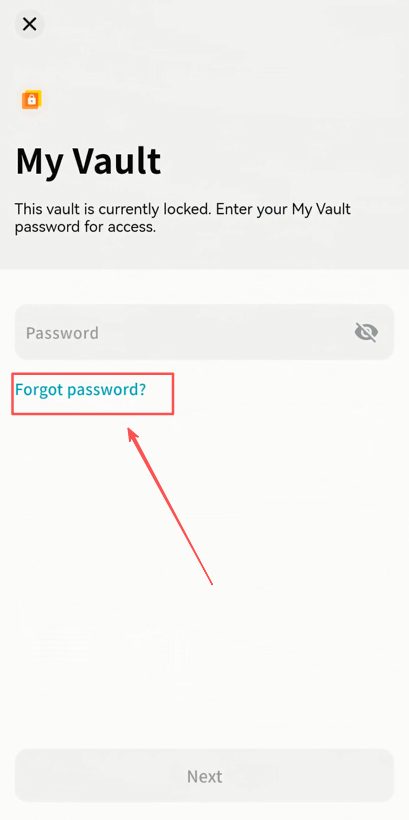
-
Enter the correct answer to your security question to reset the password.
-
Your stored data will not be affected.
Note: The password is stored on the DASSET device. If you forget both the password and the security question, the My Vault data cannot be recovered. Keep your credentials safe.
Container Tool
Using Docker containers, you can run third-party applications on the DASSET edge device to expand its functionality.
-
On first use, go to the Container Tool interface and click Install.
-
On mobile, you can only start or stop the container service.
-
For advanced configuration, use the DASSET desktop client.
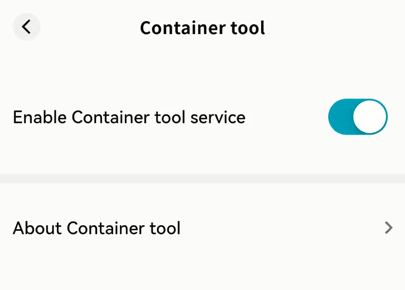
Online Document Editing
DASSET supports third-party online document editing tools to view and edit files stored on the device.
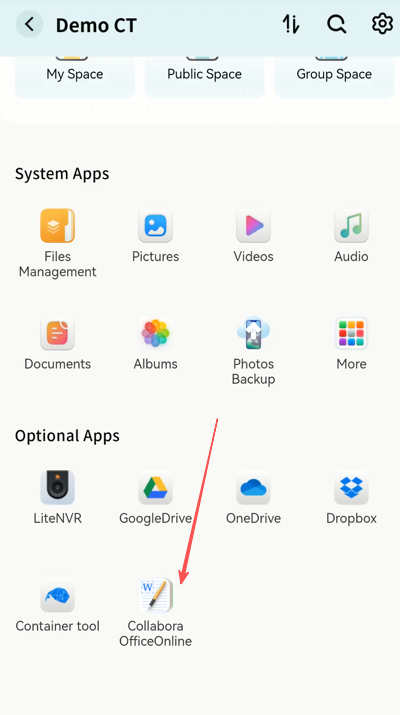
Supported formats include Microsoft Office (DOC, DOCX, XLS, XLSX, PPT, PPTX, Visio, MS Publisher), OpenDocument (ODT, ODS, ODP), and PDF.
Installing the Online Editing Tool
-
Go to Third-party Apps Collabora Office Online.
-
Click Install.
-
Wait for installation to complete. You can also manage the tool via the ... menu (disable or uninstall).
-
Once installed, you can select documents on the DASSET device for online viewing and editing.
Note: Viewing and editing take place on the DASSET device, not on your terminal.
Document Preview and Editing
- Select a document stored on the DASSET device and click Online Editing.
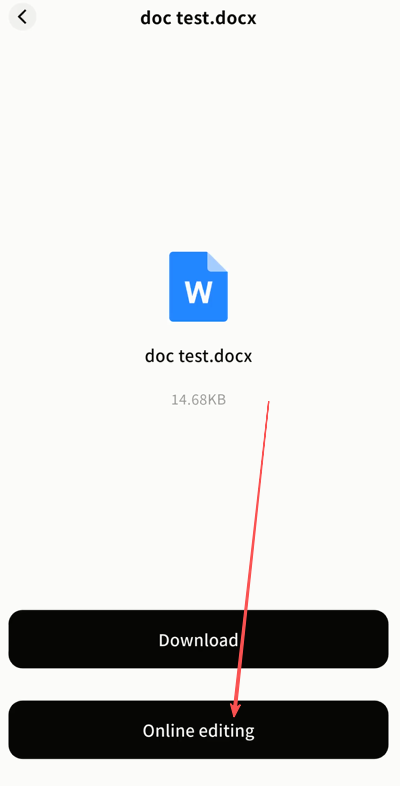
- The tool will open the document in preview mode.
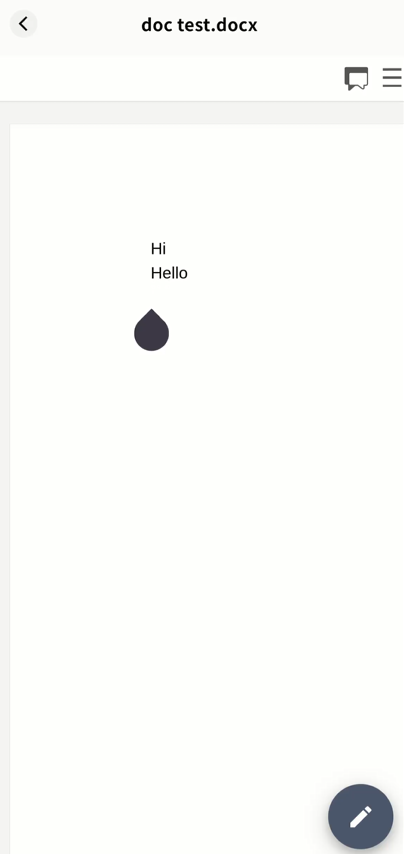
- Click the edit button to start editing.
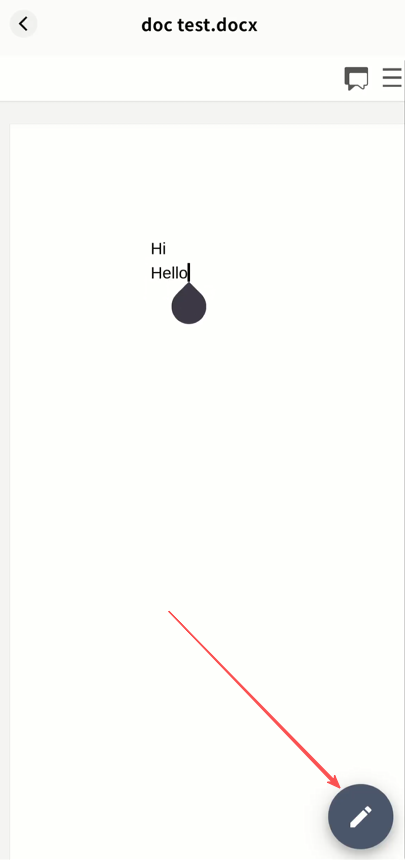
Note: All edits are stored on the DASSET device. For more details, check the tool's help documentation.
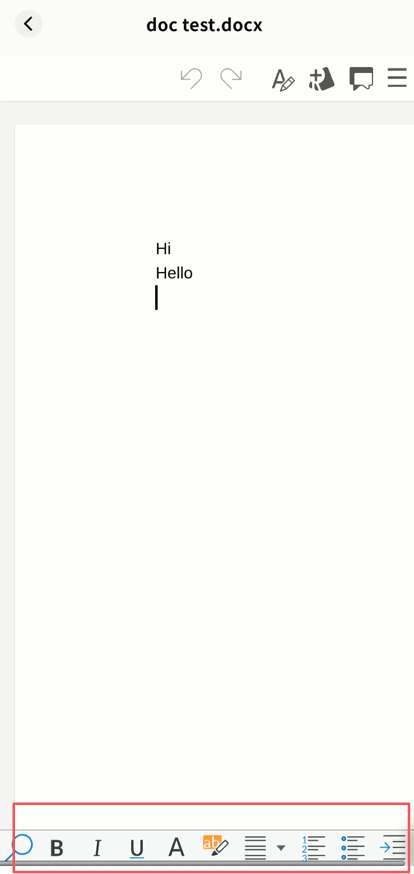
App Store
The App Store lists all Third-party apps supported by your DASSET device. You can install apps as needed.
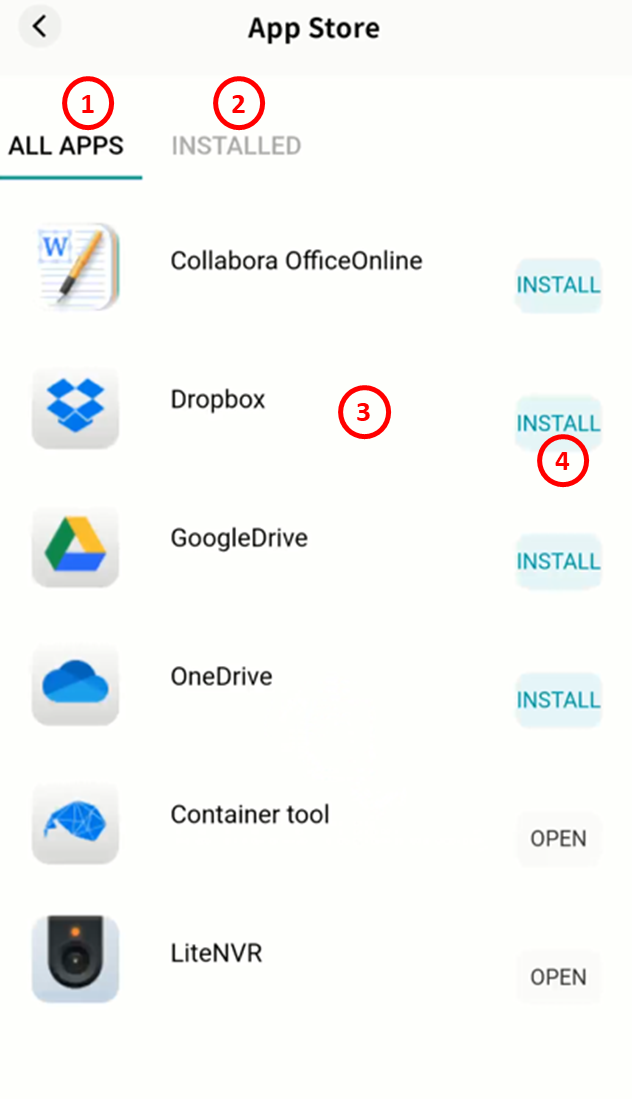
-
All Apps: Displays all available apps.
-
Installed: Displays apps already installed.
-
App List: Shows icons and names of apps.
-
Install/Open:
-
Click Install to add an app.
-
Click Open to launch an installed app.
-
Clicking an app icon shows its description, and allows you to open, stop, or uninstall it.
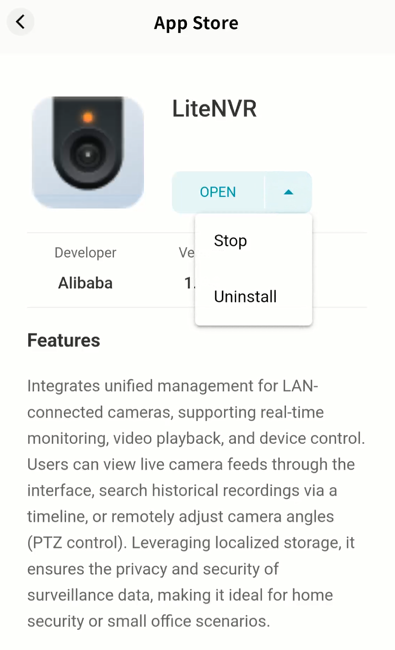
In Installed, you can manage all apps currently on the device.
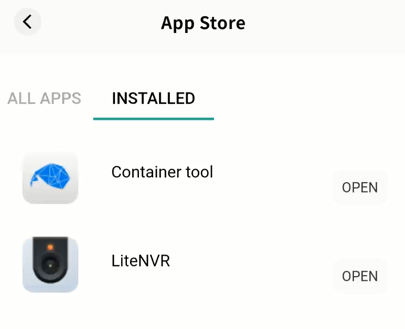
Note
Note Overview
Tap the Note button to enter your personal notes page:
-
Note Settings: By default, notes are stored on your mobile device. You can choose to sync them with your DASSET edge device.
-
Search: Search notes using keywords.
-
Notebooks: View notebook names and note counts. Tap to open.
-
Notebook Settings: Delete or rename a notebook.
-
Trash: Deleted notes and notebooks are temporarily stored here.
-
Add Notebook: Create a new notebook.
Note: Notes support direct pasting of Markdown content while preserving formatting.
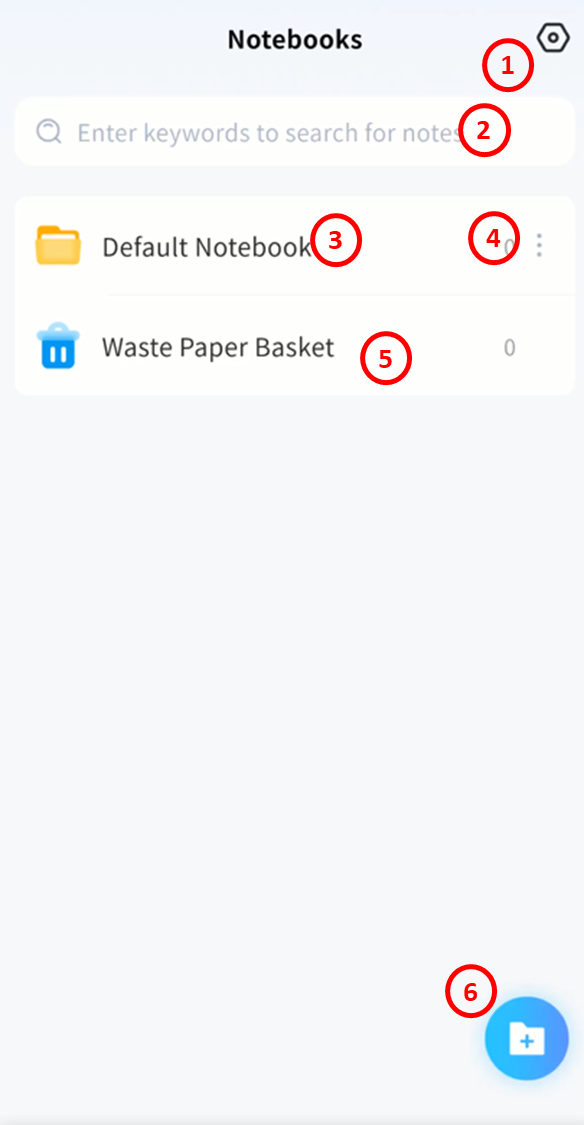
Note Settings
When sync is enabled, all notes remain consistent across your mobile device and DASSET edge device.
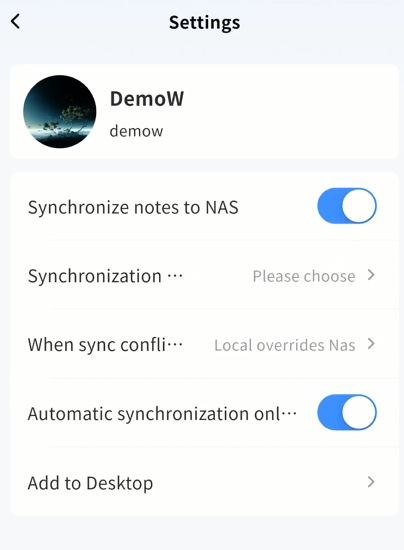
- Synchronize notes to NAS: When enabled, notes created on your mobile device sync with the chosen DASSET device.
Synchronization Object: Select the device to sync notes with.
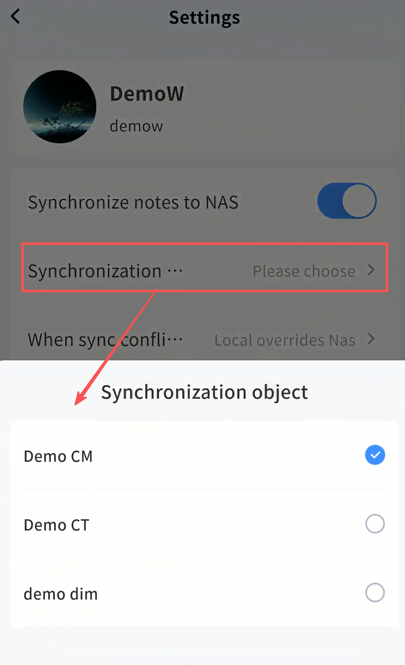
When sync conficts occur: Define how conflicts are handled when notes differ between devices.
-
Local Overrides NAS: Upload notes from your mobile device to overwrite notes on the DASSET device.
-
NAS device Overrides Local: Download notes from the DASSET device to overwrite local notes.
Recommendation: If only you use the account and you don't edit notes across multiple devices simultaneously, choose Local Overwrites NAS.
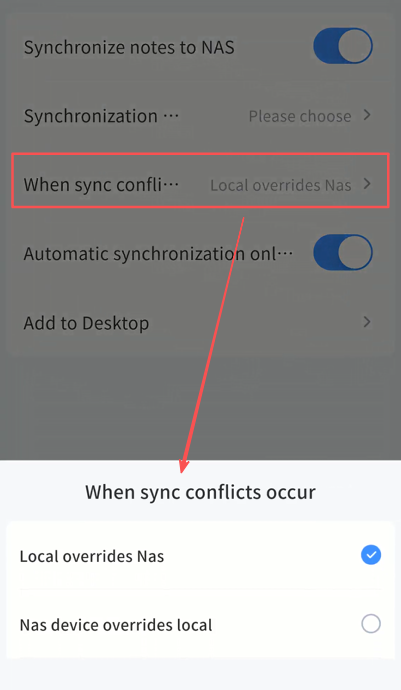
-
Sync Only on Wi-Fi: Sync runs only when connected to Wi-Fi.
-
Add to Desktop: Add a shortcut icon to your home screen for quick access.
Notebook Management
You can create multiple notebooks to organize your content.
-
Create a Notebook
- Go to the Notes app and tap +.
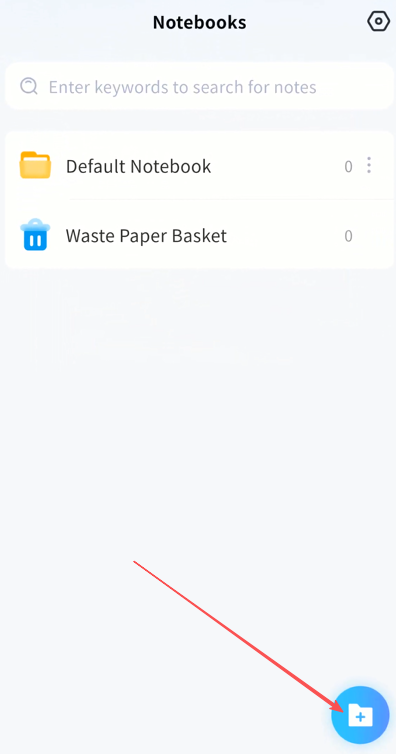
- Enter a name and tap Confirm.
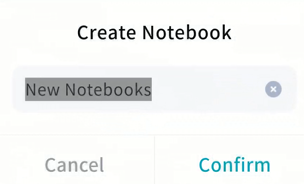
- The new notebook will appear in the list.
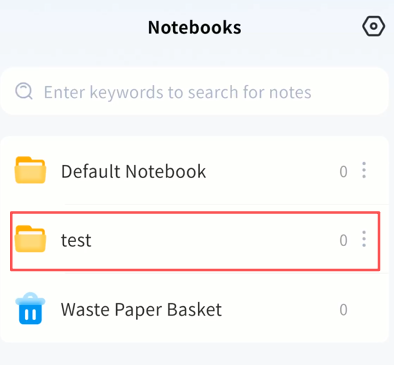
-
Rename: Tap the notebook menu Rename.
-
Delete: Tap the notebook menu Delete.
Note: Deleting a notebook also deletes all its notes. Restoring a note from Trash also restores its notebook.
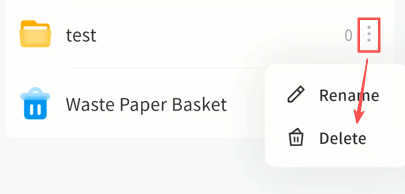
Note Management
When you enter a notebook, all its notes are displayed.
Note Status
If sync is enabled, each note shows its sync status:
-
Waiting to sync
-
Sync complete
-
Sync in progress
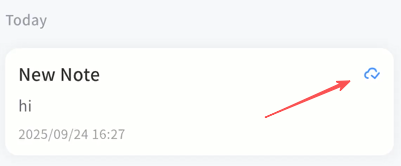
Create a Note
Tap + to create a new note.
Note Editing
In the editing screen, you can:
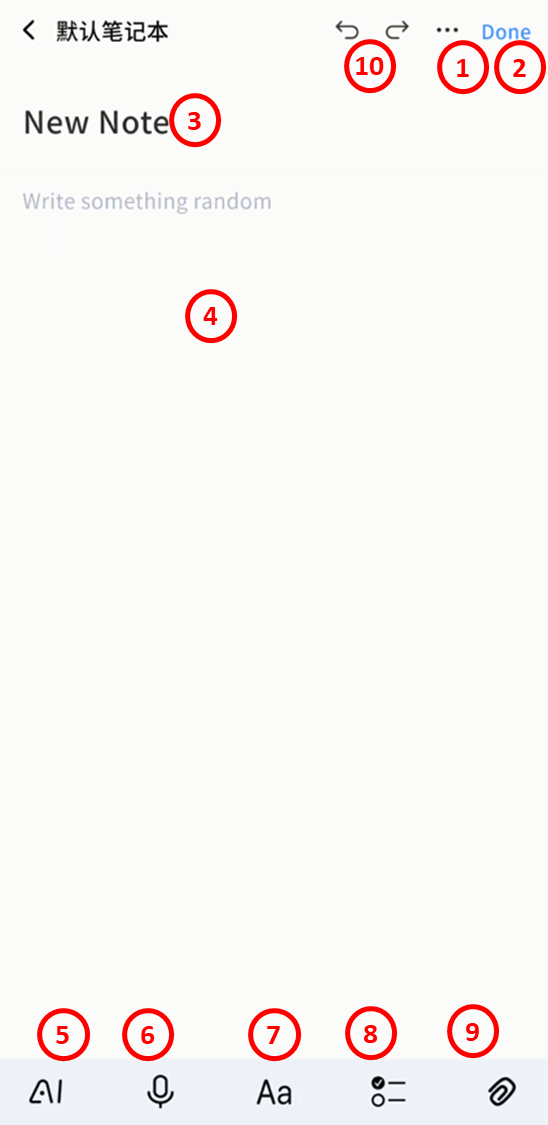
- Note Options: Move to another notebook, pin, or remove.
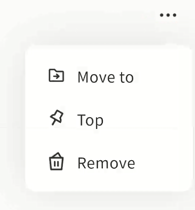
-
Done: Tap Done or simply go back to save automatically.
-
Title: Add a note title.
-
Body: Write the main content.
-
AI Agent Tools: Translate, summarize, create blog drafts, organize to-dos, and image interpretation.
-
Recording: Record audio to embed in the note.
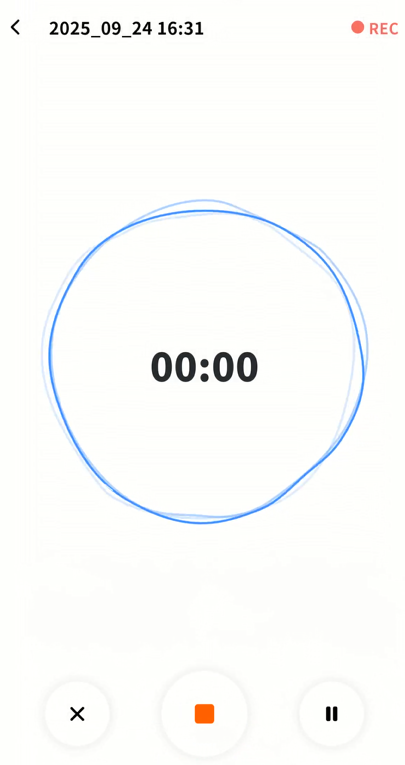
-
Exit: Discard recording.
-
Save: Store the recording in the note.
-
Pause/Resume: Control recording.
Note: First-time use requires microphone permission.
-
Formatting: Rich text and basic formatting supported.
-
Headings (H1/H2/H3), body text
-
Bold, italic, underline, strikethrough
-
Lists and alignment options
-
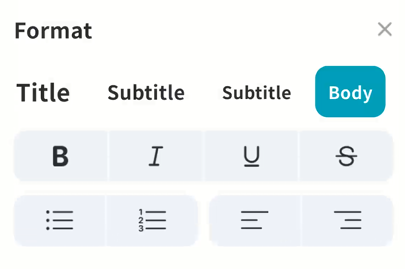
-
To-Do Items: Insert tasks with completion checkboxes.
-
Insert Media:
-
Insert photo from device
-
Take photo or video directly
-
Insert video/audio from device
-
Supported formats:
-
Audio: mp3, wma, flac, wav, aac, ape, m4a, ogg
-
Images: gif, jpg, png, jpeg
-
Video: avi, flv, mov, mkv, mp4, wmv
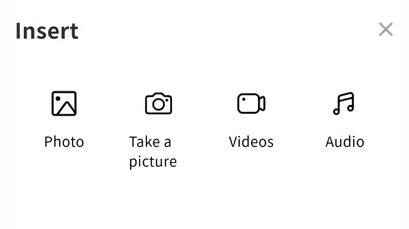
- Undo/Redo: Cancel the current edit, or restore what was just undone (only available if no further actions have been taken after the undo).
Quick Edit
Long-press selected text to: Cut, Copy, Paste, or Select All.
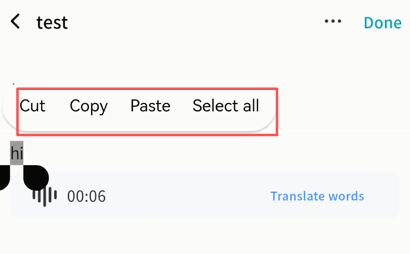
Notebook Settings
Inside a notebook, tap ... to:
-
Change view (grid or list).
-
Sort notes by modification time, creation time, or title.
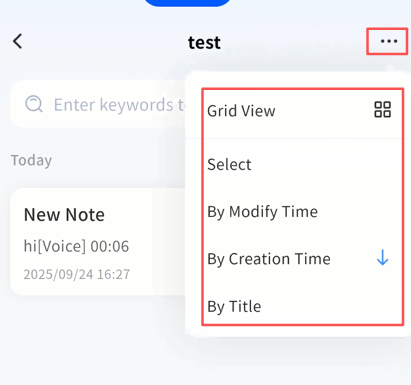
Note Management in List View
Long-press a note to perform batch actions:
-
Move to another notebook
-
Pin in current notebook
-
Copy to another notebook
-
Delete
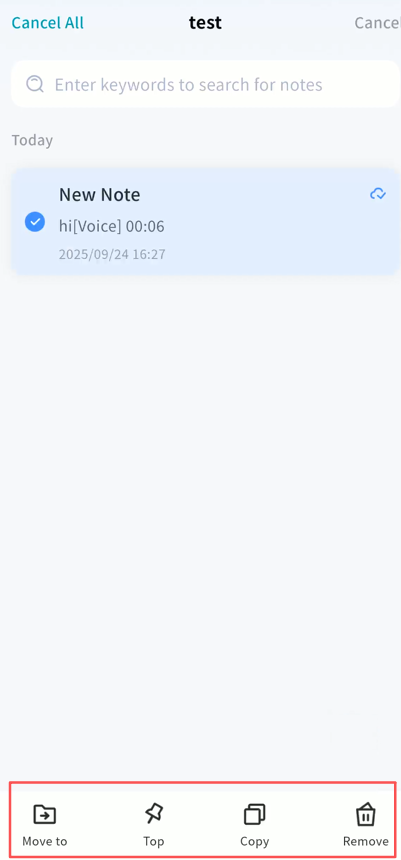
AI Agent for Notes
The Notes app includes multiple AI Agent features that you can use anytime to improve efficiency.
Image Analysis
In a note, you can use Image Analysis to let AI generate a description of an image.
- Long-press the image and select Image Analysis.
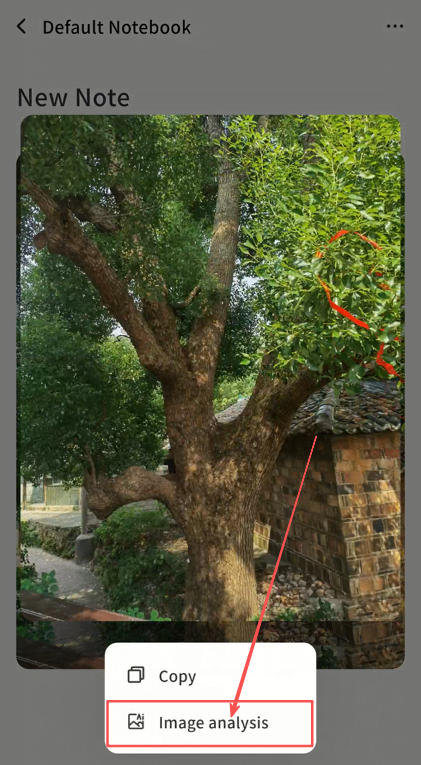
-
The DASSET AI Agent will analyze the image. Please wait for processing.
-
When complete, the AI Agent generates descriptive text. You can:
-
Save as Note: Store the description in a new note.
-
Insert Text: Add the description into the current note.
-
Try Again: Generate a new description if unsatisfied.
-
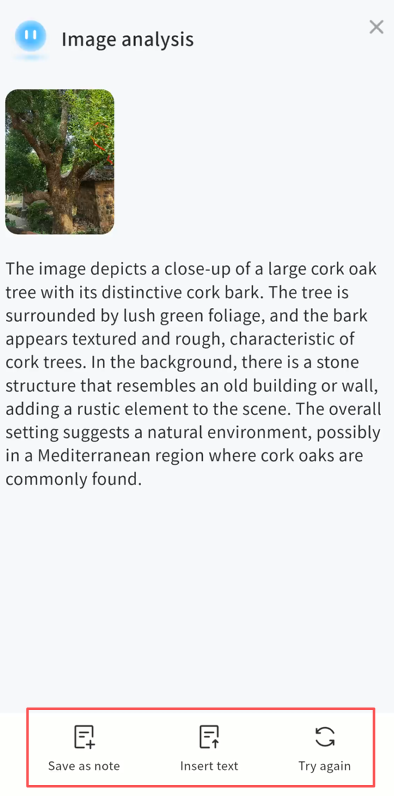
Text Translation
Use Text Translation to translate selected text into other languages. Supported target languages: Chinese, English, Japanese.
- Select text, then tap AI Translation Target Language.
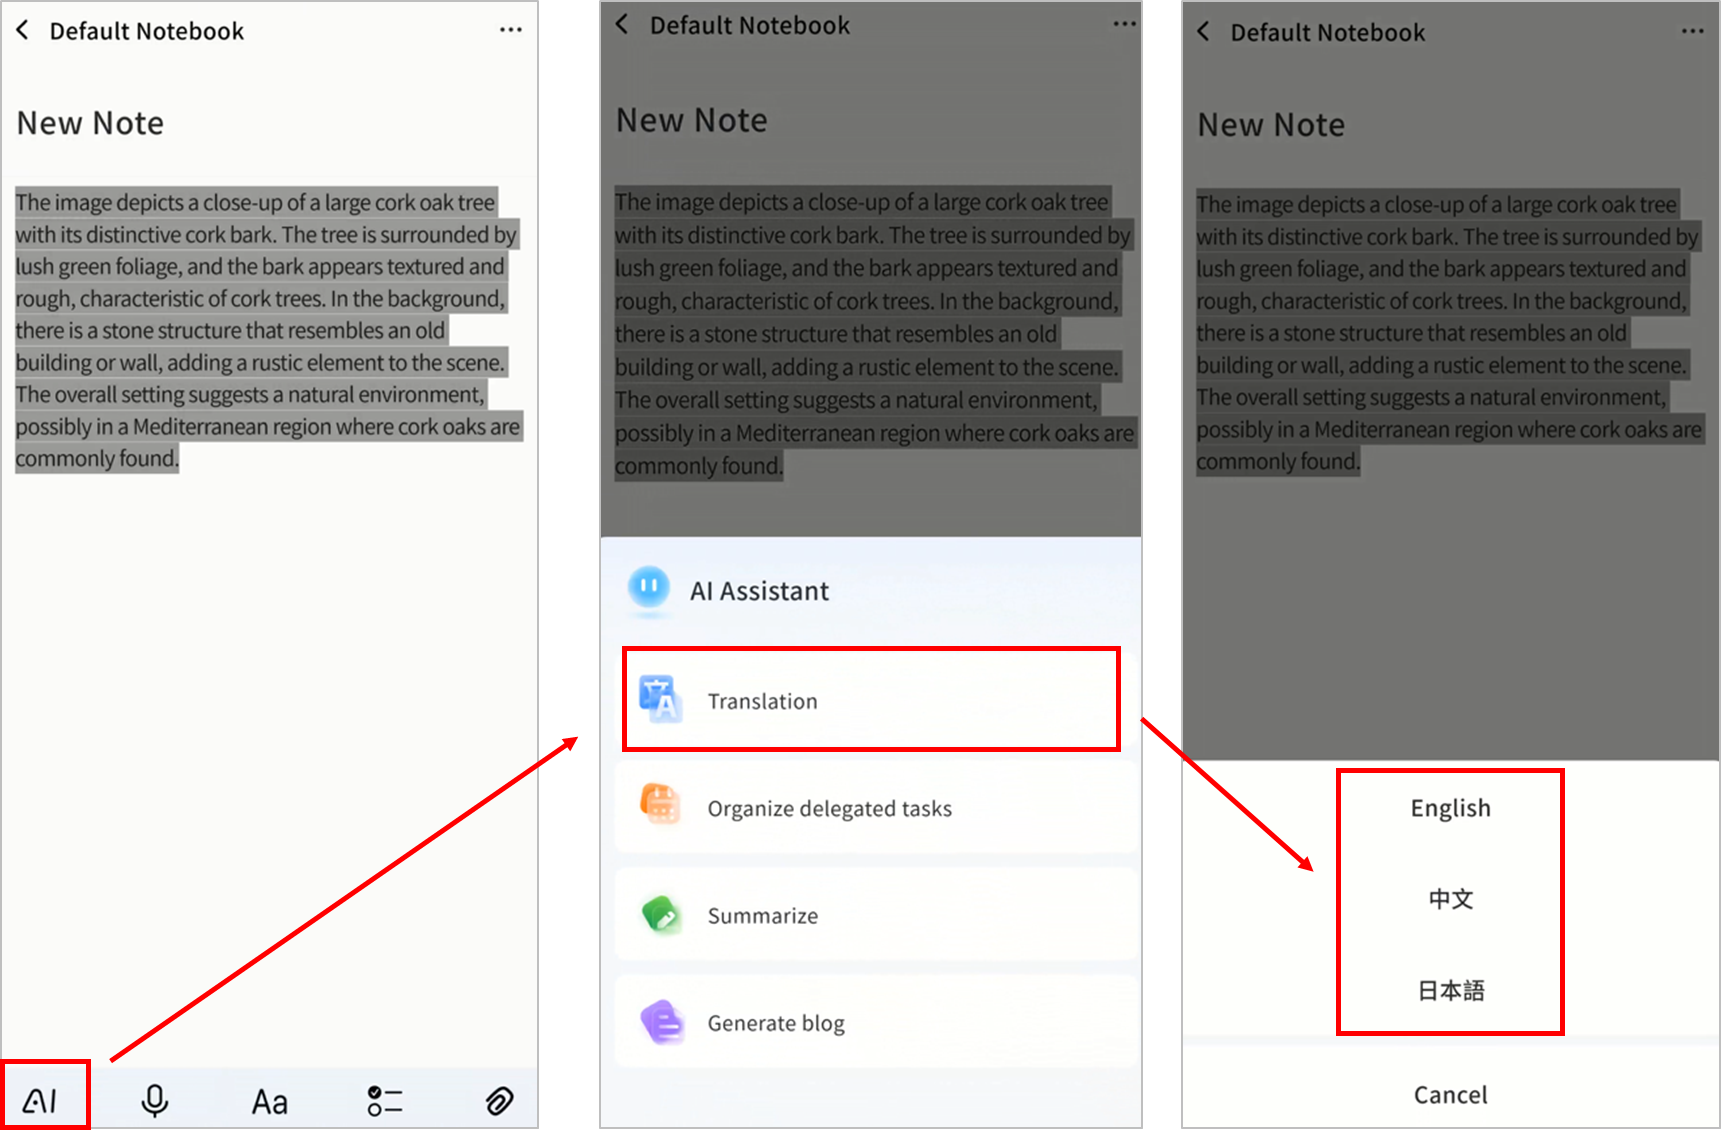
-
The DASSET AI Agent will translate the text.
-
After completion, you can:
-
Save as Note
-
Insert Text into the current note
-
Try Again to generate a new translation
-
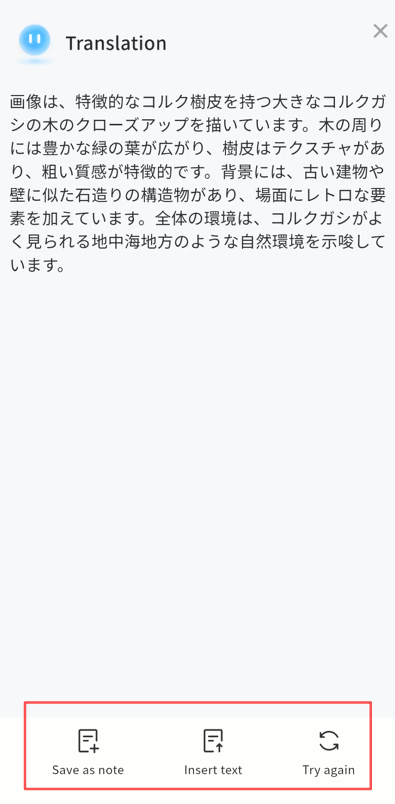
To-Do Organization
You can convert selected text into structured to-do items.
- Select text, then tap AI Organize delegated tasks.
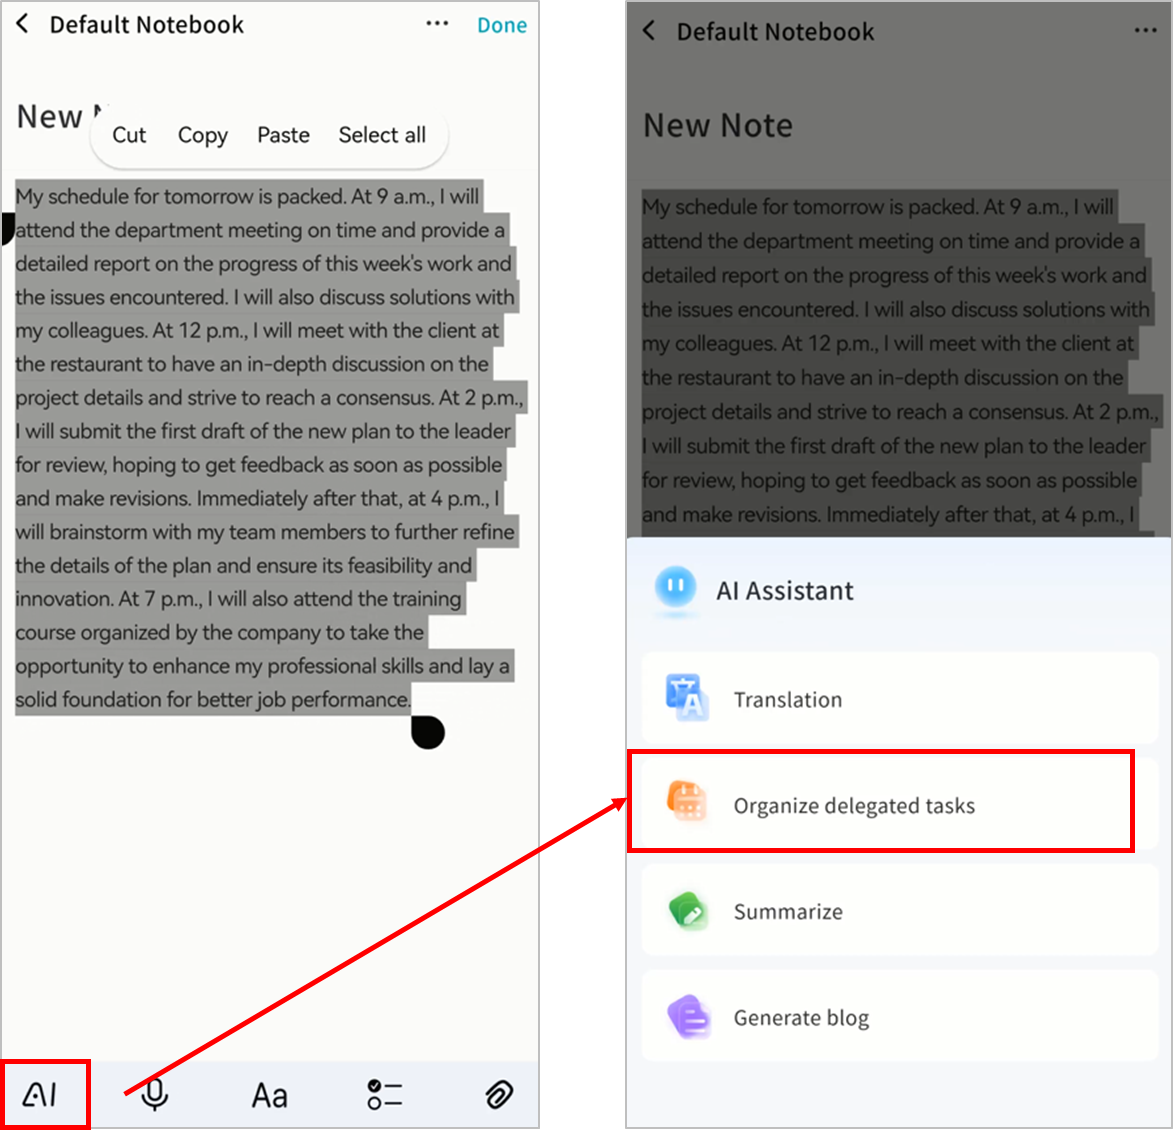
-
The DASSET AI Agent will process the text and create a to-do list.
-
After completion, you can:
-
Save as Note
-
Insert Text into the current note
-
Try Again for new results
-
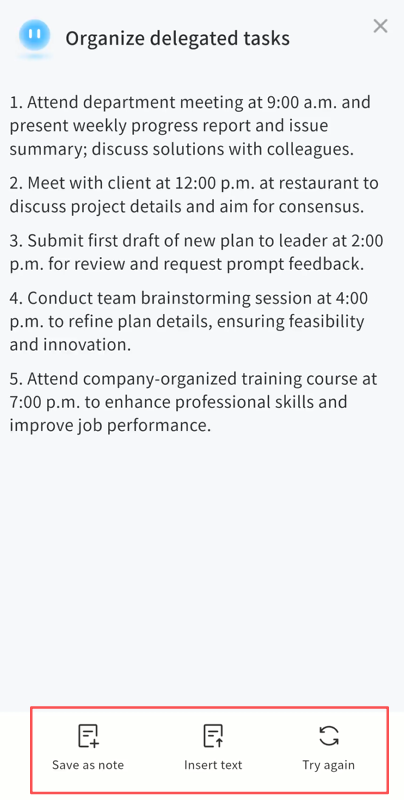
Summarization
Use Summarization to condense selected text into a concise summary.
- Select text, then tap AI Summarize.
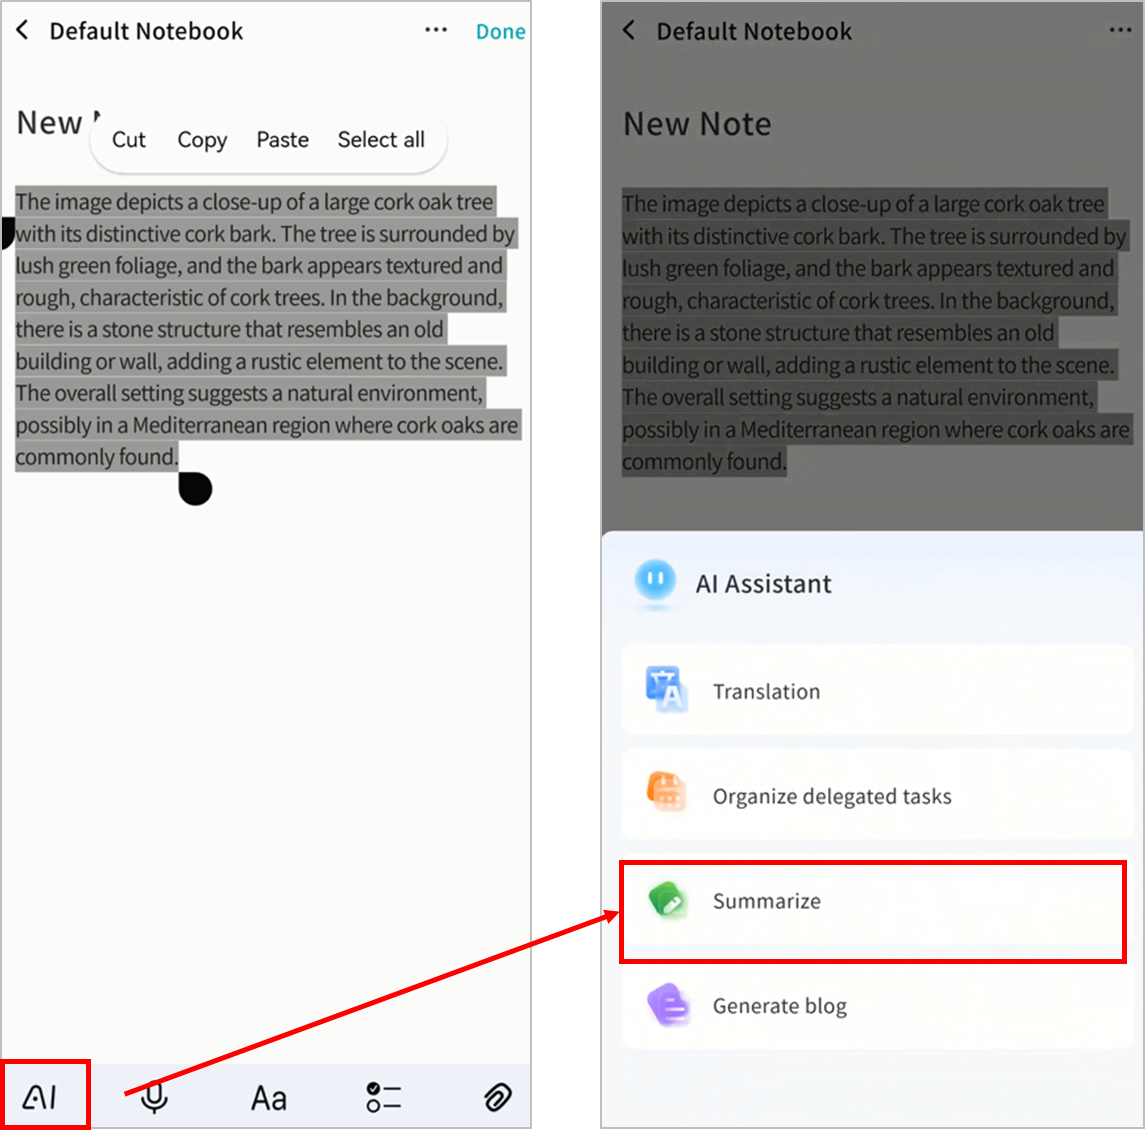
-
The DASSET AI Agent will analyze and generate a summary.
-
After completion, you can:
-
Save as Note
-
Insert Text into the current note
-
Try Again for a new summary
-
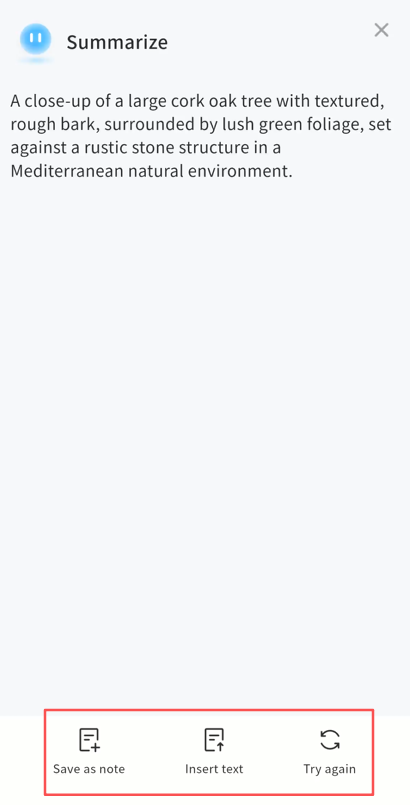
Blog Generation
Use Blog Generation to create social-media-ready drafts from selected text.
- Select text, then tap AI Generate Blog.
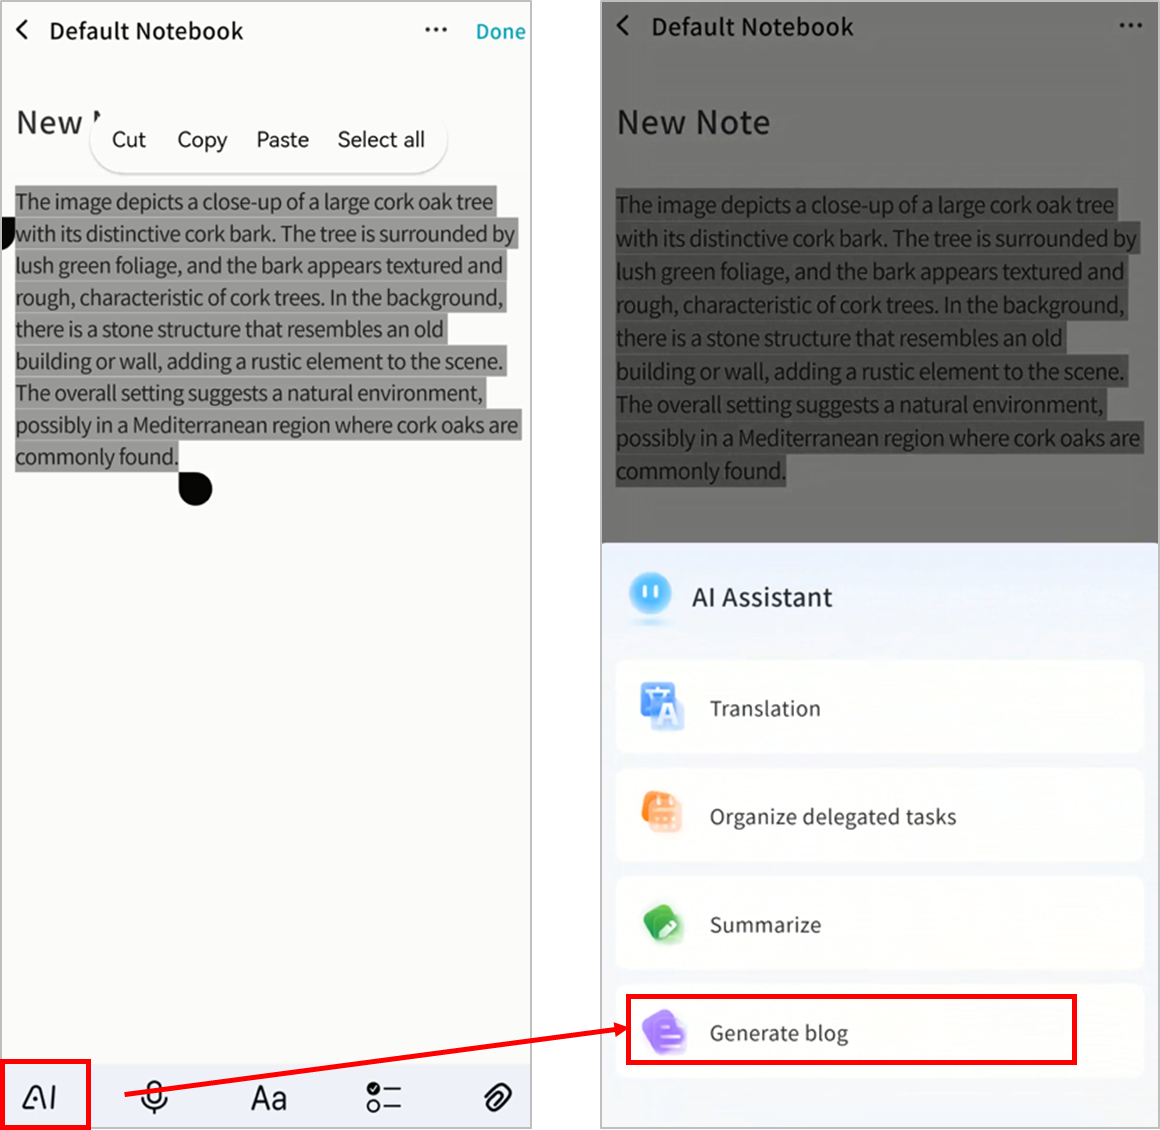
-
The DASSET AI Agent will process the text.
-
After completion, you can:
-
Save as Note
-
Insert Text into the current note
-
Try Again to regenerate the draft
-
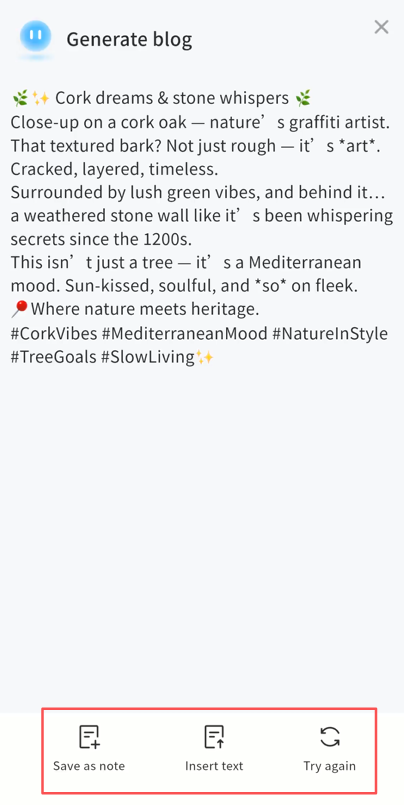
Speech Recognition
Use Speech Recognition to convert audio into text.
Note: The AI Agent can identify different speakers by tone of voice. Accuracy may vary depending on audio quality.
- Tap Translate words on an audio file.
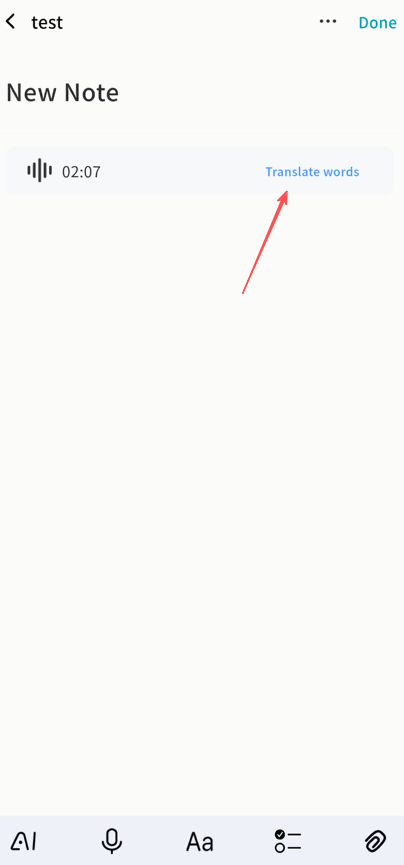
-
The DASSET AI Agent will process the audio for speakers and content.
-
After completion, you can:
-
Save as Note
-
Insert Text into the current note
-
Try Again for a new transcription
-
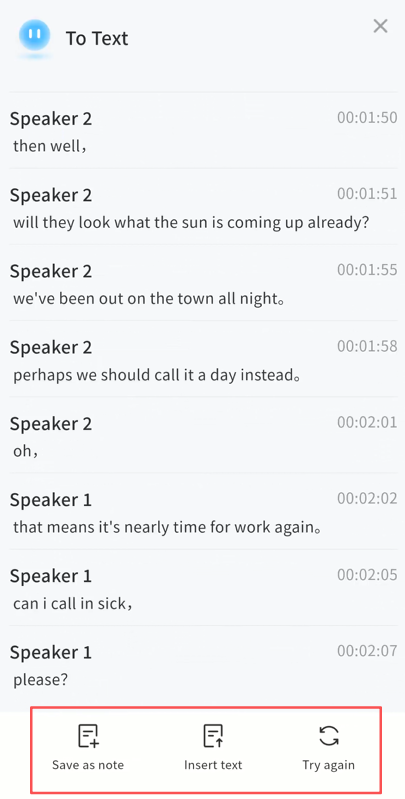
Example Use Case: Meeting Minutes
By combining different AI Agent features in Notes, you can handle various scenarios efficiently. One example is creating meeting minutes:
-
Insert the meeting audio file into a note.
-
Select Translate Words to transcribe the audio.
- Insert the transcription into the note.
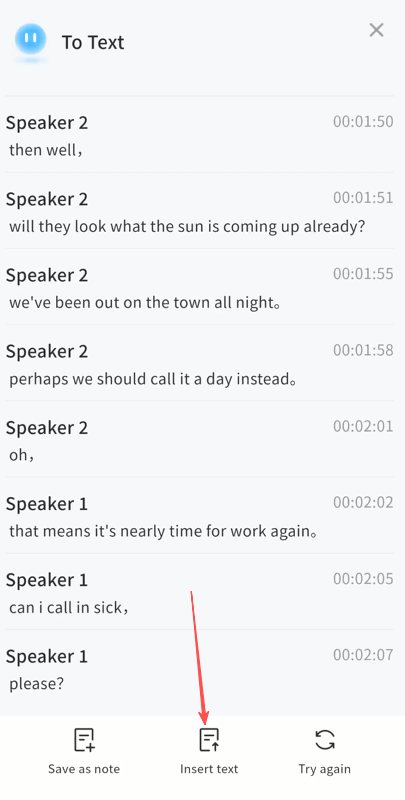
- Select the transcribed text and click Summarize.
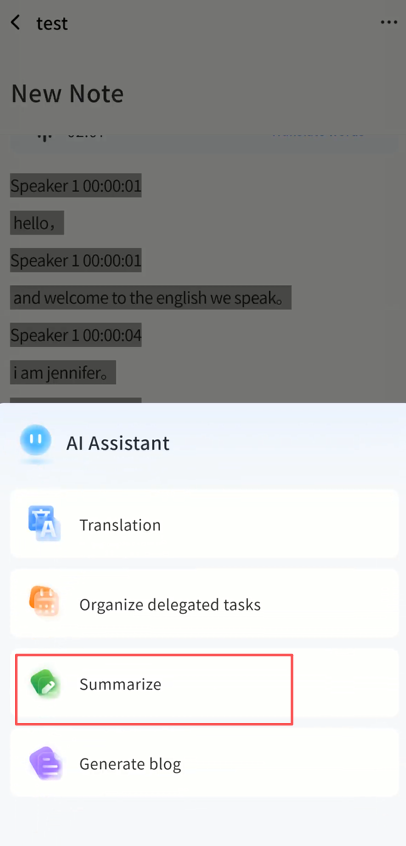
- The AI Agent will generate a meeting summary. You can save this summary as a note or request the Agent to regenerate it.
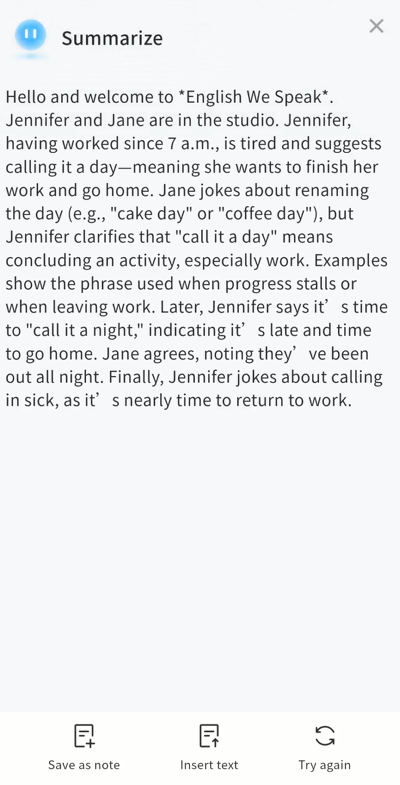
Search
Enter keywords in the search bar to find notes.
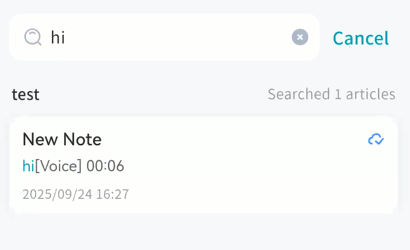
Waste Paper Basket
Deleted notes are stored in Waste Paper Basket .
Options:
-
Batch Edit: Select multiple notes for permanent deletion or restore.
-
Search: Search notes within Trash by keyword.
-
Note List: View deleted notes with details.
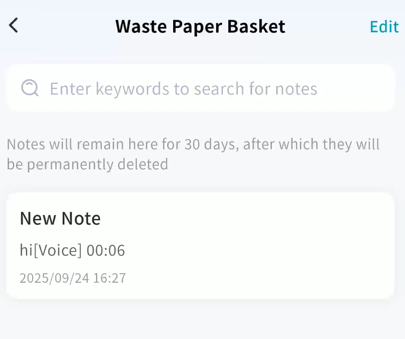
Batch Edit
-
Select All or batch select.
-
Permanently delete or restore selected notes.
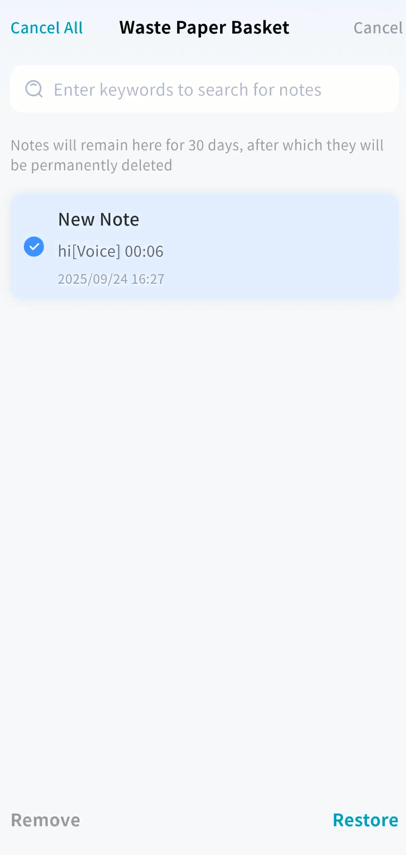
Single Note Restore/Delete
Open a note in Trash ... menu:
-
Restore: Return note to its original notebook.
-
Delete: Permanently delete the note.
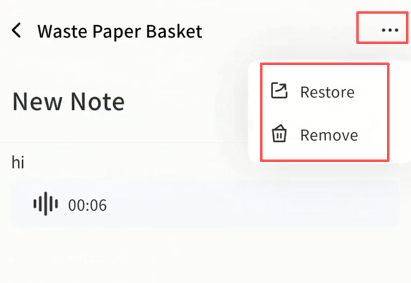
Instant Messaging (IM)
DASSET IM is a private chat tool running on the DASSET edge device. It ensures fully private instant messaging, with all chat data stored locally on the device and transmitted securely with encryption.
Supported features include:
-
Quote: Reply by quoting a message.
-
Copy: Copy the content of a message.
-
Delete: The sender can delete a message. Deleted messages are also removed from the recipient's history.
-
Media Preview: Preview images, play videos, and listen to audio shared in chat.
-
Document Preview and Editing: View and edit documents directly in chat.
-
Save Files: Save received files to your local device.
-
Message Status: View whether a message has been Read or Delivered.
-
AI Agent Features: Translate, summarize, generate reply suggestions, and transcribe voice messages.
-
Send Files: Share files stored on the DASSET device directly in chat.
Selecting a Chat Server
When using IM for the first time, you must select a DASSET device as your chat server.
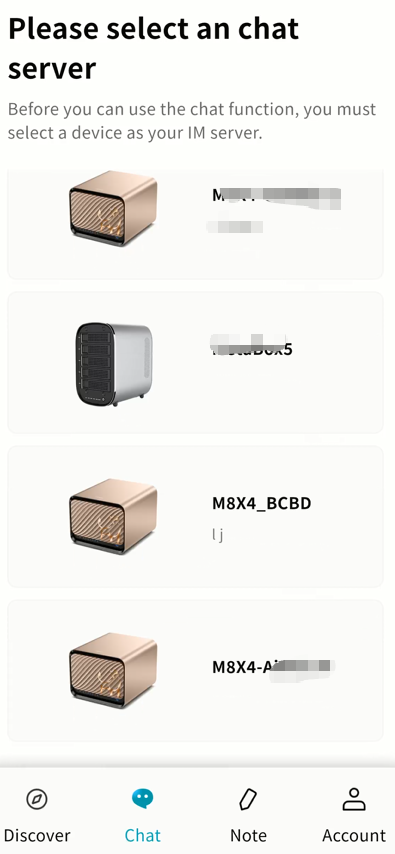
-
Each chat server runs on one DASSET device. All bound users on that device can chat with each other.
-
DASSET does not automatically create accounts for all bound users to protect privacy. To chat, users must connect to the same server.
-
Each server is independent, like having your own private WeChat server at home/office. Cross-server chat is not supported.
-
If a device does not support IM, you will see This device does not support chat services in red. This may be due to outdated firmware or insufficient hardware performance.
-
An account can connect to multiple servers, but only one server at a time. You can switch servers anytime to view other messages.
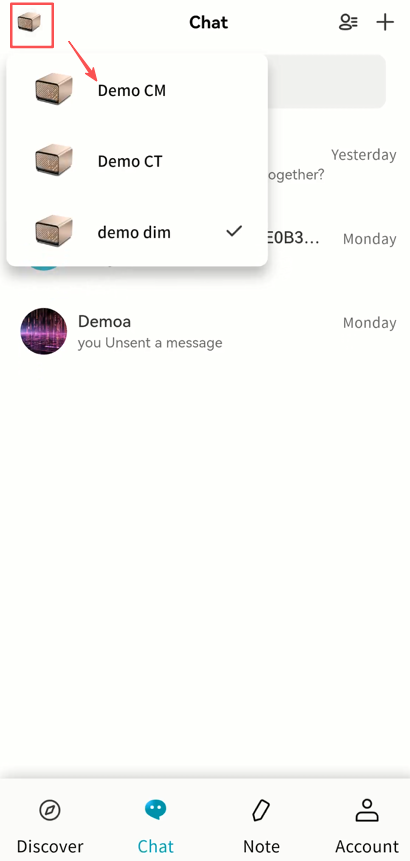
Chat Interface Overview
After selecting a server, you enter the chat interface:
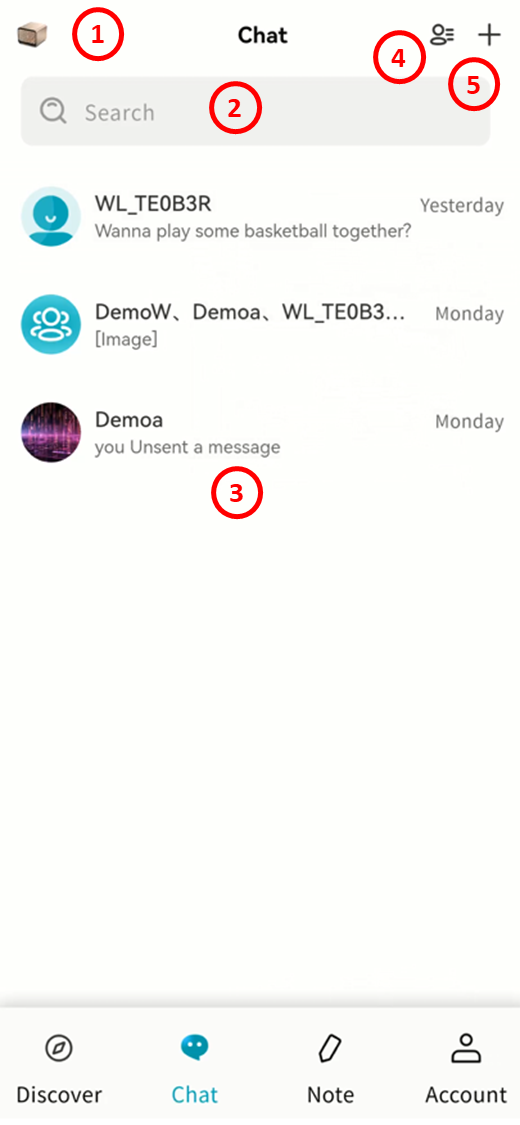
-
Switch Server: Switch between multiple servers to communicate with different user groups.
-
Search: Search contacts you've chatted with.
-
Conversation List: View all conversations. Long-press a chat to Top, Do Not Disturb, or Delete.

-
Contacts: View all users on the current chat server.
-
+ Button: Start a new chat with connected users, or invite others to the server (owner only).
Contact List
View all user accounts connected to the chat server.
-
Search: Find specific contacts.
-
Contact List: View all connected users.
-
New Conversation: Start a chat.
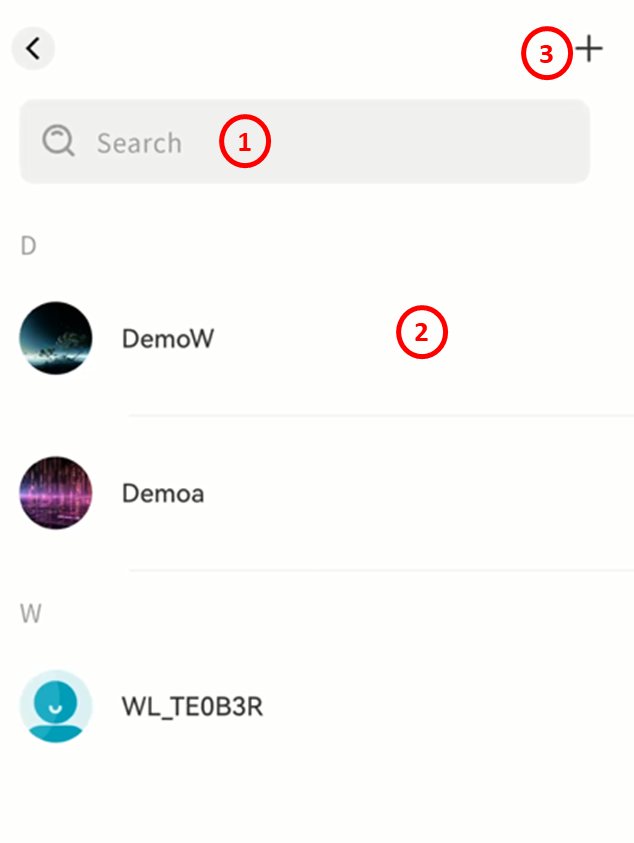
Click a contact to view details:
-
Profile picture and nickname
-
Add remarks for easier identification
-
Send message
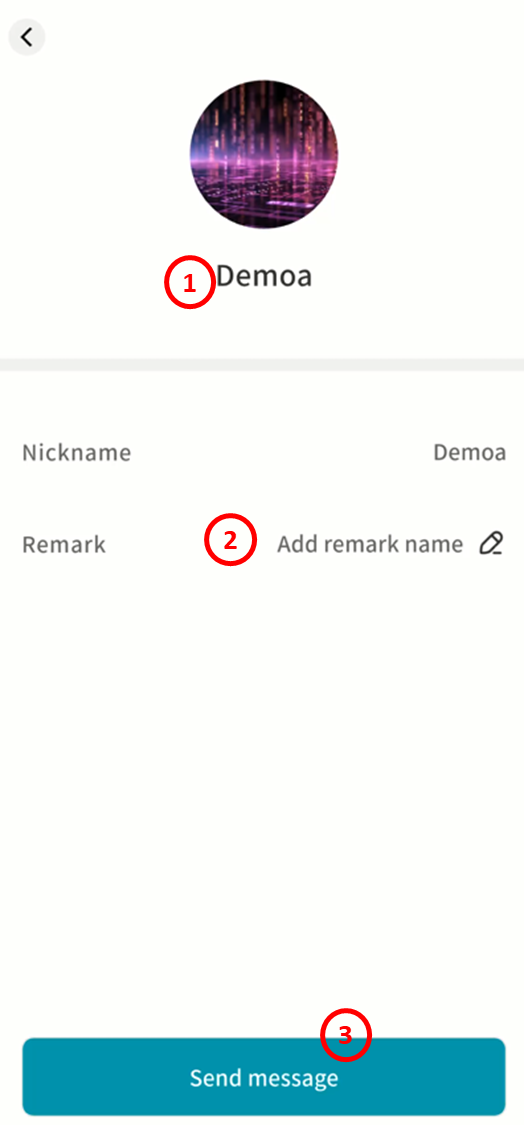
Switching Chat Servers
-
Only one server can be active at a time.
-
The current server is marked with a check (√).
-
The list shows only bound DASSET devices that support IM.
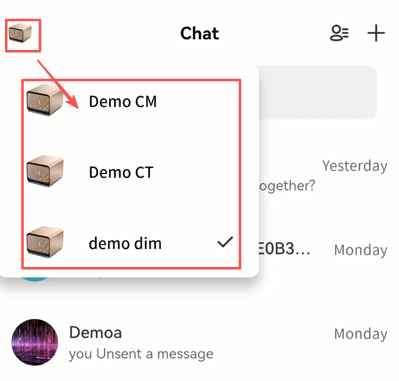
New Message Notifications
New messages are indicated by:
-
A red dot on the client's chat icon.
-
A red dot on the contact's avatar in chat.
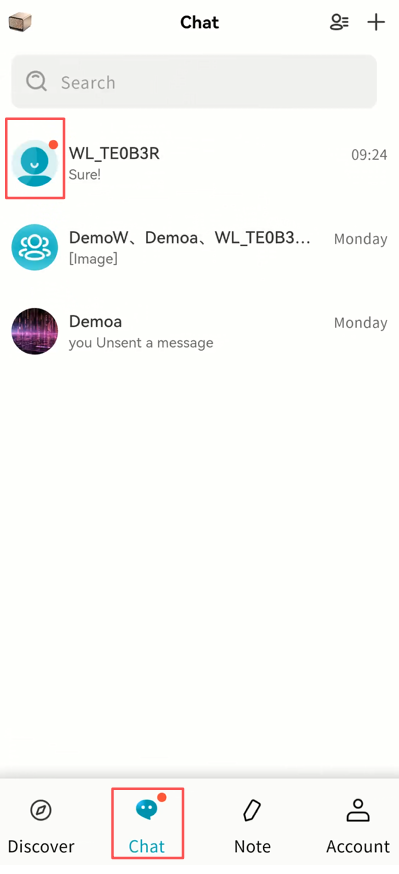
Chat Window
The chat window is designed for both one-on-one and group chats, with a familiar interface:
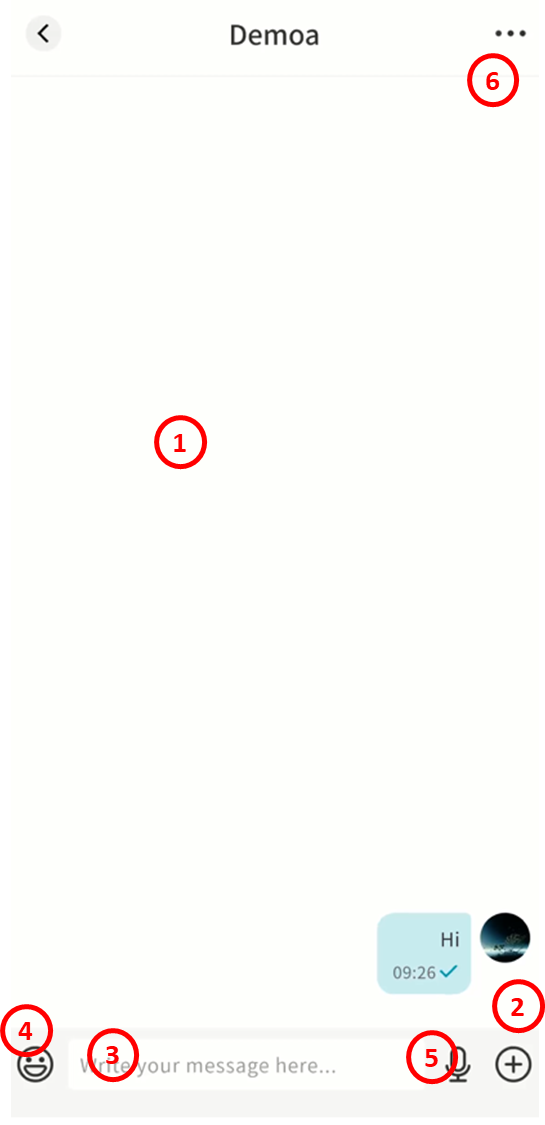
-
Chat Window: View conversation history.
-
+ Button: Send images, files, or more.
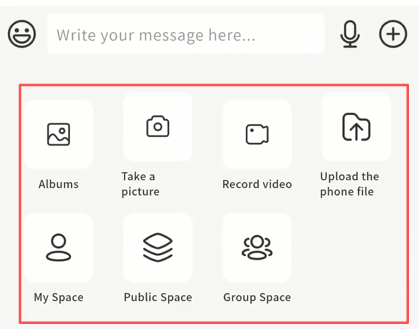
- Input Box: Enter text. Supports long text and Markdown formatting. If a message exceeds 5000 characters, it is automatically converted into a file for sending.

-
Emojis: Add emoji reactions.
-
Voice Messages: Record and send voice messages.
-
Chat Info: View details about the chat partner:
-
Profile picture and nickname
-
Add remarks
-
Pin or mute chat
-
Files Management
-
Enable Auto Translate
-
Delete conversation (deletes all local records; the recipient still retains theirs)
-

Sending Images and Files
-
Album: Send images from your gallery.
-
Camera: Take a photo and send it.
-
Video: Record a video and send it.
-
Local Files: Upload files from your phone.
-
NAS Files: Send files stored on the DASSET device.
Sending Voice Messages
Press and hold the microphone button to record and send voice messages.
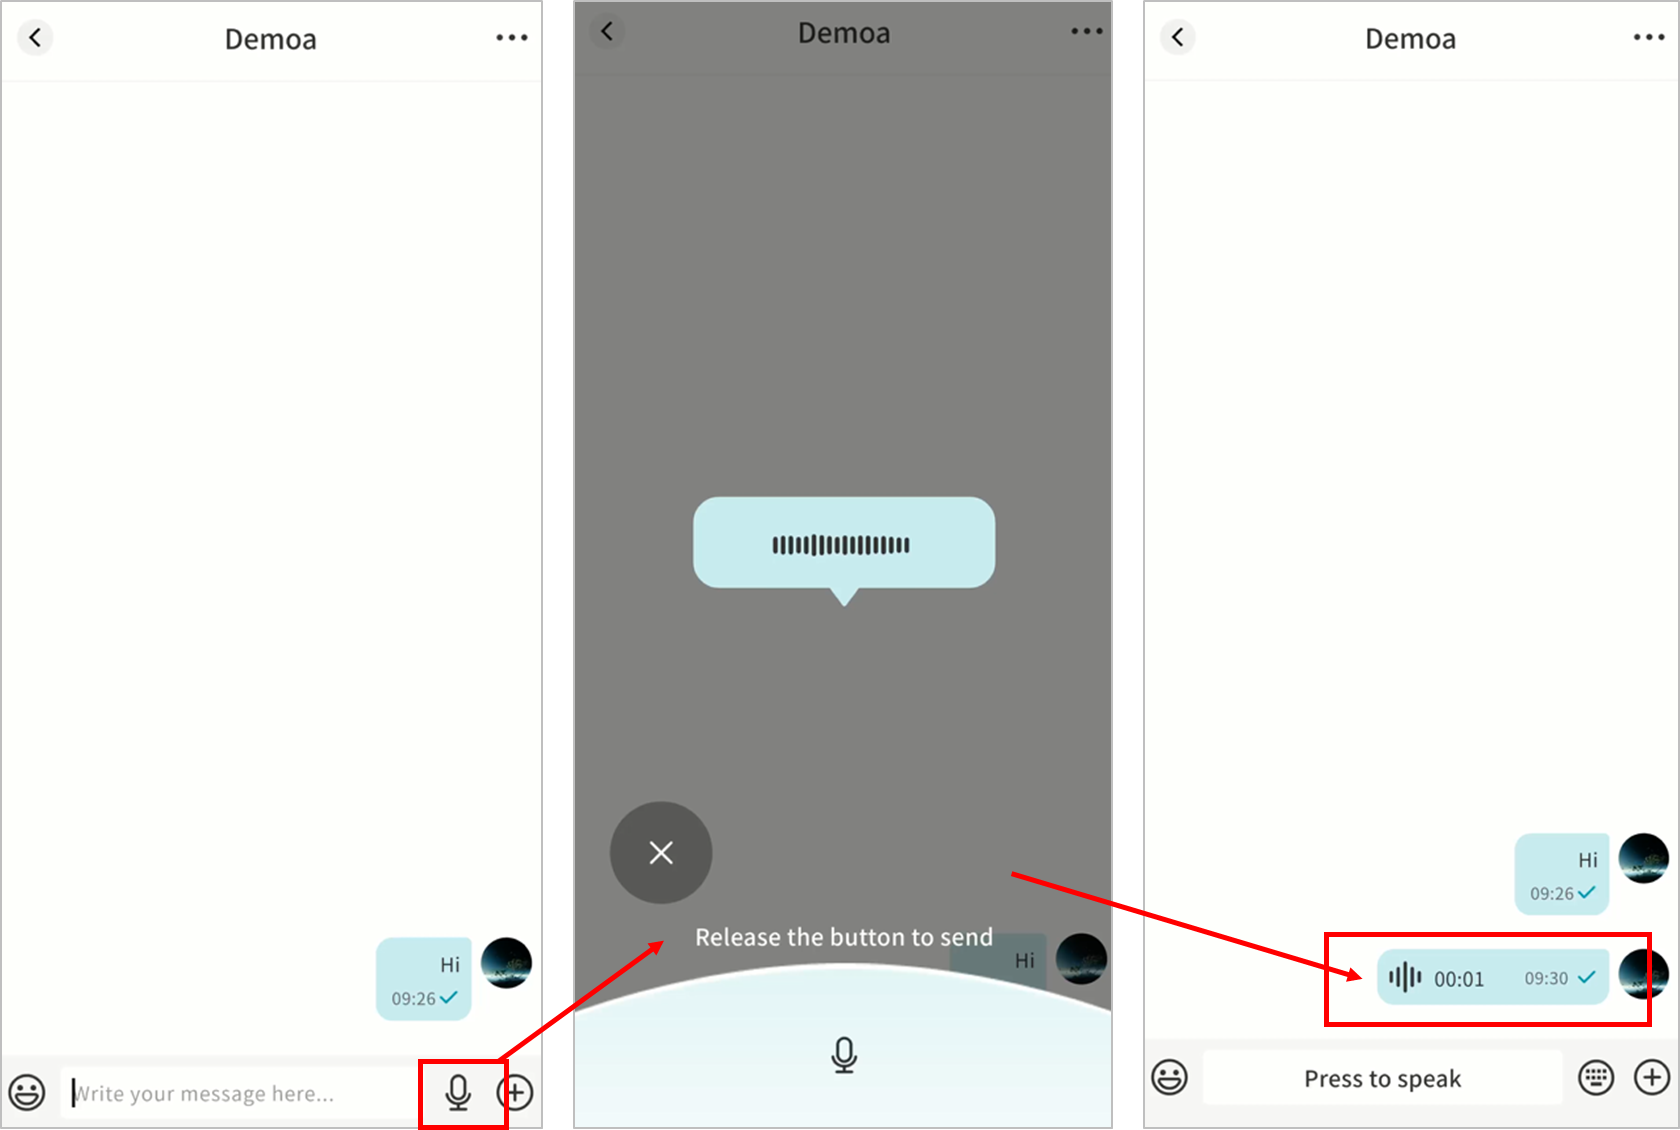
Message Interactions
Long-press a message to access the interaction menu. Options vary by message type (text, file, voice):
-
Quote: Reply to a specific message.
-
Copy: Copy the content.
-
Forward: Forward to another chat.
-
Multi-Select: Select multiple messages to forward or delete.
-
Save to NAS: Save attachments directly to your DASSET device.
-
Download: Save attachments to your mobile device.
-
Emoji Reply: React to a message with emojis.
-
Recall: Withdraw a message you sent.
-
Delete: Remove the message (local deletion only).
-
AI Agent Tools:
-
Translate: Translate into Chinese, English, or Japanese.
-
Reply Suggestions: AI generates multiple suitable replies.
-
Speech Recognition: Convert a voice message into text.
-
Summarize: AI generates a summary of the message.
-
-
URL Links: Tap to open in your browser.
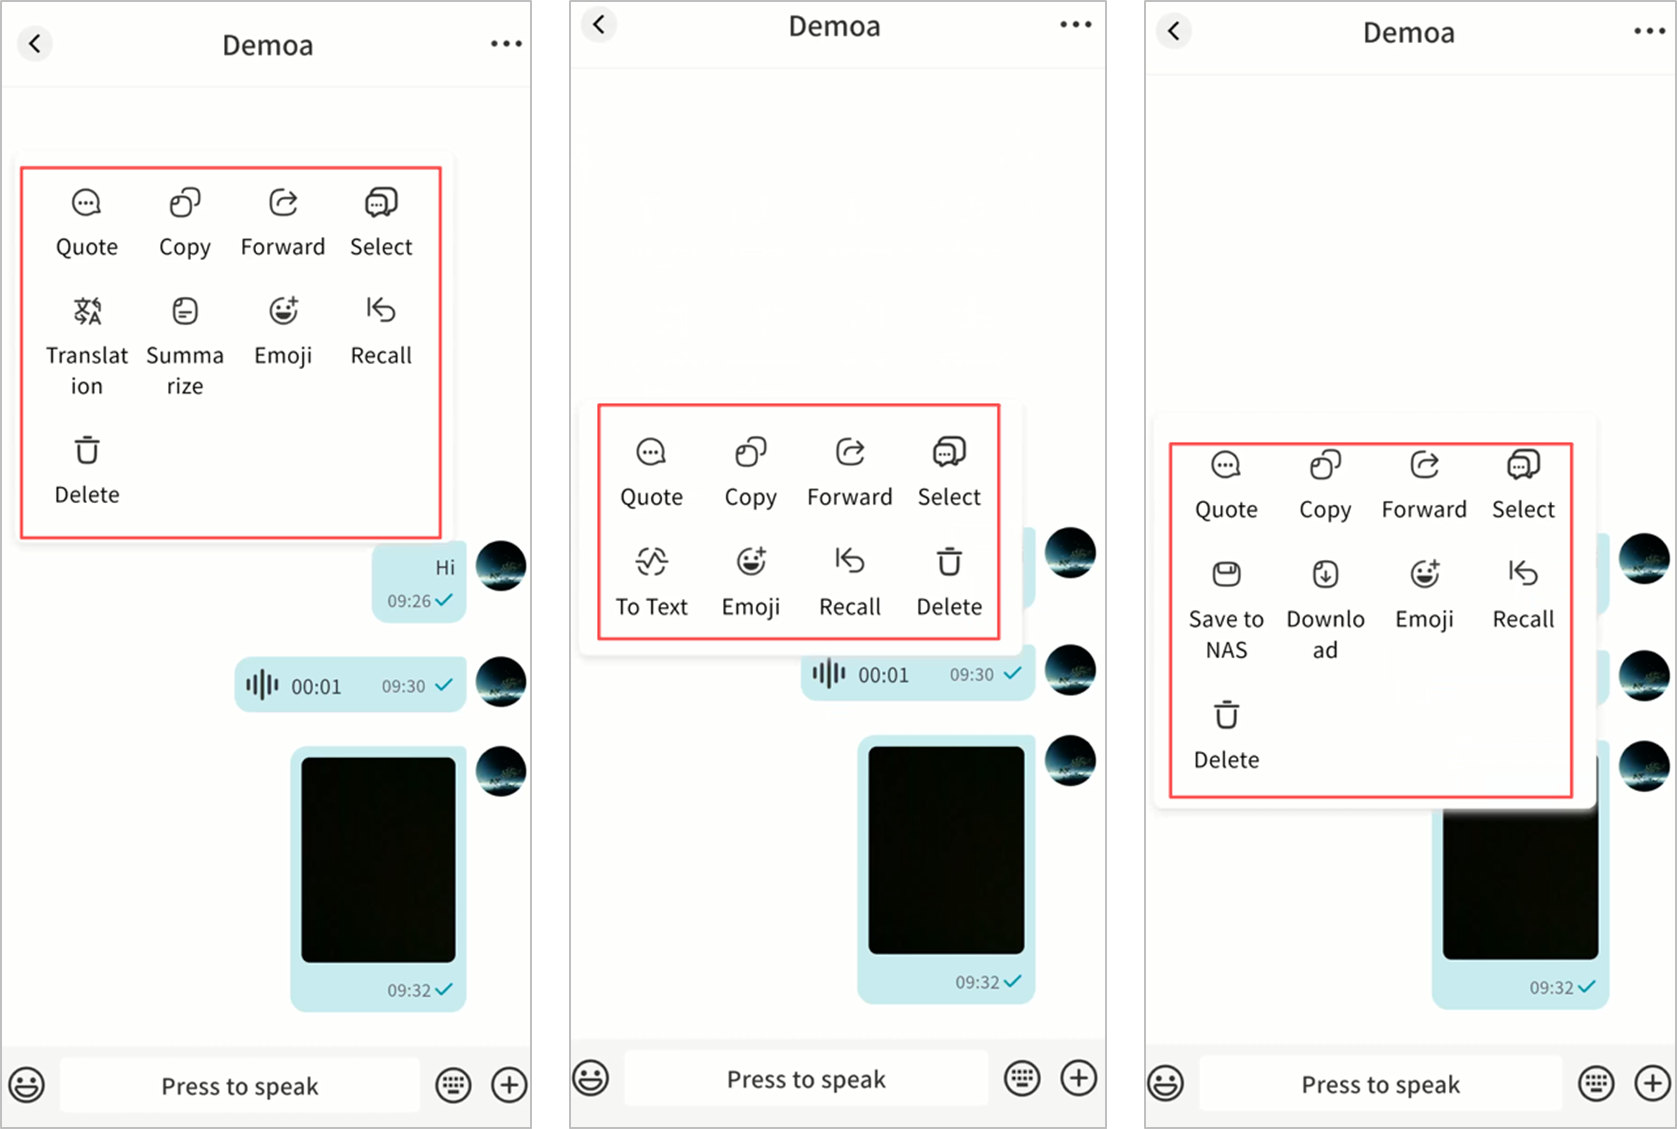
One-on-One Chat
Create Chat
- Click + New Conversation, or use the New Conversation button.
You can also start a chat from the Contacts page.
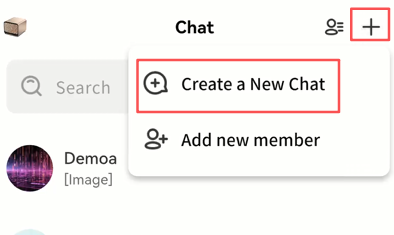
- Select one or more contacts. Multiple selections will create a group chat.
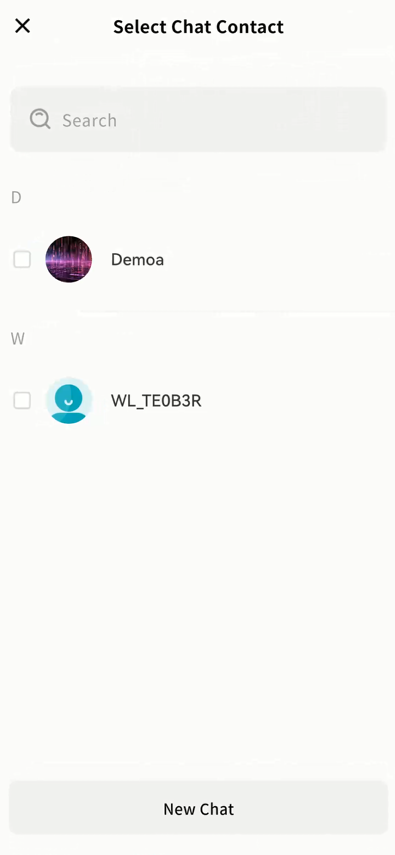
- Click Confirm to start.
Delete Chat
- In the chat window, click ... Delete session.
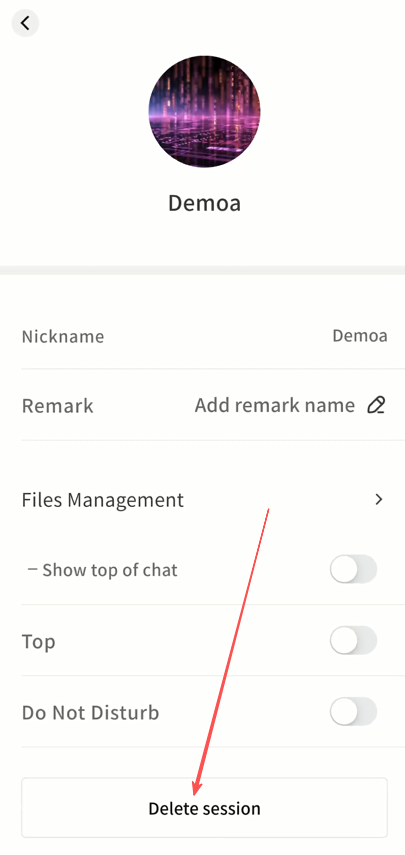
- Confirm deletion. All records will be removed locally, but the recipient still retains them.
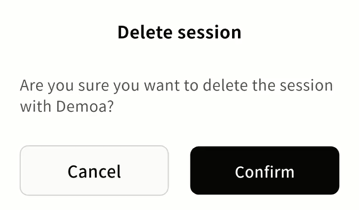
Top or Do Not Disturb
In chat settings, you can:
-
Top: Keep the chat at the top of the list.
-
Do Not Disturb: Disable new message alerts.
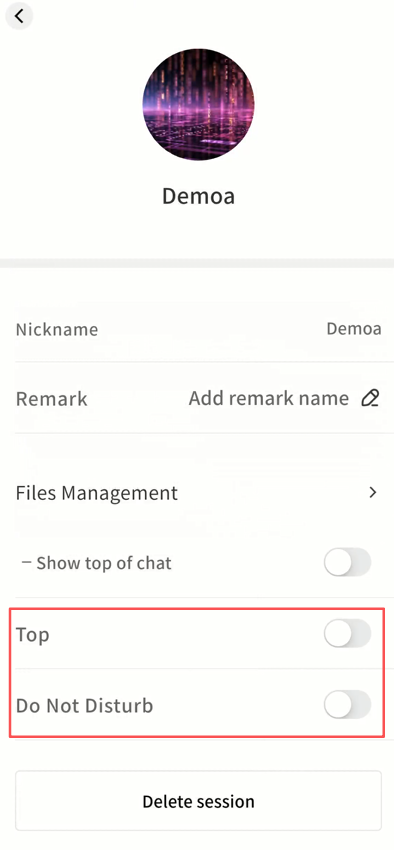
Group Chat
Group chats make it easy for teams to communicate.
Create Group Chat
- Click + New Conversation.
- Select multiple contacts.
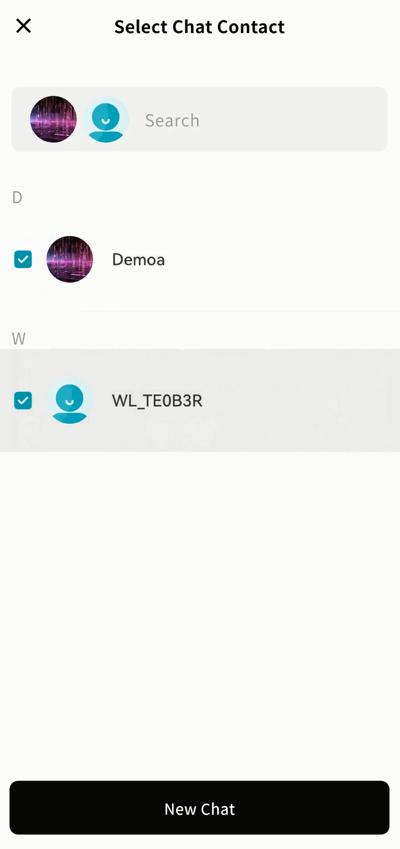
- Confirm to create the group.
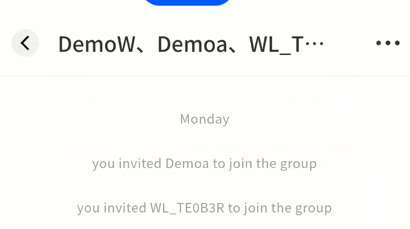
Manage Members
-
View, add, or remove members.
-
Only the group creator can remove members.
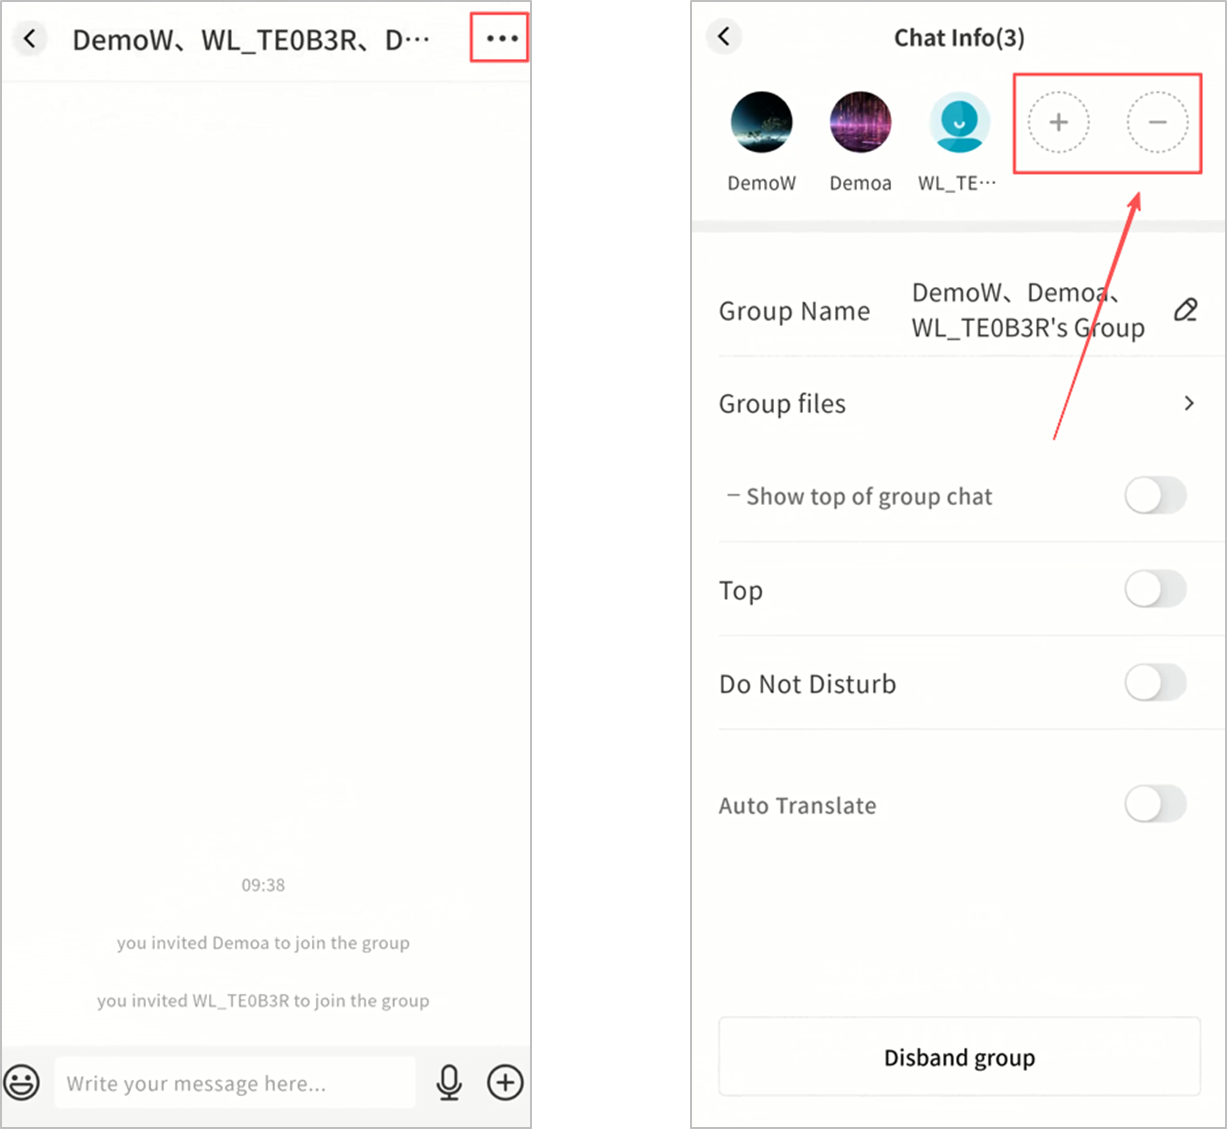
Rename Group
- Group creators can rename the group.
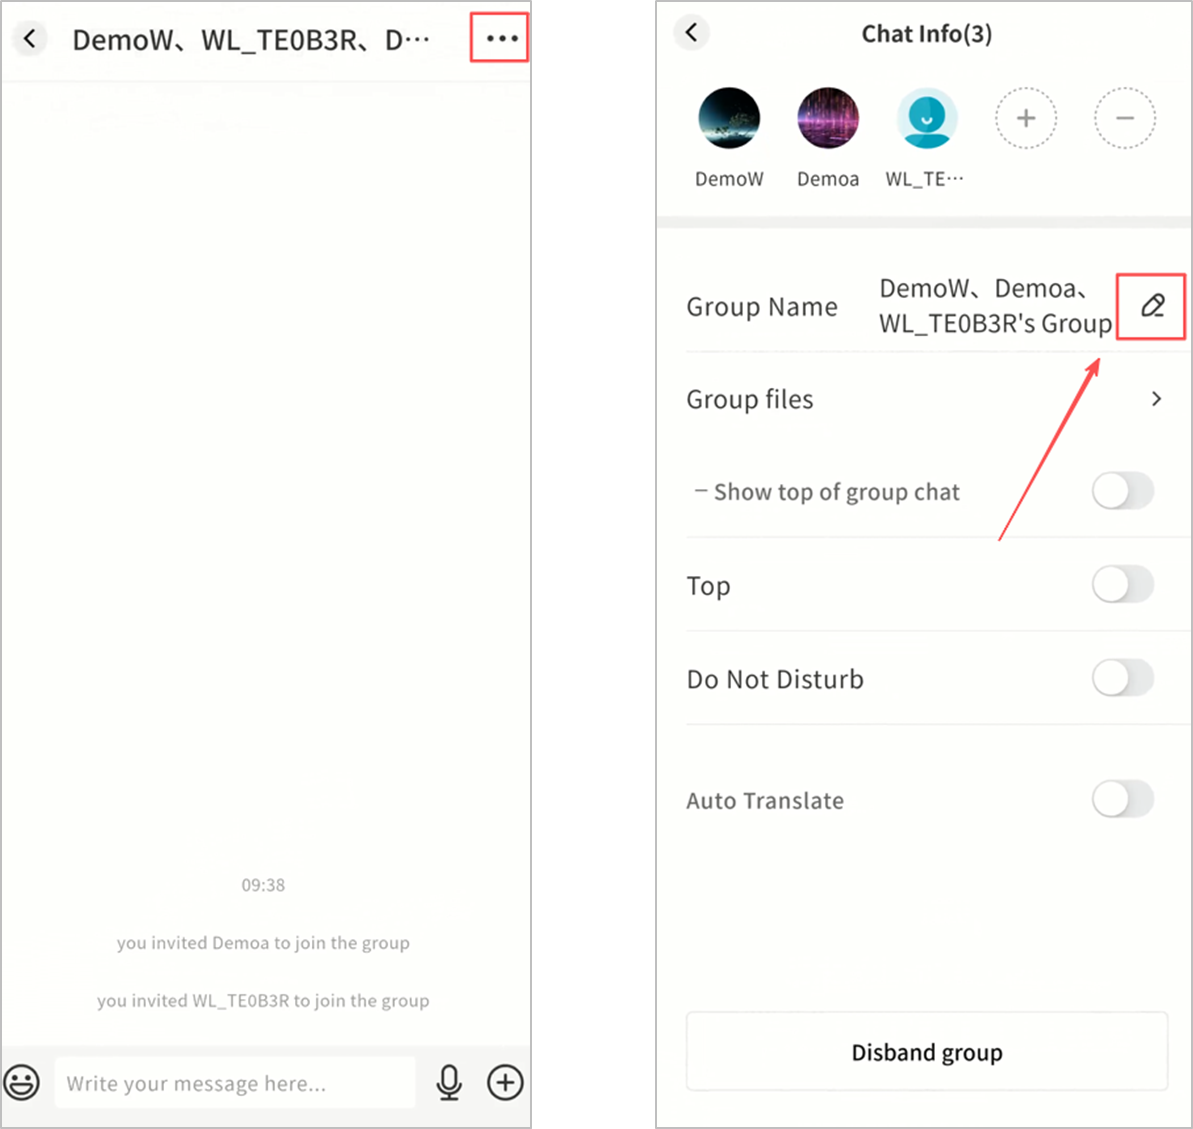
Disband Group
- Group creators can delete the group.
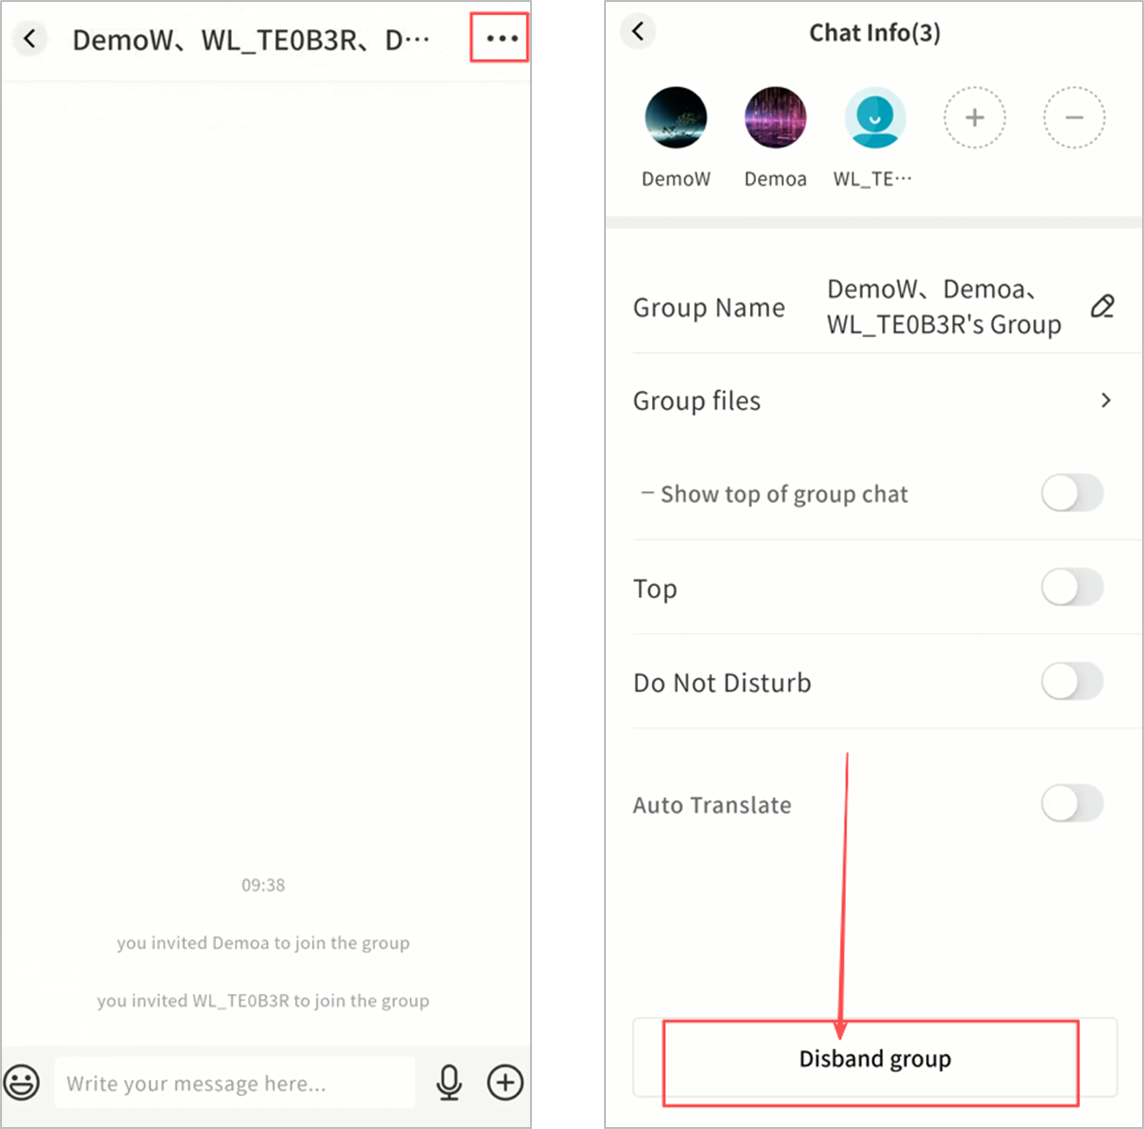
Top and Do Not Disturb
- Top the chat or mute notifications.
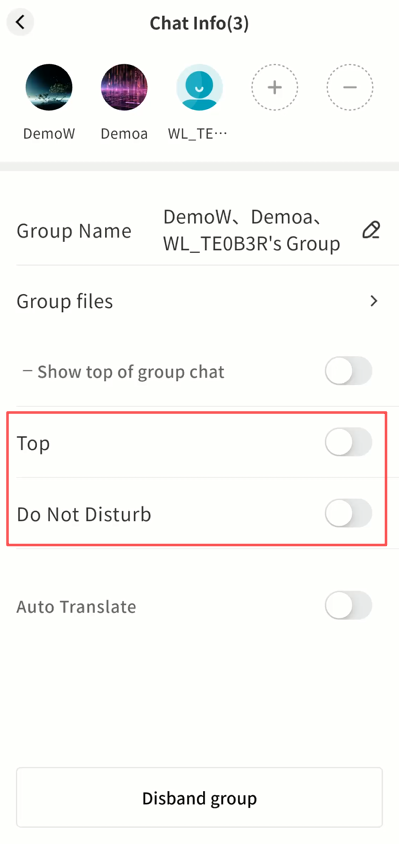
Leave Group
- Any member can exit the group at any time.
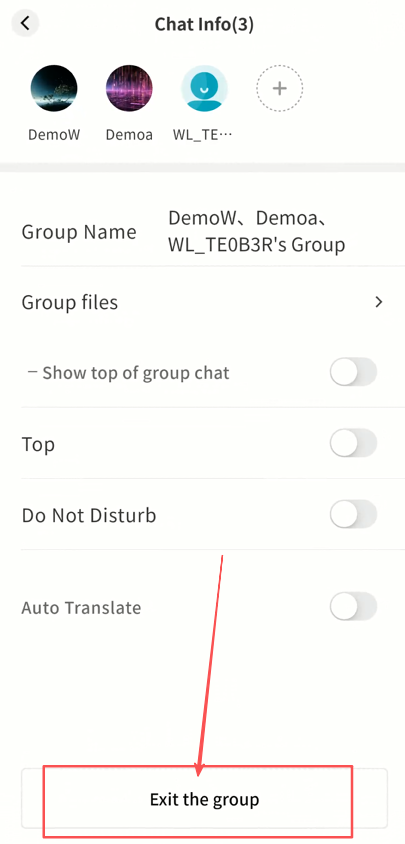
Group File Management
Access all files shared in the group via ... Group Files.
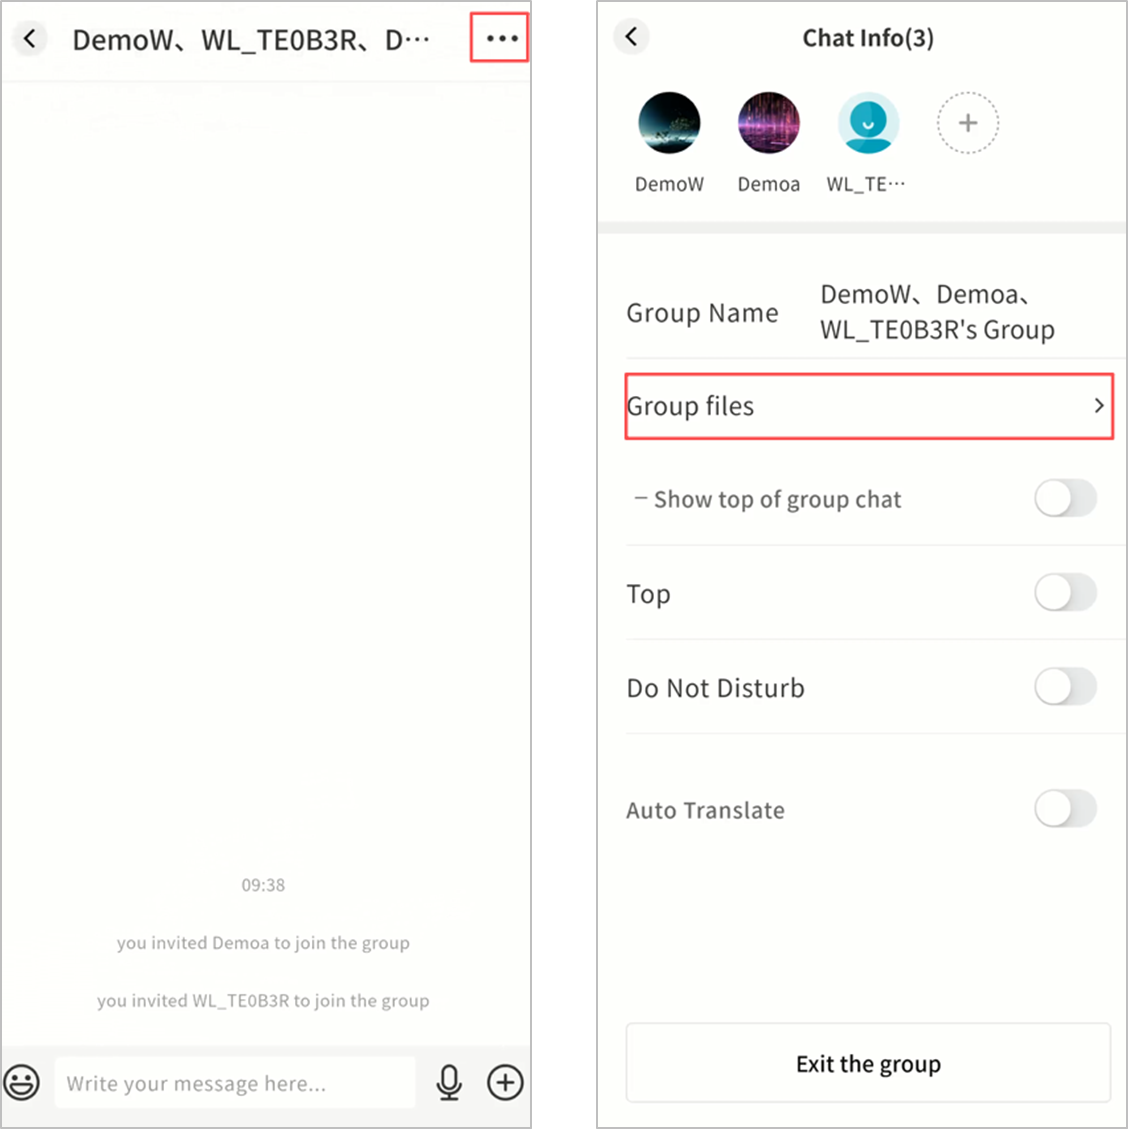
-
Sort by modification time, size, or uploader
-
List or grid view
-
Multi-select
-
File operations: Download, forward, delete (creator/uploader only), save to NAS, rename (creator only)
-
Upload local files, photos, videos, or NAS files (uploads also generate a message in the group)
In "Group File" Management, You Can:
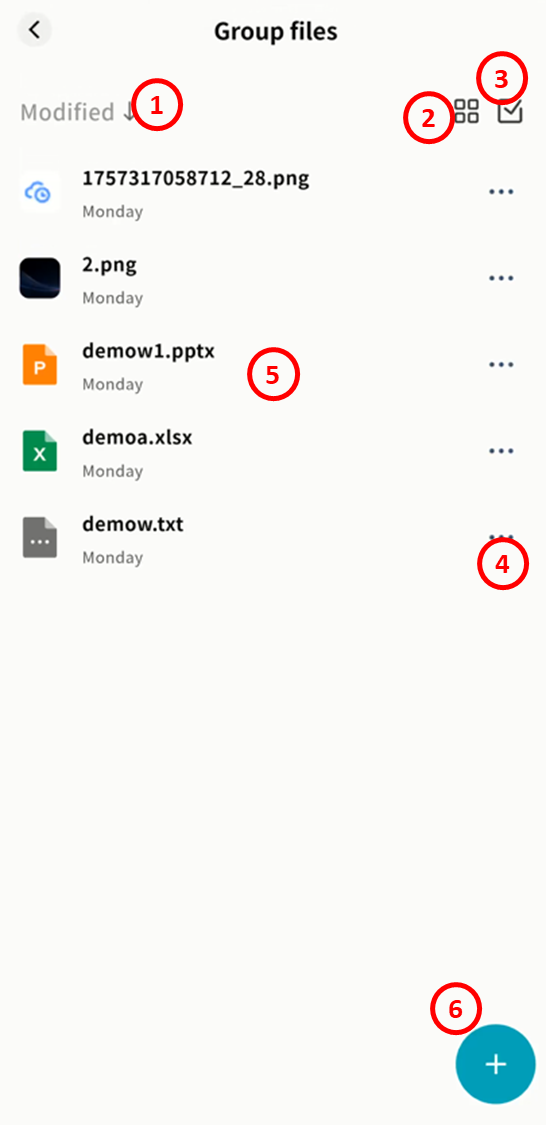
-
Sort: Sort files by modification time, file size, and uploader.
-
File Display Mode: Support displaying files in list view or grid view.
-
Selection: Select files individually or in bulk.
-
Perform file operations, including:
-
Download (All Group Members): Download files to your local device.
-
Forward (All Group Members): Forward the file to other chat conversations.
-
Delete (Only Group Creator and File Uploader): Only the current group creator or the file uploader can delete files from "Group Files".
-
Save to (All Group Members): Other users can only click "Save" to store the file in the personal NAS space of the current IM.
-
Rename (Group Creator): Allow modification of file names.
-
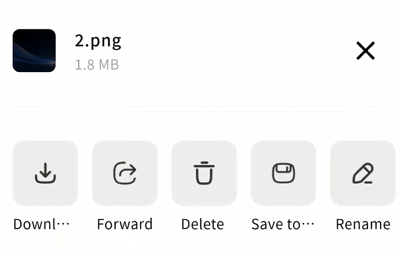
-
View the list of all group files, including file names and file upload dates.
-
+ (Note: After uploading your file, a file message will be automatically sent to the current group chat):
-
Albums: Select photos from the album to upload to group files.
-
Take a picture: Call the mobile device's camera to take photos and upload them to group files.
-
Record Video: Call the mobile device's camera to record videos and upload them to group files.
-
Upload Local File: Select files from the local device to upload to "Group Files". Note: After uploading your file, a file message will be automatically sent to the current group chat.
-
Send NAS File: Select files from the NAS to upload to "Group Files".
-
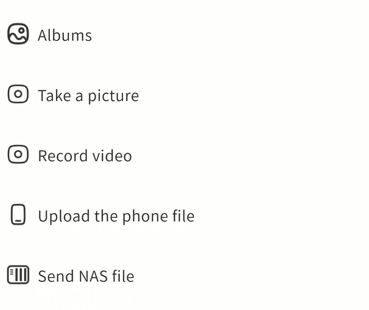
IM AI Agent
IM includes multiple AI Agent capabilities that you can use anytime to improve efficiency.
Translation
You can long-press a message and select Translate to convert it into another language.
- Supported languages: Chinese, English, Japanese.
Steps:
- Long-press the chat message Translation Target Language.
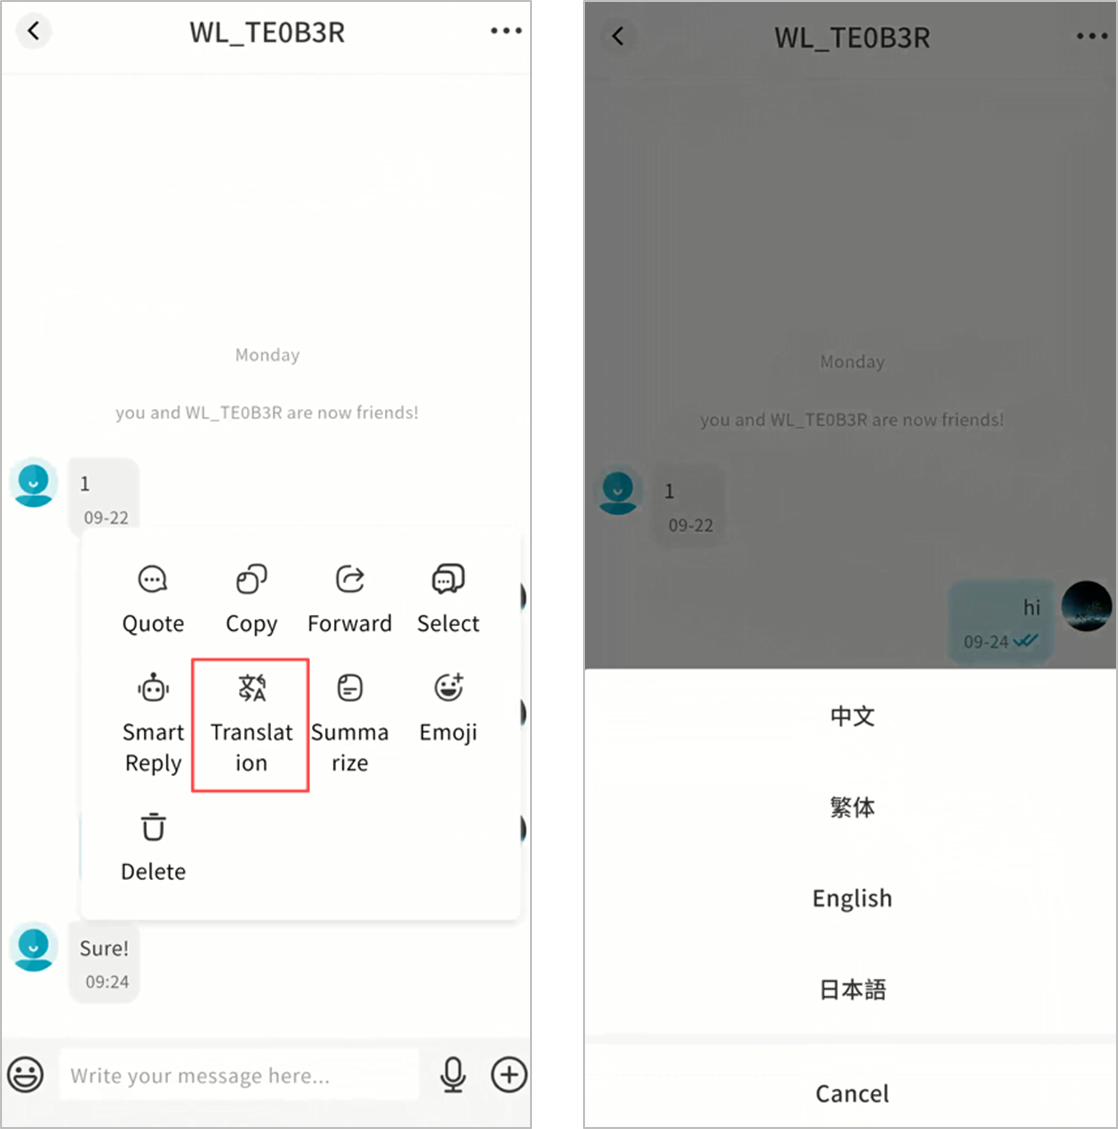
-
Wait for the AI Agent to process.
-
The translated text will be displayed.

Smart Reply
You can ask the AI Agent to generate multiple suitable reply suggestions for a selected message.
Steps:
- Long-press the chat message Smart Reply.
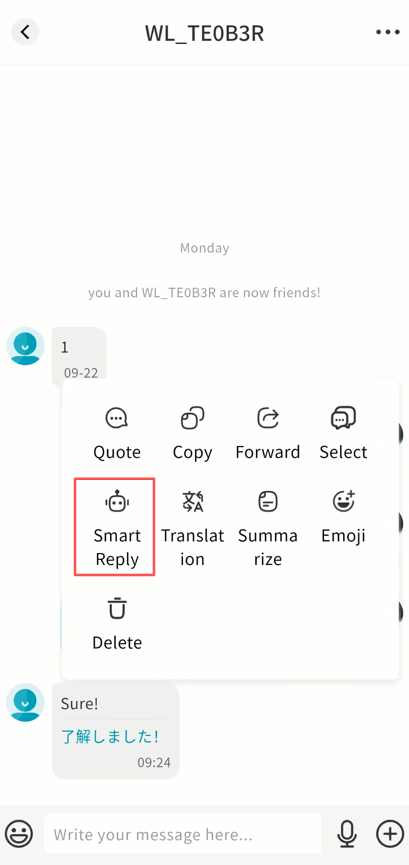
-
Wait while the AI Agent generates responses.
-
Multiple replies will be shown. Tap one to send directly.
- If unsatisfied, tap Change to refresh the suggestions.
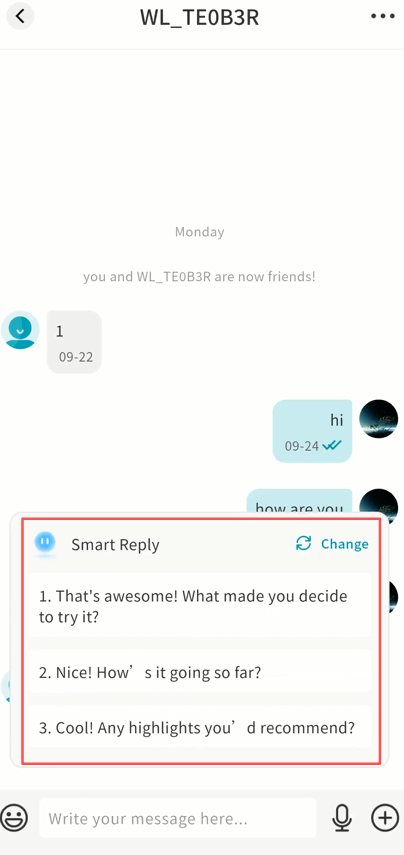
Summarization
You can summarize the content of a message with the help of the AI Agent.
Steps:
- Long-press the chat message Summarize.
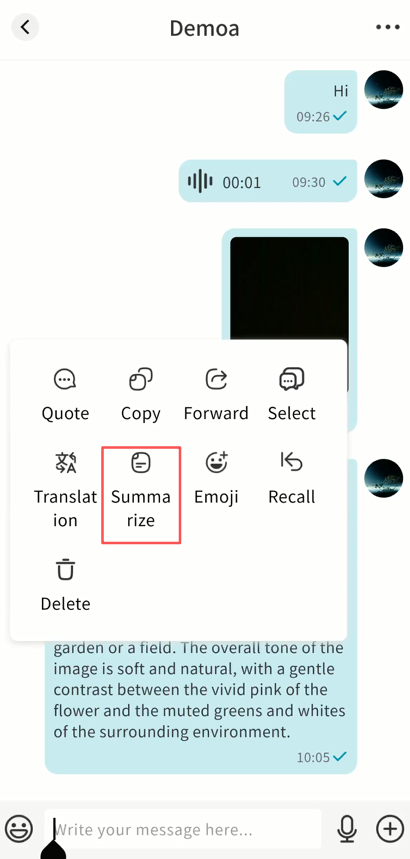
-
Wait for the AI Agent to process.
-
A summary will be displayed.
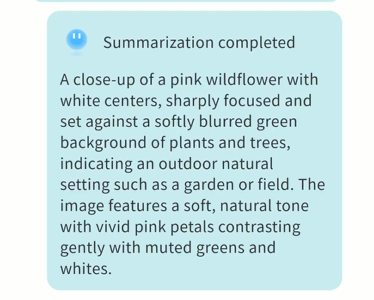
Speech Recognition
You can transcribe a voice message into text.
Steps:
- Long-press the voice message To Text.
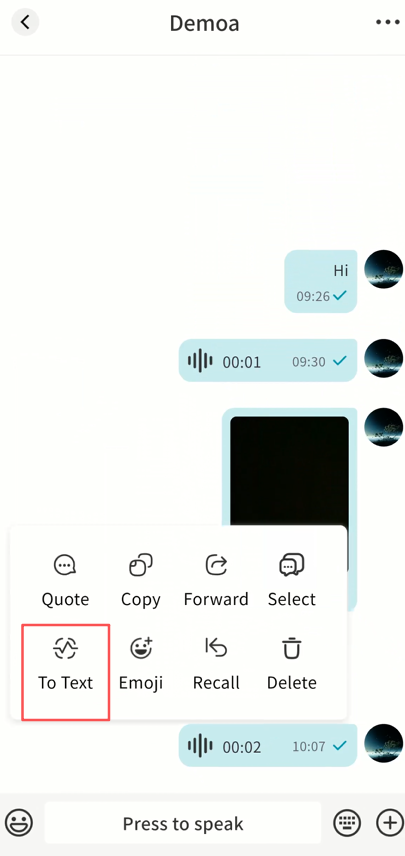
-
Wait for the AI Agent to process.
-
The transcription will be displayed.

Auto Translation
You can enable Auto Translation to have all chat messages automatically translated into your chosen language.
Steps:
- In the chat window, click the ... menu (top-right) Auto Translate.
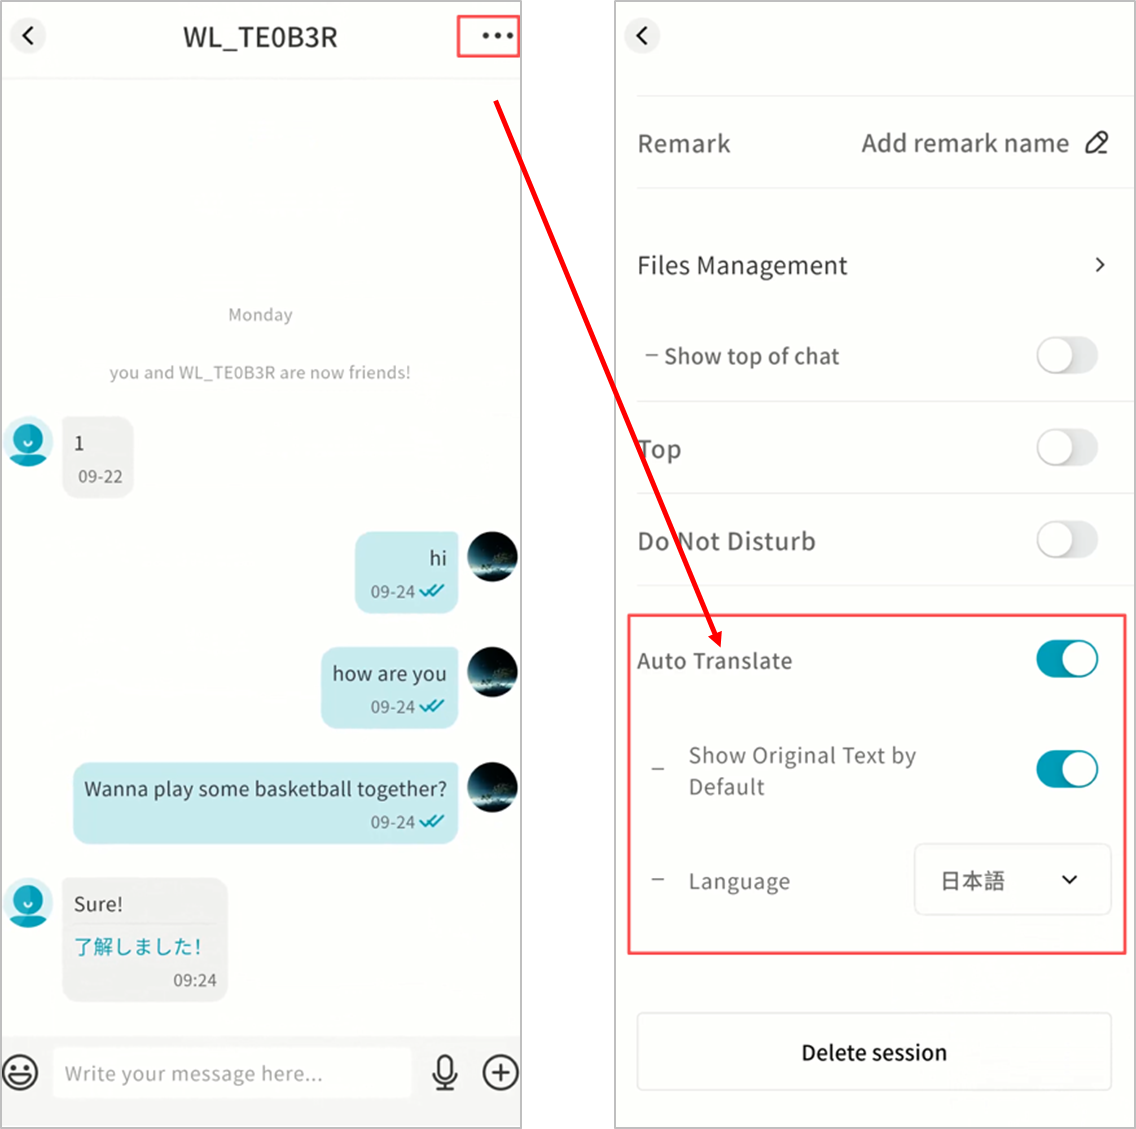
-
Enable the option, then configure:
-
Show Original Text: Display both the source and translated text.
-
Target Language: Select the output language.
-
-
The AI Agent will translate all incoming and outgoing chat messages automatically.
-
After activation, all chat history will show both original and translated text.
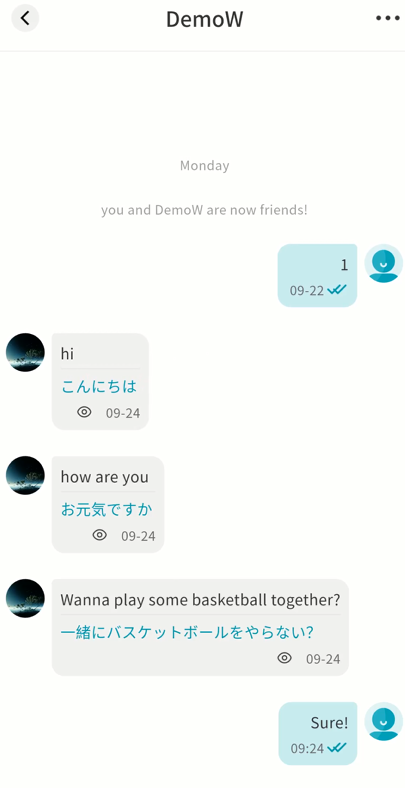
Image Recognition
You can turn on the "Image Recognition" feature within any chat. Once enabled, the AI Agent will automatically analyze the selected image and generate a detailed description.
- Long-press the image you want to analyze, then tap Recognize Image.
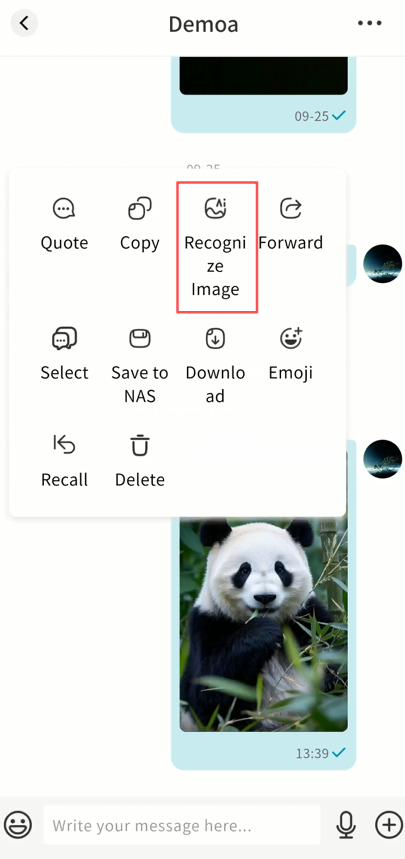
- Wait for the AI Agent to process.

- When finished, you'll see the AI-generated description of the image.
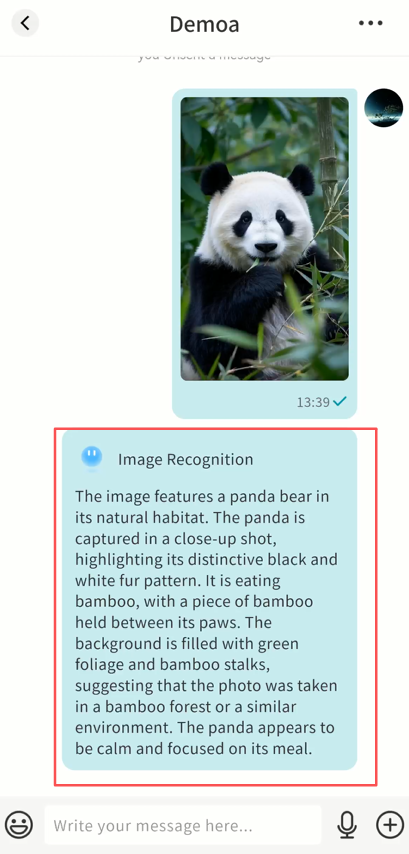
Supported Media File Formats in IM
The IM feature supports previewing media attachments. The supported formats are as follows:
Media type Supported formats
Images JPEG/JPG、PNG、GIF、BMP、SVG、HEIC、RAW
Videos MP4、WebM、AVI、MOV、MKV
Audio MP3、AAC、OGG、WAV
Light NAS
Light NAS is a unique feature of DASSET that allows your Windows or macOS computer to instantly act as a lightweight NAS. It enables seamless file interaction between the DASSET client and your computer. The key functions of Light NAS include:
-
Instantly turn your computer into a personal cloud drive
-
Designate directories on your computer for remote access
-
Access your computer files securely, quickly, and from anywhere
Accessing Light NAS from Other Terminals
- On the Discovery page, tap Connect on the Light NAS icon.
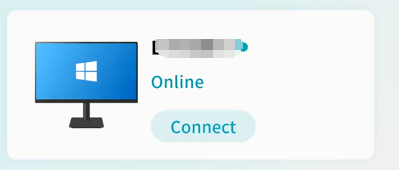
- Enter the Light NAS interface:
-
View configured directory list
-
Access Task Center for upload/download progress
-
Enter settings
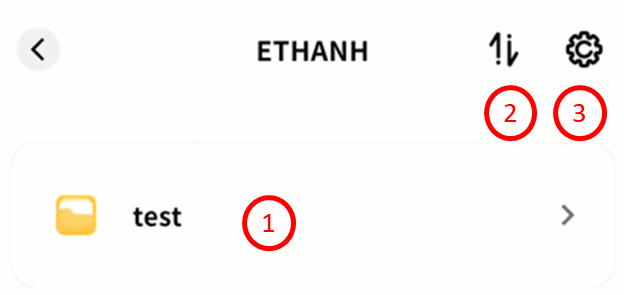
Viewing Device Information
Tap the gear icon Set up to see device name, owner account, virtual domain name, virtual IP, and LAN IP.
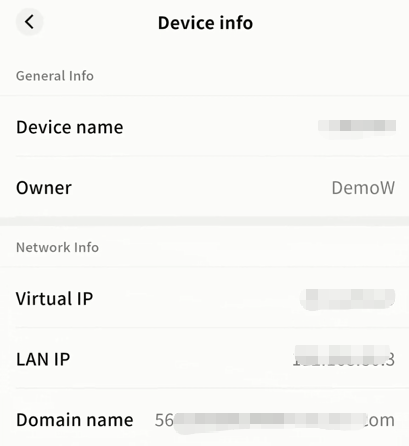
Remote File Access
On the Light NAS file manager, you can:
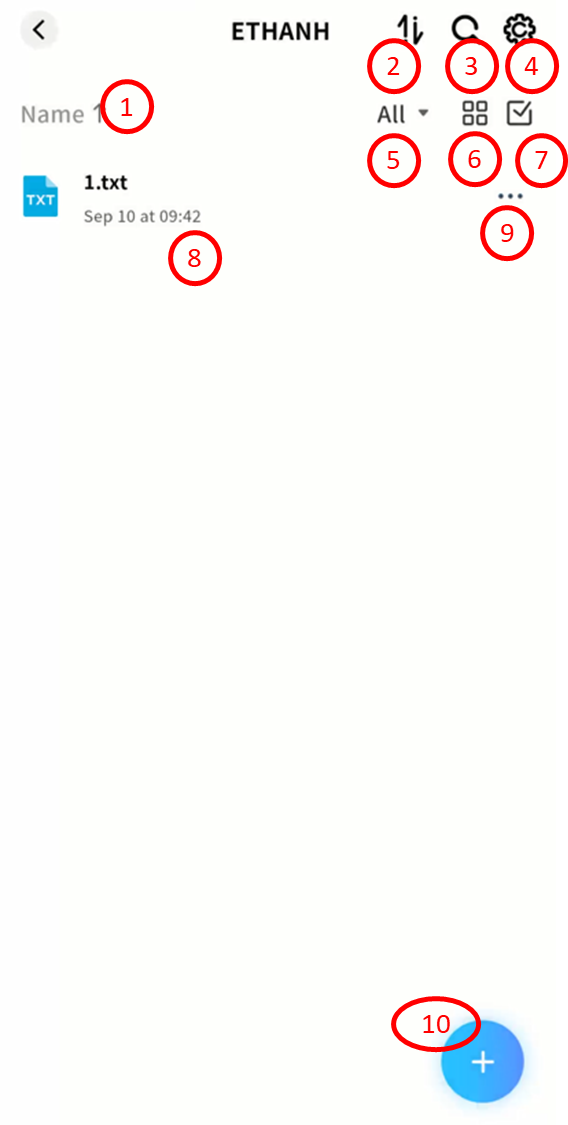
-
Sort files by name, date, or size
-
Access Task Center to monitor transfers
-
Search files by keyword
-
Enter settings
-
Categorize files (images, videos, audio, documents, compressed packages)
-
Switch between list and grid views
-
Enable multi-select mode
-
Browse the file list
-
Open file menu for download, delete, rename, or details
-
Use the + button to upload files, upload photos/videos, or create new folders
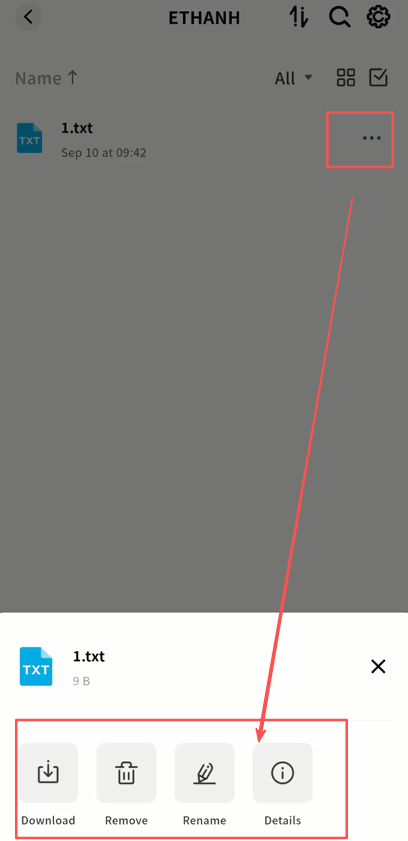
Notifications
All system notifications, including device binding operations and future system messages, are displayed in the Notifications menu.
-
Most notifications do not require action. You can mark them as Read by clicking the button in the top-right corner.
-
When you receive a notification for a device binding request, decide whether to Allow or Reject based on the situation.
Important: Once you allow an account to bind to your DASSET edge device, that account will have access to all data stored in your Public Space. Be absolutely certain before clicking Accept.
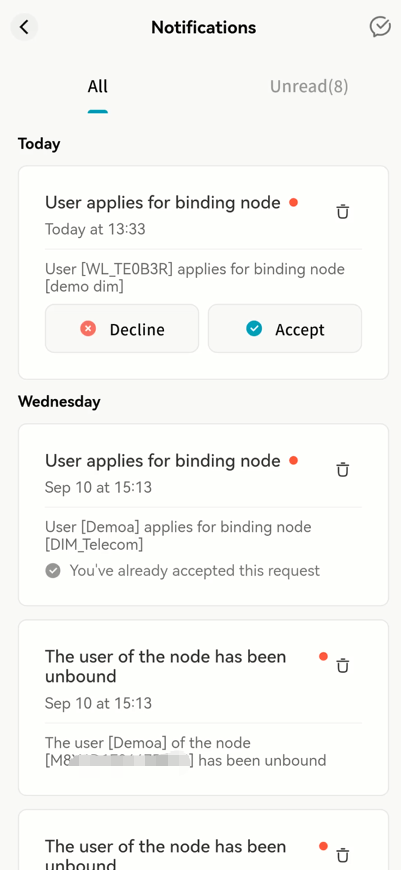
Account
This section provides access to account information and client status management for the DASSET mobile app.
-
Current Account and Nickname: Displays the currently logged-in account and nickname.
-
Account Information: View and edit account details.
-
Localhost Status: Check client information on the current device.
-
About: View the client version, check for updates, and access related information.
-
Submit Feedback: Open the DASSET website to send feedback and suggestions.
-
Help Center: Access the official DASSET documentation site.
-
Scan QR Code: Scan QR codes generated by DASSET to receive shared files.
-
Notifications: Open the notifications page to view system messages.
-
Settings: Manage DASSET client configuration.
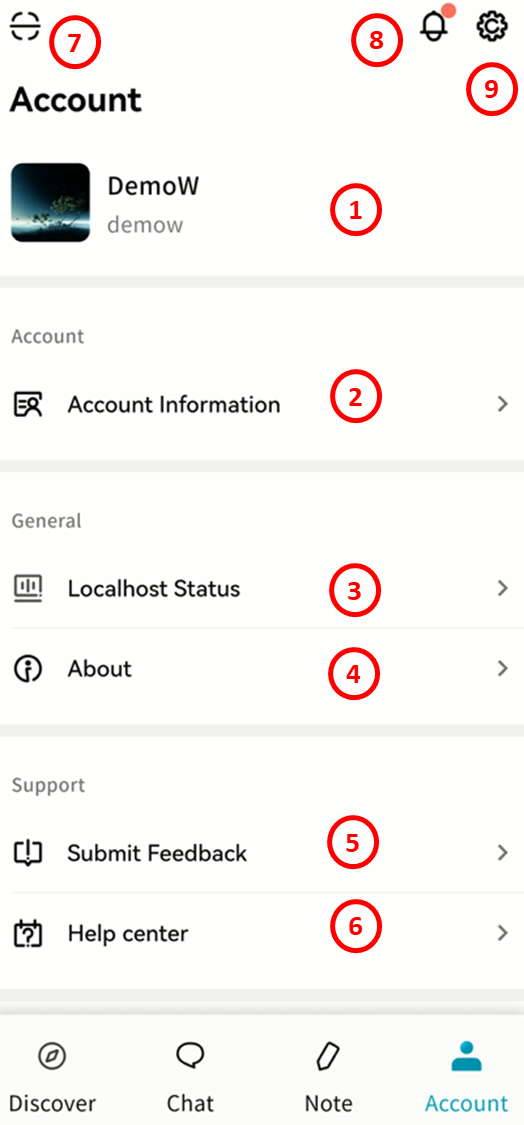
Account
Displays your current account name, nickname, and avatar.

Account Information
Click Account Information to manage your account details:
-
Change Avatar: Select an image from your mobile device as your DASSET account avatar. The avatar will also be visible to your friends.
-
Nickname: Set a display name that is easier for your friends to recognize.
-
Bind Email: Link or update the email address associated with your account.
-
Bind Phone: Link or update the phone number associated with your account.
-
Login Password: Change your account password.
Note: After adding or modifying your email, phone number, or password, your account will be automatically logged out. Please log in again.
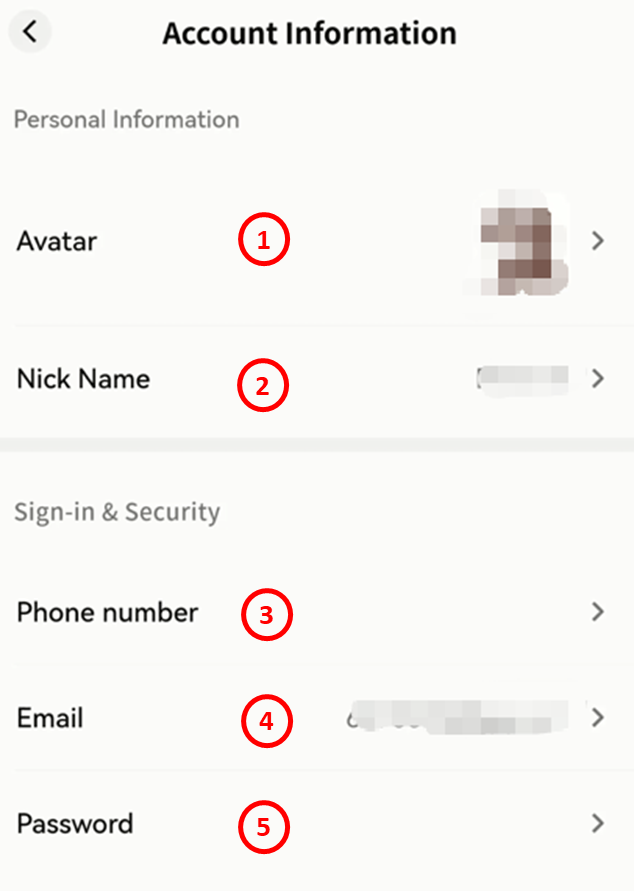
Local Status
The Local Status page shows information about your current DASSET mobile client:
-
Device Name: Modify how your mobile device name is displayed in the client.
-
Current Network: The name of the virtual network you are connected to.
-
Virtual Network IP: The virtual IP address of your mobile device, used to communicate with DASSET edge devices over the SDVN virtual network.
-
LAN IP: The LAN IP address currently configured on your mobile device.
-
Domain Name: The unique virtual domain name of your mobile device within the virtual network.
-
Online Duration: The current session duration.
-
Latency: The latency of your virtual network connection.
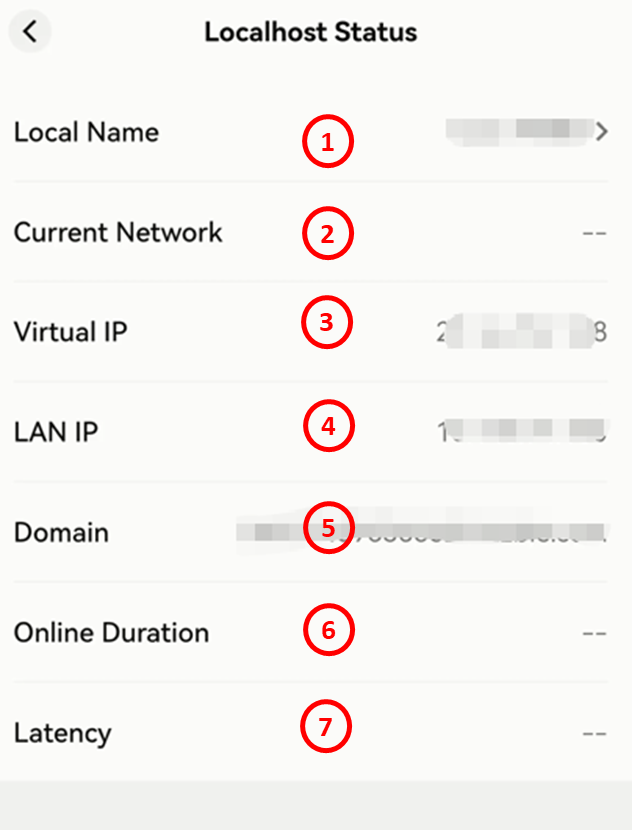
About
View the DASSET client version number, check for updates, and access the official website, privacy policy, and related information.
Submit Feedback
Go to Account Submit Feedback. The DASSET client will prompt you to open a browser and access the contact page, where you can send feedback to the DASSET team.
Help Center
Go to Account Help Center. The DASSET client will prompt you to open a browser and access the DASSET Help Center, where you can view official product documentation.
Scan QR Code
Tap Scan QR Code to scan file-sharing codes sent by other users and download the corresponding files to your DASSET edge device.
For details, see the QR Code Sharing section.
Notifications
System notifications, including device binding and other future system messages, are displayed in the Notifications menu.
Tap a notification to view details. For more information, see the Notifications section.
Settings
In the Settings page, you can configure:
-
Clear Cache: Remove cached files stored on your mobile device to save storage space.
-
Language: Change the display language of the client. By default, it follows the system language, but you can manually set it.
-
Advanced: Define encryption protocols for communication between the client and DASSET devices.
-
Network Settings: Configure how the client connects to DASSET devices.
-
Image Loading Settings: Define how images are loaded in the client.
-
Switch Account: Quickly switch between DASSET accounts previously logged in on the device.
-
Log out: Log out of the current account.
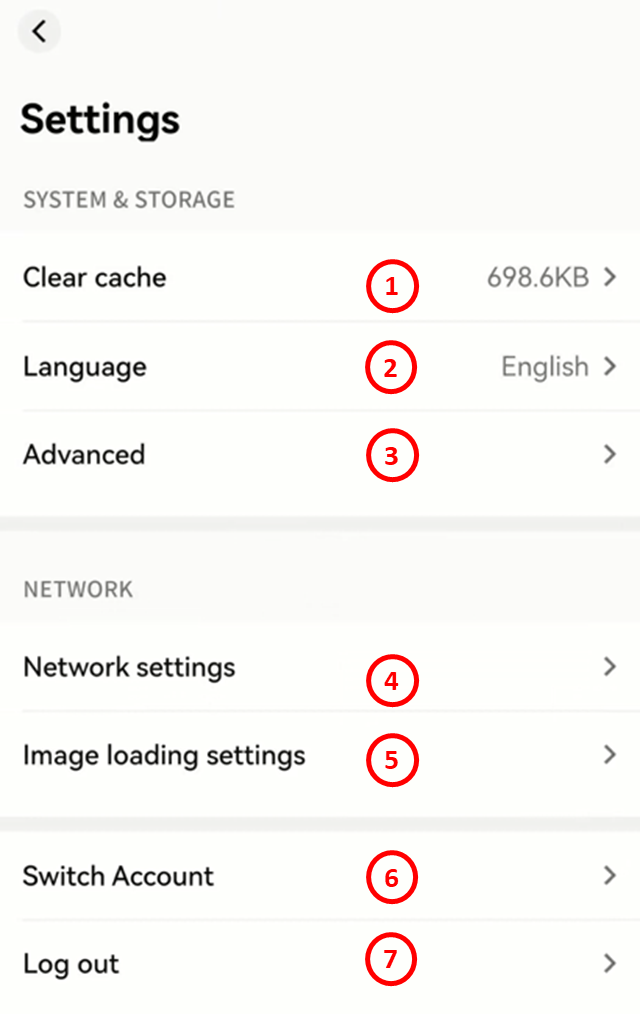
Clear Cache
Go to Settings Clear Cache to view the storage space used by cached files. Tap to release the occupied space.
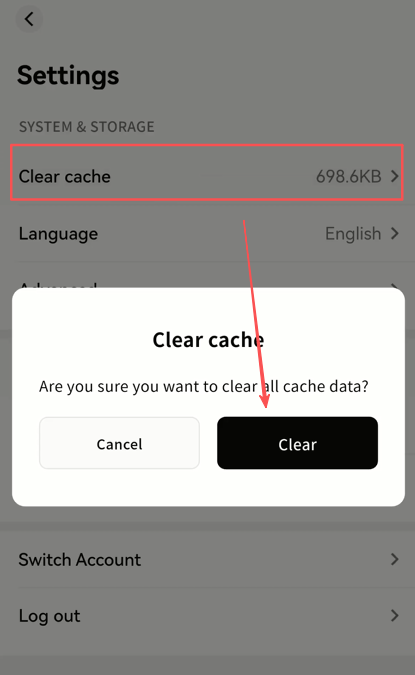
Language
In the Language Settings page, select the preferred display language for the client.
-
If set to Follow System, the client interface will match your device's system language.
-
Language options are continuously being expanded.
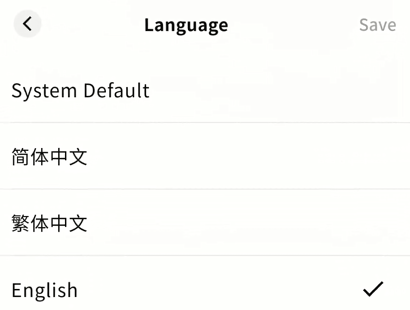
- You can also change the language from the login screen.
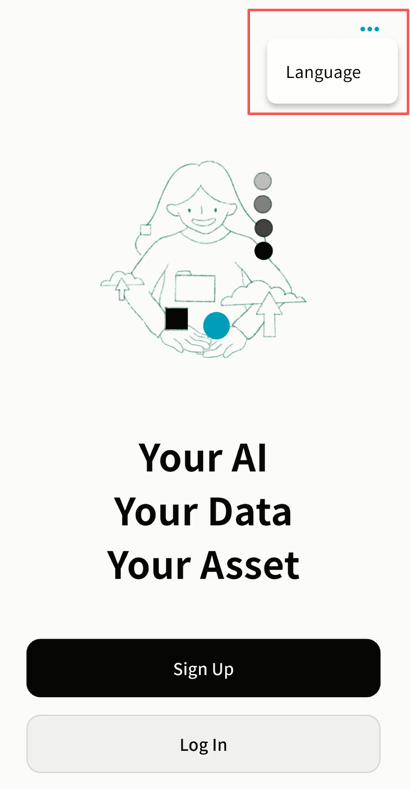
Advanced Settings
In the Advanced Settings page, you can configure:
-
DLT:
-
On: The client attempts direct channel communication with the device.
-
Off: Communication defaults to relay transmission.
-
-
Security Options: Choose an encryption algorithm for data transmission.
-
RC4: Faster, but less secure.
-
SHA256: Slower, but more secure.
-
No Encryption: Not recommended.
-
-
Enable Logging: Activate client logging. (Logs may be required by the DASSET support team for troubleshooting.)
Note: The file path of log storage will be displayed for manual access when needed.
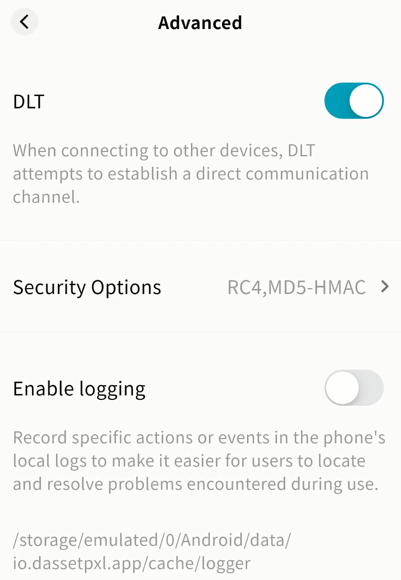
Network Settings
Configure communication between the client and DASSET devices:
-
Blocking LAN Access:
-
On: Communication is forced through the SDVN virtual network (more secure, slower).
-
Off: If the client detects that the device is on the same LAN, data is transmitted in plaintext over LAN (faster, less secure).
-
-
Allow uploads and downloads using mobile data:
-
On: Data transfer occurs over both Wi-Fi and mobile data.
-
Off: Data transfer occurs only when the device is connected via Wi-Fi.
Note: For large data transfers, it is recommended to turn this option off to avoid excessive mobile data usage.
-
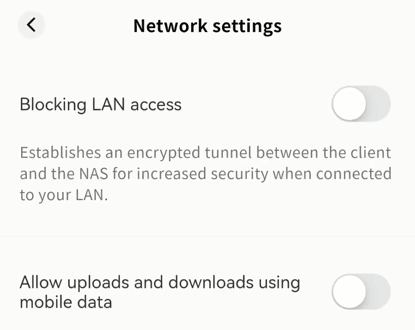
Image Loading Settings
Options include:
-
Do not auto-load original images: Only thumbnails are displayed by default.
-
Auto-load original images when on Wi-Fi: Original images load automatically when connected to Wi-Fi.
-
Always auto-load original images: Original images always load.
Note: Choosing "Always auto-load original images" in non-Wi-Fi environments may result in significant mobile data usage.
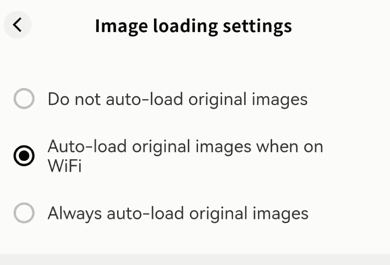
Switch Account
Switch accounts without logging out. Select from previously logged-in accounts on the current device.
Log out
Two options are available:
-
Log out Only: Exit the account without removing saved credentials. You can log in again quickly via account switching.
-
Log out and forget account: Exit the account and remove stored credentials. You will need to re-enter account and password for future logins.
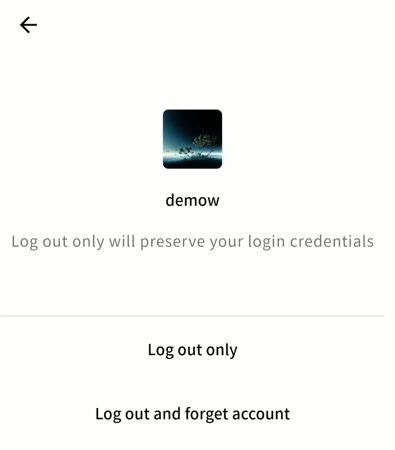
DASSET provides information that is believed to be accurate and reliable; however, DASSET assumes no responsibility for the use of this information, or for any infringement of third-party patents or other rights that may result from such use. No license is granted by implication or otherwise under any DASSET patents or patent rights. DASSET reserves the right to modify this statement at any time without prior notice.
Apple, Mac, macOS, iOS, OS X, and Time Machine are trademarks of Apple Inc. App Store is a service mark of Apple Inc. Baidu Netdisk is a trademark of Baidu. Aliyun is a trademark of Alibaba. Dropbox is a trademark of Dropbox. OneDrive is a trademark of Microsoft. Wi-Fi is a registered trademark of Wi-Fi Alliance®. Android and Google Play are trademarks of Google Inc. All other trademarks are the property of their respective owners.
© 2025 DASSET. All rights reserved.