Set-up your DASSET Data Hub
Congratulations on the purchase of your DASSET Data Hub! In this article, you will be guided through the steps of initially setting-up and connecting to your Data Hub using the DASSET application.
Prerequisites
To complete the set-up of your Data Hub, make sure you have completed the following:
- Complete the DASSET App Install & Set-Up how to article.
- Remove the Data Hub from the packaging and review any included pamphlets from the manufacturer.
Step 1: Hardware Set-up
- Open the DASSET mobile application on your phone and log in to your account.
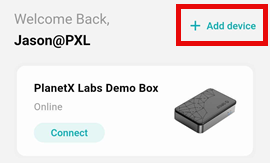
- On the Devices page, select + Add device from the upper right-hand corner of the screen.
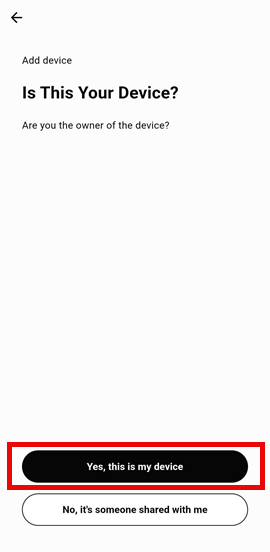
- You will be asked whether you are the owner of this device or if someone shared the device with you. Select Yes, this is my device.
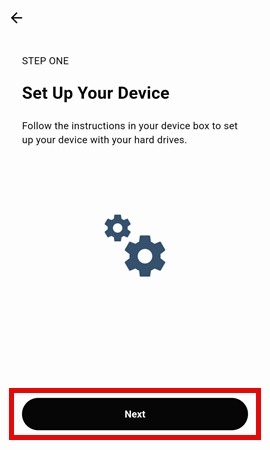
- Make sure to read any pamphlets that have been provided from the manufacturer of your Data Hub and complete any required steps before selecting Next
- If not already completed, make sure to plug your Data Hub's power supply into a power outlet, plug the networking cable into your router, and press the Data Hub's power button.
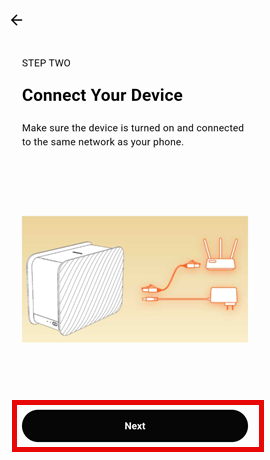
Your Data Hub make take a few minutes to fully turn-on and boot-up the DASSET operating system. Ensure your Data Hub has been powered-on before moving to the next step.
Step 2: Bind your Data Hub
You will be presented with 2 options to connect to your Data Hub, also known as Binding.
- QR Code Scan - By default, the DASSET application will open your phone's camera to scan the QR Code that is a sticker either on your Data Hub, or in the pamphlet that came with your device.
- Add via LAN Search - Below the camera window in the app is a link to Add via LAN Search, which scans your local area network for the device. Select this option if you cannot scan the QR code for some reason.
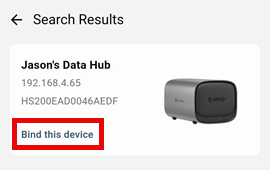
After completing either the QR Code scan or LAN Search, your Data Hub should show-up in the results window. Click Bind this device to complete the Binding process.
Step 3: Name your Data Hub
You will now be presented with the option to give your Data Hub a friendly name to replace the default name assigned to your device.
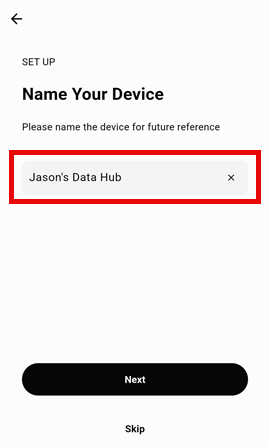
The name you enter here will be visible to any users you choose to invite to join your Data Hub. If you'd like to give a more personal, private name that only you can see, refer to Device Name & Remark for how to set this up later.
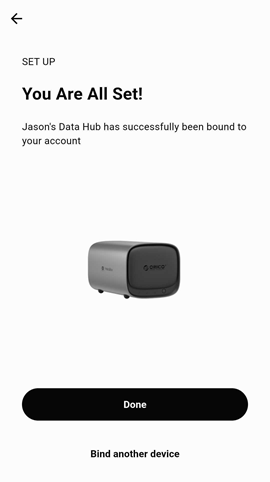
Congratulations 🎉, you have now successfully bound your user account to your DASSET Data Hub!
Step 4: Connect to your Data Hub
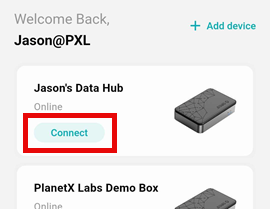
Navigating back to the Devices screen of the DASSET application, you will now see your Data Hub available for use. Simply select the Connect button in your device tile, and you will be taken to the Home Screen of your DASSET Data Hub.
