Network Discovery Services
Samba
DASSET supports the Samba protocol. Once enabled, you can connect from a computer, smart TV, or other devices to access files stored on the DASSET device via Samba.
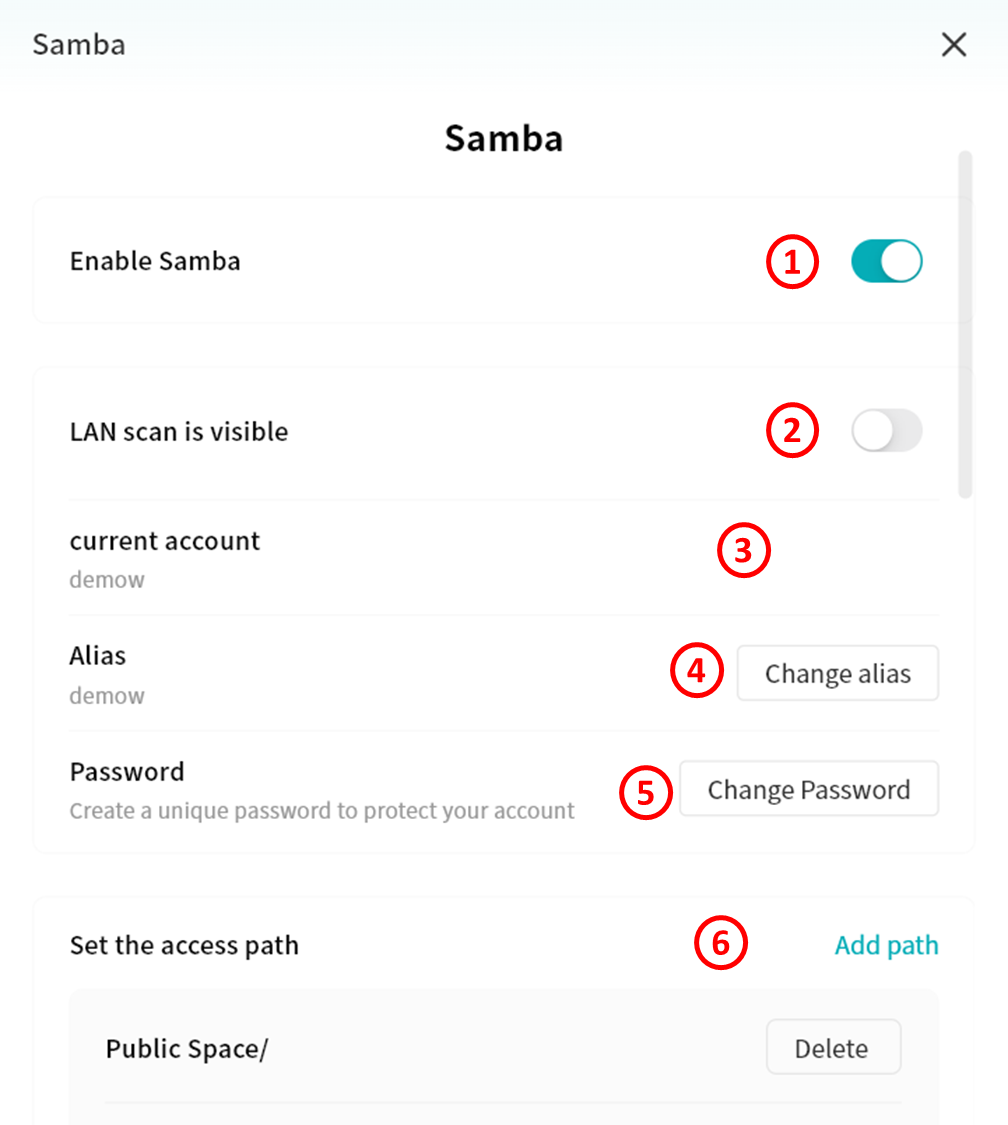
- Enable or disable Samba protocol
- Allow discovery of the DASSET device from other devices on the local network
- Current account: Samba login account
- Alias: You can set an alias for Samba and use it later to log in
- Password: Set the Samba login password
- Set the access path: Specify the directories on the DASSET device that are accessible through Samba
Windows Connection to Samba
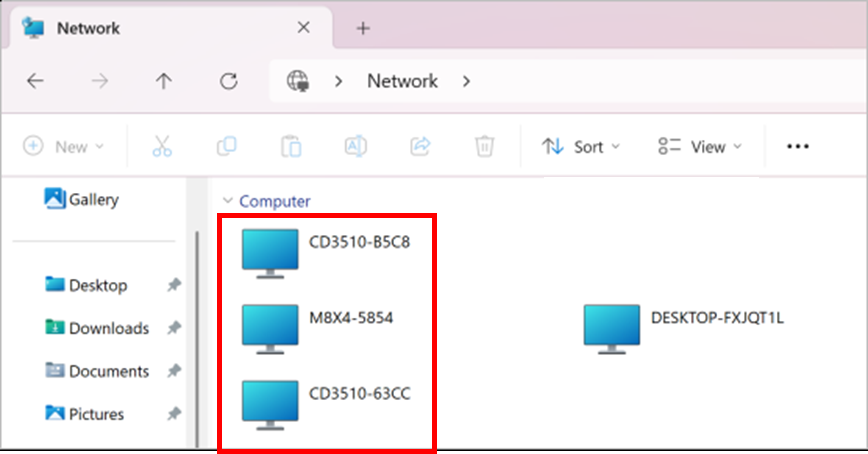
Access via Network Discovery
When "Visible in LAN Scan" is enabled in DASSET, the device will appear automatically under the Network section in File Explorer. Simply double-click the DASSET device icon and enter your Samba username and password to log in.
Map as a Network Drive
- Open File Explorer, type
\\DASSET_DEVICE_IP_ADDRESS\]in the address bar, and press Enter.
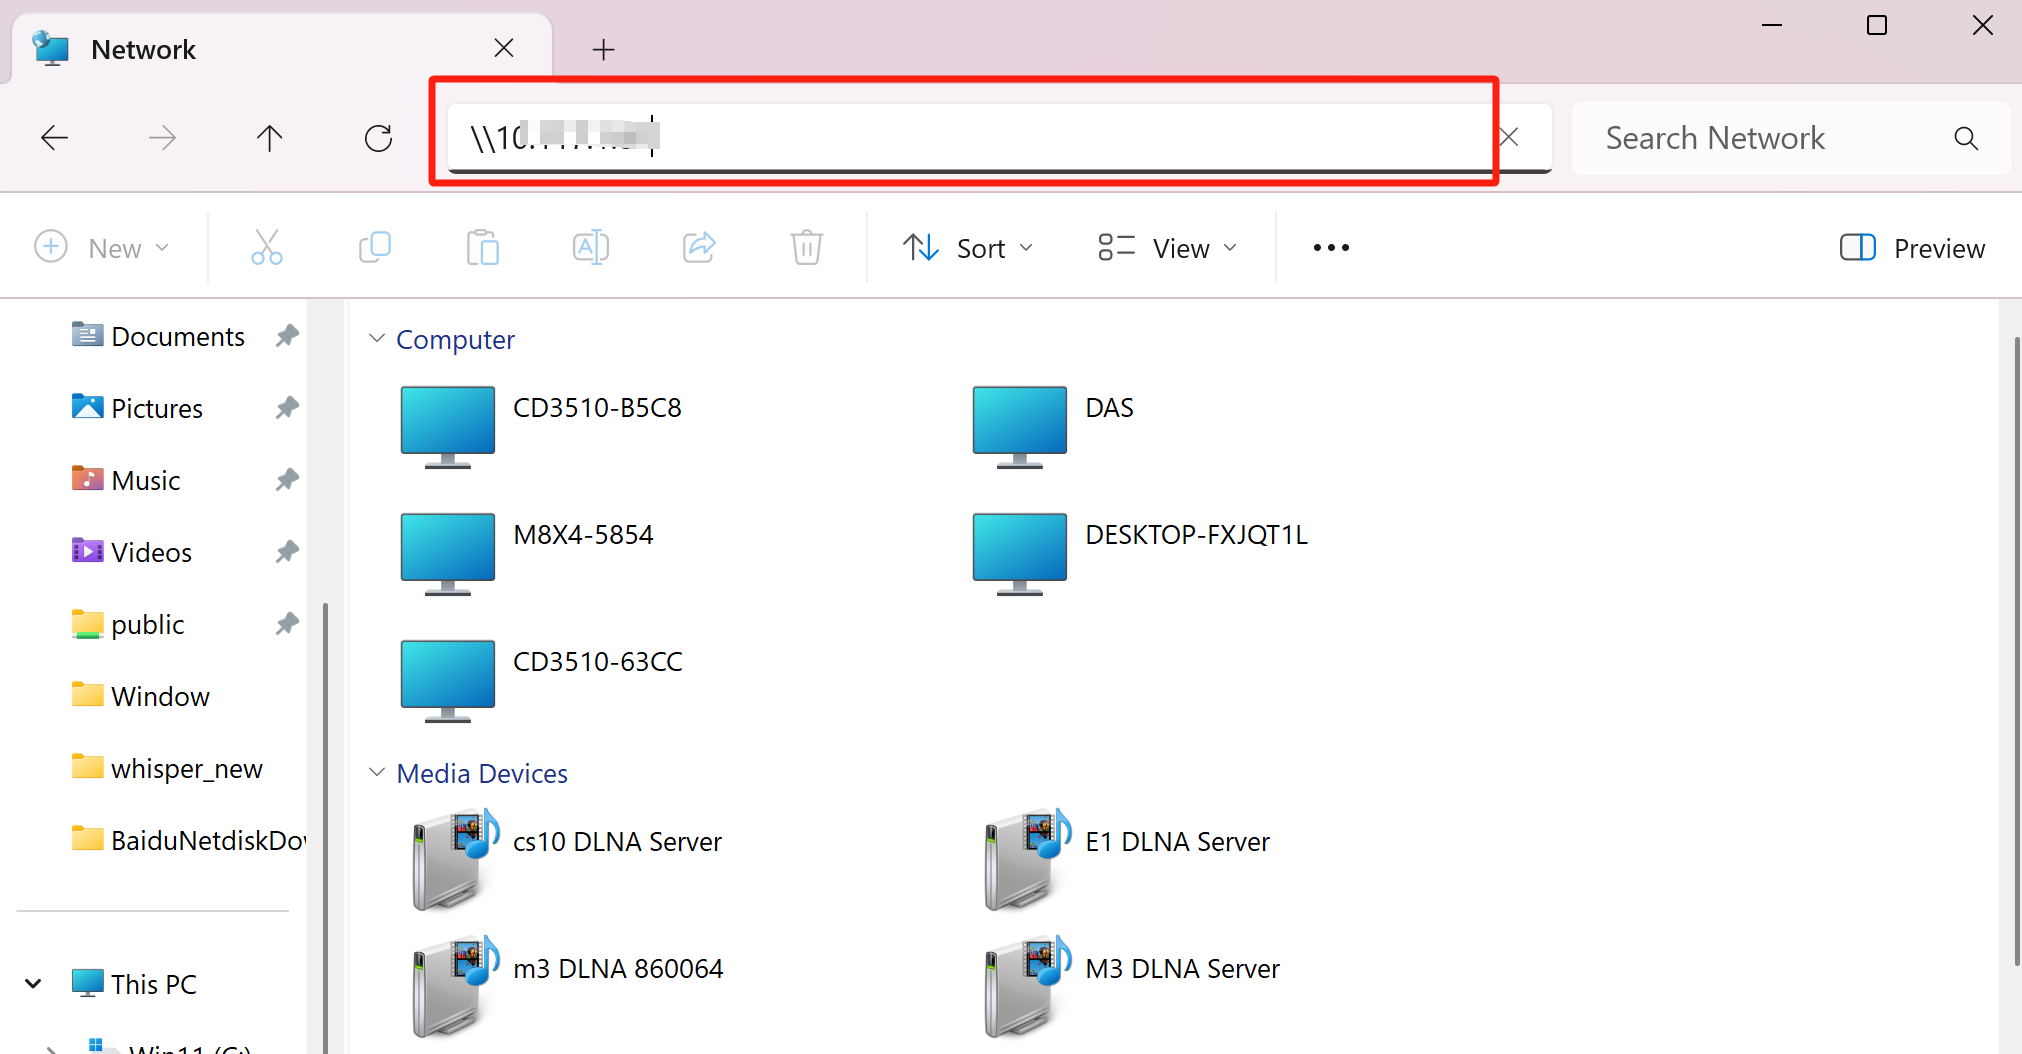
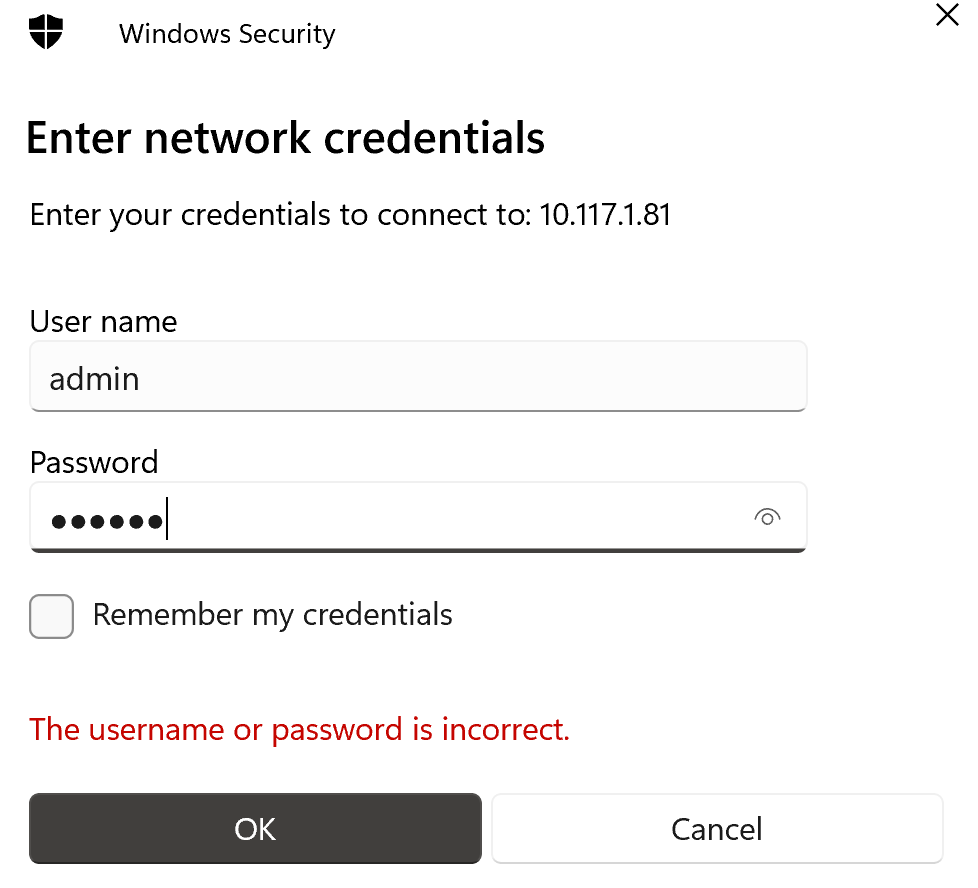
- When prompted, enter your Samba username and password, then click OK.
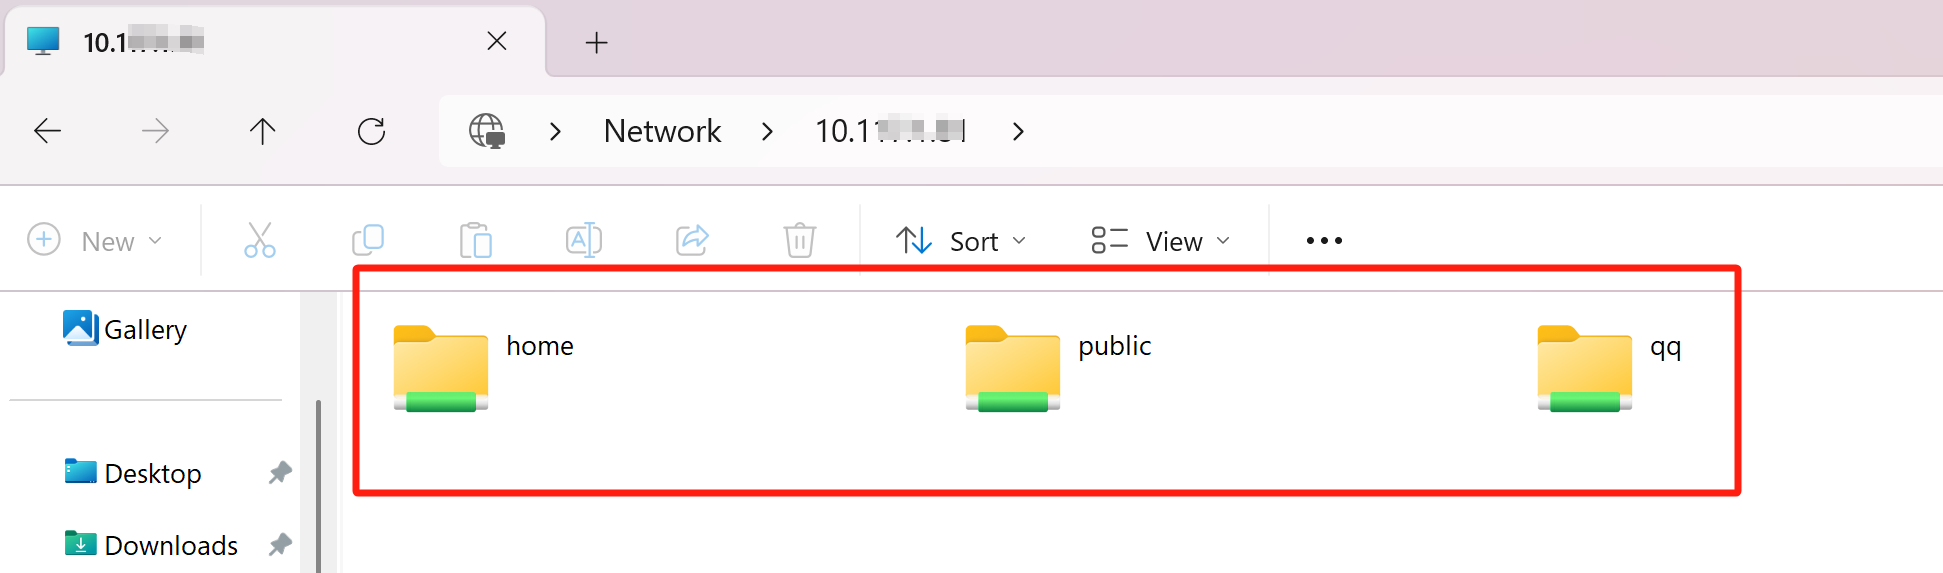
- Once authenticated, File Explorer will display all folders accessible under your DASSET account.
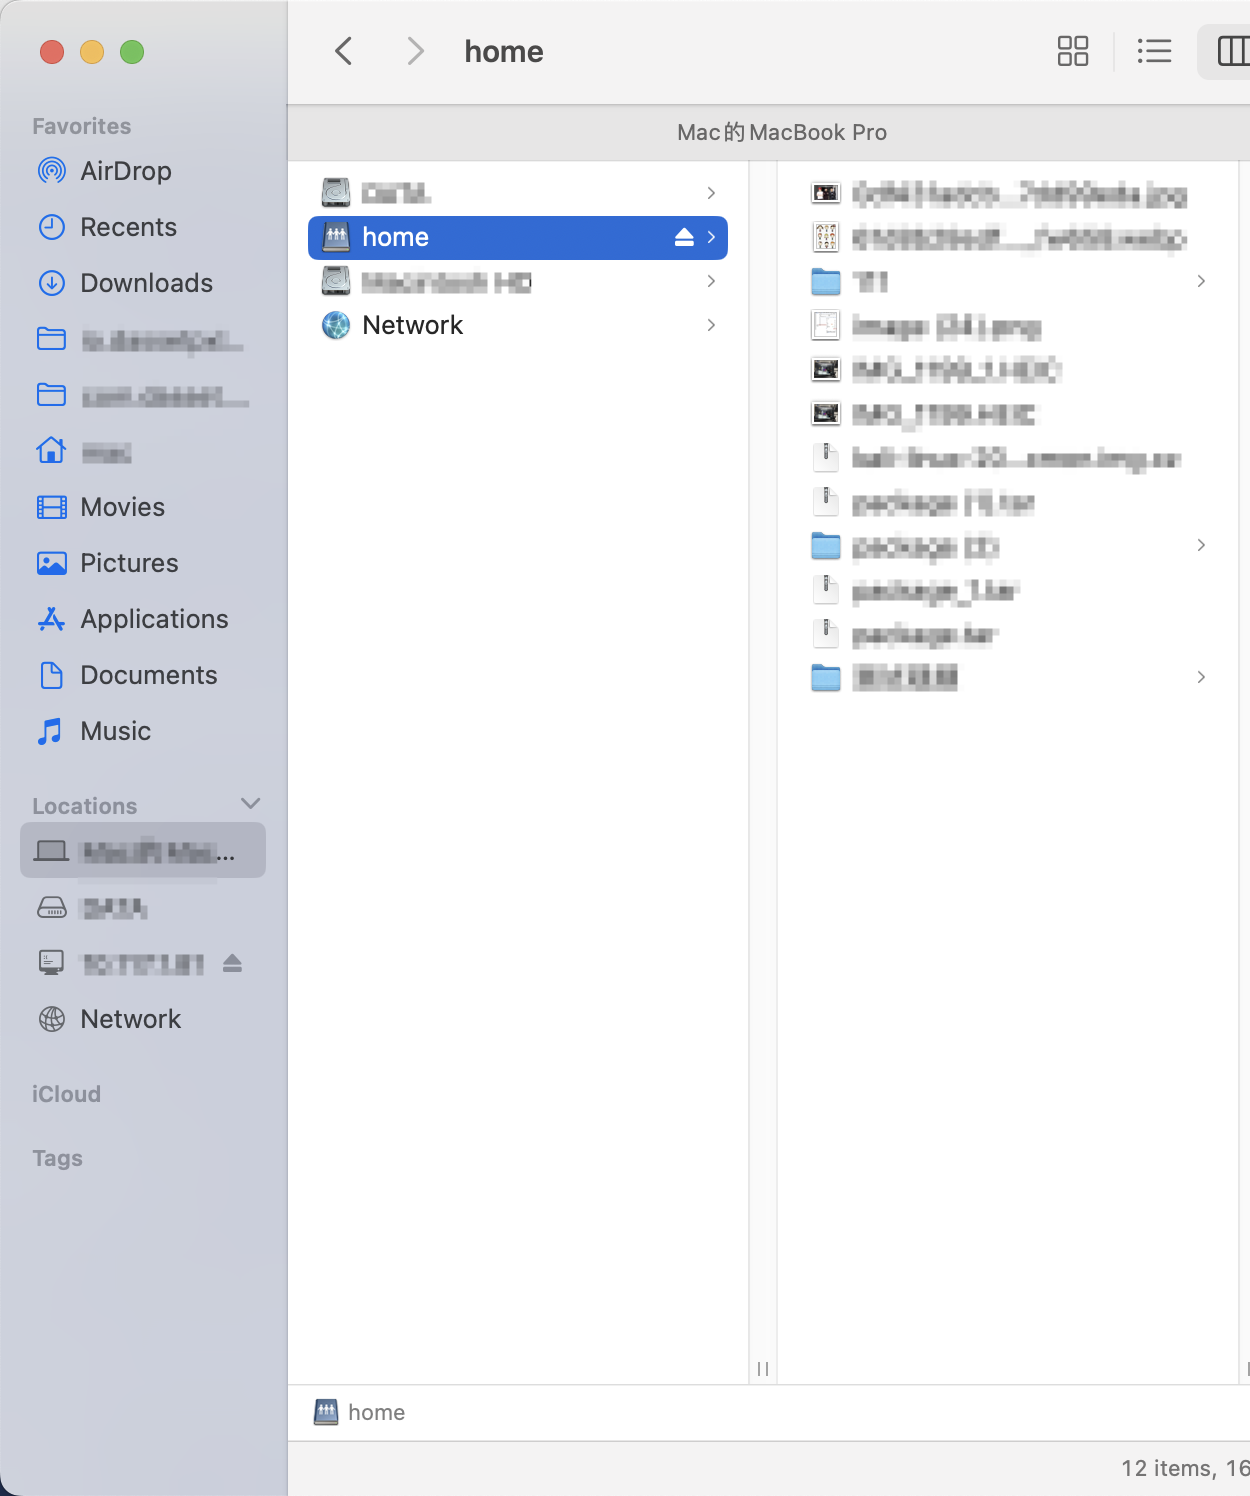
- home: Your My Space on the DASSET device.
- public: The Public Space accessible to all users on the DASSET device.
- Other directories: Shared Group Spaces that your account has joined on the DASSET device.
- Right-click the folder you access frequently, and select Map network drive....
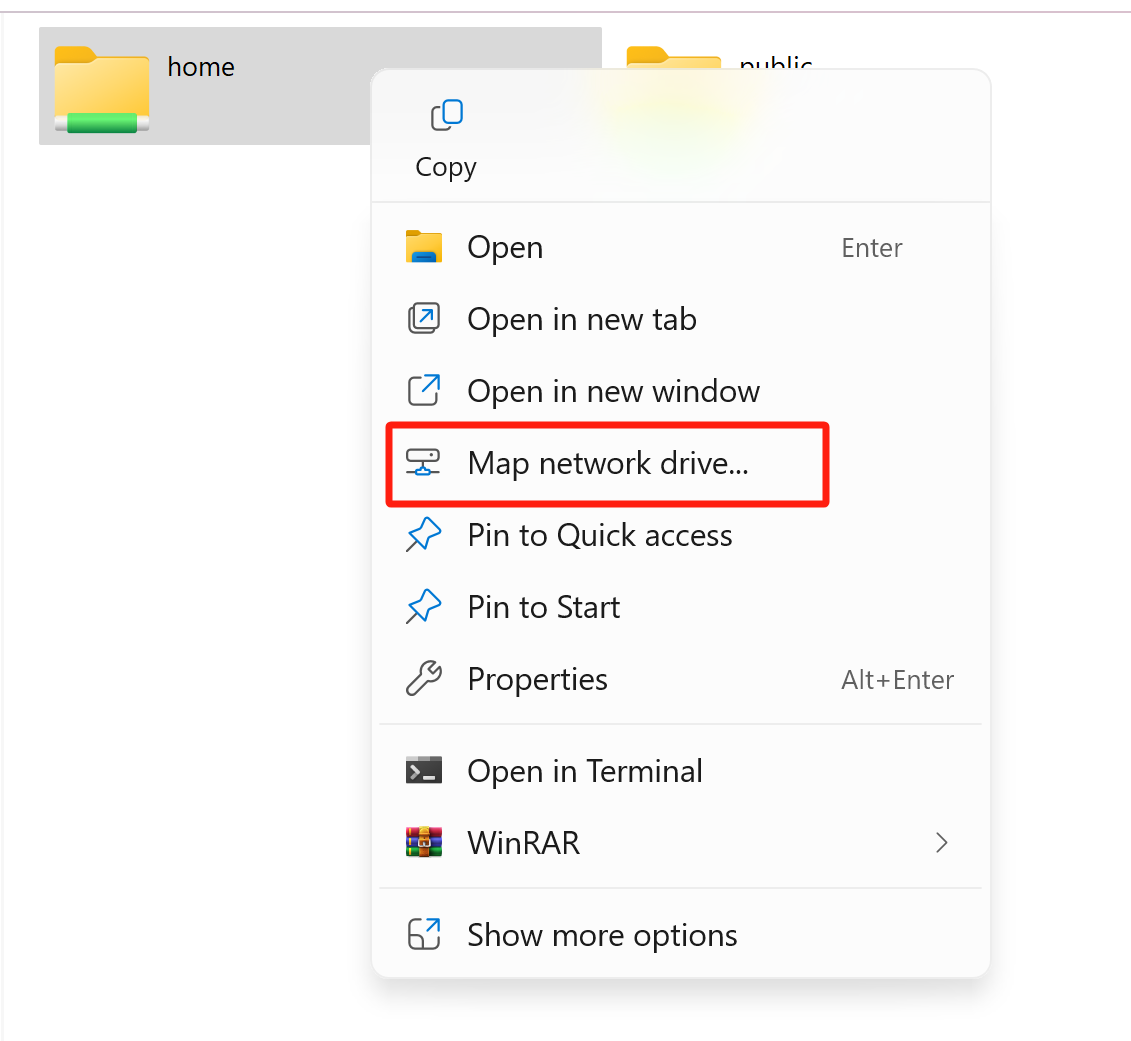
- Choose an available drive letter, check Reconnect at sign-in, and click Finish.
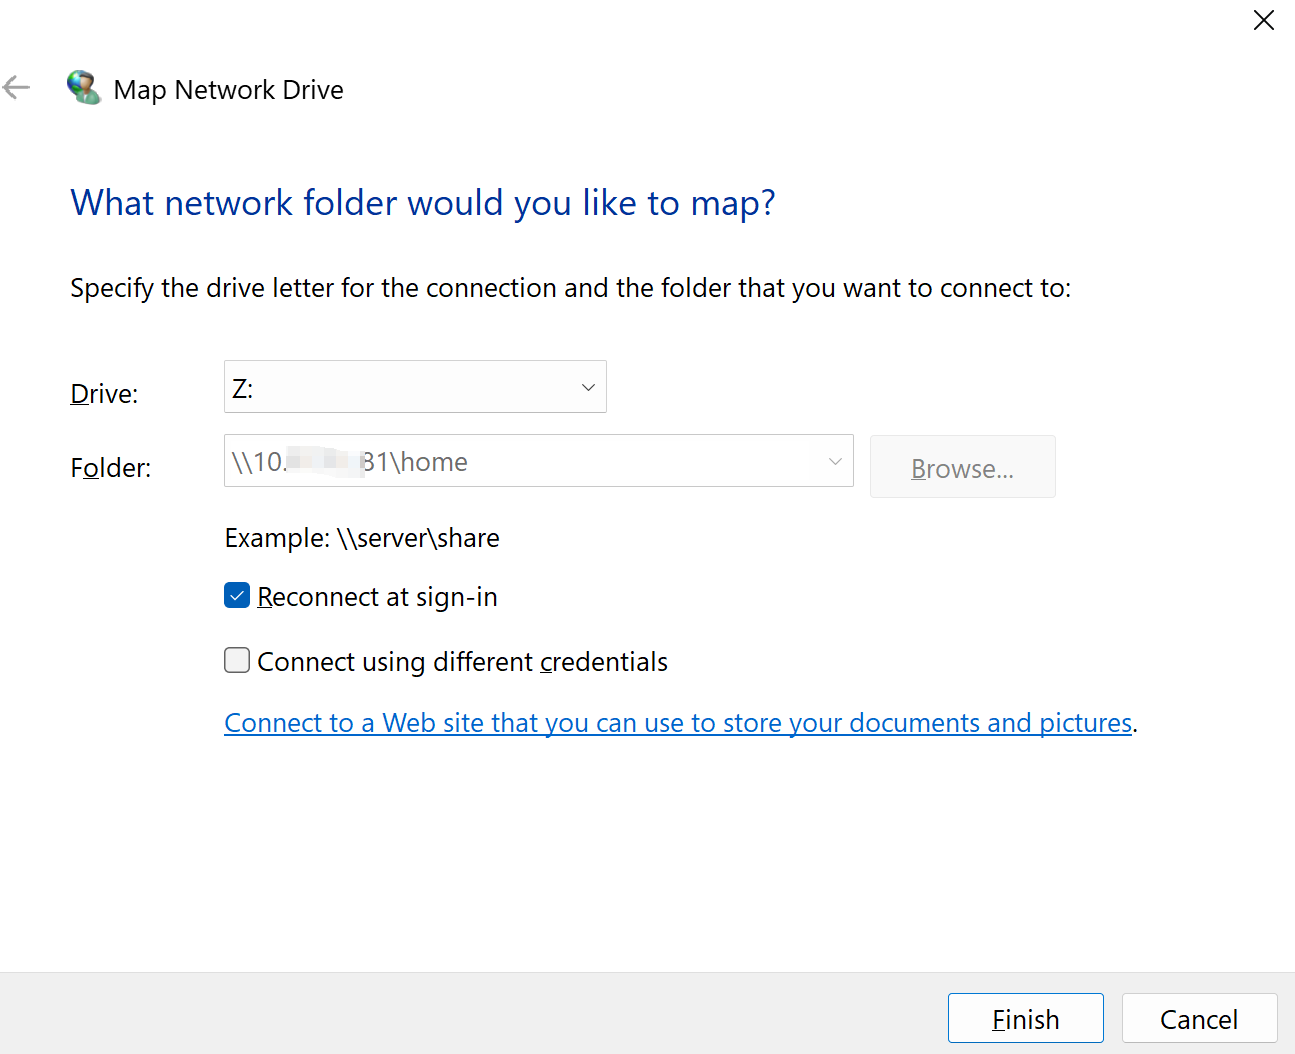
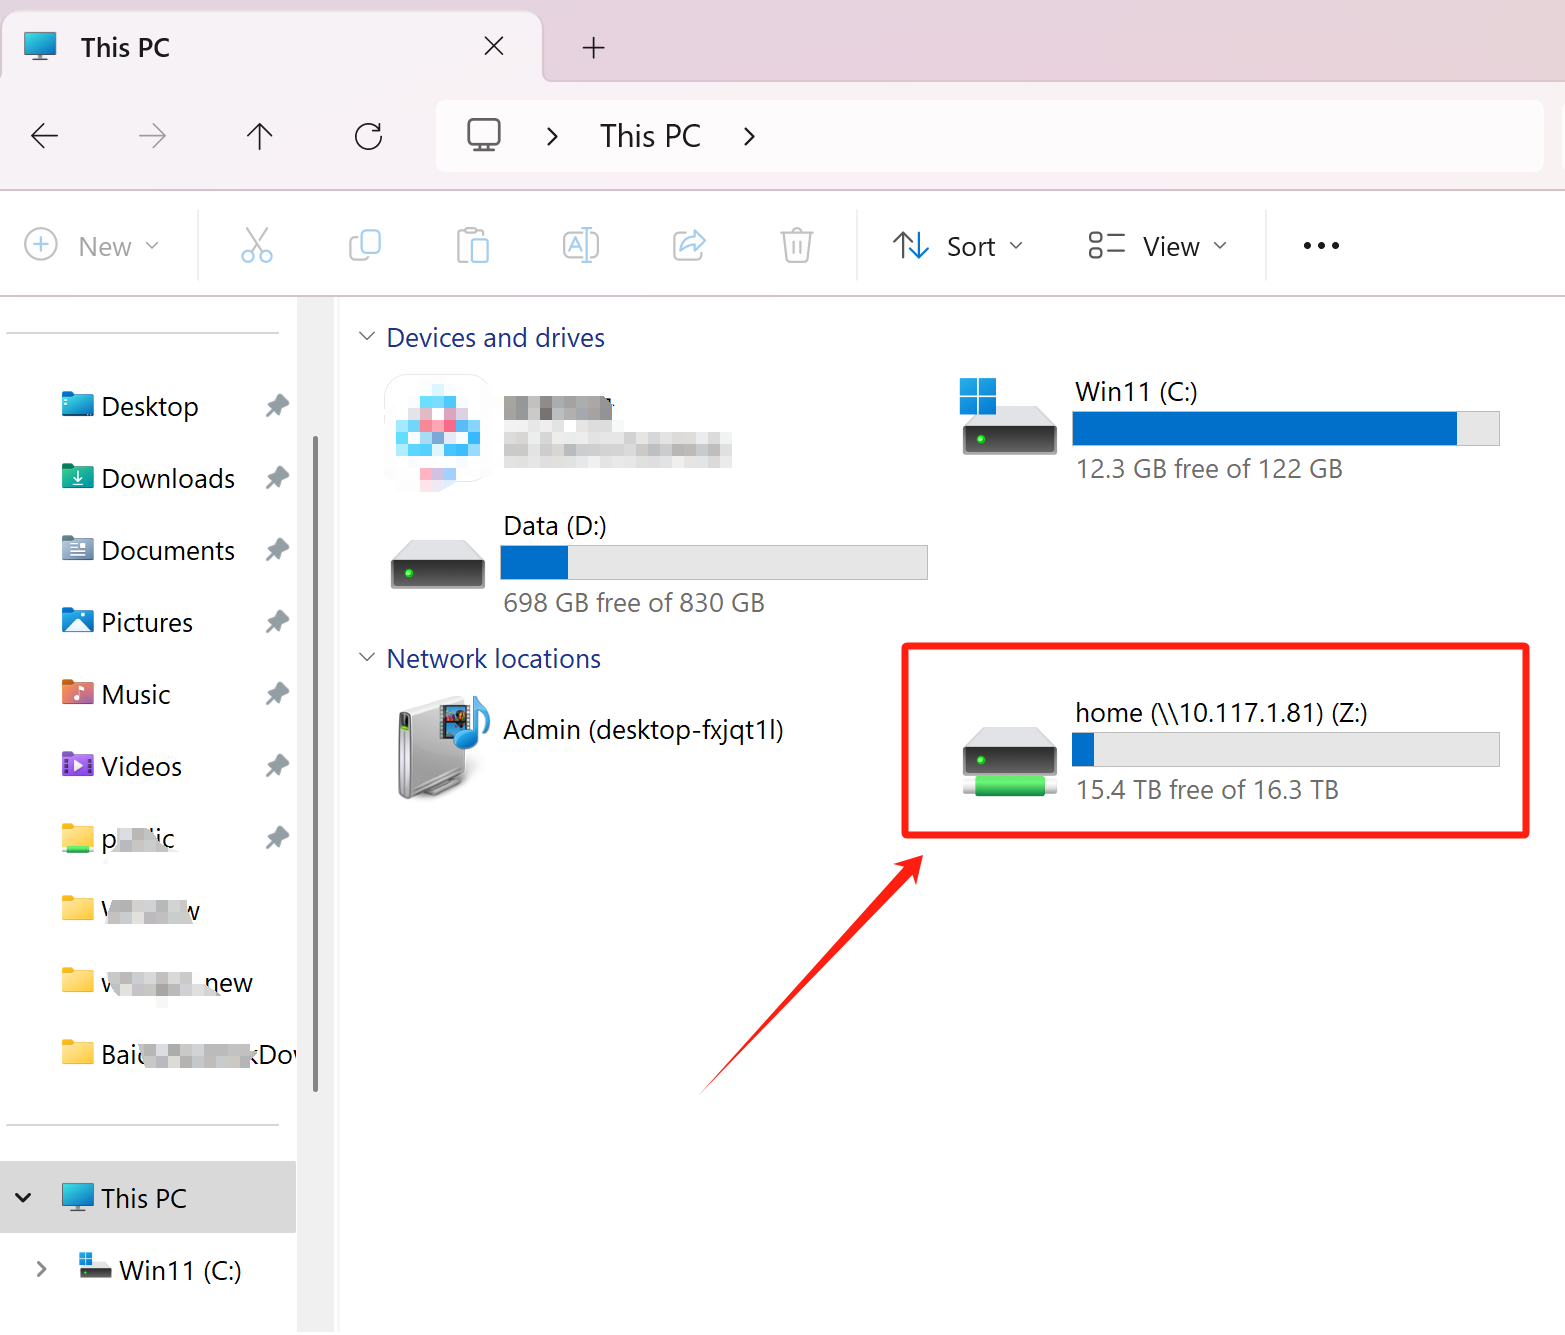
- The mapped network drive will now appear under This PC, allowing quick access to shared files on your DASSET device.
macOS Connection to Samba
- Open Finder... Go... Connect to Server.
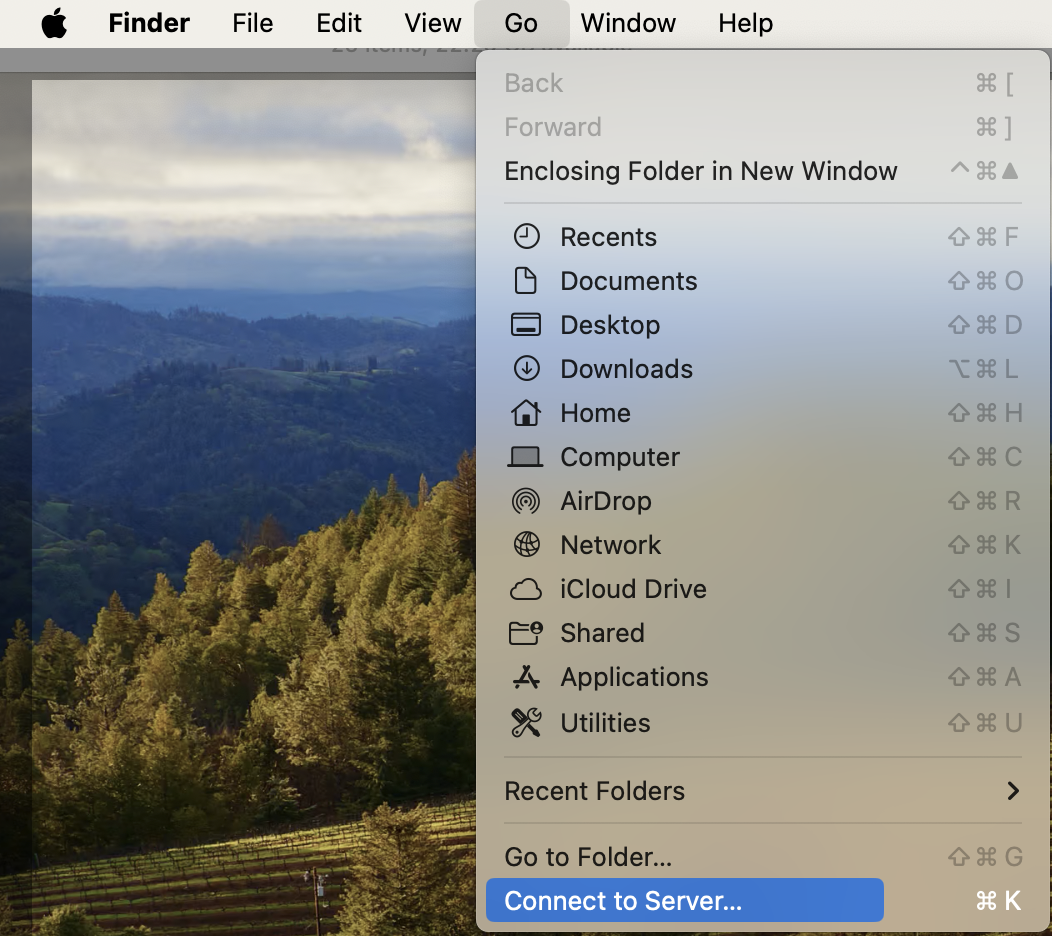
- In the server address field, enter:
smb://DASSET_DEVICE_IP_address(The Samba application interface will display your current IP s address.)
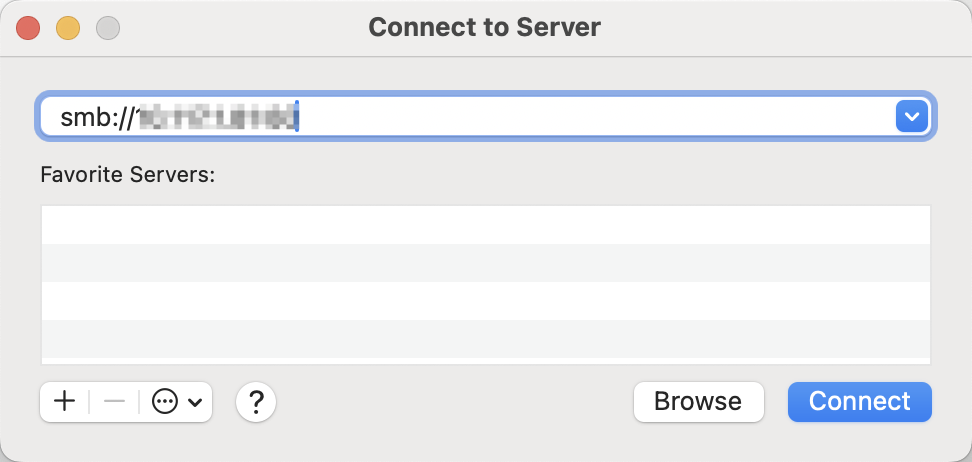
- Click Connect Select Registered User
- Enter your Samba username and password and click Connect.
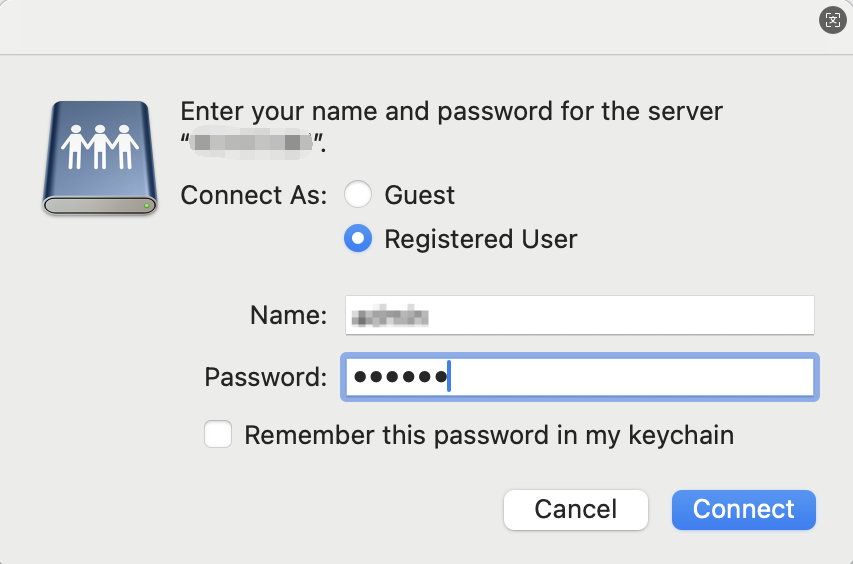
- Select shared directories to access:
- home (My space)
- public (Public space)
- Group spaces (if available)
- Quick access setup: Drag frequently used folders to the "Locations" section in Finder's sidebar
DLNA
DASSET device supports the DLNA protocol. Once enabled, your computer, mobile phone, smart TV, and other devices can discover this device and access its media files directly. When using DLNA for the first time, you must add a DLNA scan path. Only media files stored in the added paths will be accessible to other devices on the LAN.
Configuring DLNA
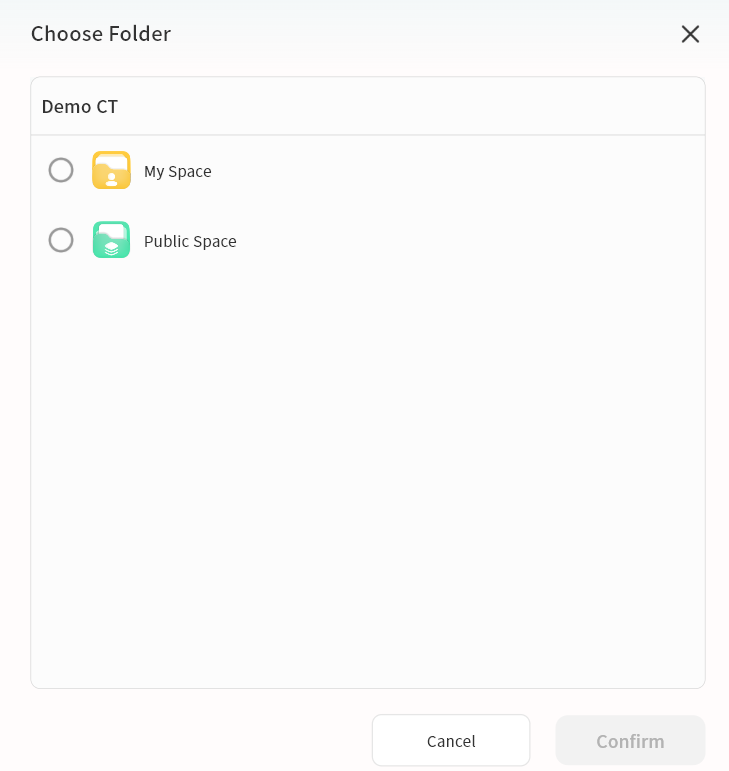
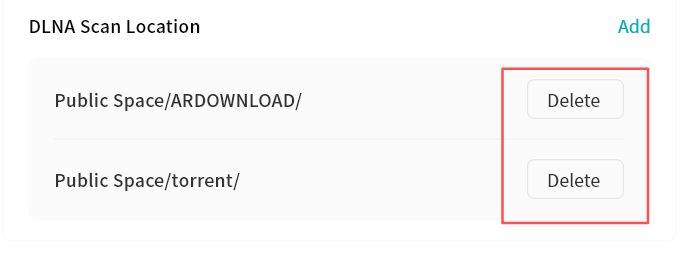
- Click Add.
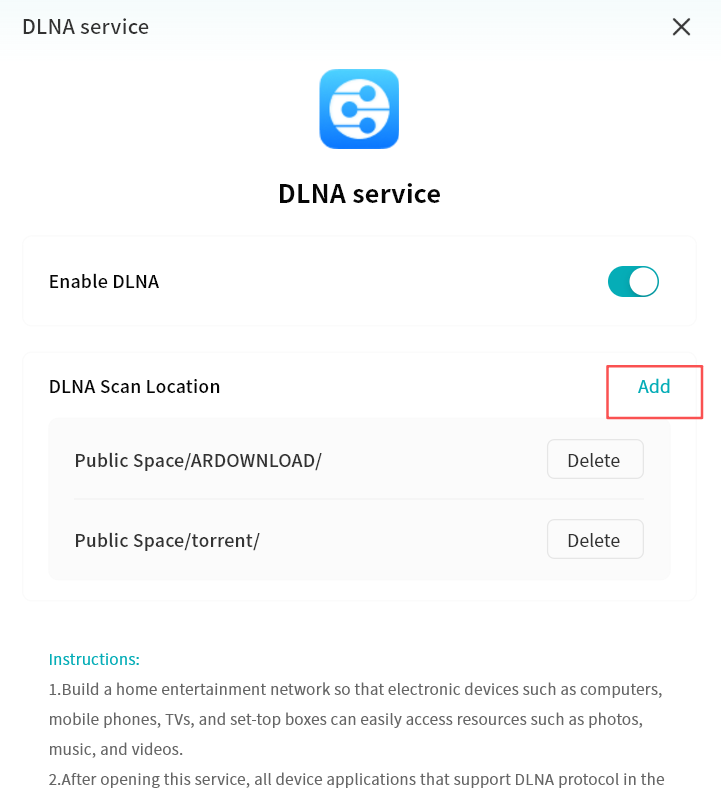
- In the pop-up window, add the folder you want to make available via DLNA.
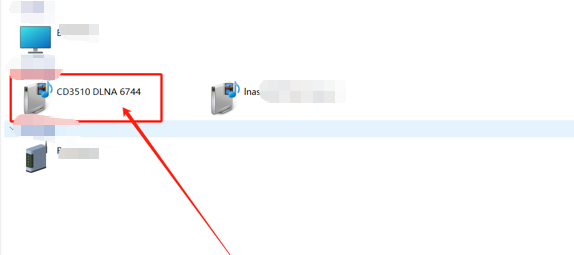
- Once added, any device on the LAN that supports DLNA will be able to discover the DASSET device and play the shared media files.
- You can modify or remove directories from the DLNA interface at any time. Once a folder is removed, other devices on the LAN will no longer have access to its contents.
DLNA is a standardized protocol that allows compatible devices (such as smart TVs, mobile phones, computers, and speakers) to automatically discover each other over a home network and directly stream or play music, videos, and photos stored on another device---without the need for manual file transfers or physical media such as USB drives.
Time Machine
The DASSET device supports Apple's Time Machine feature. Once enabled, you can back up your Mac directly to the DASSET device using Time Machine.
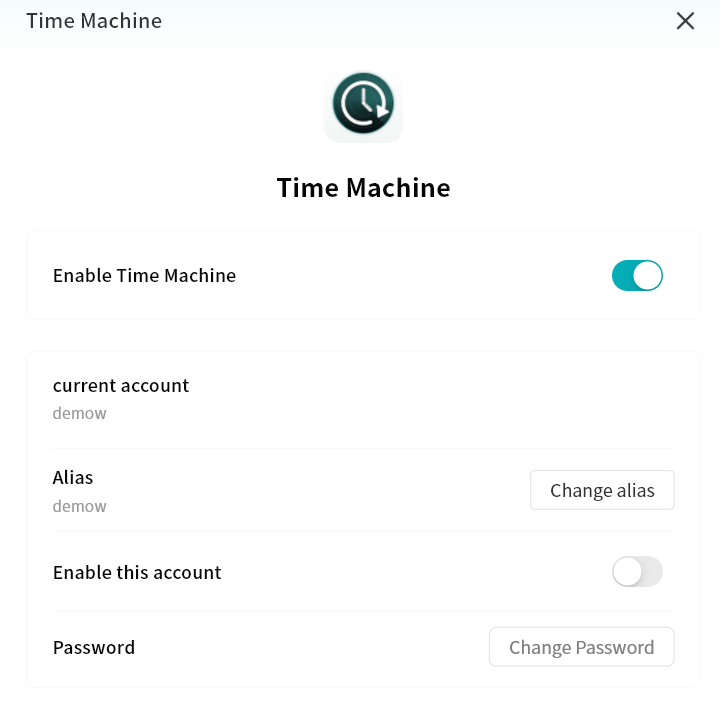
- Enable or disable Time Machine: When enabled, your Apple device can connect to the DASSET device for data backup and recovery.
- Time Machine account: The account used on your Mac to log in to the DASSET device for Time Machine backup.
- Alias: You can set an alternate account alias to be used as the login credential for Time Machine.
- Password: When enabling Time Machine for the first time, you must set a password for account authentication from your Mac.
Apple Time Machine does not support the @ symbol in account names.
Connecting a Mac to Time Machine
- On your Mac, go to System Settings General Time Machine.
- Select Add Backup Disk..., then choose your device from the list and click Set Disk....
- Enter the corresponding network account and password in the pop-up window, then click Connect.
- After setup is complete, your Mac will automatically back up files to the DASSET device using Time Machine.