Applications
Group Space
In Group Space, users with Group Space permissions can create group folders and invite specific members to join. Only members can access files within a group folder, with access controlled by predefined read/write permissions. Group Space is useful when certain photos, videos, or files need to be shared only with selected users. By creating multiple groups, different content can be shared with different users, providing resource sharing and collaboration for families or small teams. Group Space supports multi-device, cross-platform access but does not support Samba access.
Files in Group Space are permanently deleted once removed and do not enter the Recycle Bin.
Create a Group
- Click Group Space +, then enter the group name.
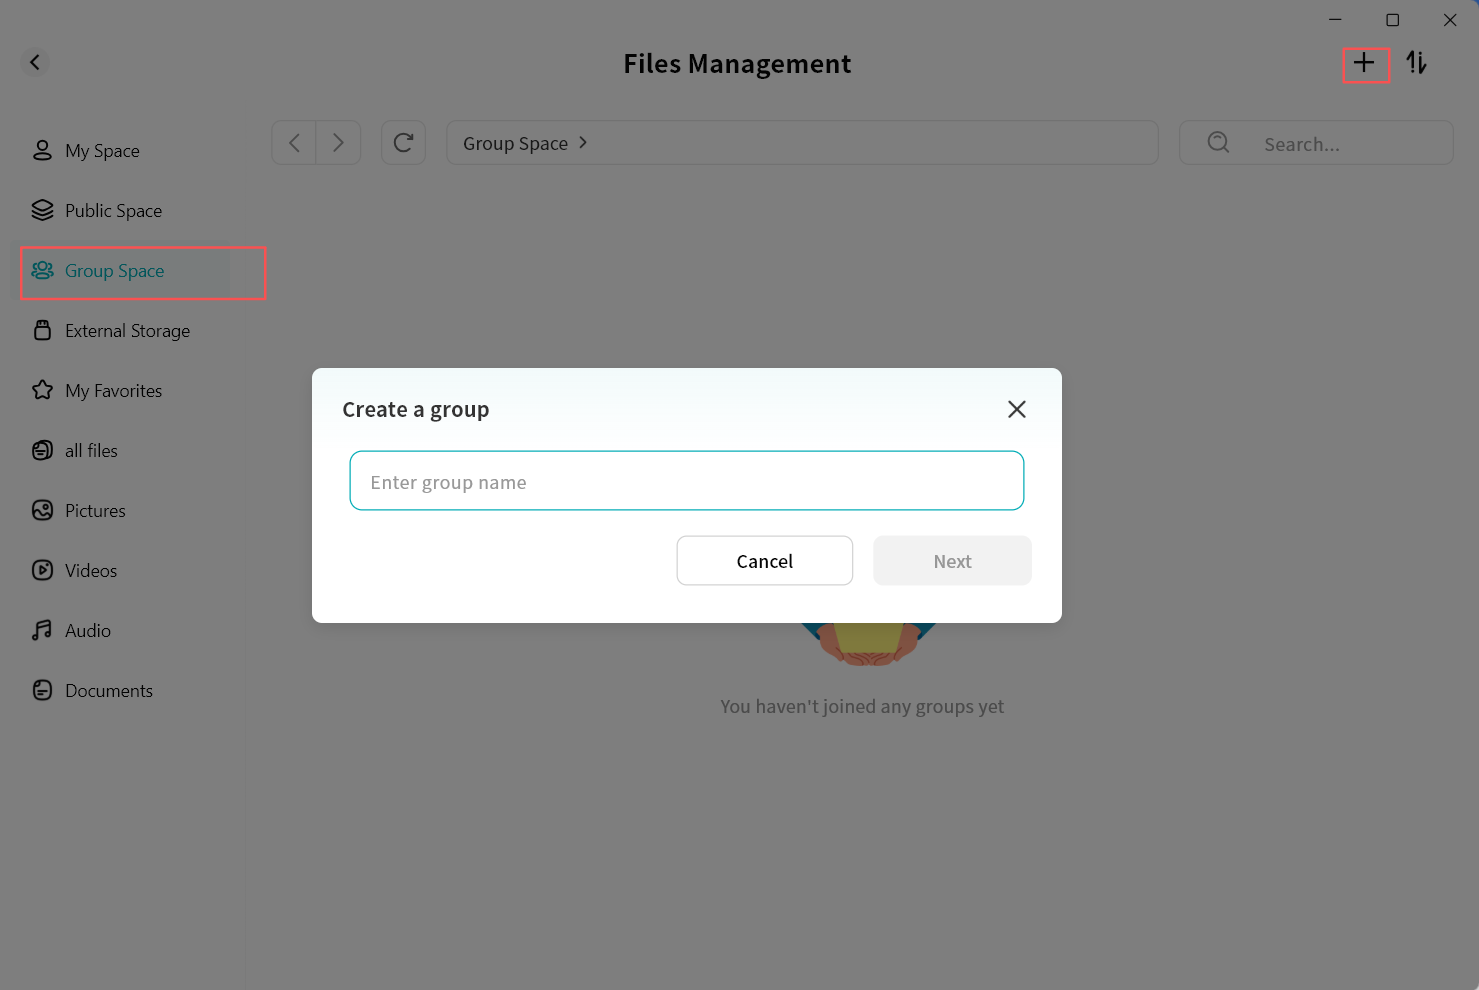
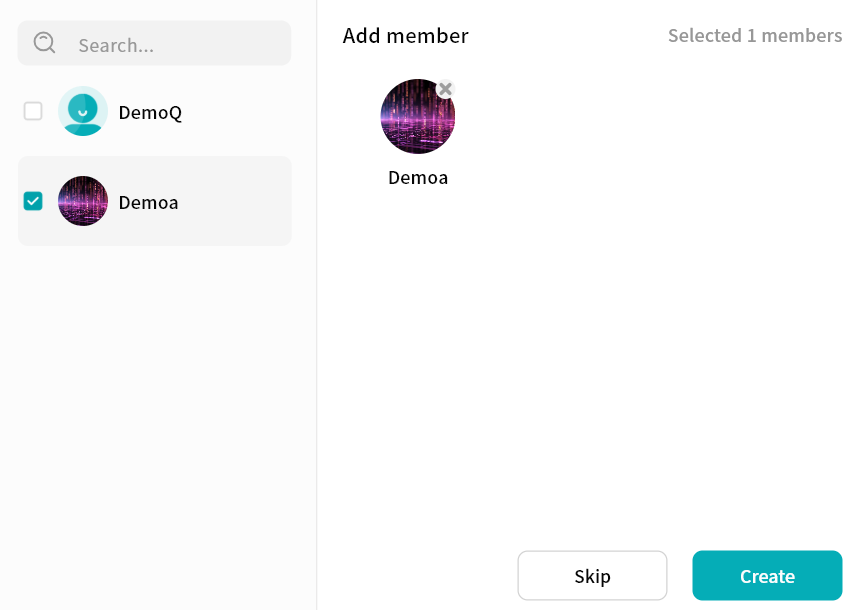
- In the pop-up window, select one or multiple members to join the group:
- Member list supports multi-selection.
- Click the "x" on a member's avatar to cancel an invitation.
- Keyword search is supported for quickly finding members.
- After selection, click Create.
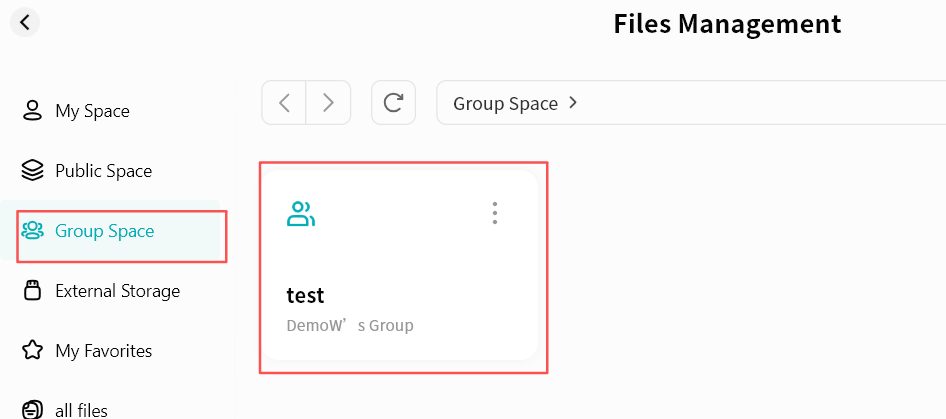
- Once created, the group will appear on the Group Space page.
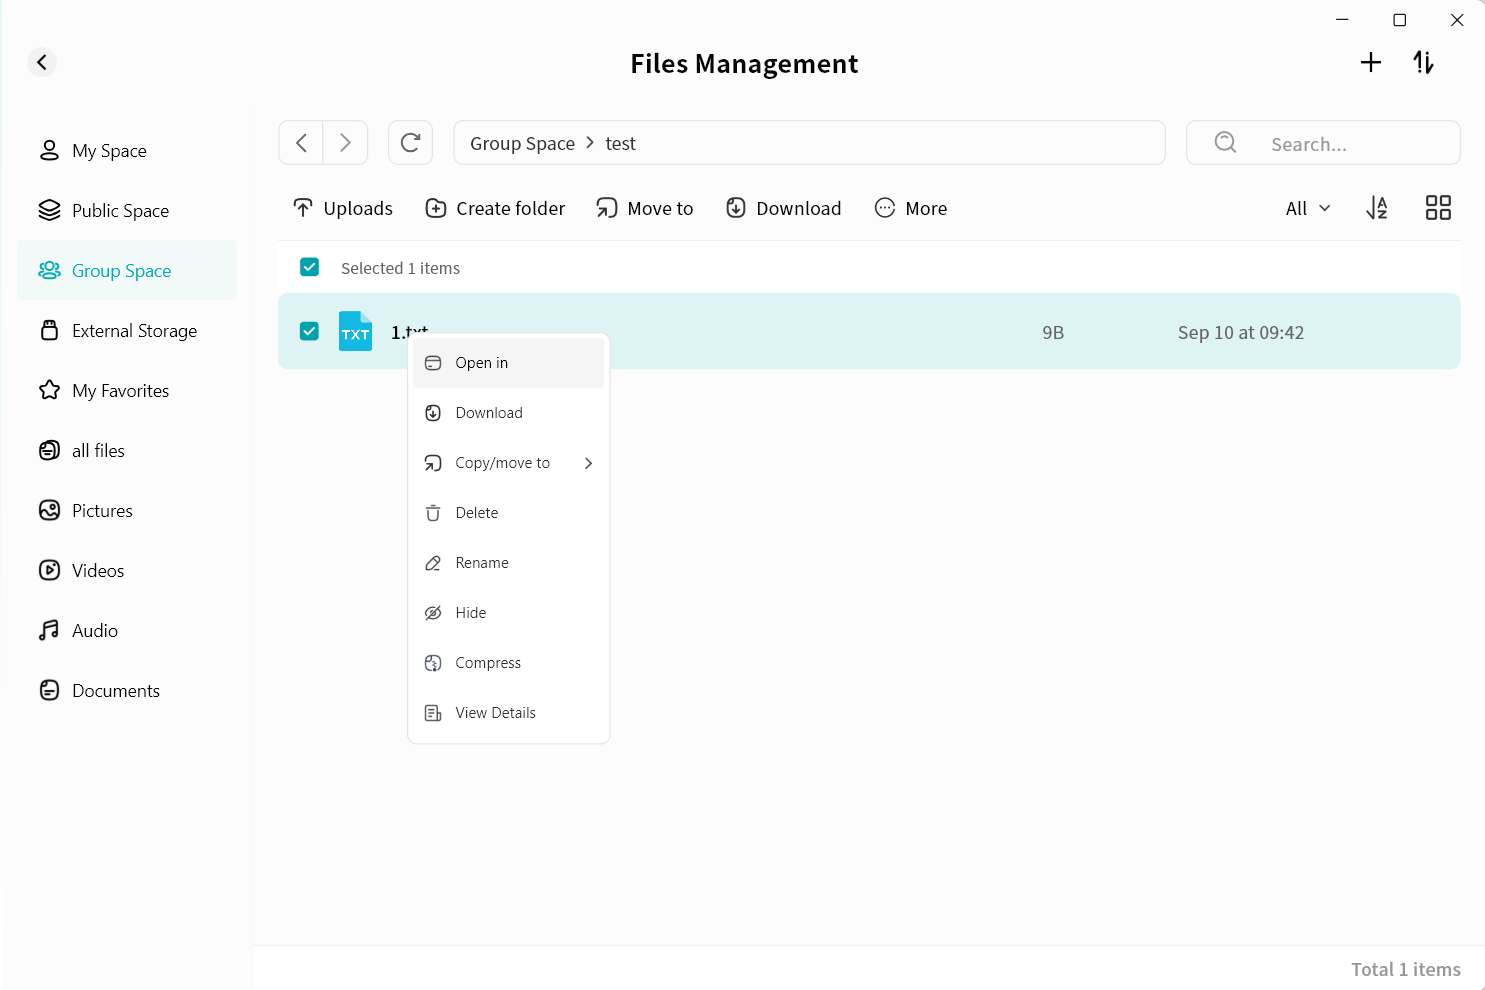
Using Group Space
Group Space usage is consistent with other file management pages. You can:
- Upload files to a group
- Download files from a group
- Create new folders
- Move/Copy files within a group
- Rename files/folders
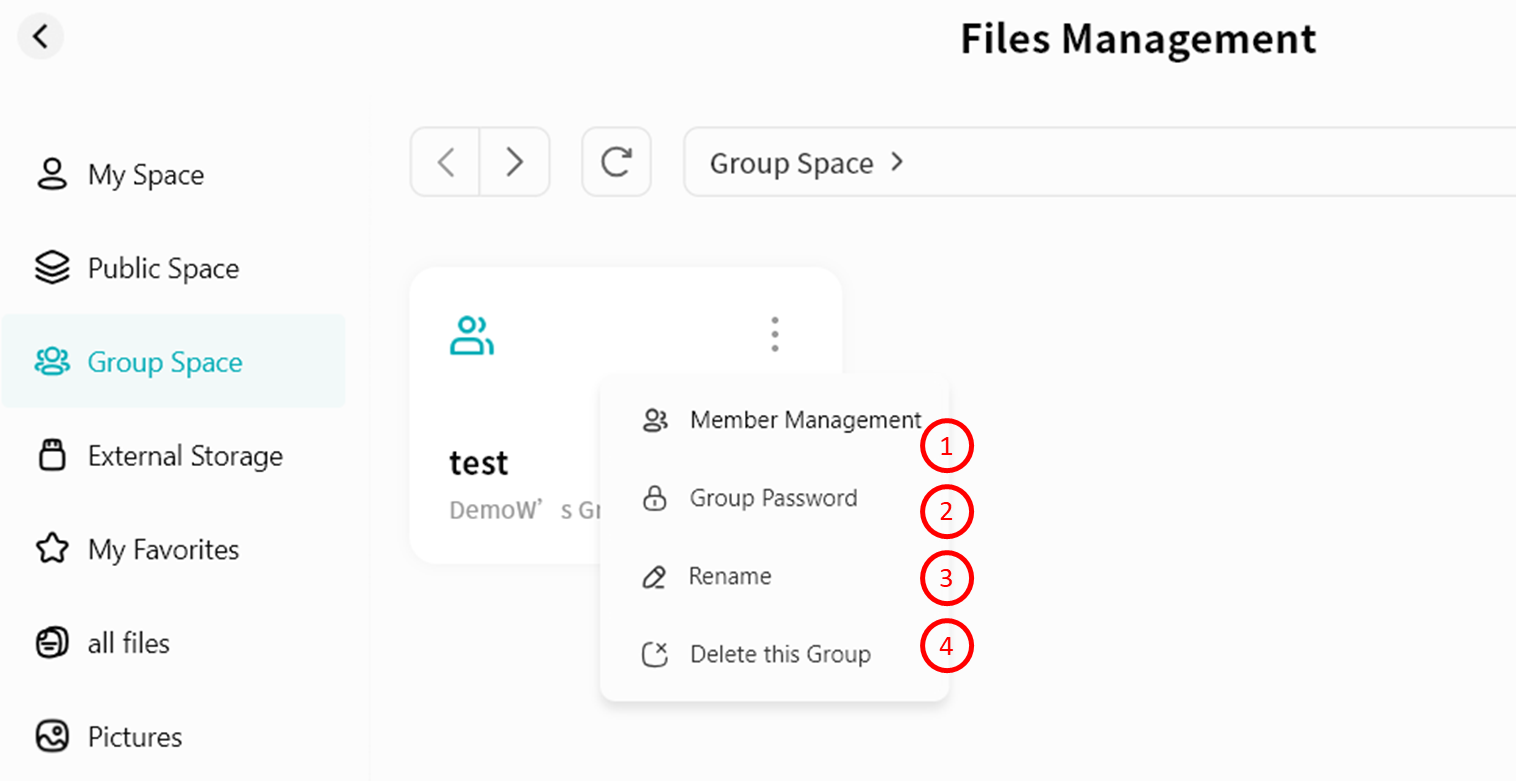
Group Management
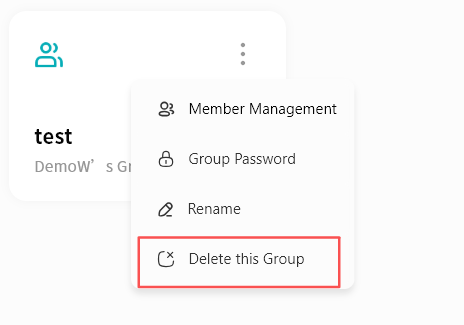
Creators of the group have permission to manaage a group. On the group list, click the ellipsis icon to open the Group Management menu:
- Member Management: Add or remove members.
- Group Password: Set a password required for accessing files.
- Rename: Modify the group name.
- Delete Group: Delete the group, including all files within.
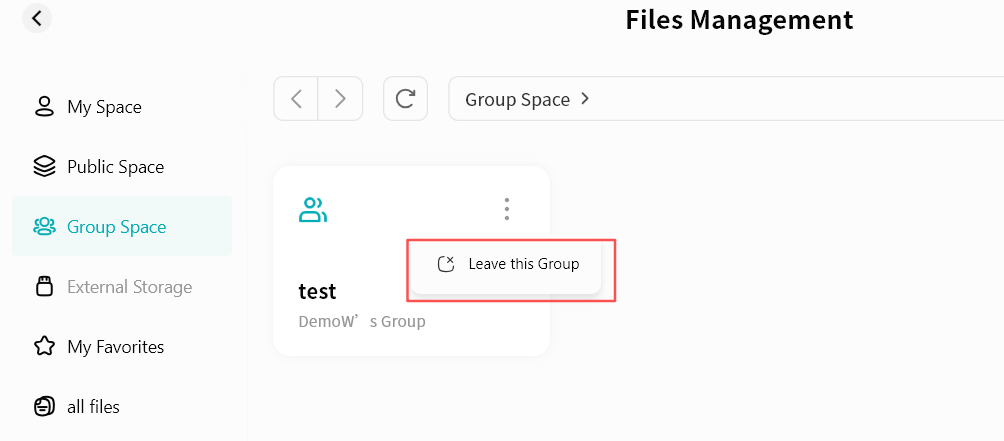
- Exit Group (Members only): Members of a group can choose to exit the group.
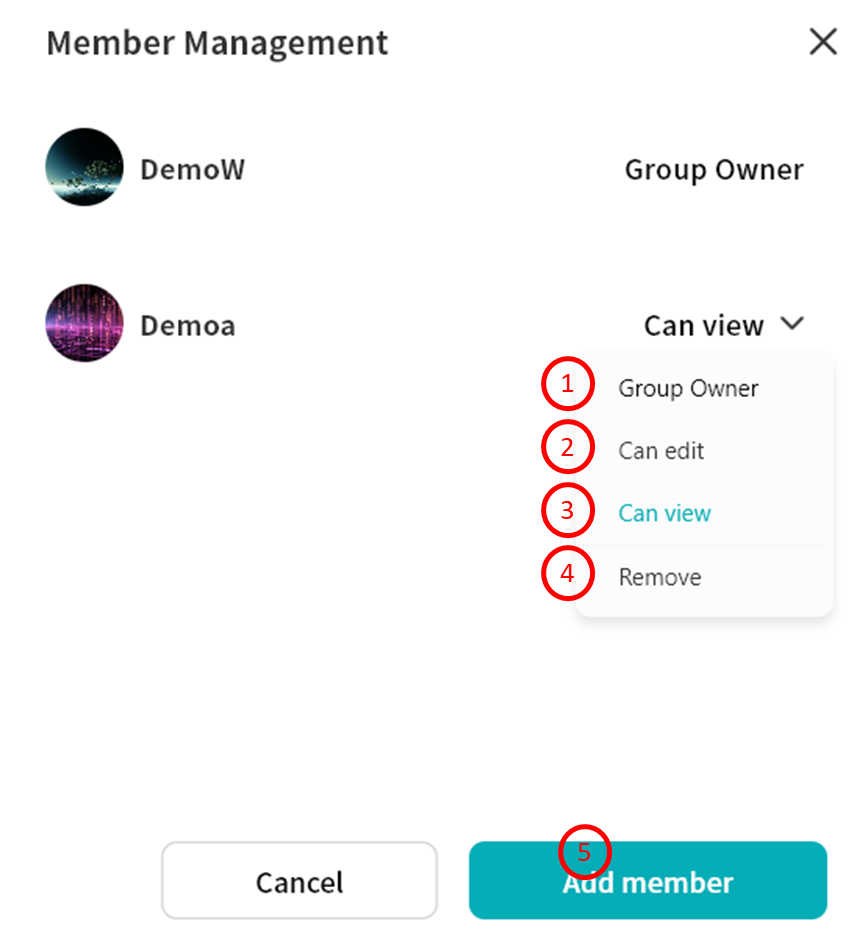
Member Management
In the Member Management page, you can add/remove members or configure permissions:
- Transfer Ownership: Assign group Owner role to another member.
- Edit: Members can write to the group, performing all file operations including upload, download, move, etc.
- View Only: Members can only view files and perform limited actions such as download, copy, or view details.
- Remove: Remove the member from the group. The removed user cannot access the group.
- Add Members: Add new members to the group.
Group Password
You can set a password for the group, requiring members to enter it before accessing files.
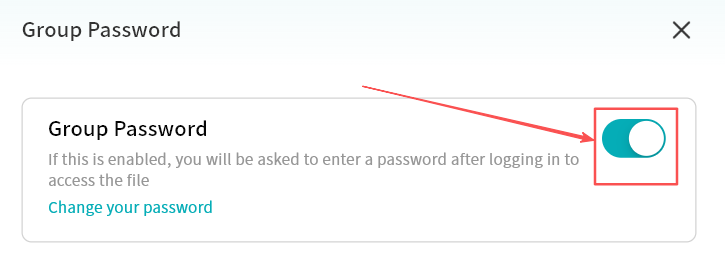
Set Group Password
- Click Group Password.
- In the pop-up window, enable Group Password.
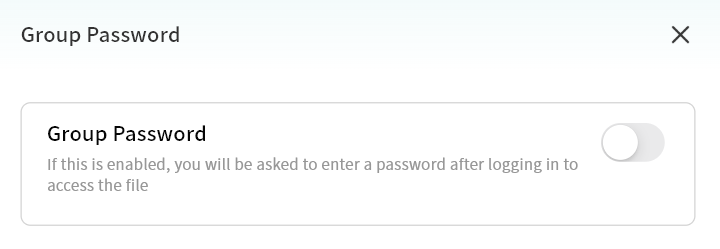
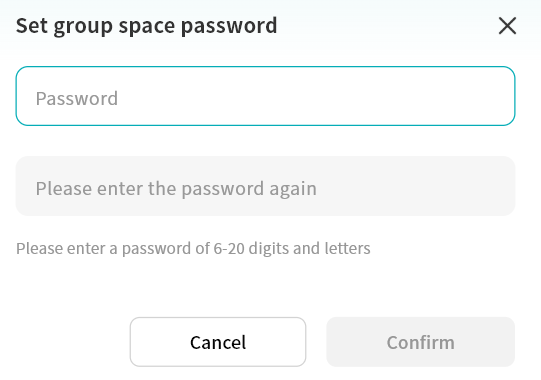
- Set the password and click Confirm.
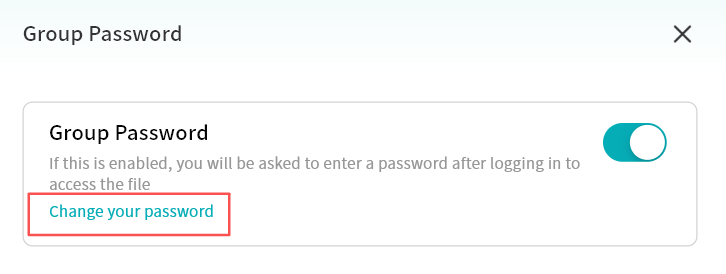
Modify Group Password
- Click Group Password.
- Select Change Your Password.
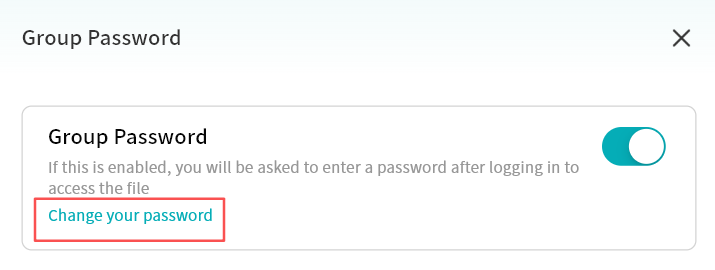
- Enter the current password and click Confirm.
- Set a new password.
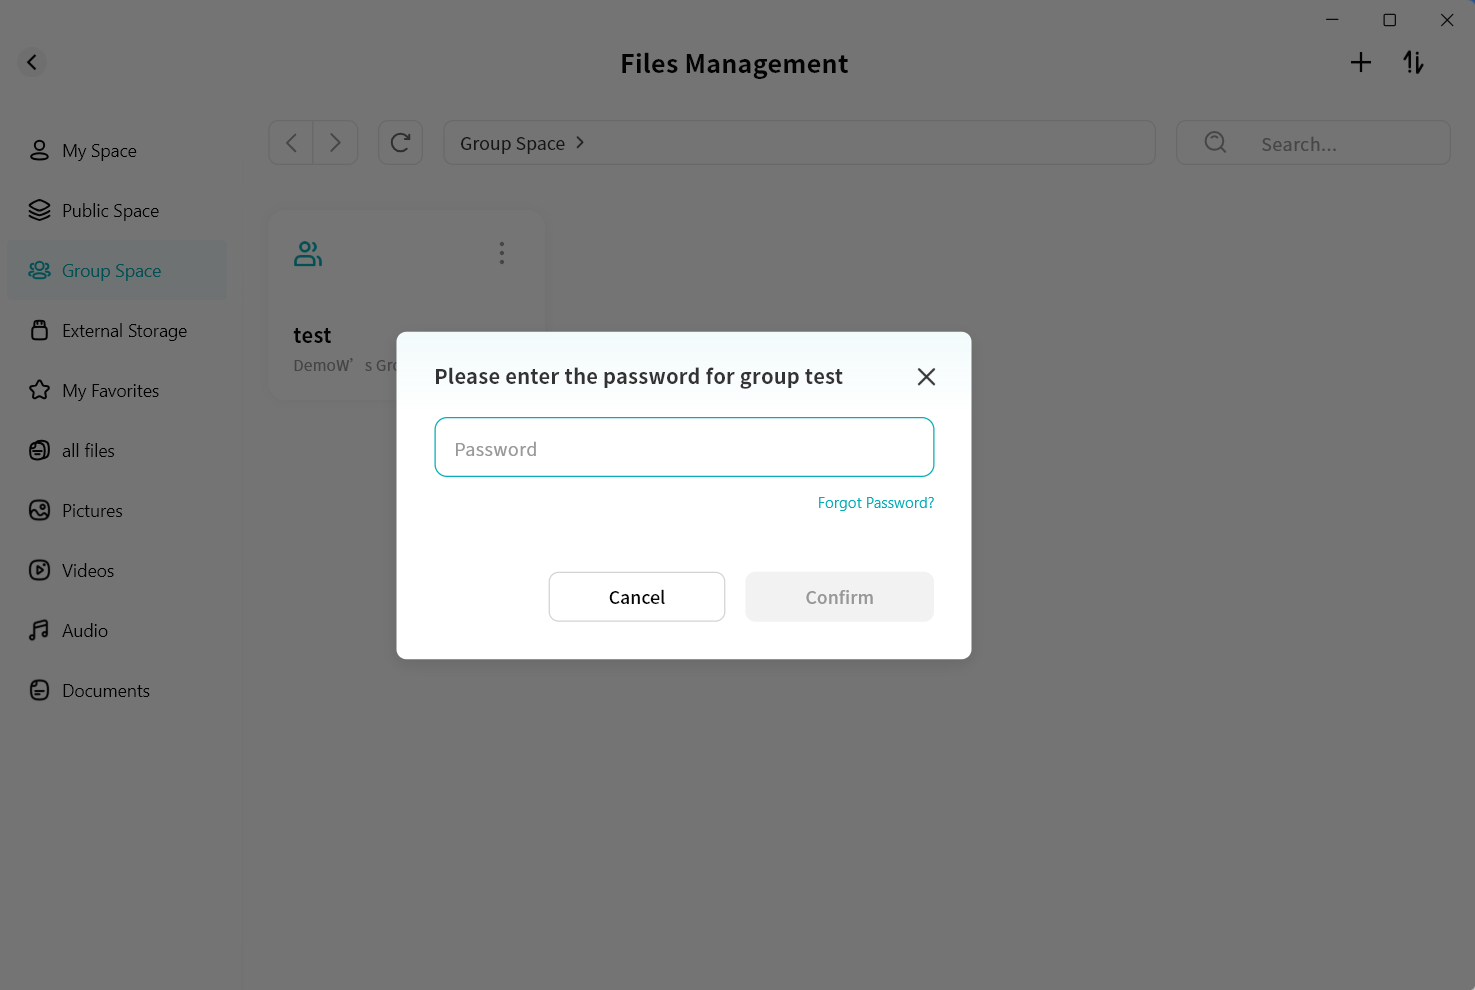
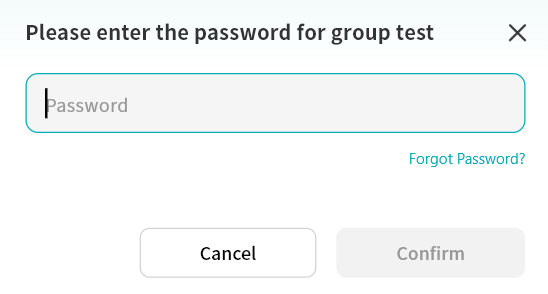
Access Group with Password
- Click the group.
- In the pop-up window, enter the correct password to access Group Space.
Recover Group Password
- Click Group Password Change Password.
- Select Forgot Password.
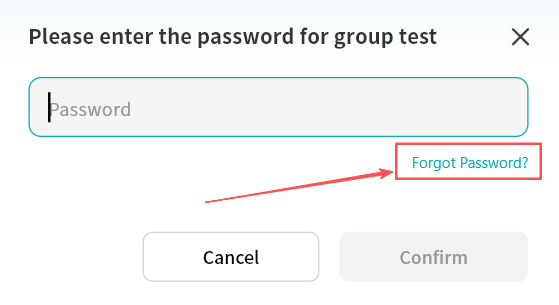
- Enter your DASSET account email or mobile number for identity verification.
- Enter the email/SMS verification code.
- After verification, you can reset the group password.
Disable Group Password
- Click Group Password Disable.
- Enter the current group password.
- The password will be successfully disabled.
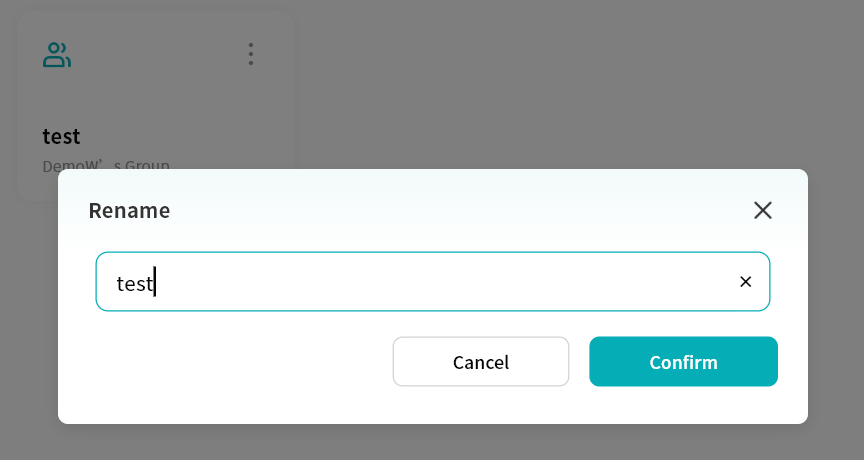
Rename Group
Click Rename, then enter a new group name in the pop-up window to update the name.
Delete Group
Click Delete This Group to permanently delete the group and all its contents.
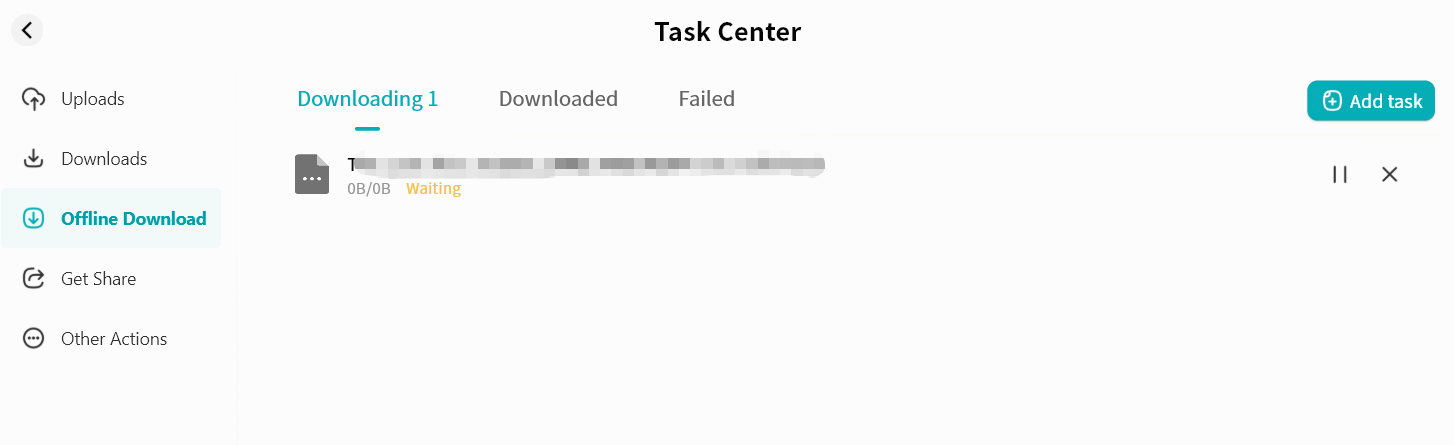
Task Center
All file uploads, downloads, and related operations are displayed centrally in the Task Center.

From the device home page, click the Task Center icon in the upper right corner. A number displayed on the icon indicates the count of ongoing tasks.
Within the Task Center, operation progress is categorized as follows:
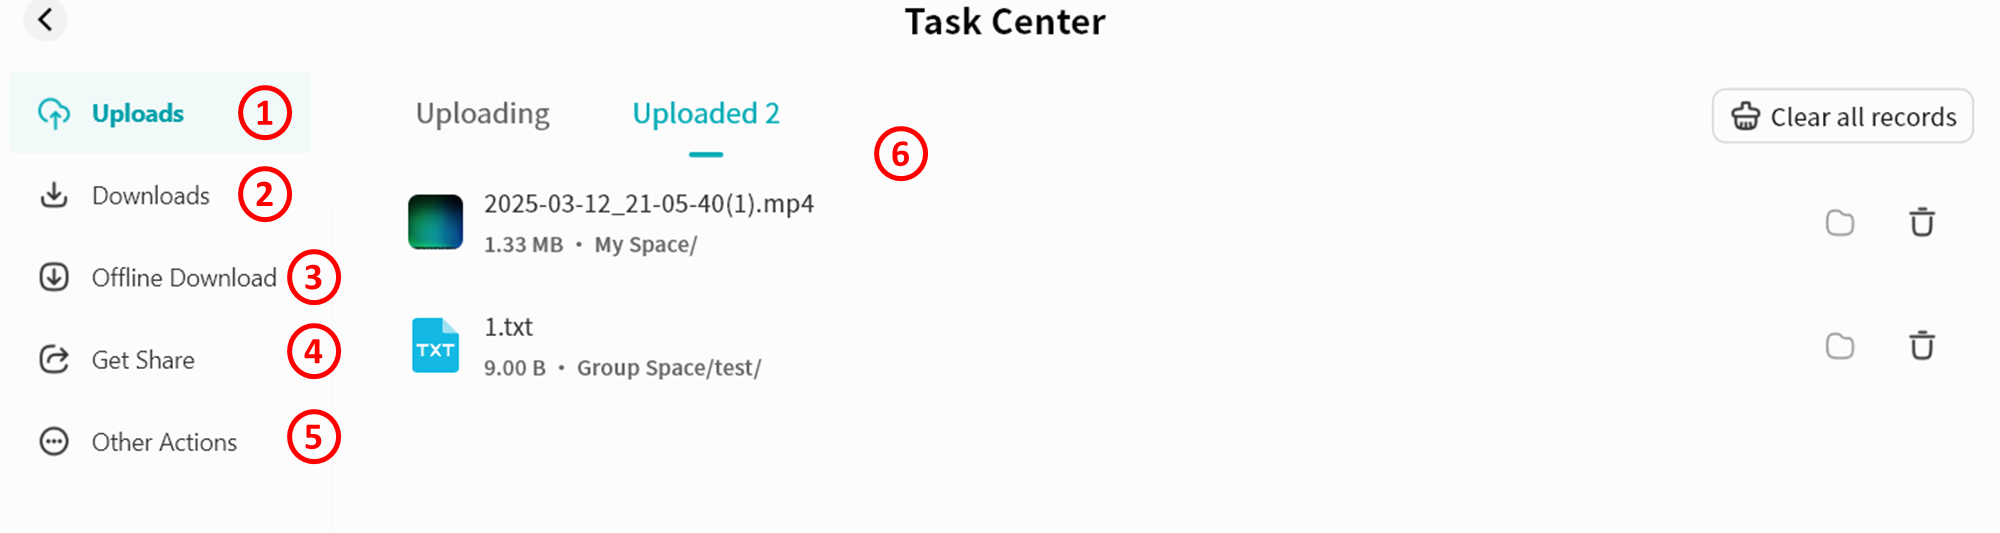
- Upload: Shows all ongoing and completed upload tasks
- Downloads: Shows all ongoing and completed download tasks
- Offline Download: Shows ongoing, completed, and failed offline download tasks
- Get Share: Shows files you have received or shared with others
- Other Actions: Shows ongoing and completed operations such as move, copy, decompress, and compress
- Task Details Page: Displays a complete record of all tasks
My Vault tasks are displayed separately to ensure your privacy.
Upload
In the Upload section, you can view ongoing and completed uploads, and control tasks at any time (pause, resume, cancel).

- Upload tasks display current upload speed, uploaded size, and total file size.
- You can click the control button to pause/resume/cancel all current upload tasks at once.
- You can also manage individual tasks using the control button on each task entry.
- You can delete all task records, or delete a single record.
- Clicking a task's path button opens the file's storage location on the DASSET device.
Downloads
In the Download section, you can view ongoing and completed downloads, and control tasks at any time (pause, resume, cancel).
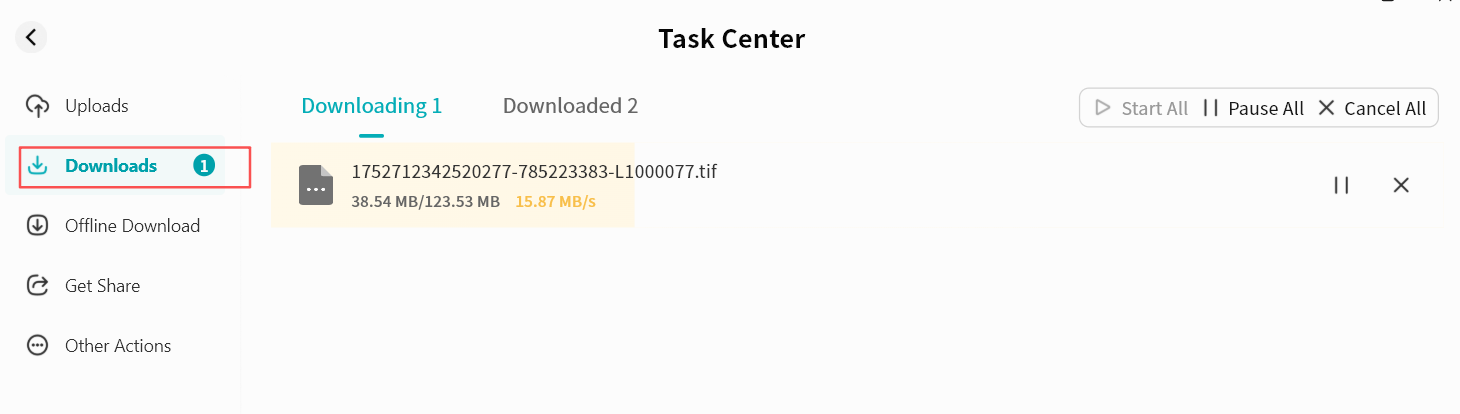
- Download tasks display current download speed, downloaded size, and total file size.
- You can click the control button to pause/resume/cancel all current download tasks at once.
- You can also manage individual tasks using the control button on each task entry.
- You can delete all task records, or delete a single record.
- Clicking a task's path button opens the file's saved location on your computer.
Get Shares
The Received Shares section includes two types of file sharing:
- From Members: File sharing between members on the same DASSET device (available to all users).
- QR Code Sharing: Receive files shared by other DASSET users via QR code or share code. Files are downloaded to the recipient's DASSET edge device (available only to device Owners).
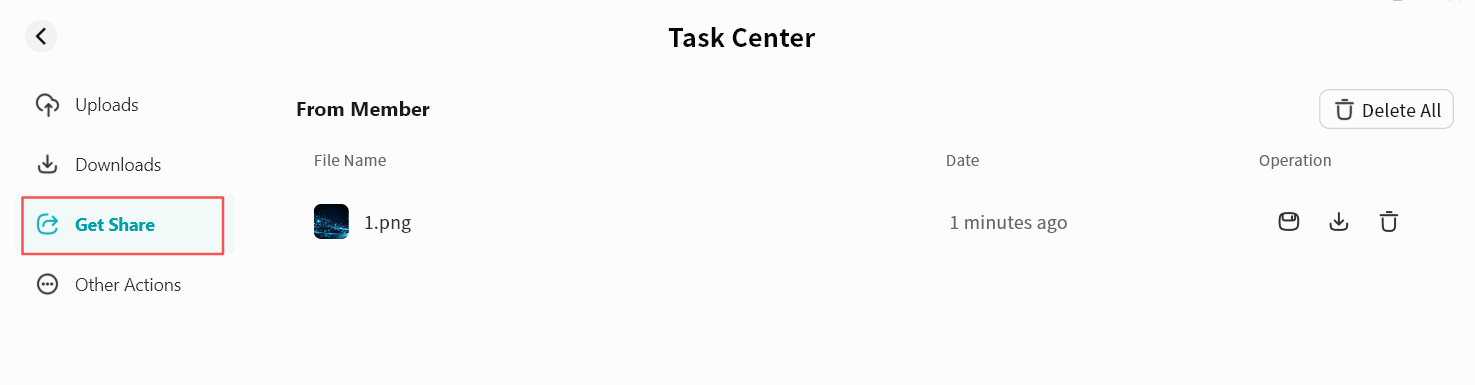
From Members
You can view all files shared with you by other members on the same device.
- Save files to My Space or My Vault
- Download files to local storage
- Delete individual share entries
- Delete all share entries
QR Code Sharing
The QR Code Sharing page provides:
- Add Share: Enter a share code to obtain shared files
- Download Status: Displays progress for ongoing, completed, or failed downloads
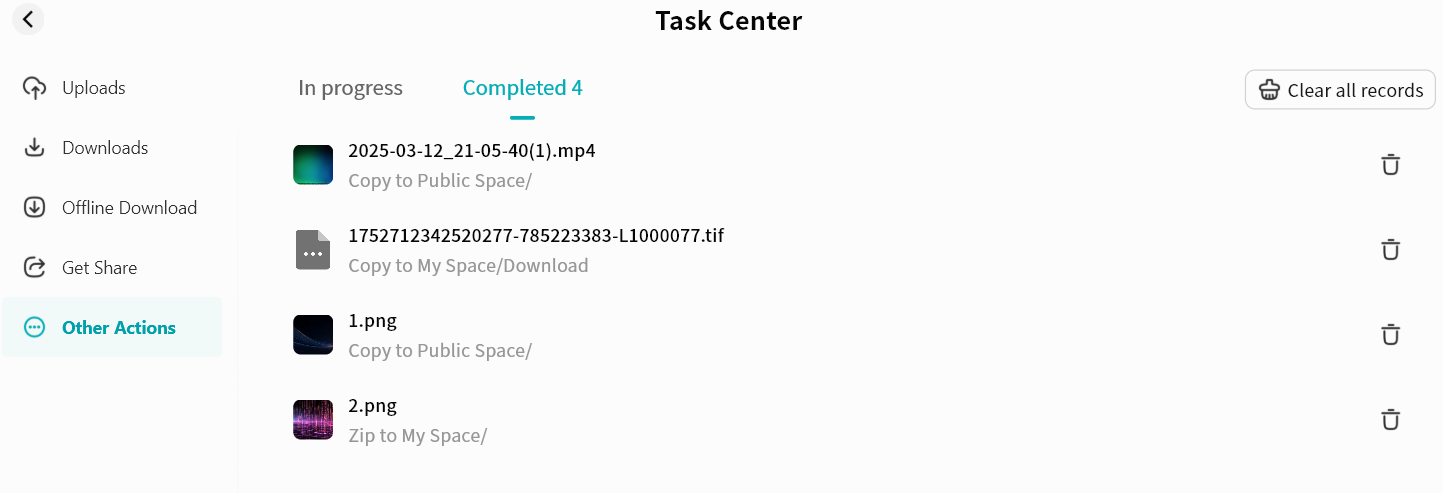
Other Actions
All move, copy, decompress, and compress operations are displayed in Other Operations. You can view task progress, specific actions, and target paths clearly. You can delete all task records, or delete a single record.
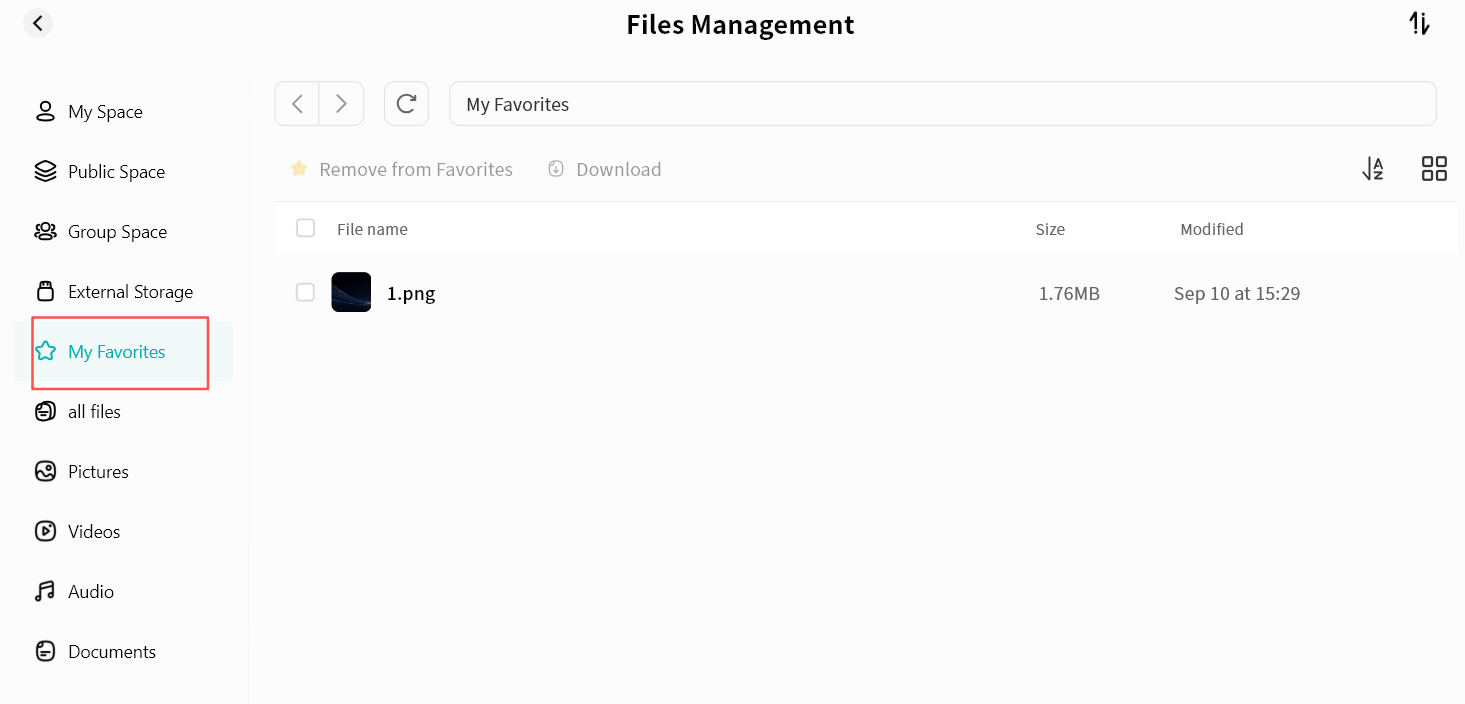
My Favorites
You can add data stored on the DASSET device to My Favorites, allowing quick access at any time. Enter Favorites by clicking the My Favorites icon in the DASSET app, or by selecting My Favorites from the left sidebar in File Management. In Favorites, you can:
- Cancel favorites for single or multiple files
- Download files directly
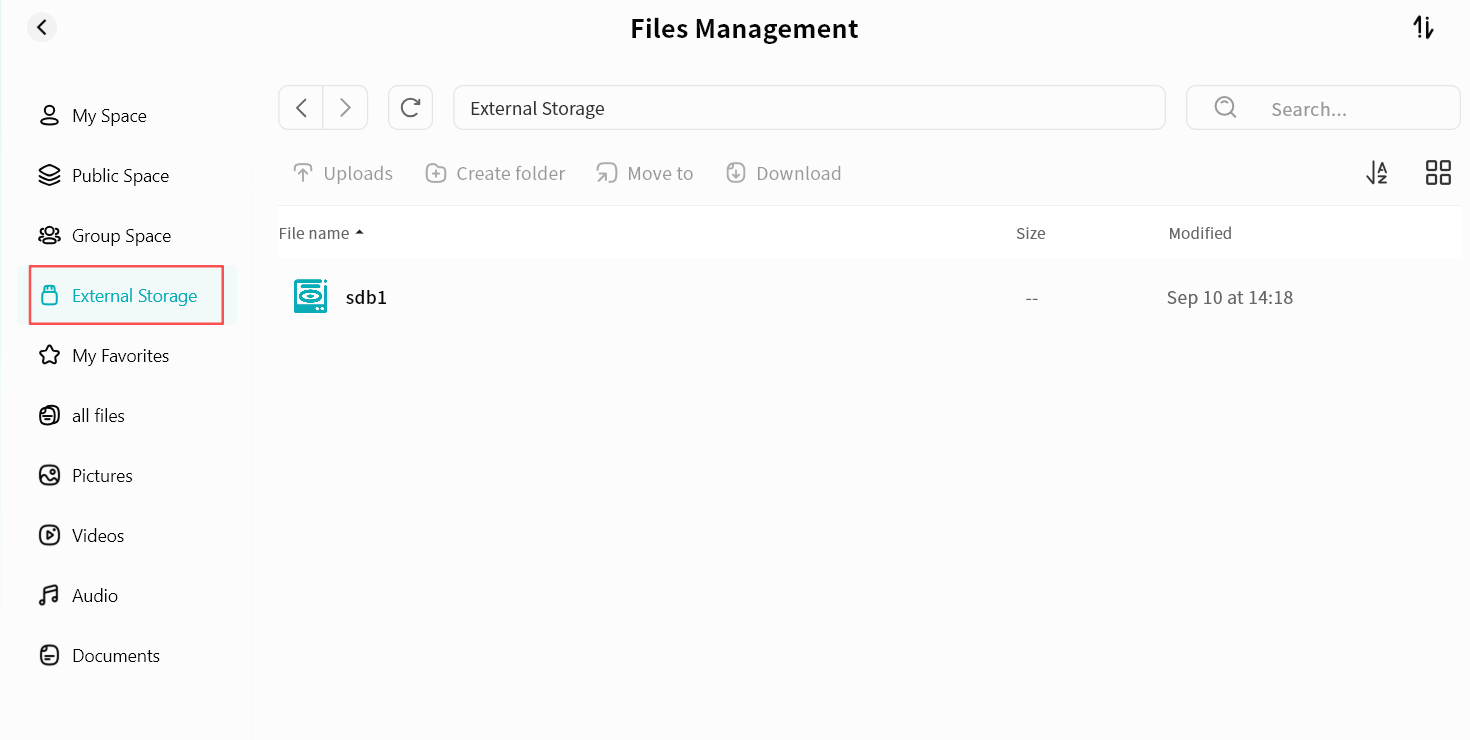
External Storage
When a USB drive is connected to the DASSET device, you can access its data through the External Storage function in the client. Files on the USB drive can be managed in the same way as files in other DASSET spaces. You can enter External Storage by clicking the External Storage icon in the app, or by selecting External Storage from the File Management sidebar. Supported Disk Formats: exfat, fat32, vfat, ext4, NTFS
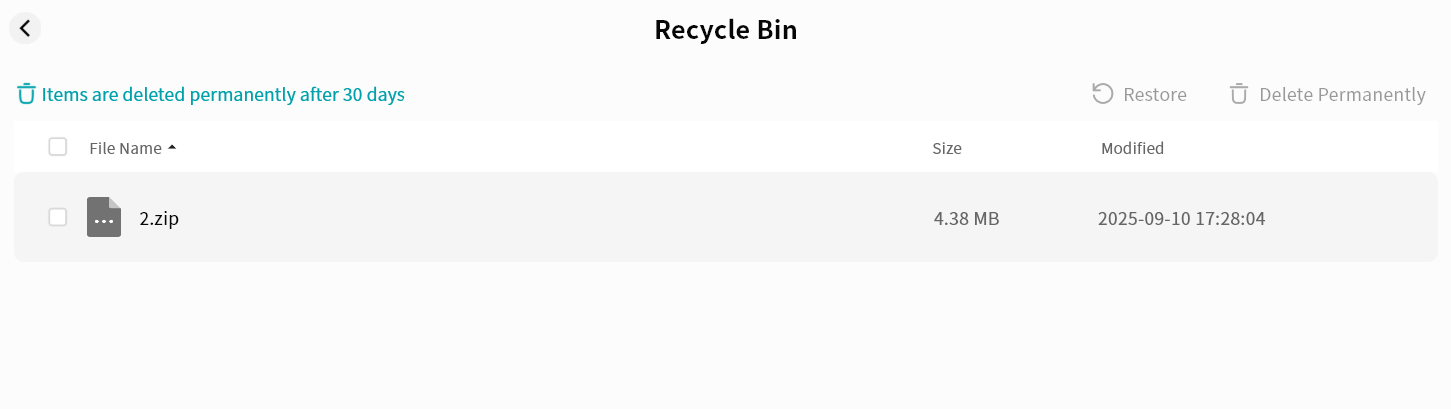
Recycle Bin
All deleted files from the DASSET device are placed in the Recycle Bin. You can restore or permanently delete files at any time.
Files remaining in the Recycle Bin for 30 days will be permanently deleted.
Offline Download
Offline download allows the DASSET device to run 24/7 to automatically download resources. This feature is available only to Owner and Administrator accounts.
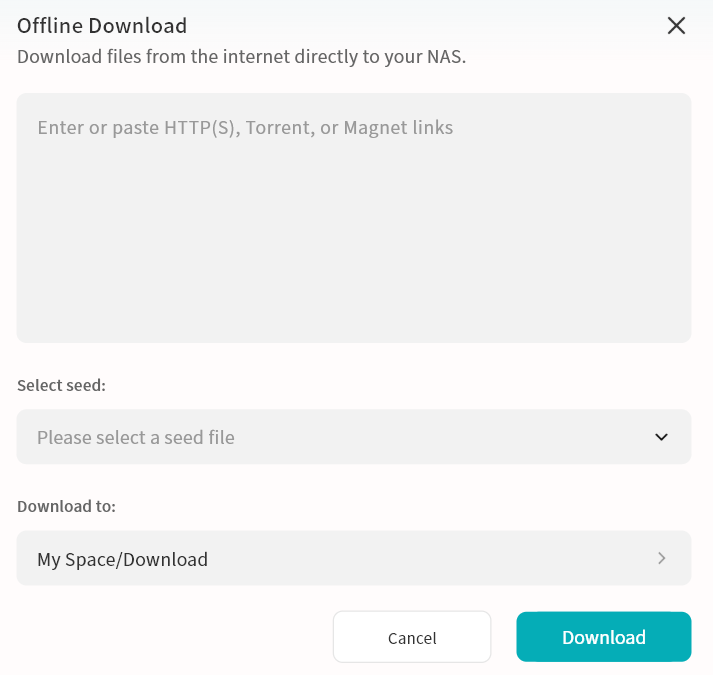
- Supports http, https, ftp, magnet, and torrent downloads.
- Torrent files can be uploaded locally or selected from those stored on the device.
- Default download path: My Space/Download (custom paths supported).
- Progress can be viewed in Task Center Offline Download.
- You can also click New Task in Task Center to quickly create new offline download tasks.
Download speed depends on network conditions, resource availability, and thread control.
My Shares
My Shares provides centralized management for all file sharing tasks you created, including Member Sharing and QR Code Sharing.
- Member Sharing: Shows tasks where you shared files with members on the same device.
- QR Code Sharing: Shows all QR code share tasks and cross-device share tasks you created.
Member Share Task Management
Displays all ongoing member share tasks.
- You can cancel any share task.

QR Code Sharing
Displays all QR code share tasks and cross-device share tasks you created.
- Cancel share tasks at any time.
- Click a task to redisplay its QR code and details.
- Even if you lose the original QR code, you can retrieve it here and share it again with other DASSET users.

My Vault
The My Vault is a secure area within the DASSET device. All files stored in My Vault are protected with strong encryption to ensure security. Without entering the correct password, My Vault cannot be accessed from the DASSET client.
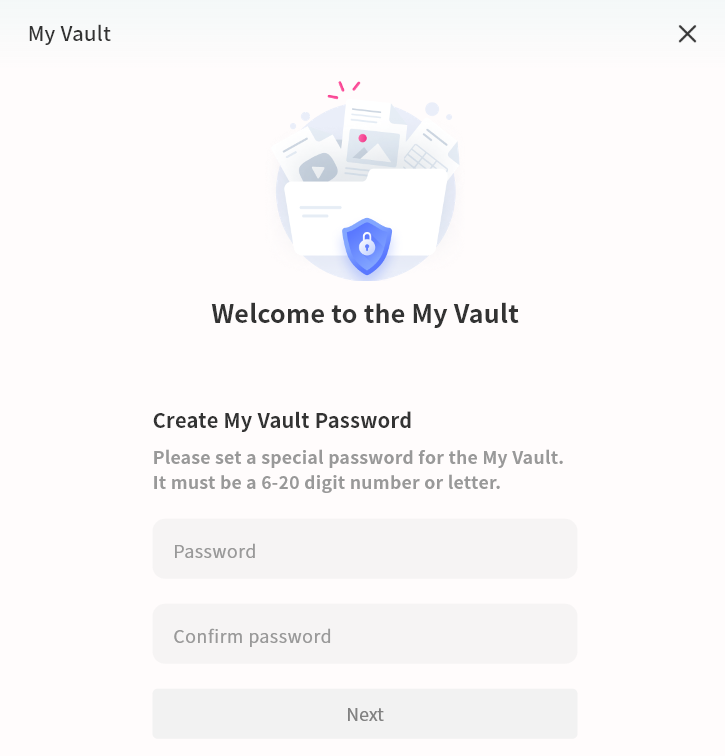
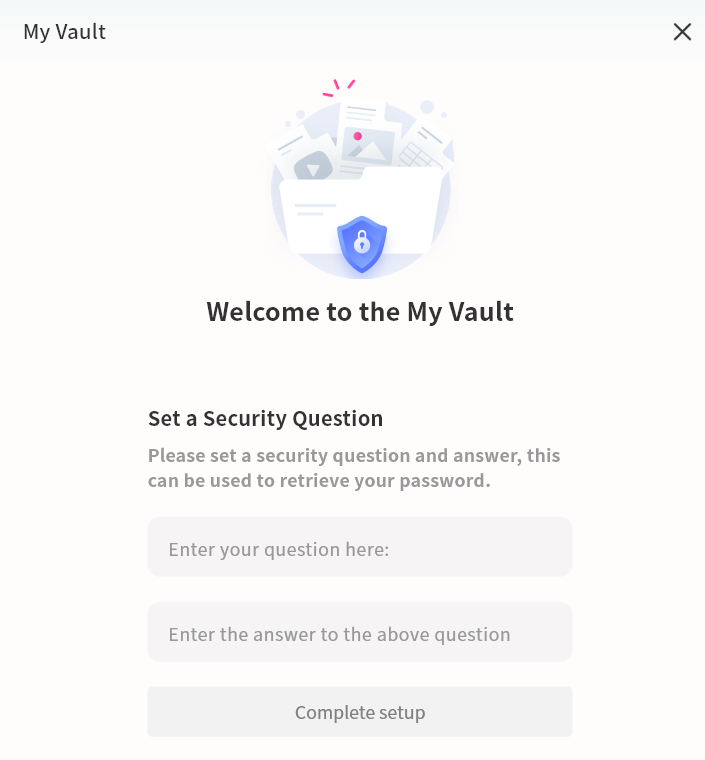
Creating a Vault
When using My Vault for the first time, follow the setup guide to create a password and a security question.
- Create a My Vault password
The password must contain 6--20 characters, consisting of numbers or letters.
- Set a security question
Create a security question to help recover your My Vault password if needed.
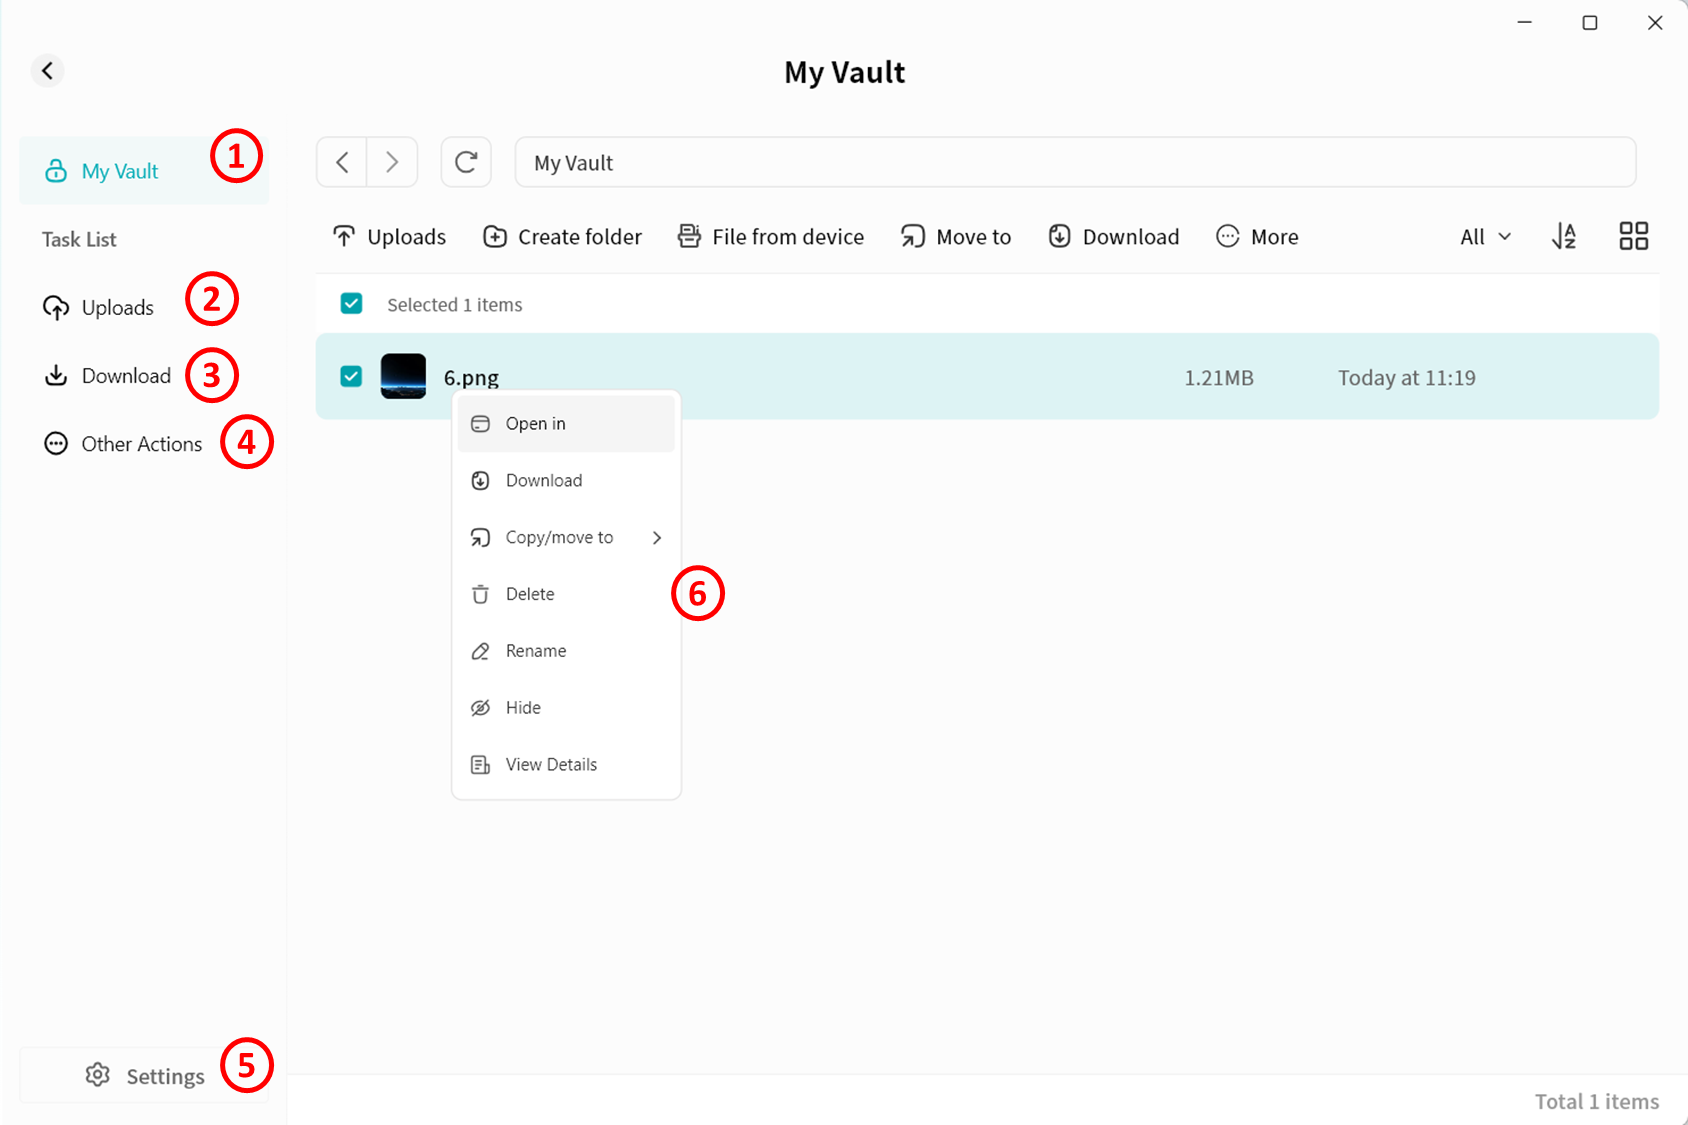
My Vault Operations
Within My Vault, you can manage files in the same way as in other areas of DASSET.
- My Vault: Opens My Vault file management interface.
- Task list -- Upload: Displays the progress and history of files being uploaded from the computer to My Vault.
- Task list -- Download: Displays the progress and history of files being downloaded from My Vault to the computer.
- Task list -- Other operations: Displays the progress and history of actions such as moving or copying files within My Vault.
- Settings: Manage My Vault password and related information.
- File operations:
- Files can be uploaded directly from the computer to the "My Vault", or downloaded from My Vault to the computer.
- Files from any DASSET space can be copied or moved into the "My Vault".
- Files in My Vault can be moved or copied to other spaces such as My Space.
Files deleted from My Vault are permanently erased and will not go to the recycle bin. Exercise caution when deleting.
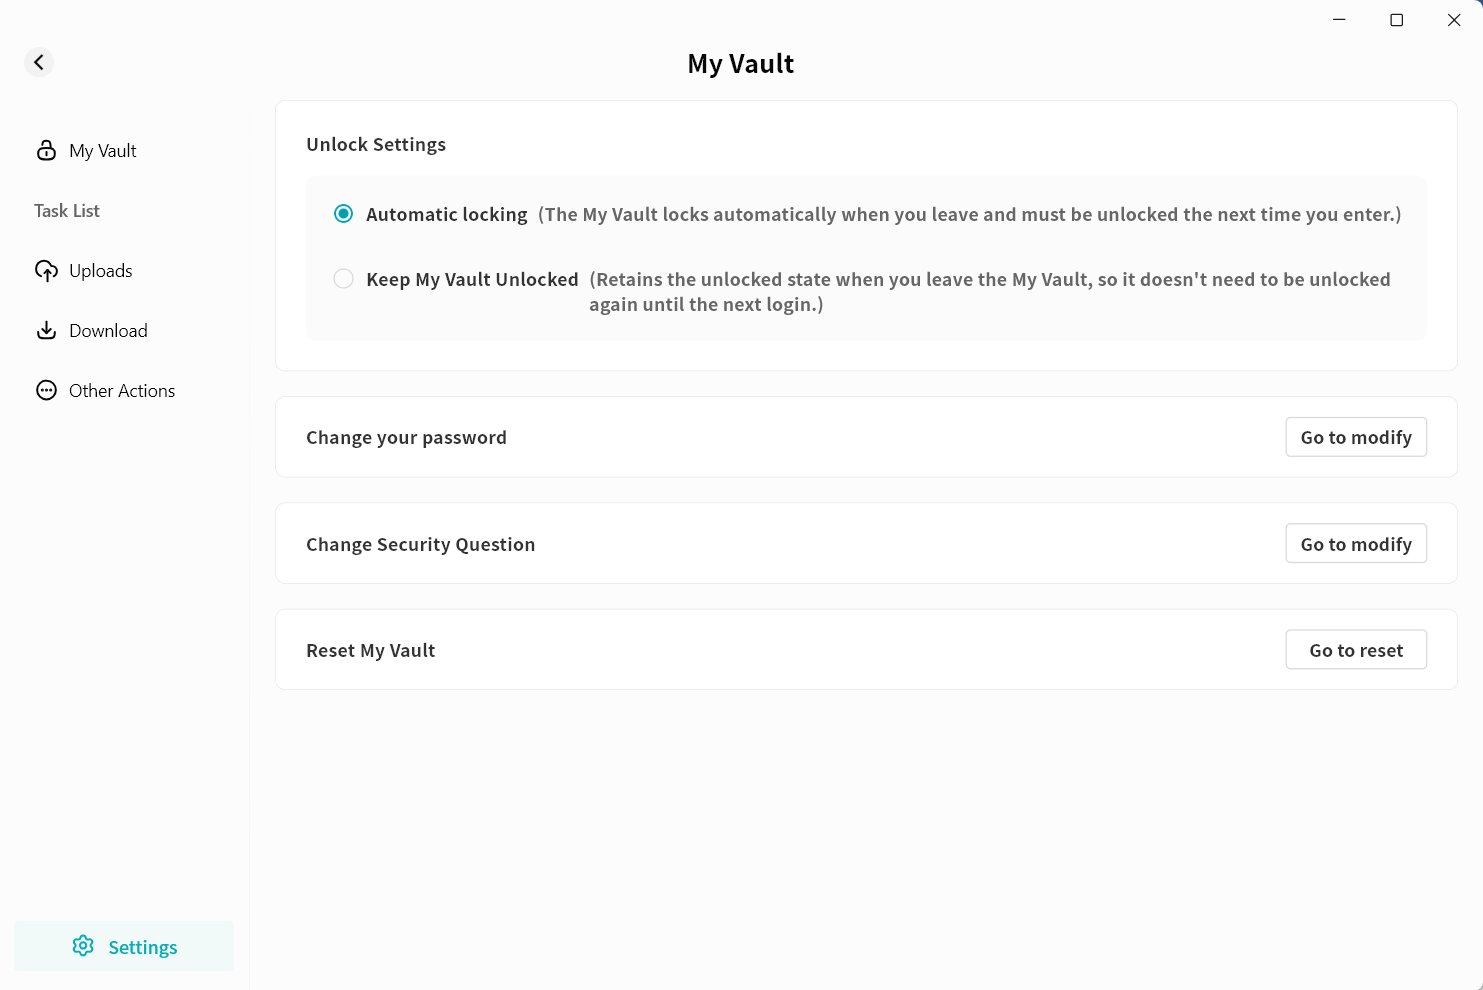
My Vault Settings
On My Vault settings page, you can configure:
- Unlock Settings: Define different ways to access My Vault.
- Change your password
- Change security questions
- Reset My Vault. Resetting requires verifying your DASSET account password.
danger
Resetting My Vault will permanently delete all data contained in the vault.
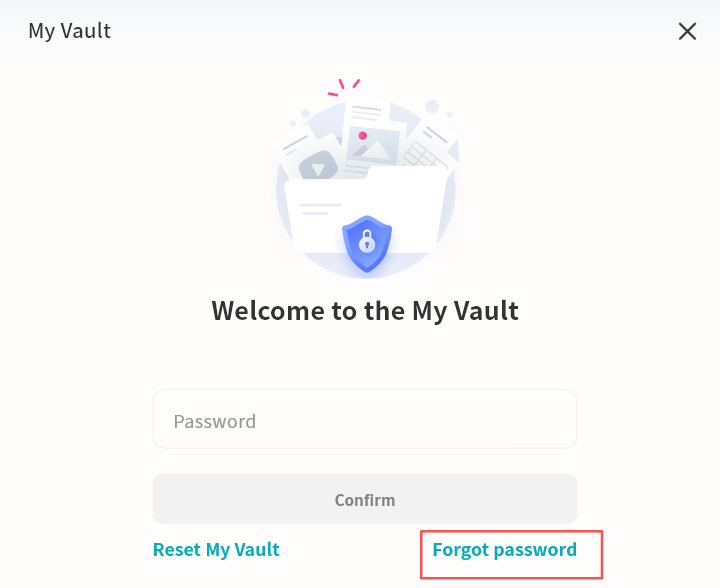
My Vault Password Recovery
If you forget your My Vault password, use the Forgot Password option on My Vault login page to reset it. Enter the correct answer to the security question in the pop-up menu, then set a new password for My Vault. This operation will not affect the data stored inside.
The My Vault password is stored on the DASSET device. If you forget both the password and the security question, the data inside the My Vault will be permanently inaccessible. Be sure to keep your "My Vault" credentials safe.
Lite NVR
The DASSET device supports cameras compatible with the Onvif protocol, enabling centralized management of cameras, storage of surveillance video, real-time and historical video viewing, and PTZ (pan-tilt-zoom) control. You can securely view surveillance footage anytime, anywhere without the privacy risks associated with uploading video to the cloud.
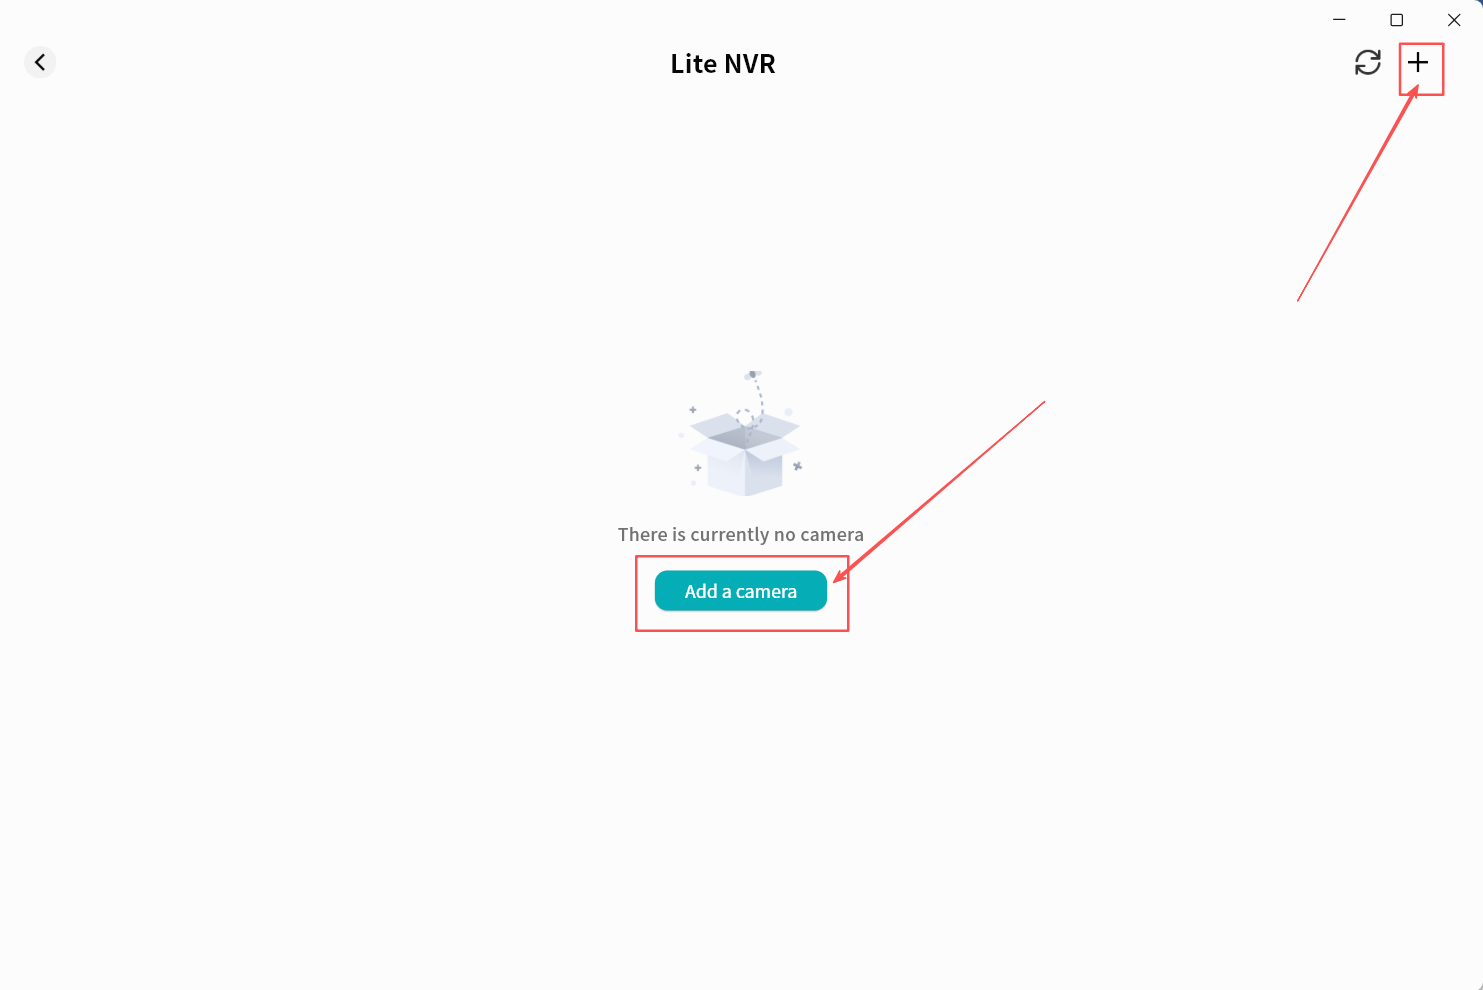
Add a Camera
- Click + to search for cameras on the same LAN as the DASSET device.
Ensure the camera and DASSET device are connected to the same LAN, the camera supports Onvif, and the camera is powered on with network access.
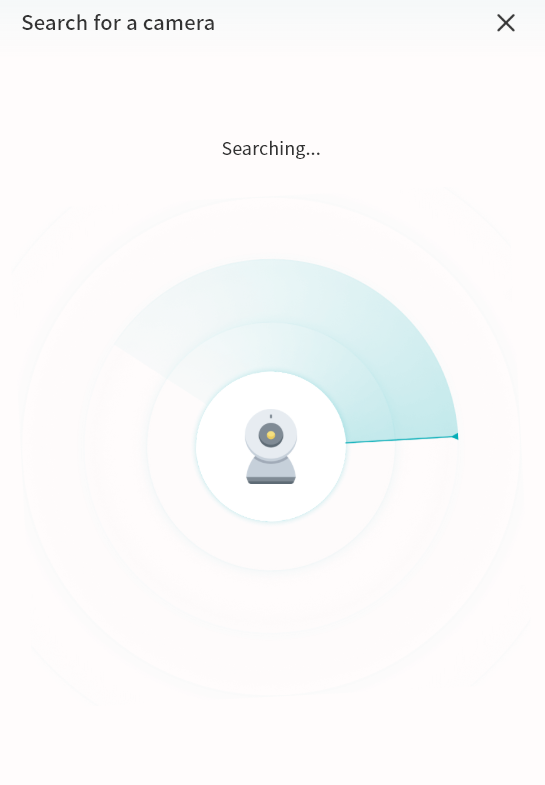
 2. Wait for the search results. The process is usually quick.
 3. Once discovered, the camera will appear in the results list.
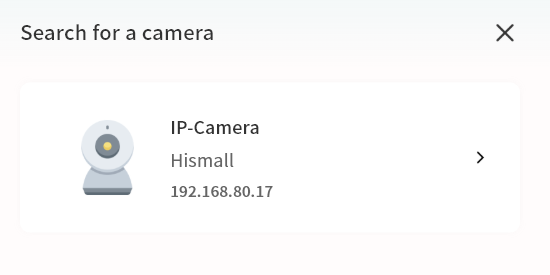 4. Click the camera to open its configuration page. If authentication is required, enter the username and password of the camera (check the camera manual or contact the manufacturer if needed).
5. On the add-camera page, configure the following settings:
4. Click the camera to open its configuration page. If authentication is required, enter the username and password of the camera (check the camera manual or contact the manufacturer if needed).
5. On the add-camera page, configure the following settings:
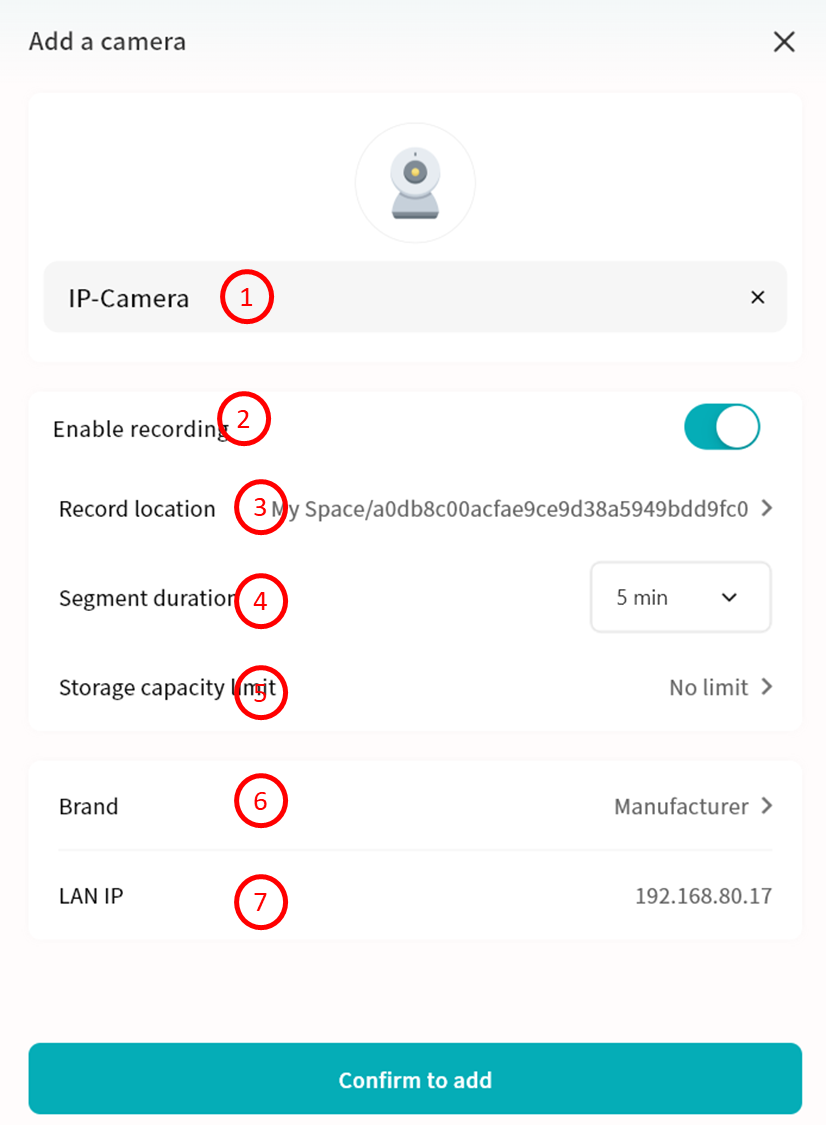
- Camera Name: Display name in the Video Monitor application.
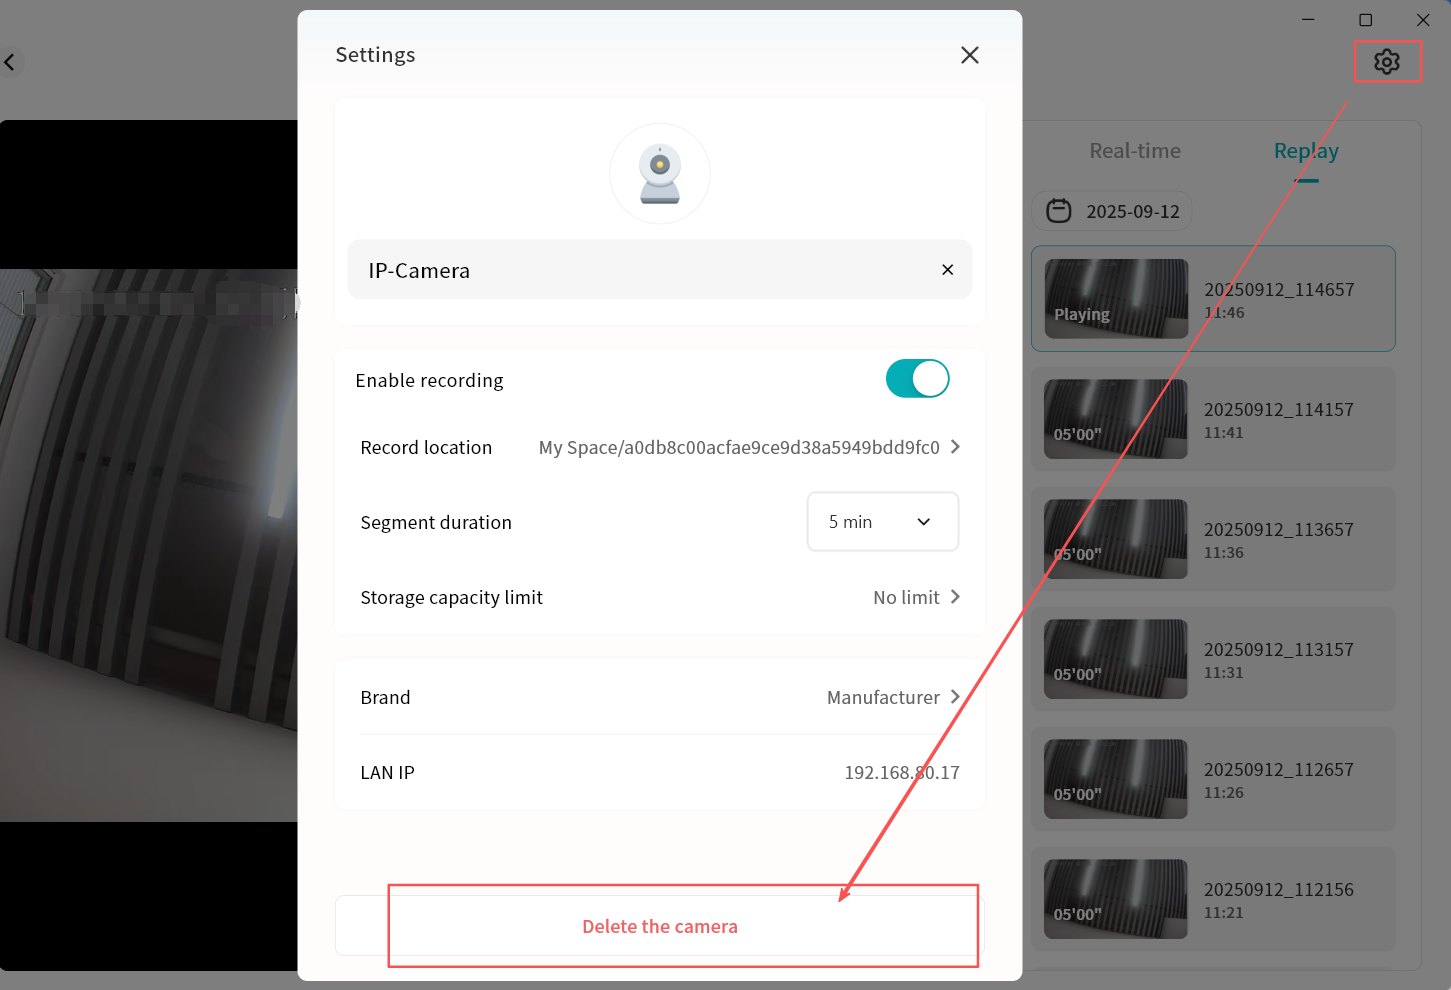
- Enable recording: Enable recording to save camera footage to the DASSET device.
- Record Location: Specify where video files will be saved.
Unless the video needs to be shared with other DASSET members, save it in* My Space or Group Space (accessible only by group members).
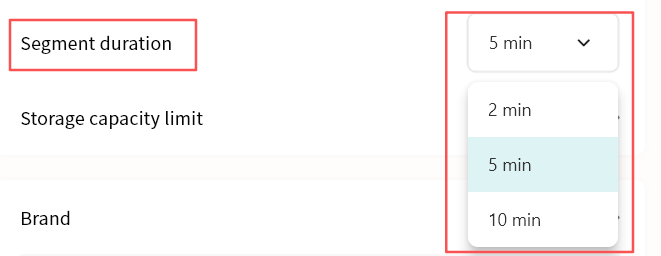
- Segment Duration: Define the length of each video file. DASSET will split and save videos accordingly.
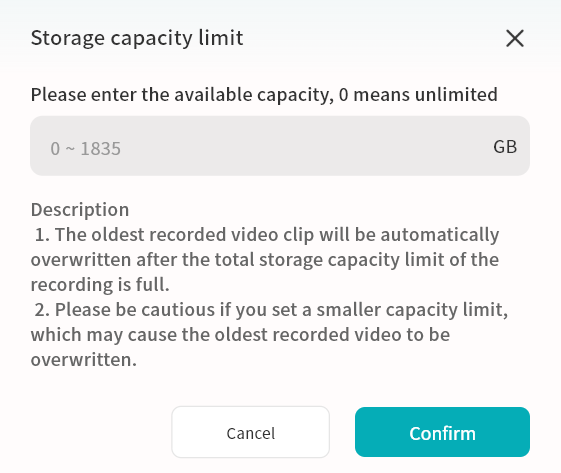
- Storage Capacity Limit: Set a maximum storage capacity for video files. Once reached, older recordings will be overwritten to free space.
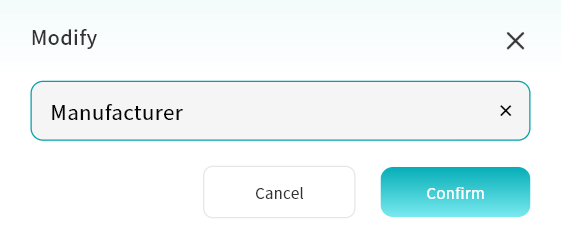
- Brand: The system will auto-detect the brand via the Onvif protocol. You can manually correct this if necessary.
- LAN IP: Displays the current LAN IP address of the camera.
- Click Confirm Add. The camera will now appear in the Video Monitor page.
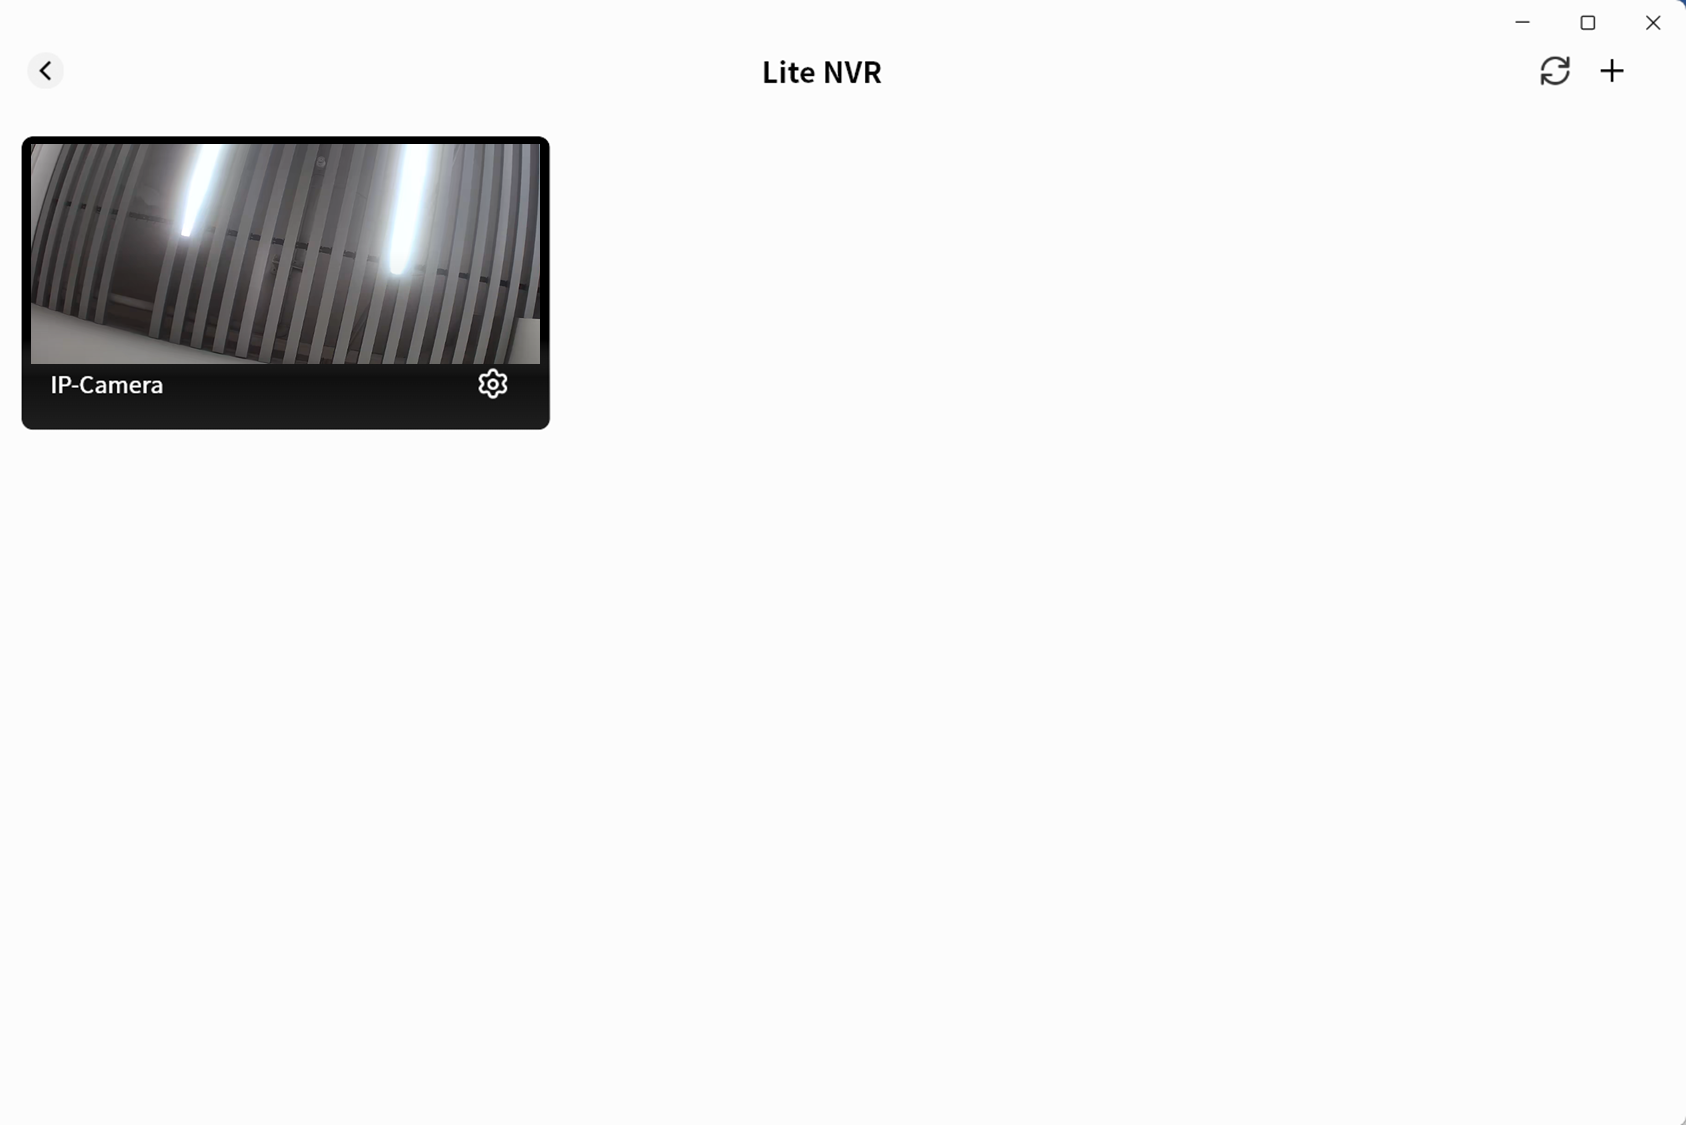
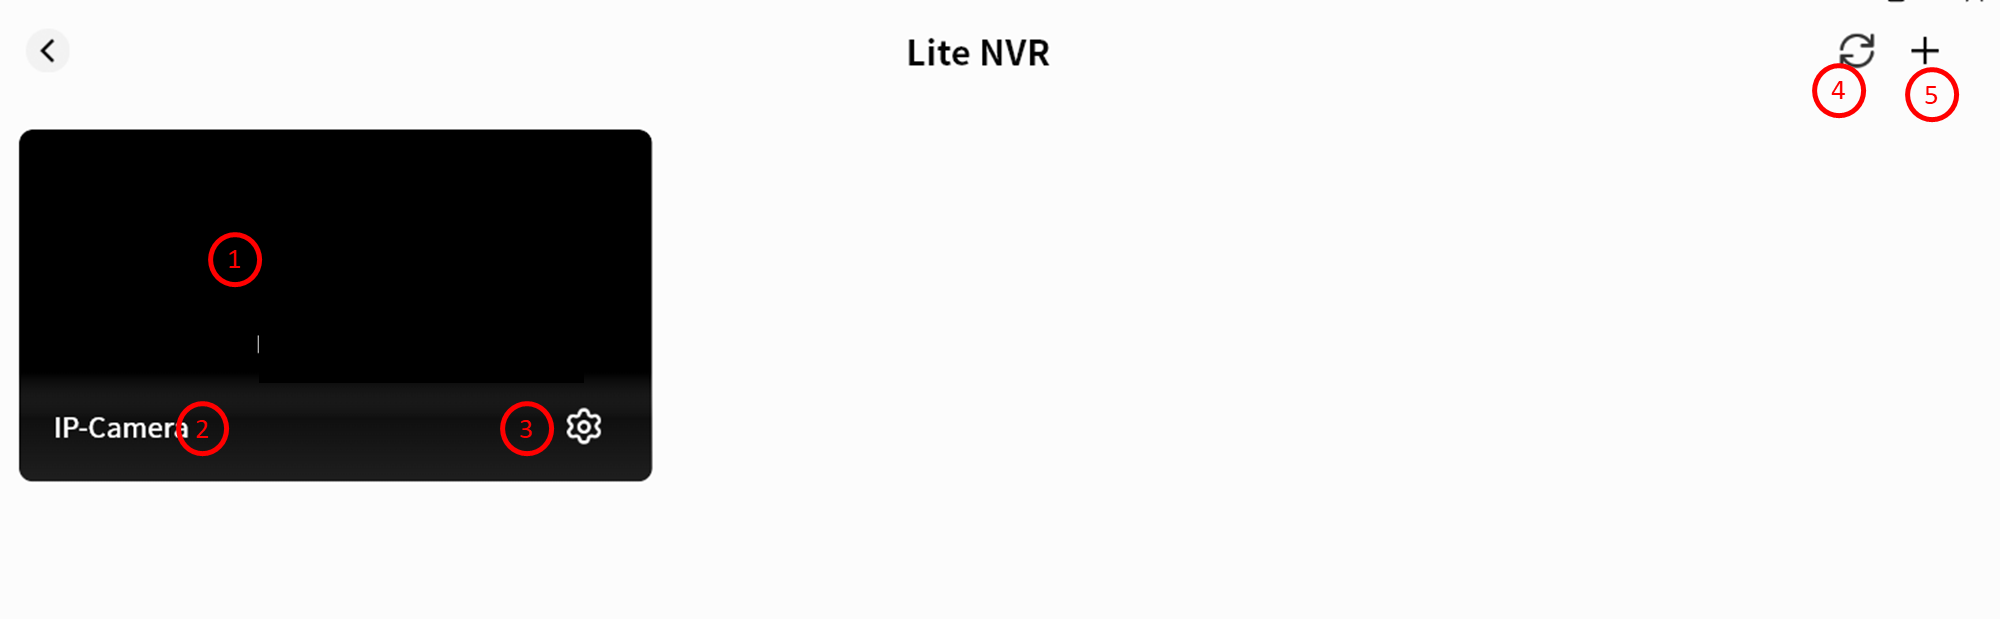
View Live Video
In the Video Monitor page, you can view connected cameras with a static preview, camera name, and timestamp. You can also edit or refresh the camera view.
- Camera preview and current time
- Camera name
- Camera configuration (including delete option)
- Refresh the current page
- Add a new camera
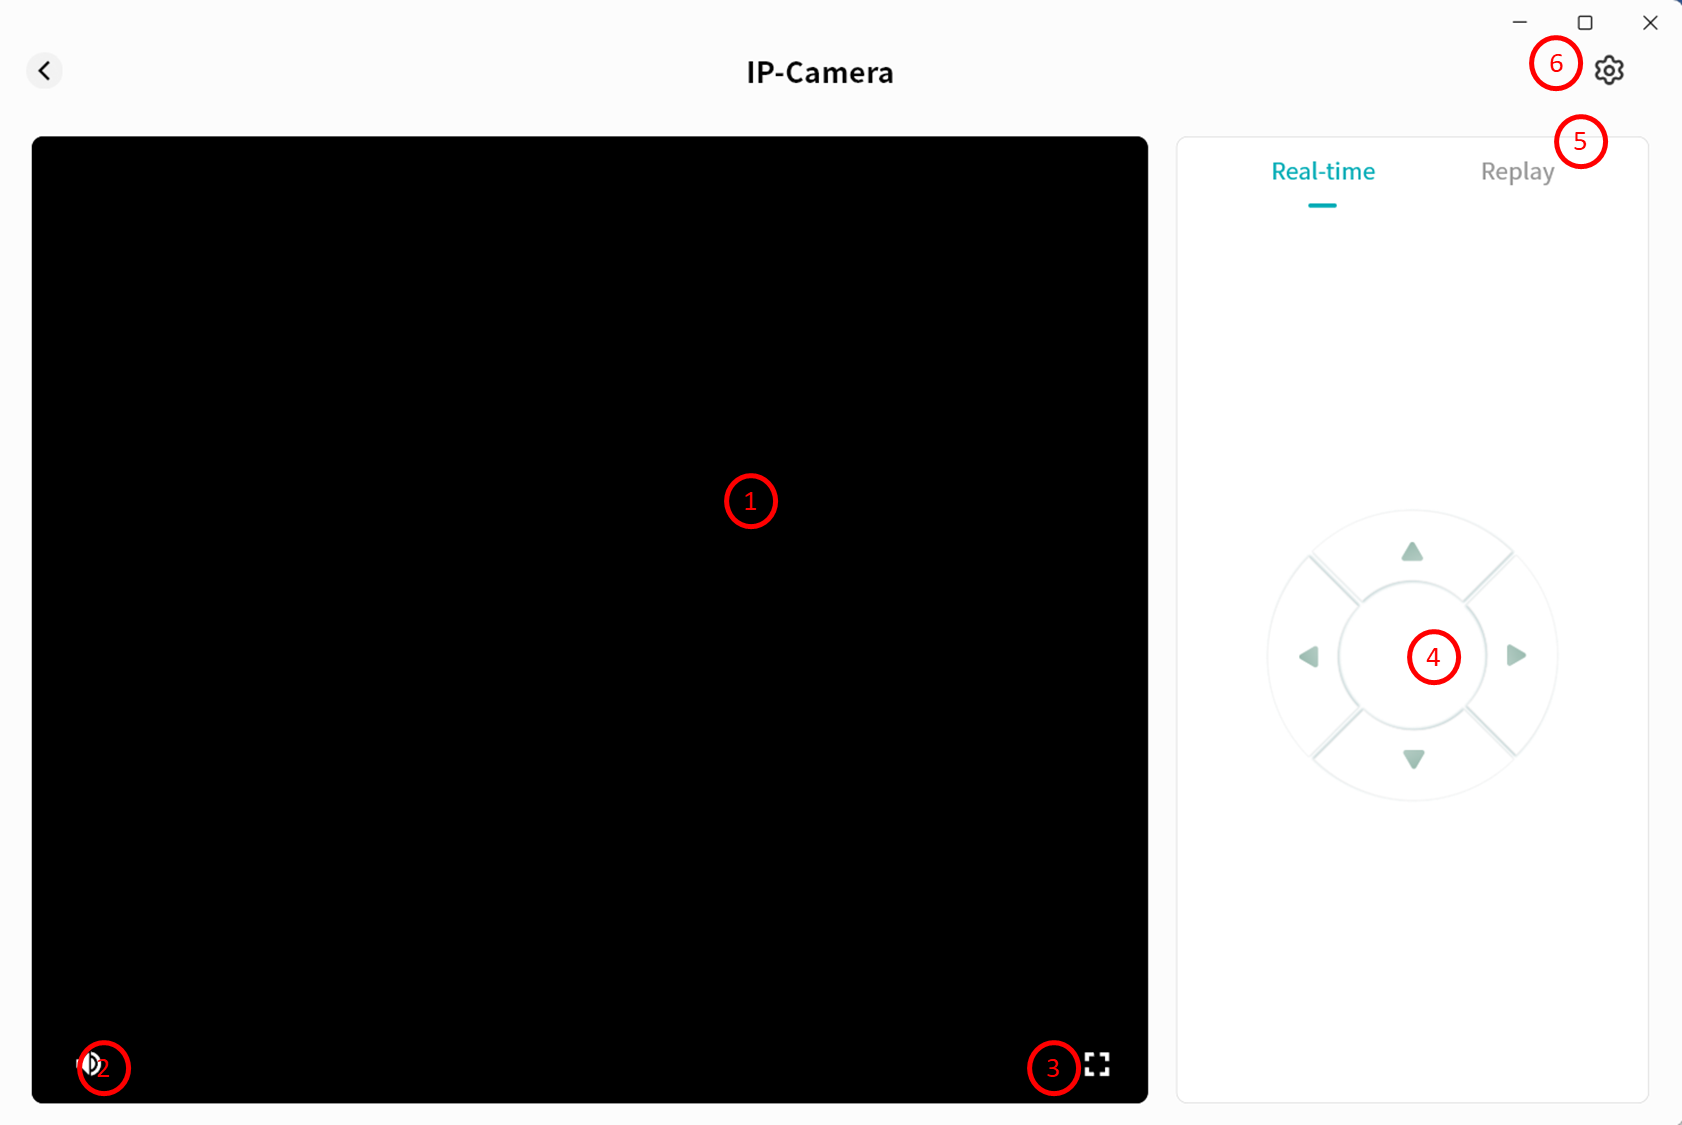
Camera Monitoring Operations
Click a camera preview to enter its monitoring interface. You can:
- View the live feed with timestamp
- Adjust audio volume
- Switch to fullscreen
- Use PTZ controls
- View recorded playback
- Edit camera settings (see Add Camera section)
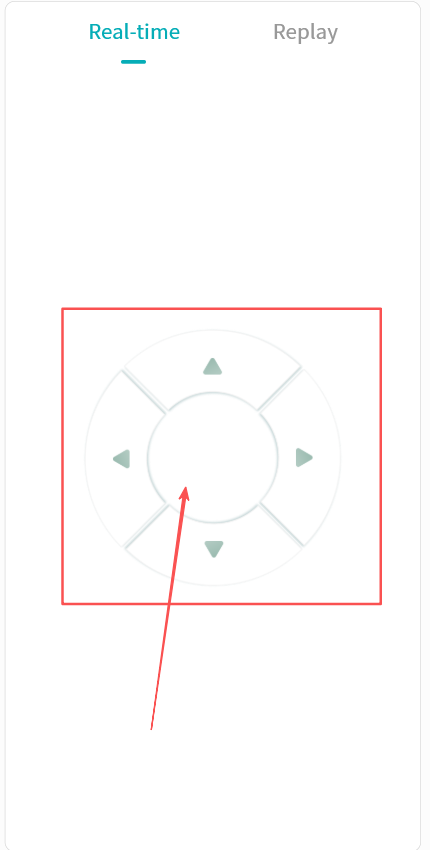
PTZ Control
Click the directional keys to adjust the camera angle. If PTZ is not supported by your camera, a notification will be displayed.
View Playback
- In the monitoring interface, click Playback to view recorded videos stored on the DASSET device. Recordings are listed chronologically based on recording duration.
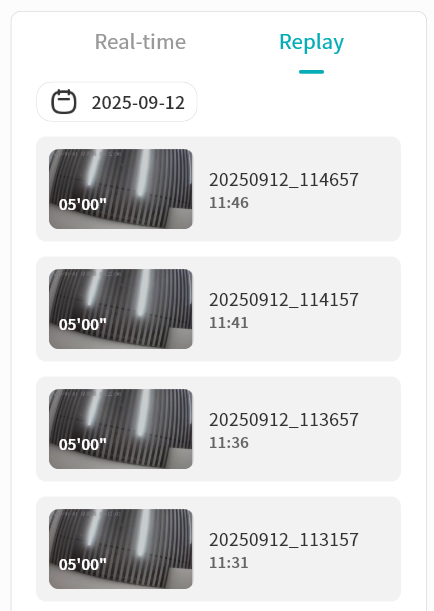
- Use the calendar to locate recordings from a specific date.
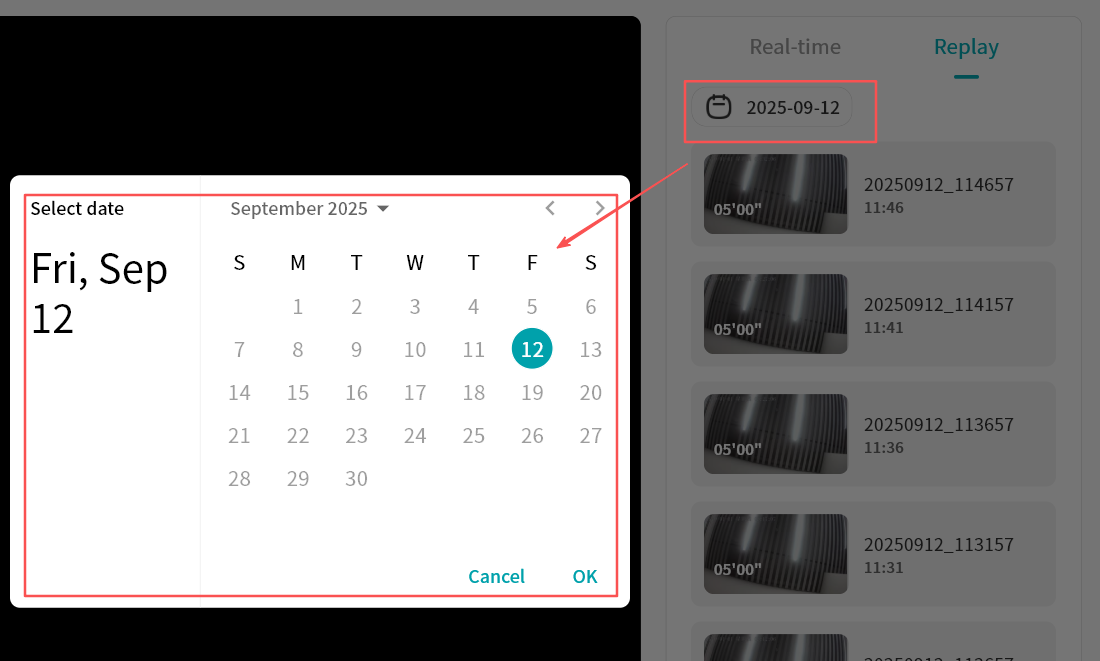
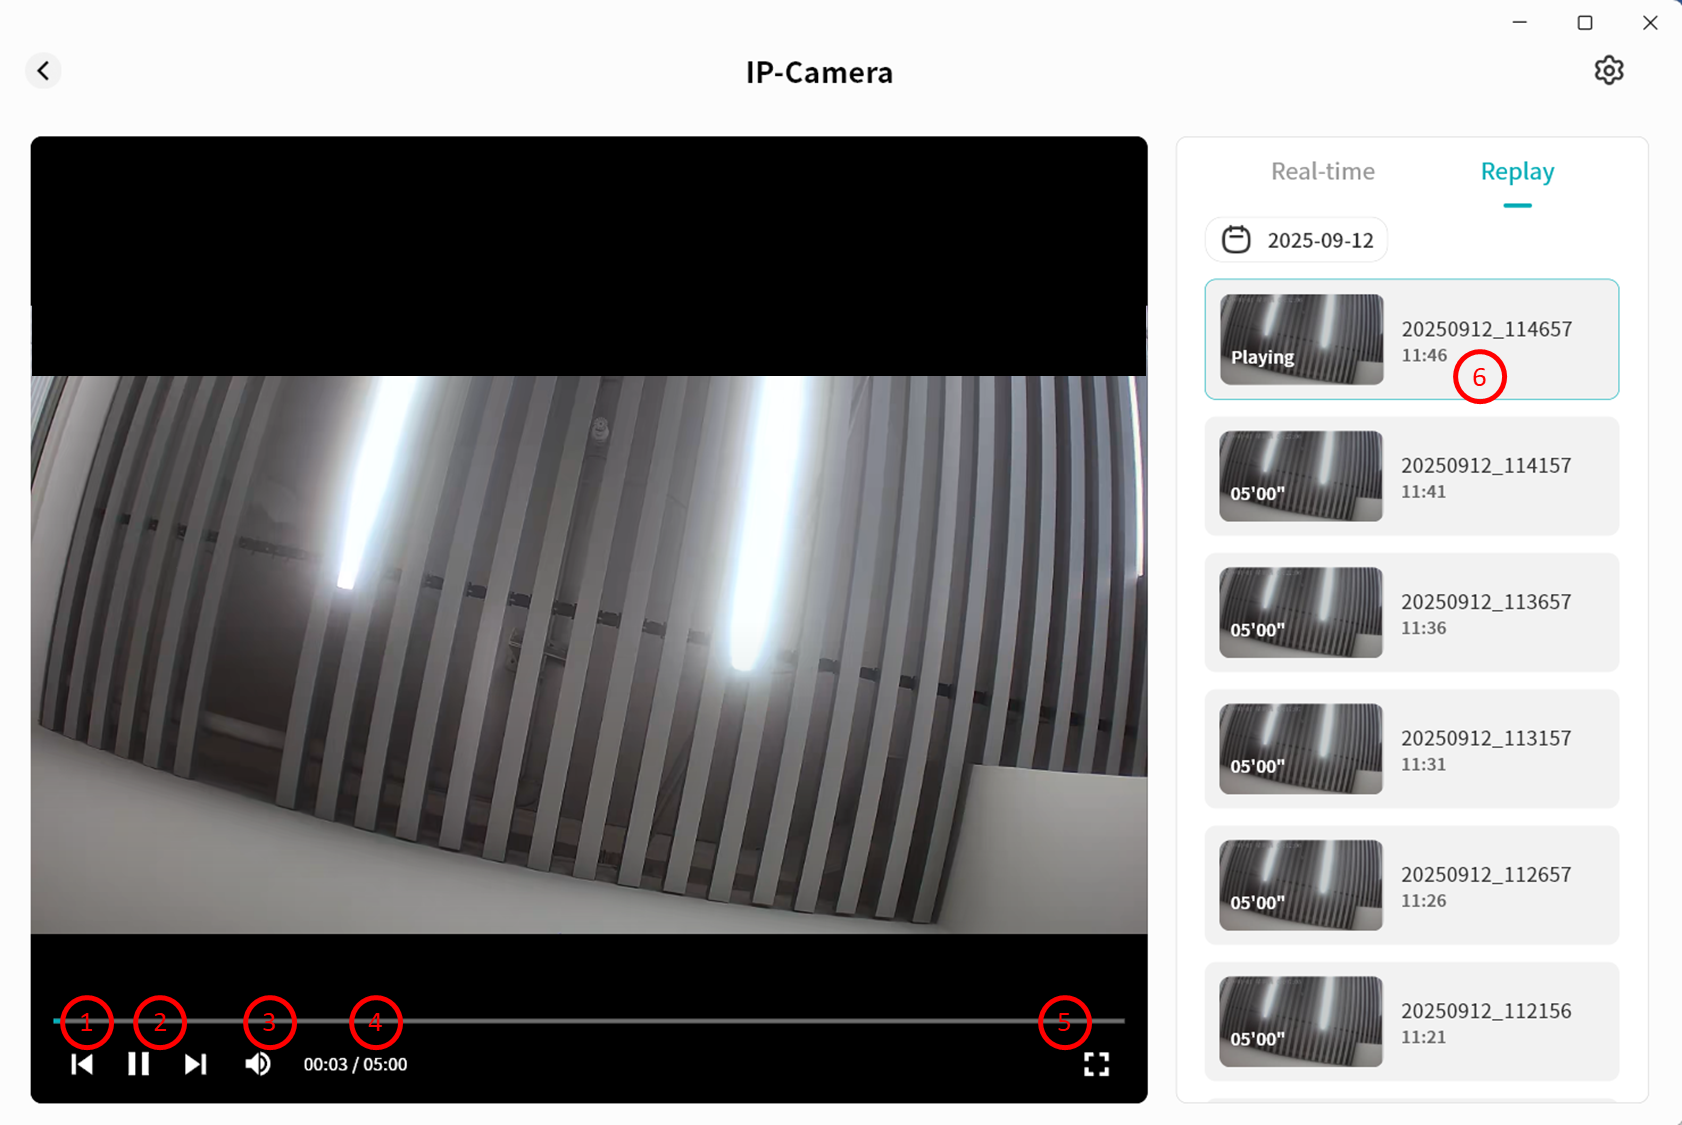
- Click a video segment to play it. Options include:
- Switch quickly between previous/next recordings
- Pause/Play
- Adjust audio volume
- Display video duration and current playback timestamp
- Fullscreen playback
- Show the file name of the current video
Delete a Camera
You can remove cameras from the DASSET device at any time.
- From the Video Monitor home page or monitoring interface, click the gear icon.
- Select Delete Camera to complete the removal.
Container Tool
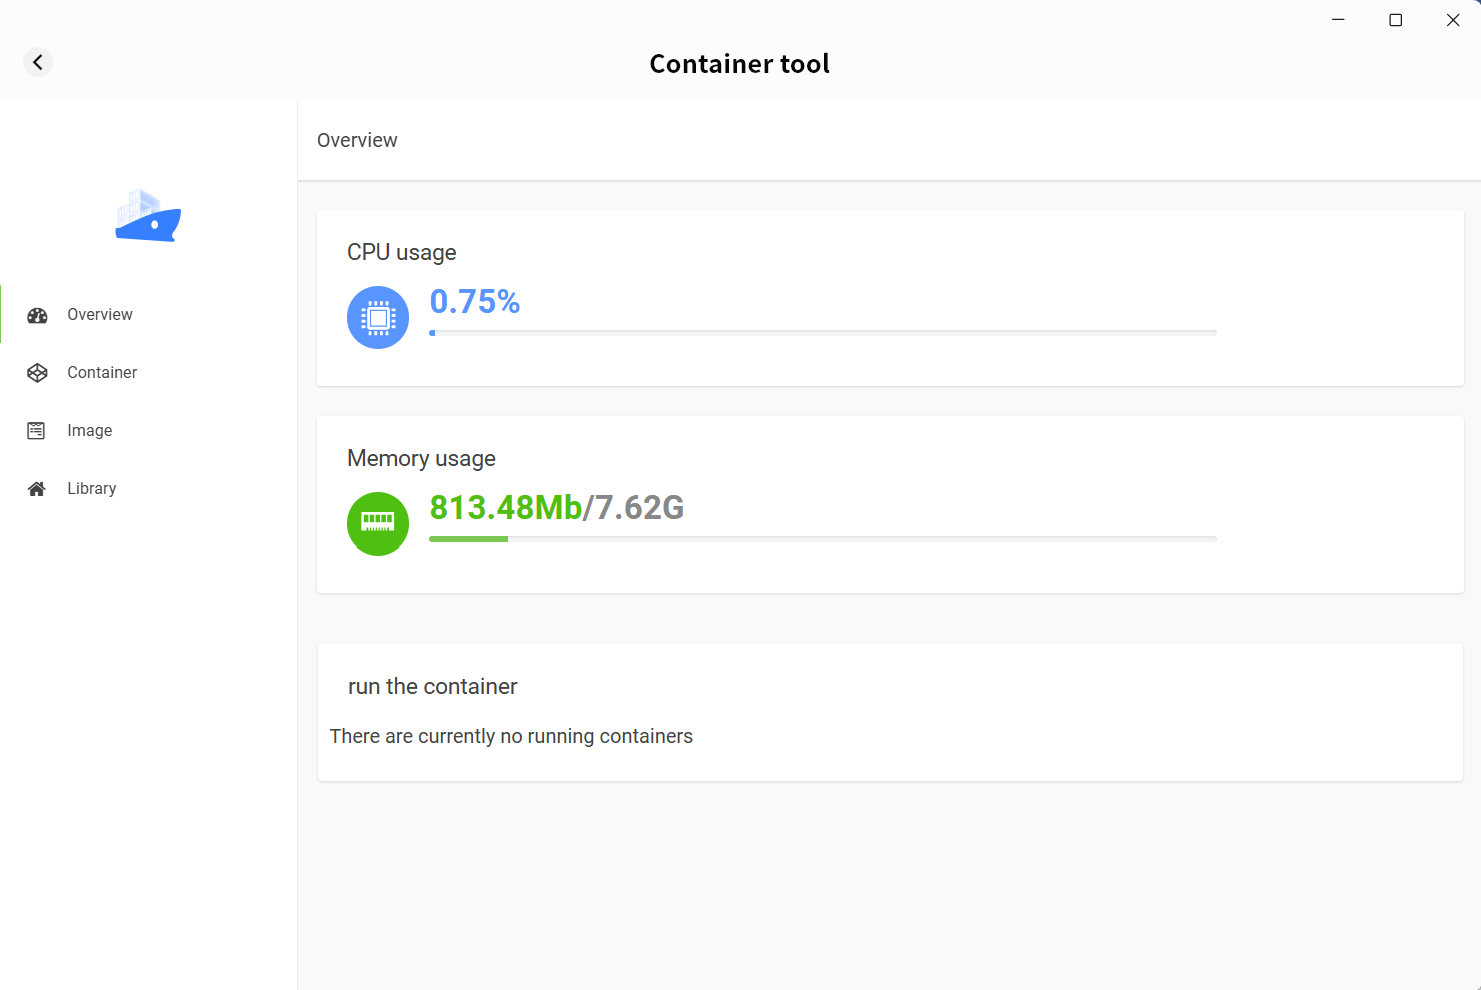
Using Docker containers, you can run a variety of third-party applications on the DASSET device to expand its capabilities. The container tool is available only to the Owner account.
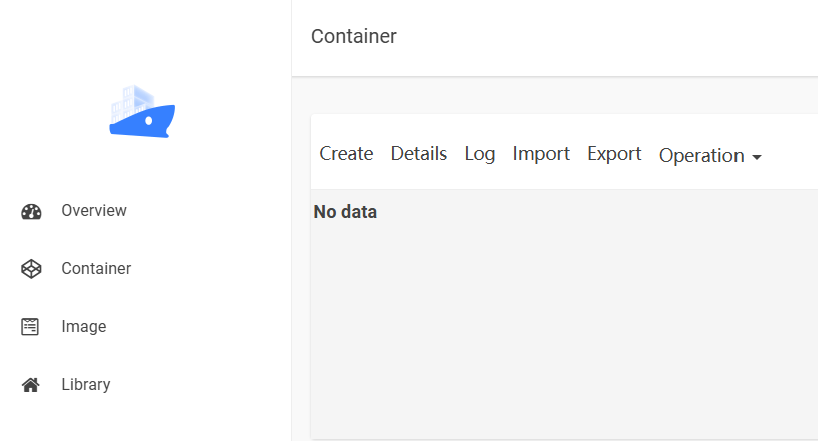
- Overview: Displays current CPU usage, memory usage, and the list of running containers on the DASSET device.
- Containers: Create and manage your containers.
- pc-images: Manage stored image files.
- Repository: Connect to image repositories to search and download required pc-images.
Containers
On the container page, you can create new containers using previously added pc-images.
- Basic settings:
- Select image
- Set container name
- Allocate memory for the container
- Set CPU priority (not recommended to set to High, to avoid excessive resource consumption)
- Advanced settings: Configure additional parameters required for container creation, including:
- Run with high privileges or not
- Automatically restart container after DASSET device reboot
- Container network mode
- Container startup parameters
- Port mapping (defines which port to use when accessing the container)
- Directory mapping between the container and the DASSET device (enables the container to access specific directories on the device)
- Environment variables required for the container
Different containers may have different configuration requirements. Refer to the official configuration guide of the container you are creating. For detailed container creation steps, see Appendix 1.
Image
All downloaded pc-images are stored on the pc-images page for unified management.
- Import: Import image files from the computer into the DASSET device.
- Export: Export stored image files from the DASSET device to the computer.
- Batch delete: Select multiple image files to delete at once.
Library
The library connects to centralized Docker image distribution sites, allowing you to search for and download any required pc-images directly to the DASSET device.
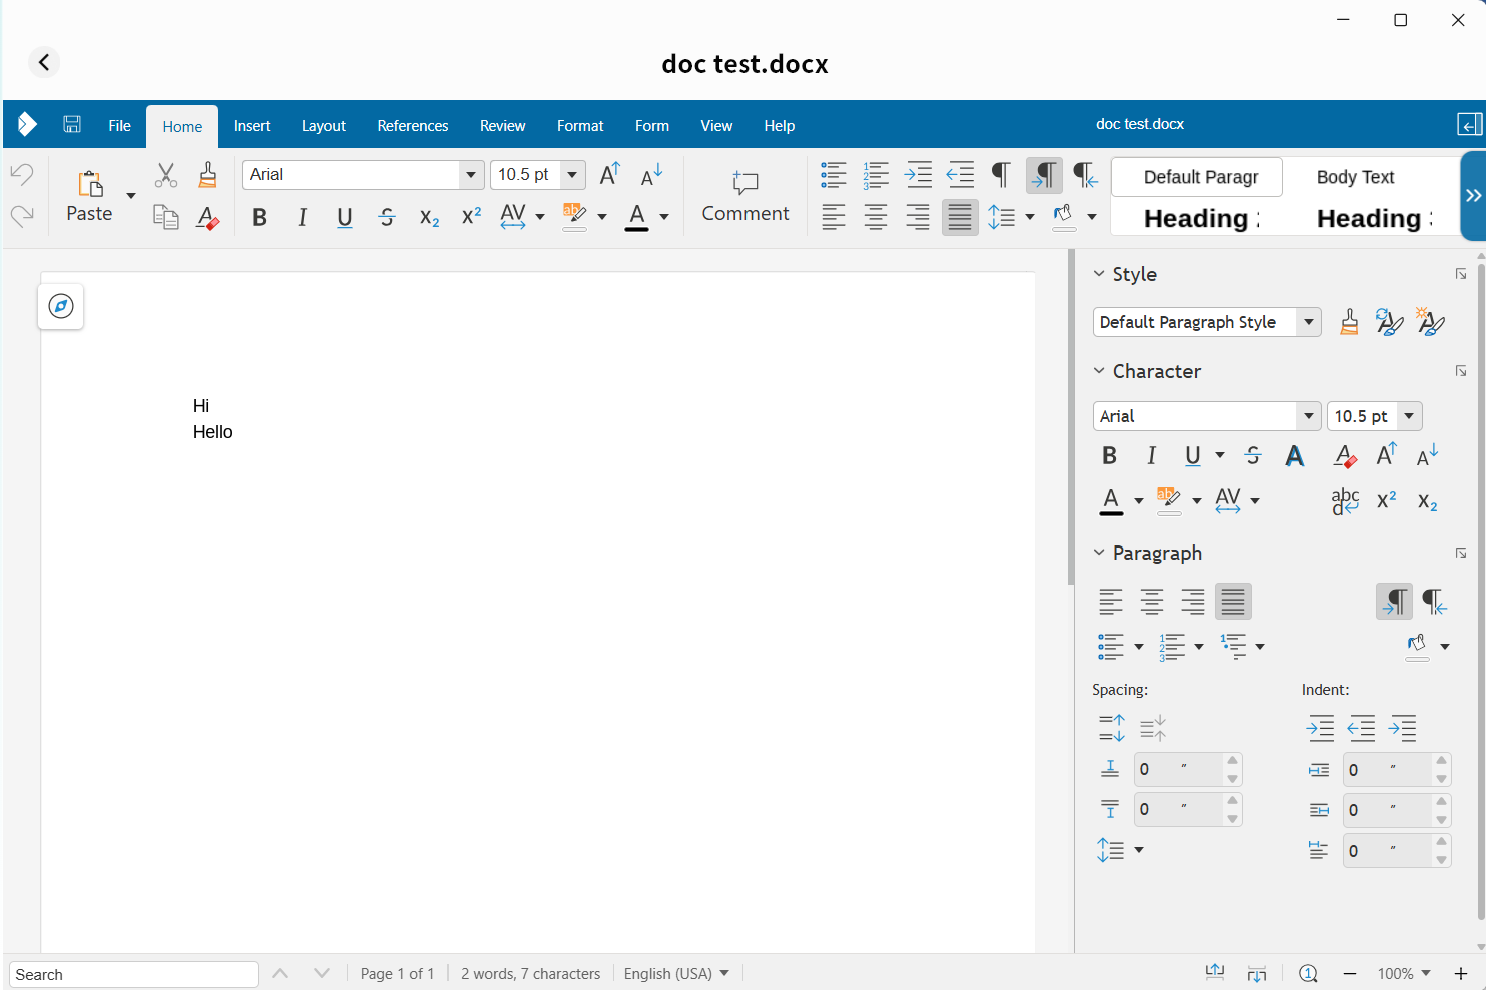
Online Document Editing
DASSET provides a third-party online document editing tool as an extension application. With this tool, you can view and edit documents stored on the DASSET device directly. Supported formats include major Microsoft Office file types (DOC, DOCX, XLS, XLSX, PPT, PPTX, Visio, MS Publisher), standardized open document formats (ODT, ODS, ODP), and PDF.
Installing the Online Document Editing Tool
- In the third-party applications, select Online Document Editing Install.
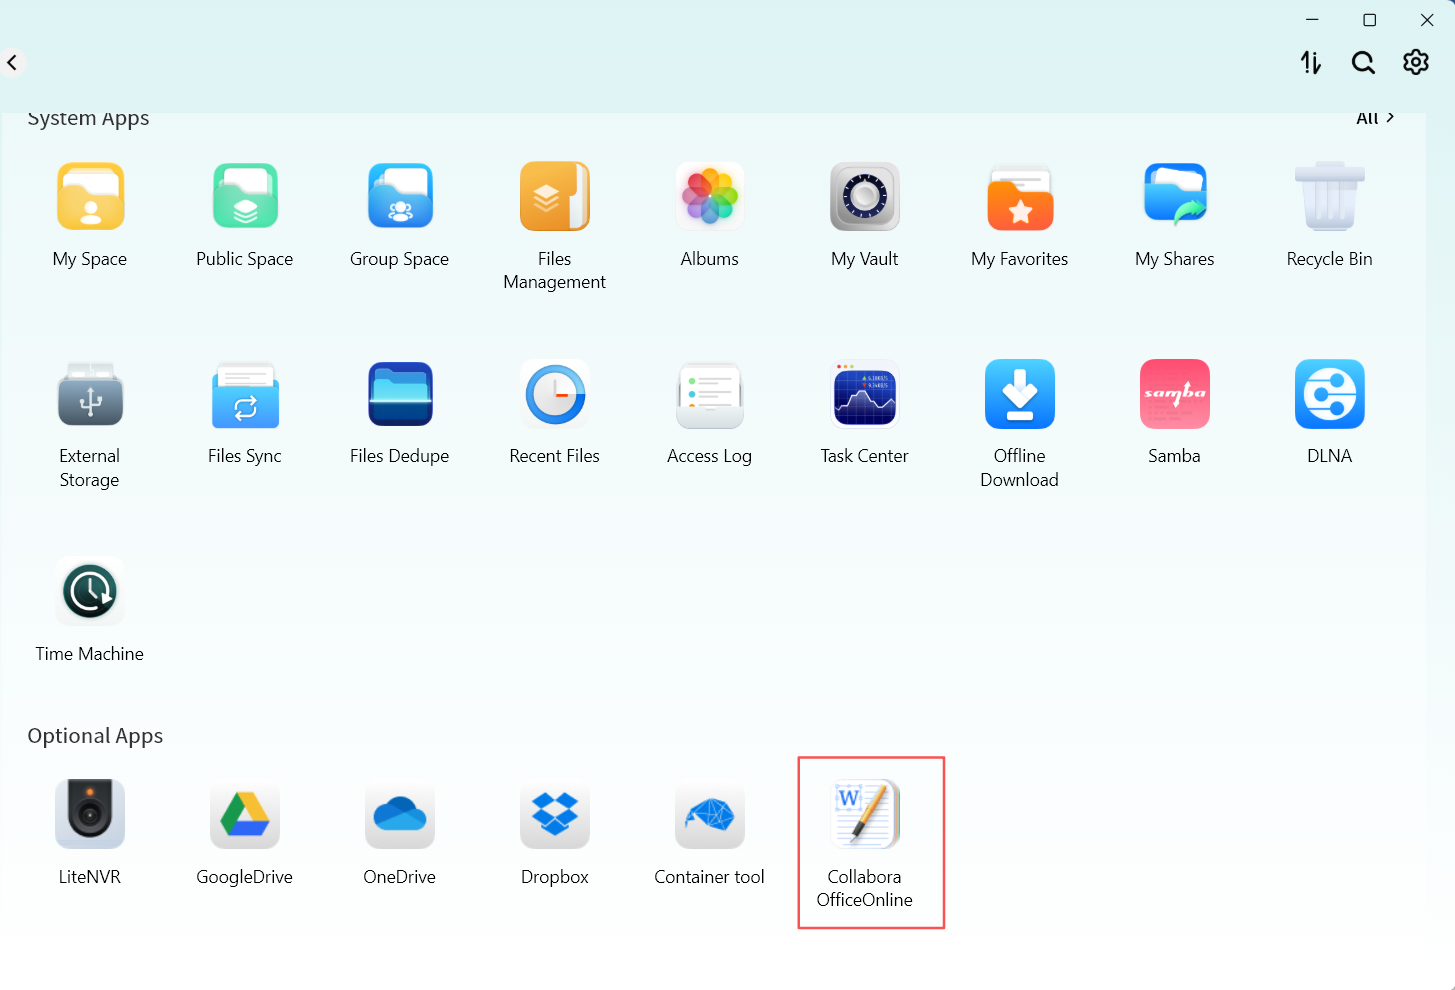
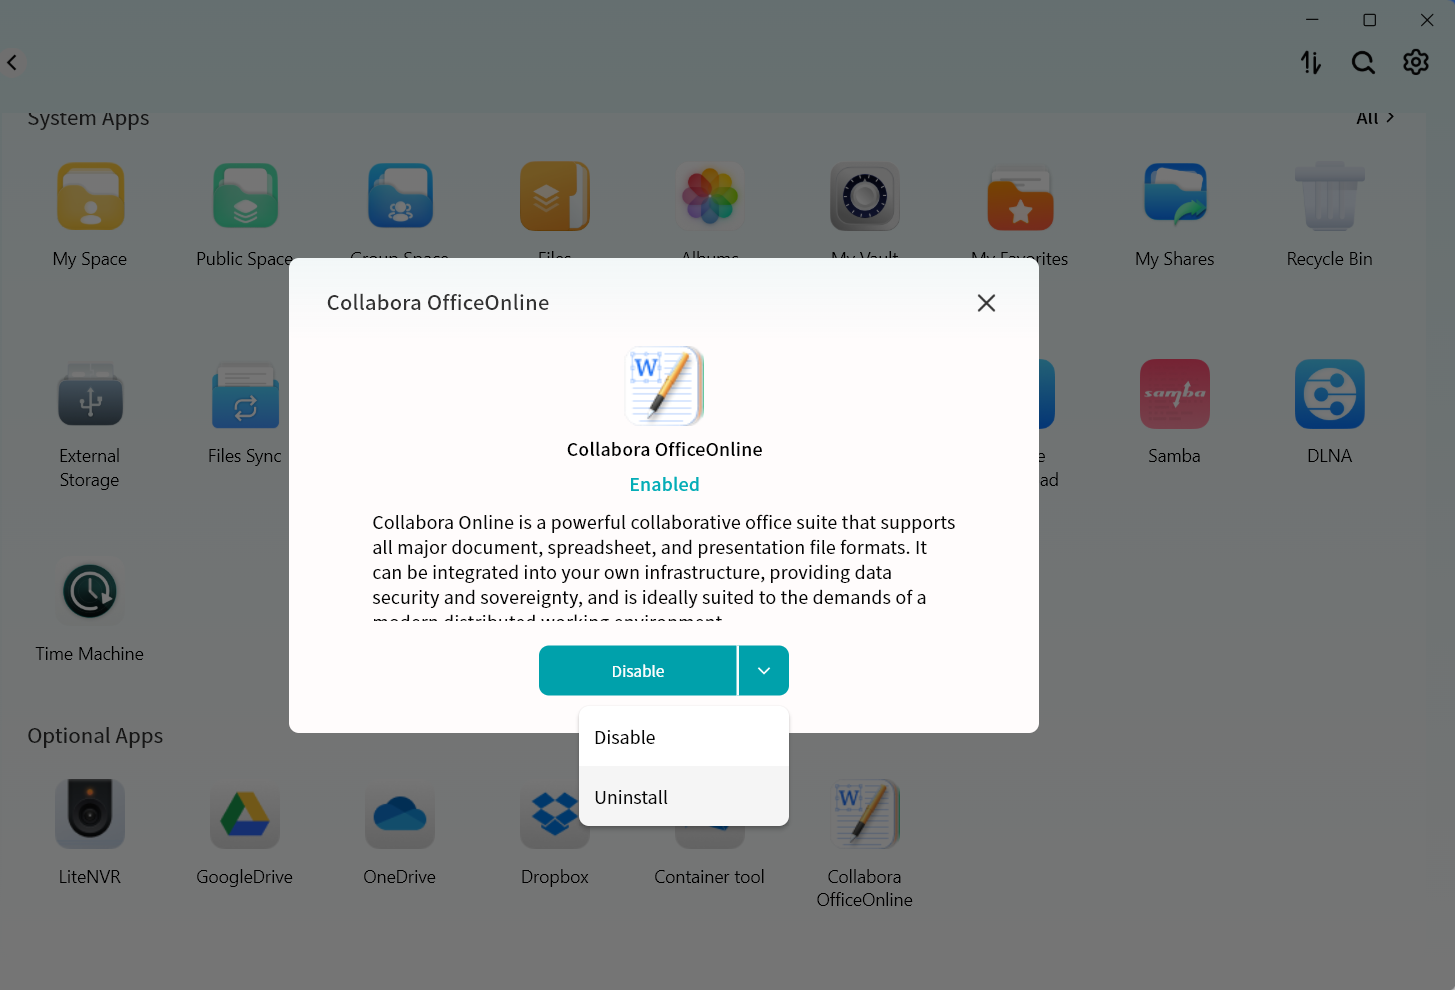
- Wait for the installation to complete. The tool will be automatically installed on the DASSET device. You may also use the dropdown menu to disable or uninstall the tool.
- Once installed, you can open and edit documents stored on the DASSET device directly.
Document preview and editing are performed on the DASSET device itself, without downloading files to your computer.
Online Document Preview and Editing
You can select any document stored on the DASSET device and choose Online Edit to preview or edit its content. All edits are saved directly on the DASSET device. Example using a Word document:
- Select the document and choose Online Edit.
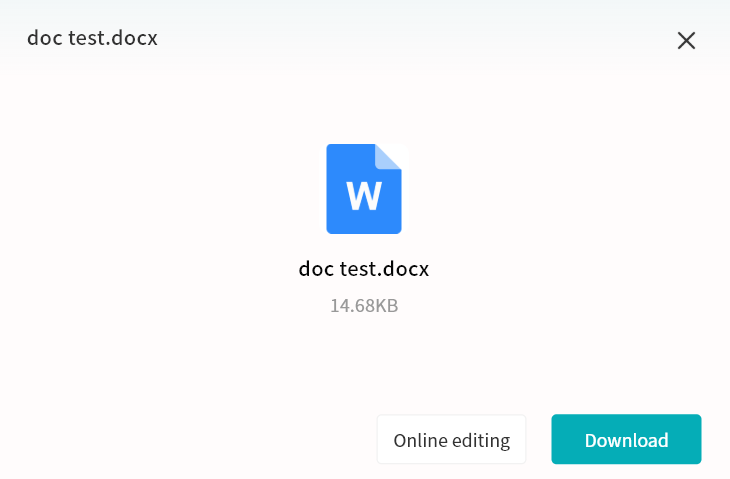
- The online editing tool will open the Word document, allowing you to view and edit it.
 For more details on using the online document editing tool, refer to its built-in help documentation.
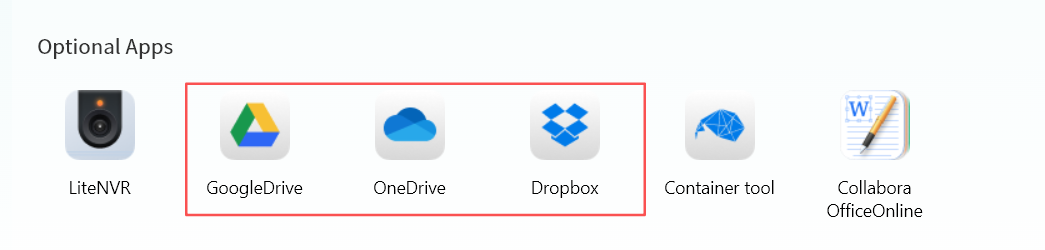
Cloud Drive
DASSET supports integration with third-party cloud drives. You can upload files from the DASSET device to a cloud drive, download files from a cloud drive to the device, and synchronize data between them. Currently supported services include Google Drive, OneDrive, and Dropbox.
Cloud Drive Login
Log in to Google Drive
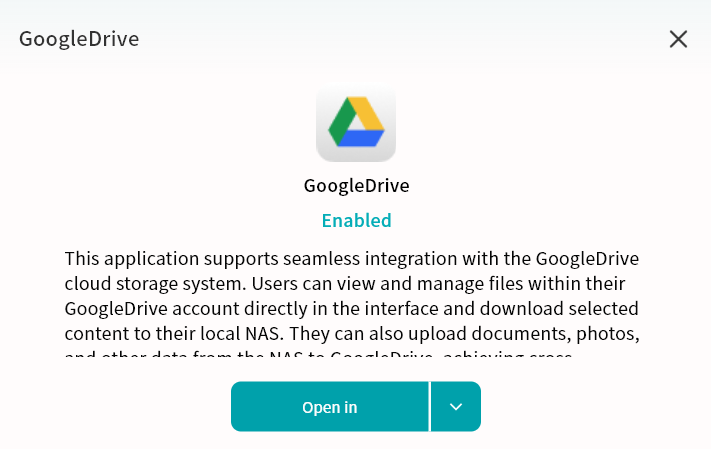
- For first-time use, click Install.
- After installation, click Open.
- Read and agree to the Google Drive usage terms, then click Confirm.
- Click Authorize Login.
- Enter your Google account on the authorization page and click Next.
- Enter your password and click Next.
- Click Advanced.
- Select Proceed to Google Drive.
- On the permissions page, click Continue.
- Once logged in, your Google Drive files will be accessible.
Log in to OneDrive
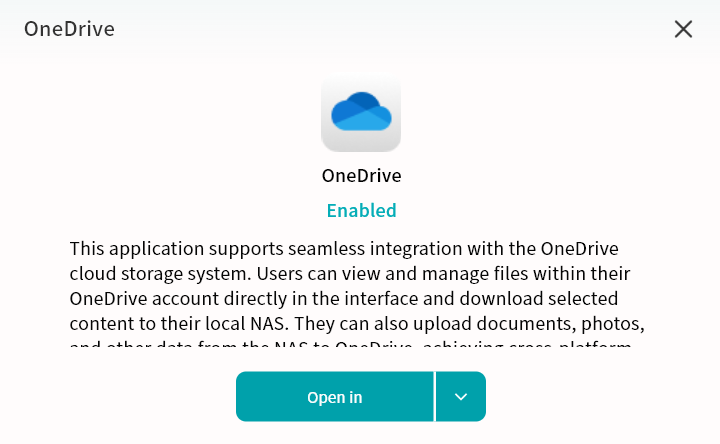
- For first-time use, click Install.
- After installation, click Open.
- Read and agree to the OneDrive usage terms, then click Confirm.
- Click Authorize Login.
- Enter your OneDrive (Microsoft) account and click Next.
- Verify using either a password or a verification code.
- Choose whether to stay logged in (recommended for convenience).
- Once logged in, your OneDrive files will be accessible.
Log in to Dropbox
- For first-time use, click Install.
- After installation, click Open.
- Read and agree to the Dropbox usage terms, then click Confirm.
- Click Authorize Login.
- Log in using your Dropbox account credentials, or with a Google or Apple account.
- Once logged in, your Dropbox files will be accessible.
Cloud Drive Operations
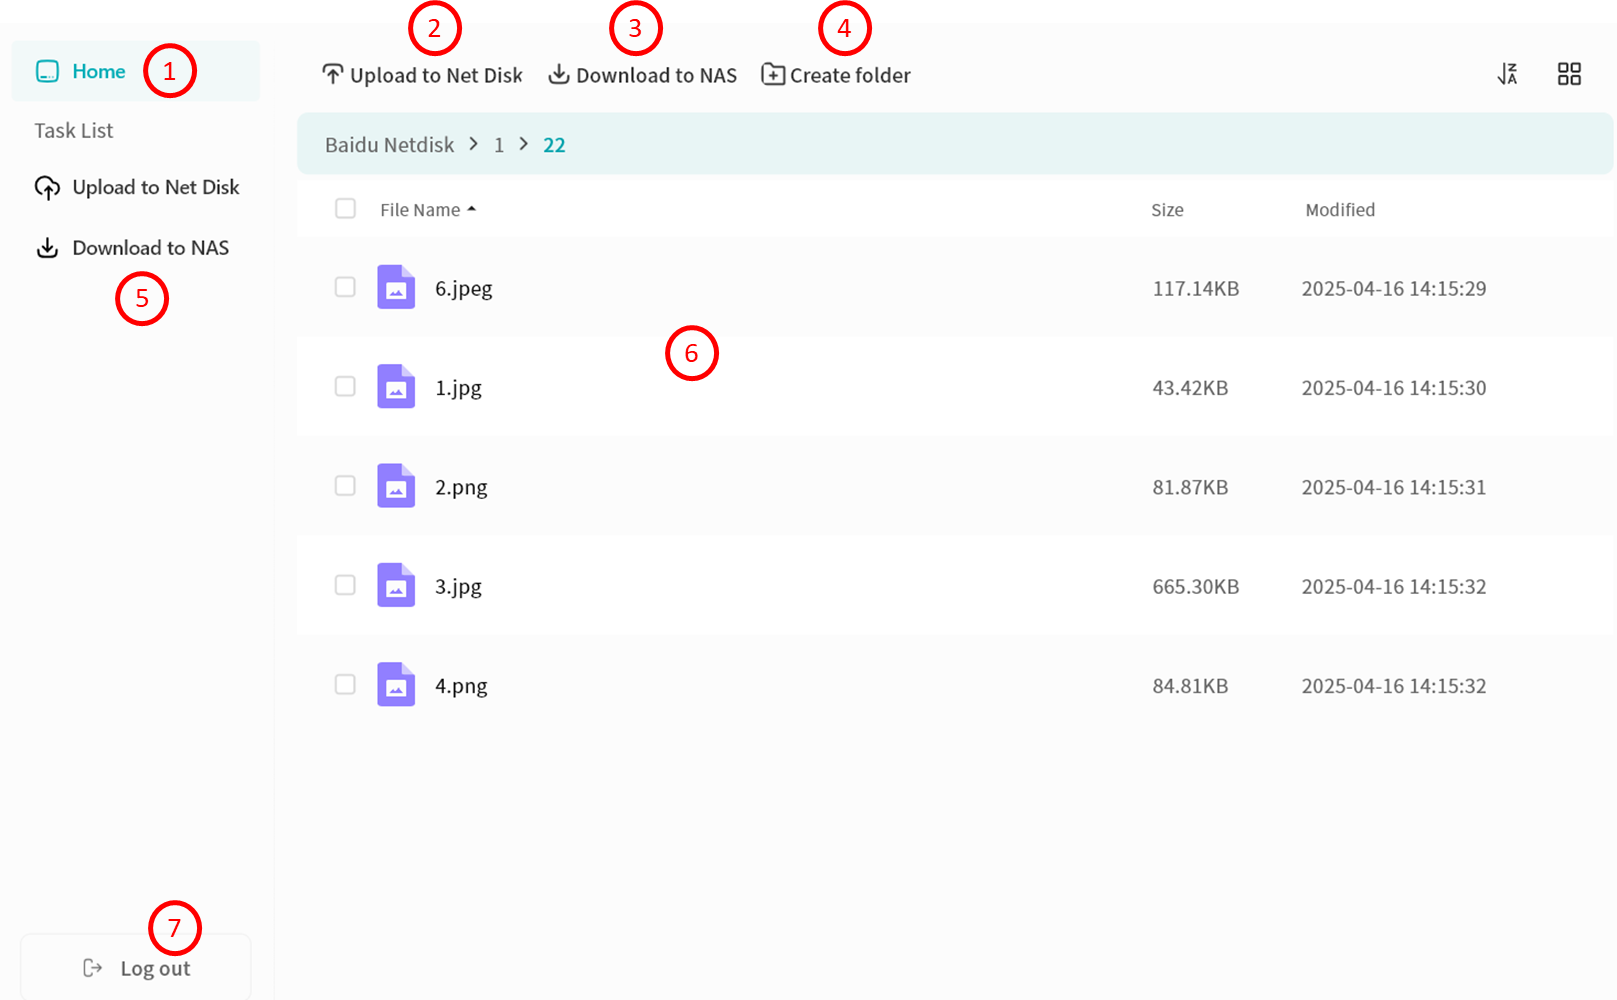
Interface
After login, the Cloud Drive interface provides:
- Home: Access the file list of the cloud drive.
- Upload to Net Disk: Upload files from the DASSET device.
- Download to NAS: Download files from the cloud drive to the DASSET device.
- Create Folder: Create folders in the cloud drive.
- Task List: View upload/download progress and history.
- File List: Browse files in the drive.
- Logout: Exit the cloud drive (requires re-login for next access).
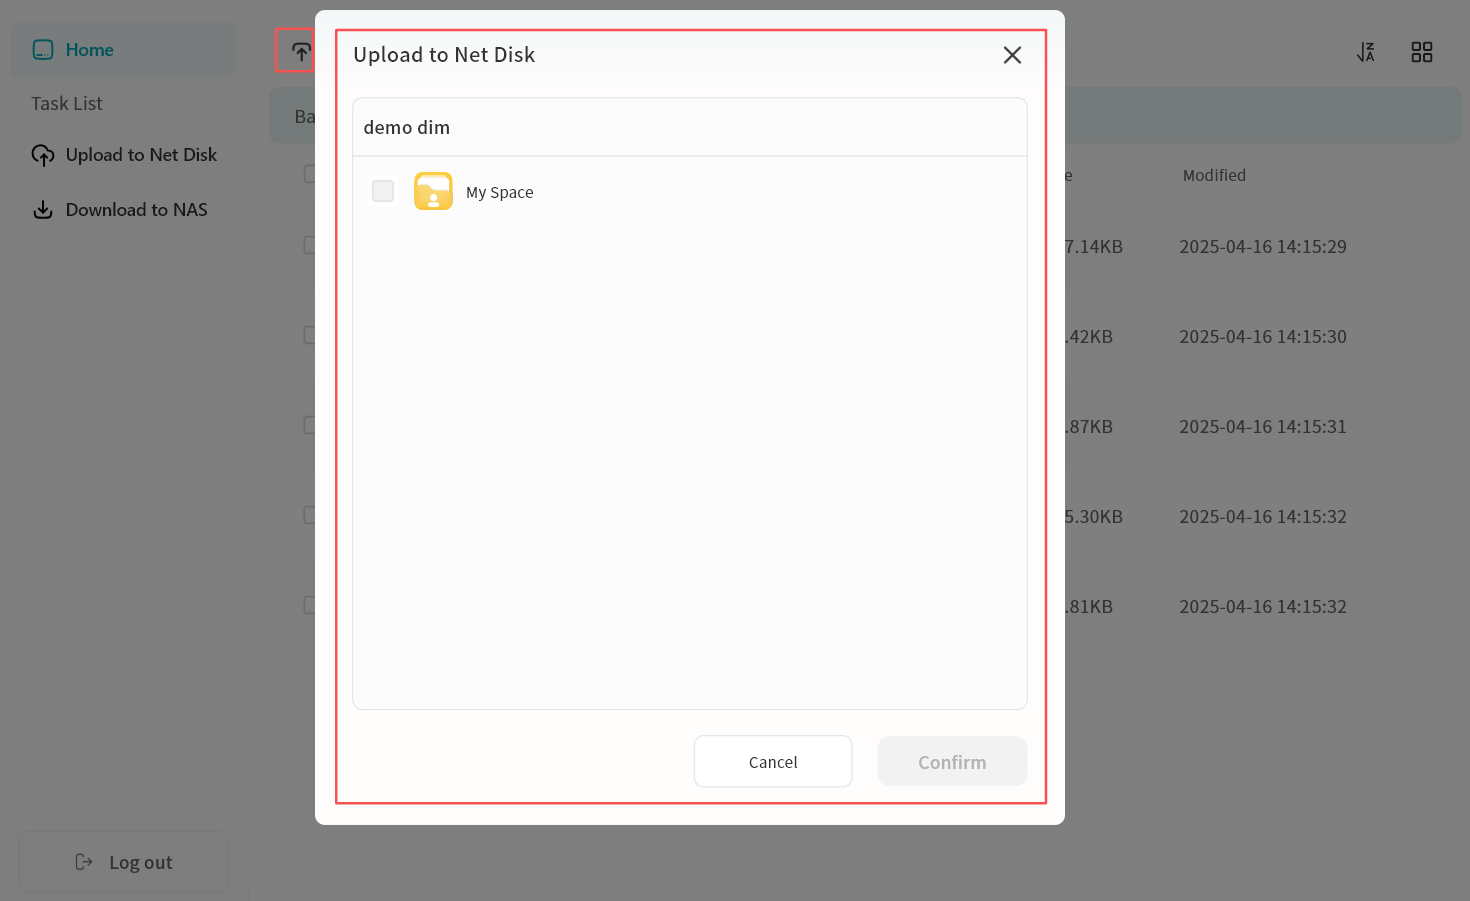
Upload Files to Net Disk
- Click Upload to Net Disk.
- In the pop-up, select files or folders from My Space (multi-select supported).
important
For security reasons, only files from My Space can be uploaded.
- Confirm to start upload.
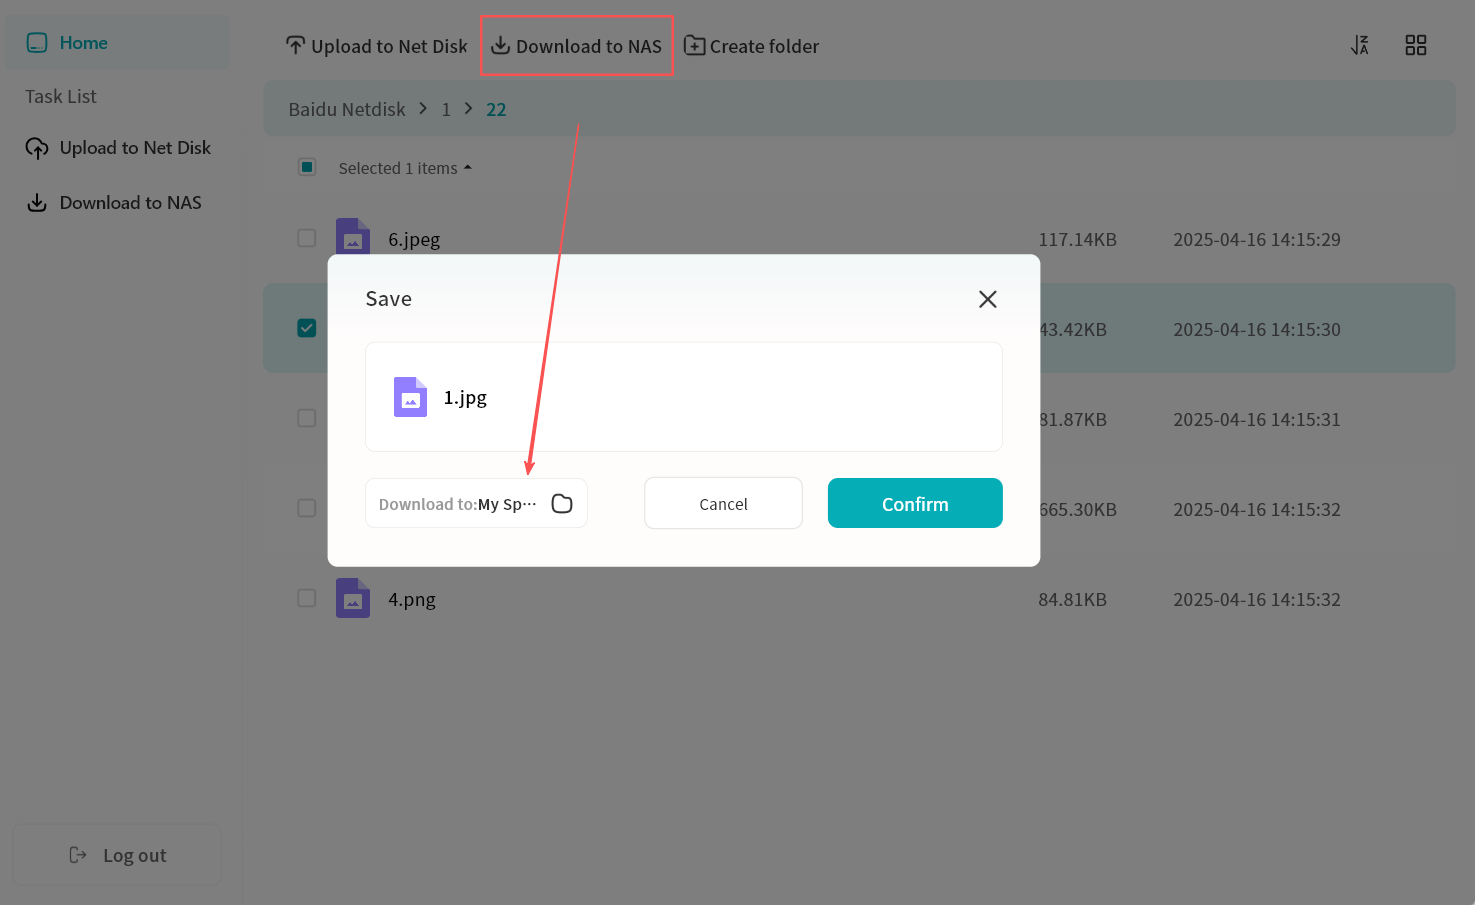
Download Files to NAS
- Select files (single or multiple) and click Download to NAS.
- In the pop-up menu, choose a target path.
important
For security reasons, files can only be downloaded to My Space or My Vault.
- Confirm to start download.
File Operations
- Top Menu: Create new folders in the cloud drive.
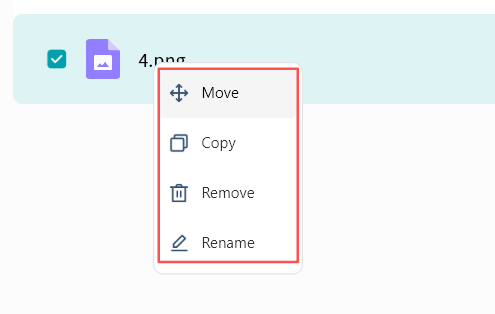
- Right-Click Menu:
- Move: Move files between folders in the cloud drive (batch supported).
- Copy: Copy files to other folders in the cloud drive (batch supported).
- Delete: Remove one or more files.
- Rename: Edit file or folder names.
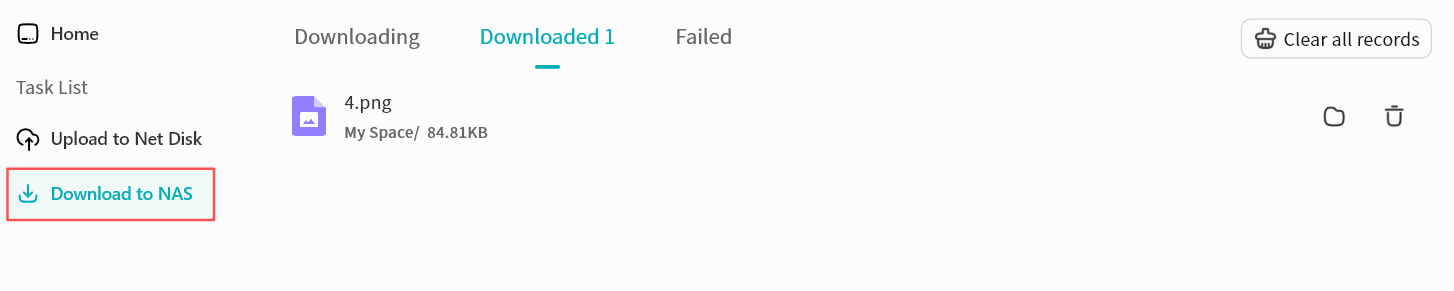
Task List
All upload and download activities are displayed in the Task List.
- Uploads:
- Pause, resume, or cancel multiple tasks.
- View or clear completed tasks.
- Review failed uploads.

- Downloads:
- Pause, resume, or cancel multiple tasks.
- View, clear individual tasks, or clear all completed tasks.
- Jump directly to the file's save location.
- Review failed downloads.